All pages referring or tutorials for Intune.
This is the multi-page printable view of this section. Click here to print.
Intune
- Automatically start Windows App at startup
- Deploy Google Chrome Single Sign On with Intune
- Disable Windows Taskbar Widgets through Intune
- Using and configuring Windows Backup for Organizations in Intune
- Remove Pre-installed Windows Store Apps with Intune
- Starting out with Universal Print
Automatically start Windows App at startup
In some cases we want to automatically start the Windows App for connections to AVD and Windows 365 at startup. We can achieve this through different ways which I will describe in this post.
In some cases we want to automatically start the Windows App for connections to AVD and Windows 365 at startup. We can achieve this through different ways which I will describe in this post.
Creating the Intune script
We can achieve this with Intune using a PowerShell script. As Intune doesn’t support login/startup scripts, we have to create a Platform script that creates a Scheduled Task in Windows for us. This is a great way, as this is visible at the client side and can be disabled pretty easily.
To create this task/script, go to the Intune Admin center: https://intune.microsoft.com
Go to Devices -> Windows -> Scripts and remediations, then open the tab “Platform scripts”.
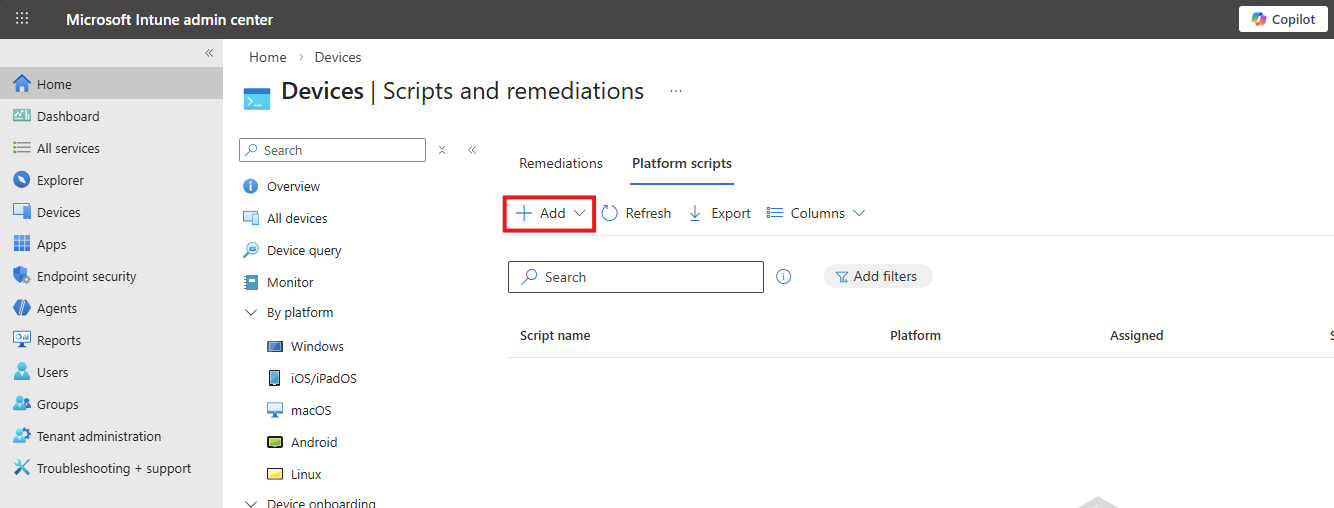
Click on “+ Add” and select “Windows 10 and later” to create a new script.
Click “Next”.
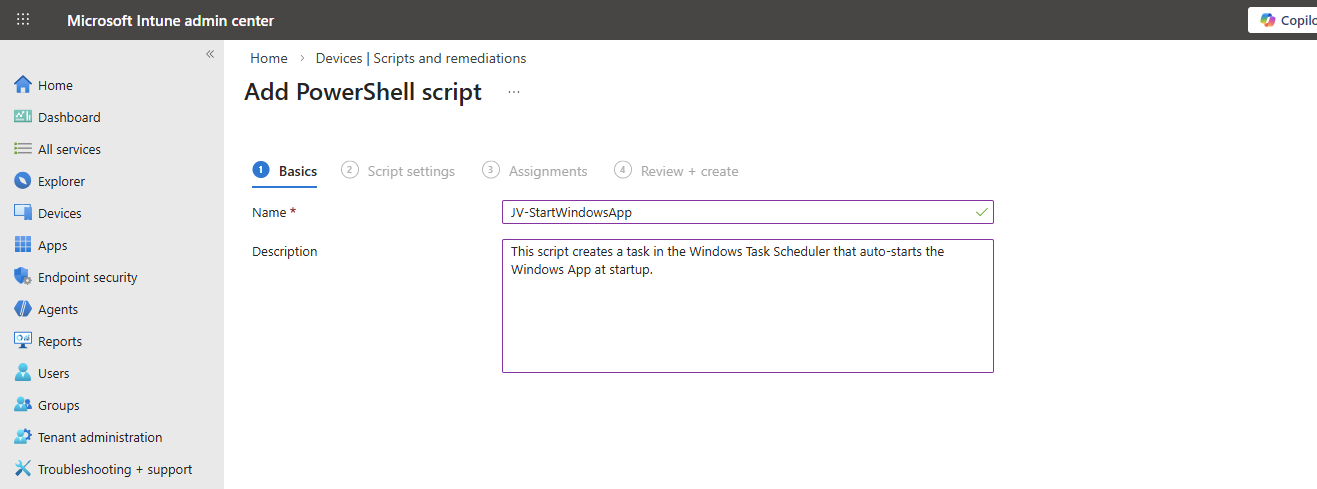
Then download my script here that does the magic for you:
Or create a new file in Windows and paste the contents below into a file save it to a .ps1 file.
POWERSHELL
$TaskName = "JV-StartWindowsApp"

$Action = New-ScheduledTaskAction `
    -Execute "explorer.exe" `
    -Argument "shell:AppsFolder\MicrosoftCorporationII.Windows365_8wekyb3d8bbwe!Windows365"

$Trigger = New-ScheduledTaskTrigger -AtLogOn

$Principal = New-ScheduledTaskPrincipal `
    -GroupId "BUILTIN\Users" `
    -RunLevel Limited

Register-ScheduledTask `
    -TaskName $TaskName `
    -Action $Action `
    -Trigger $Trigger `
    -Principal $Principal `
    -Force
Upload the script to Intune and set the following options:
- Run this script using the logged on credentials: No
- Enforce script signature check: No
- Run script in 64 bit PowerShell Host: Yes

Then click “Next”.
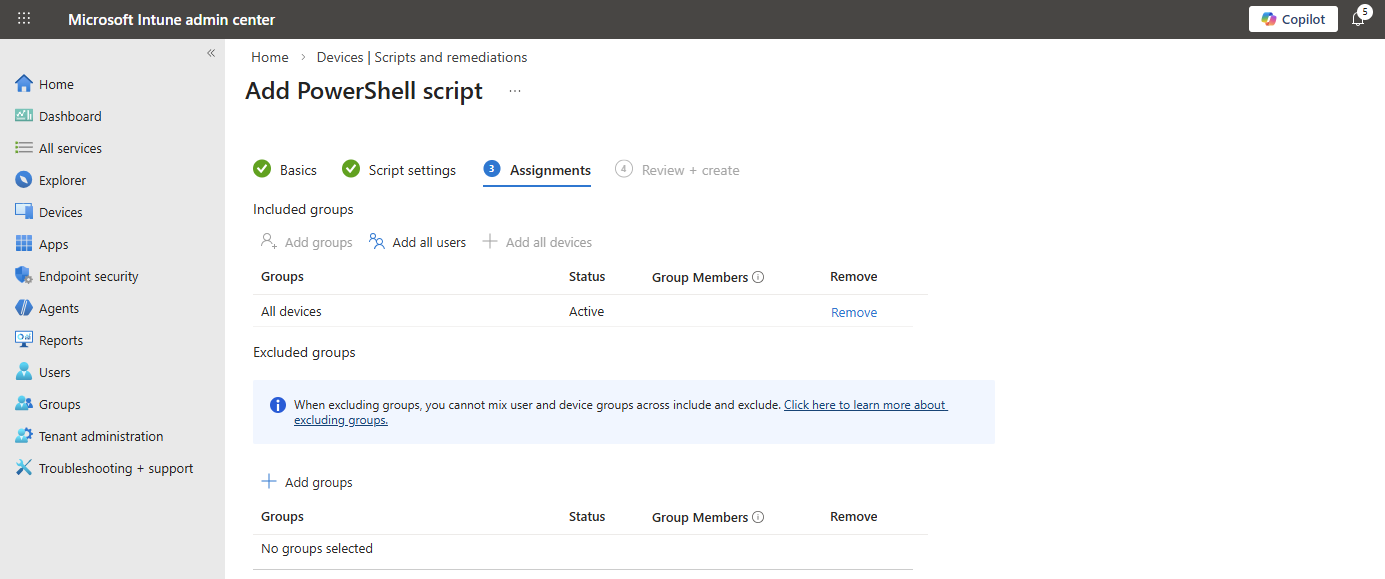
Assign the script to the group containing your devices where you want to autostart the Windows App. Then save the script.
The results
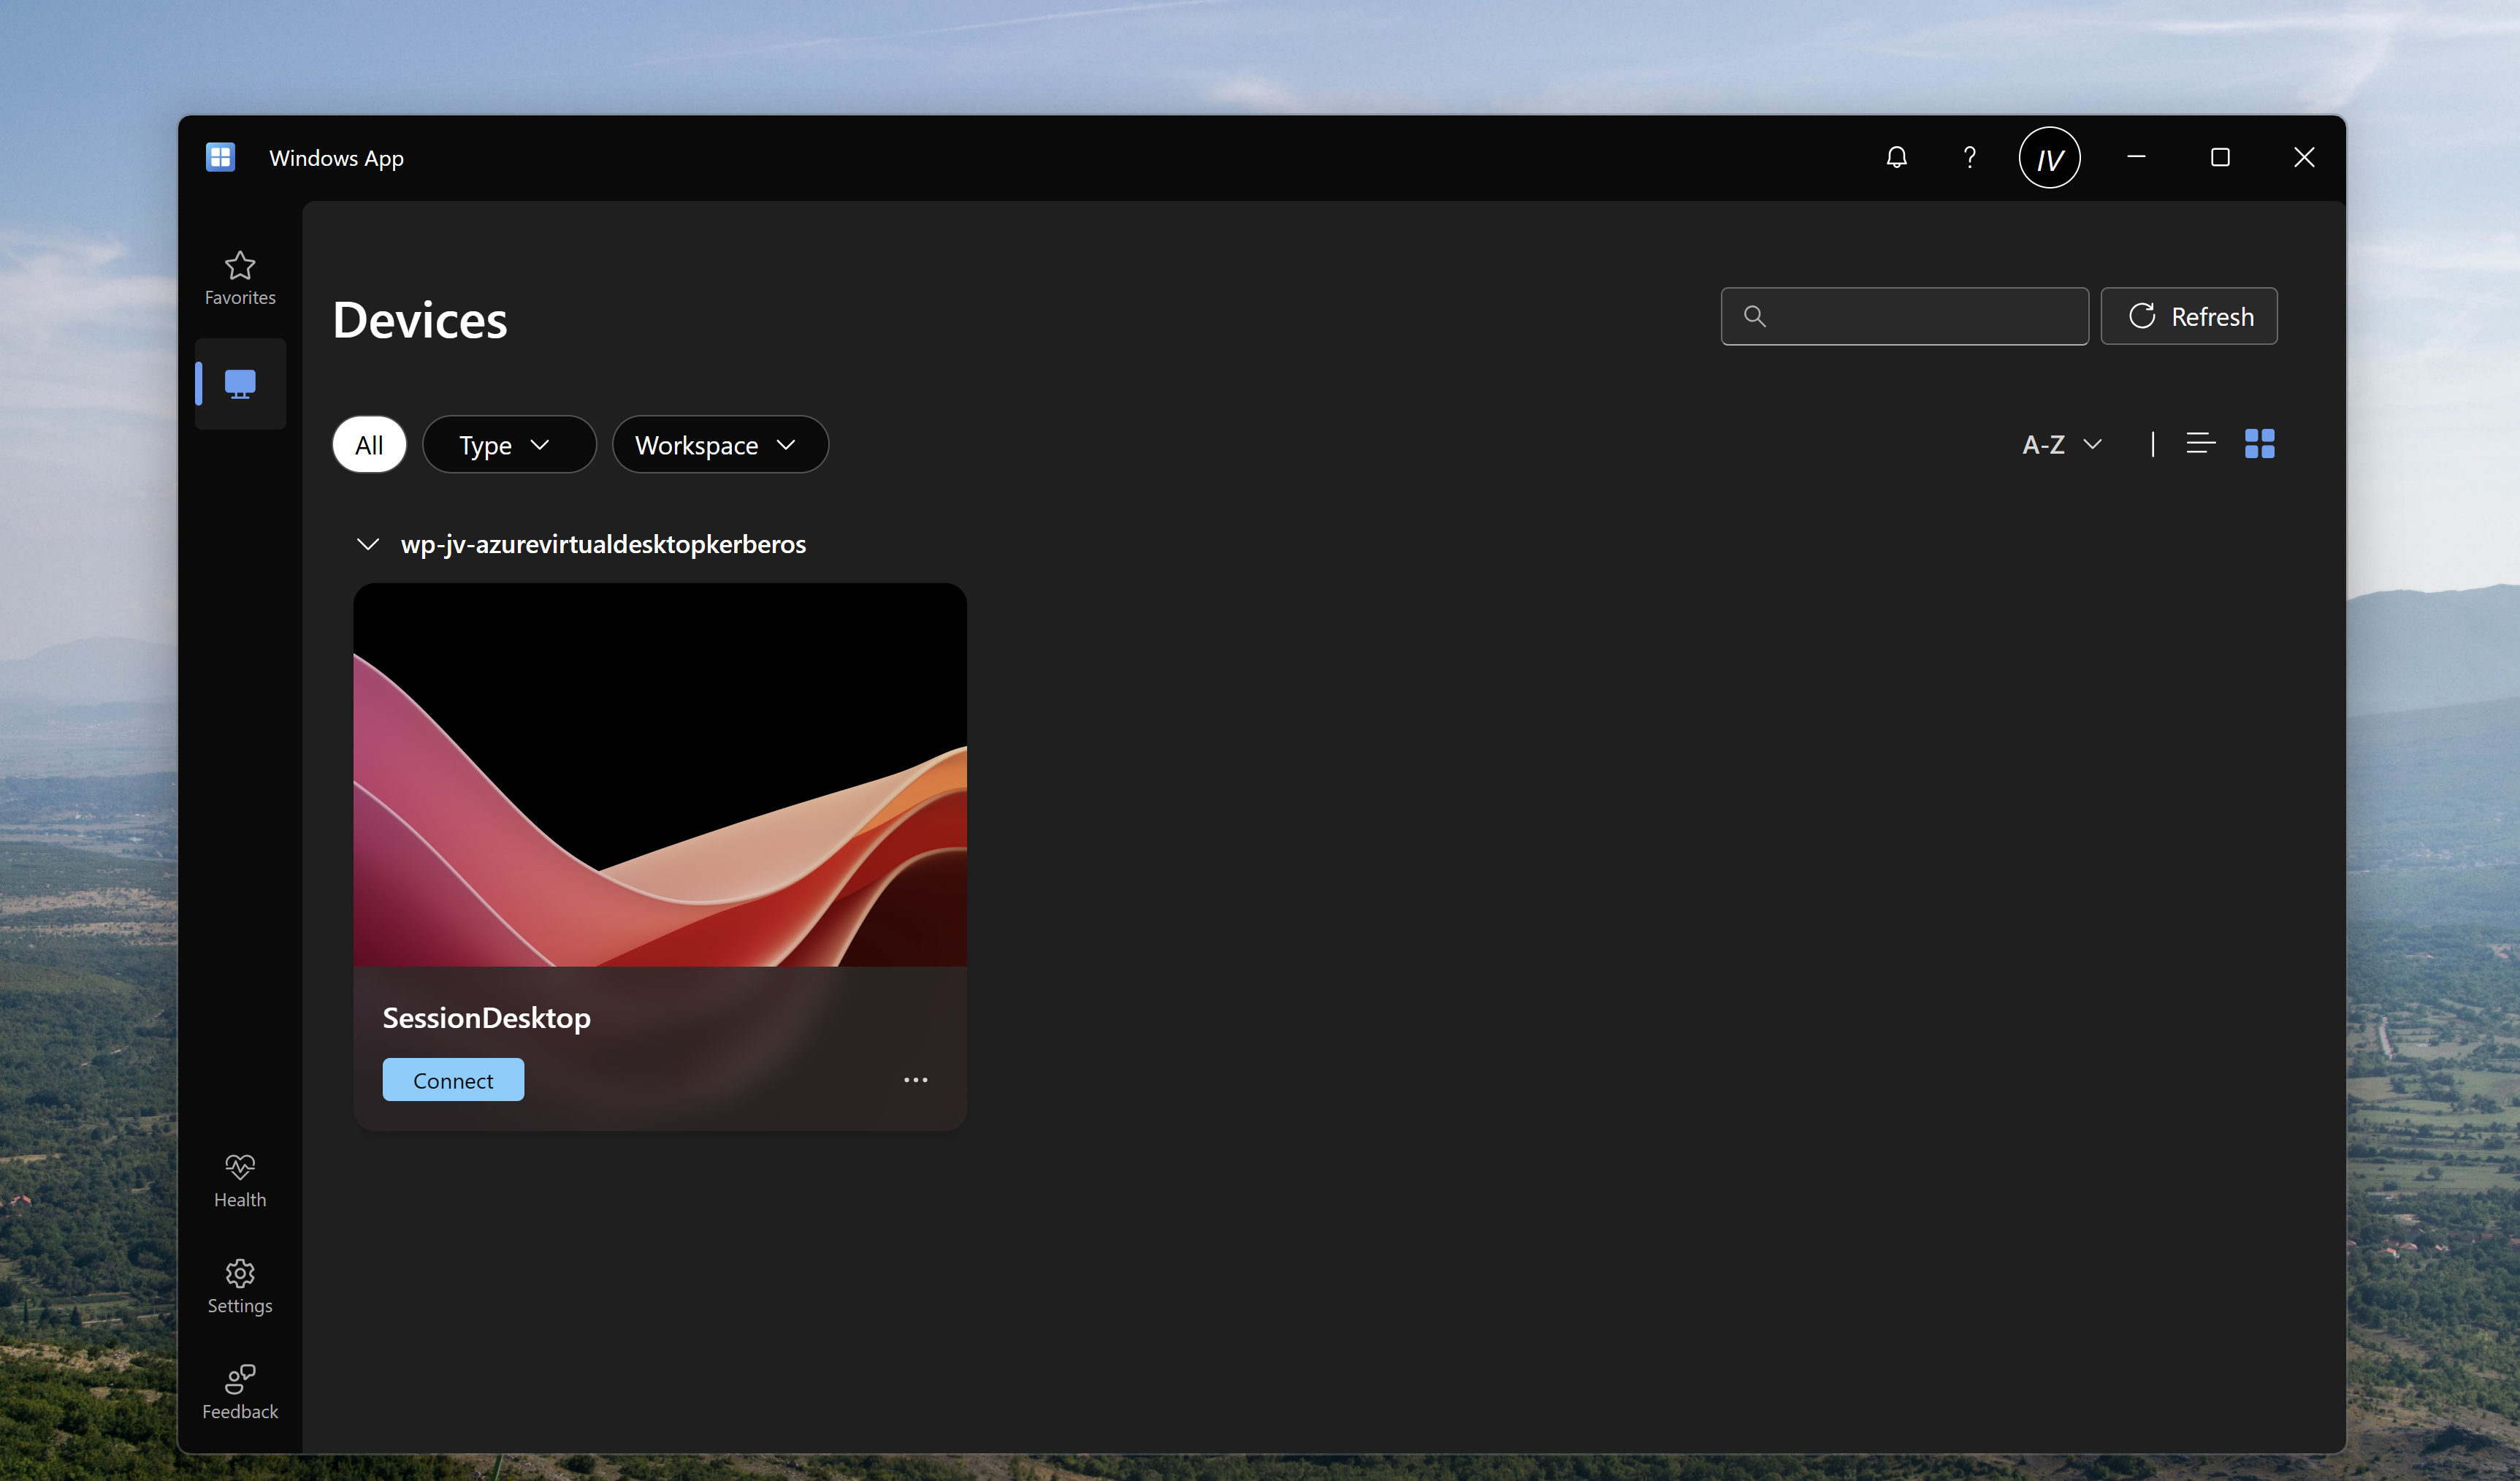
After the script was applied which can take up to 30 minutes, and after restarting the computer, the Windows App will automatically start after the user logs in, automating this process and elaminating the start-up wait time:
Summary
Automatically startint the Windows App can help end users to automate a bit of their daily work. They don’t have to open it after turning on their PC and can sign-in directly to their cloud device.
Thank you for visiting my website and I hope it was helpful.
Sources
These sources helped me by writing and research for this post;
- None
End of the page 🎉
You have reached the end of the page. You can navigate through other blog posts as well, share this post on X, LinkedIn and Reddit or return to the blog posts collection page. Thank you for visiting this post.
If you think something is wrong with this post or you want to know more, you can send me a message to one of my social profiles at: https://justinverstijnen.nl/about/
If you find this page and blog very useful and you want to leave a donation, you can use the button below to buy me a beer. Hosting and maintaining a website takes a lot of time and money. Thank you in advance and cheers :)

The terms and conditions apply to this post.
Deploy Google Chrome Single Sign On with Intune
When deploying Google Chrome with Microsoft Intune, users still have to manually login with their credentials into Microsoft Online websites.
When deploying Google Chrome with Microsoft Intune, users still have to manually login with their credentials into Microsoft Online websites. Microsoft Edge has built-in Single Sign On (SSO) for users who already logged in with their Microsoft account to their computer.
However, there is a Chrome extension published by Microsoft themselves which allows users to also have this Single Sign On experience into Google Chrome.
On this page I will show how this extension works, what the advantages are and how we can deploy this with Microsoft Intune. I will share both a Configuration Policy and a PowerShell script option where you may choose which one to use.
How the extension works
The Microsoft SSO extension for Google Chrome uses the same token/session you already have when you have your device Entra ID joined. It will send that to every Microsoft Online webpage to show you are already authenticated and have a valid token. This makes the user experience a lot better as they don’t have to authenticate first before starting to use the web applications.
The extension can be manually downloaded from here: https://chromewebstore.google.com/detail/microsoft-single-sign-on/ppnbnpeolgkicgegkbkbjmhlideopiji?pli=1
The fast pass
I have both the Configuration Profile and PowerShell script for you to download and implement easily on my Github page. You can download them there:
Download Configuration Profile and Script
How to deploy the extension with Intune Configuration Policies
To deploy the extension with Intune, login to the Microsoft Intune Admin Center: https://intune.microsoft.com
From there, navigate to Devices -> Windows -> Configuration and create a new policy.
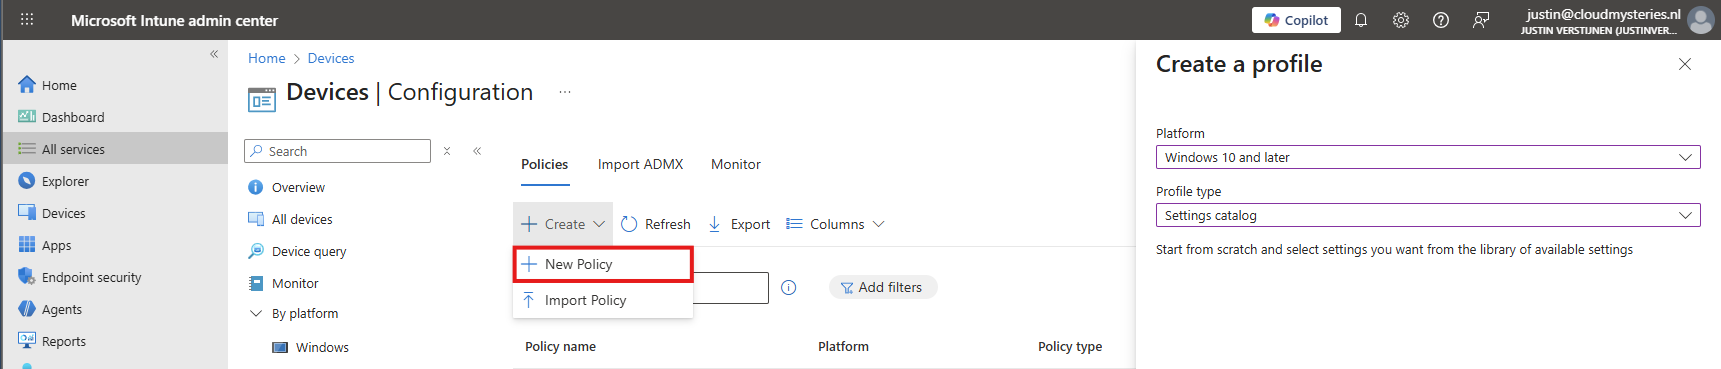
Select Windows 10 and later for “Platform” and use the “Settings catalog” profile type. Then click on “Create”.
Now define a name and description for this new policy, defining what this actually does.
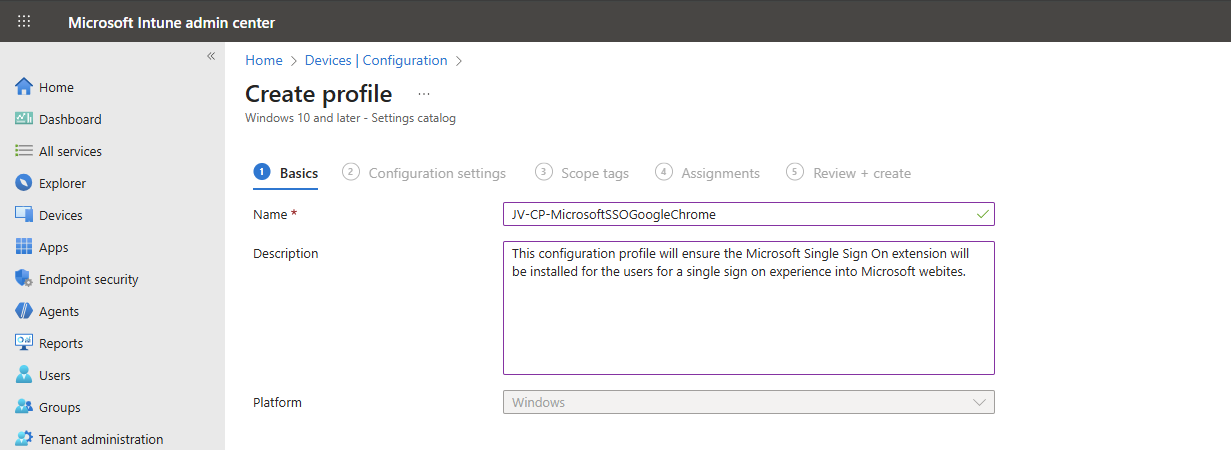
Then click on “Next”.
Now click on “+ Add settings”, search for Google. Click it open to go down to “Google Chrome” and then “Extensions”.
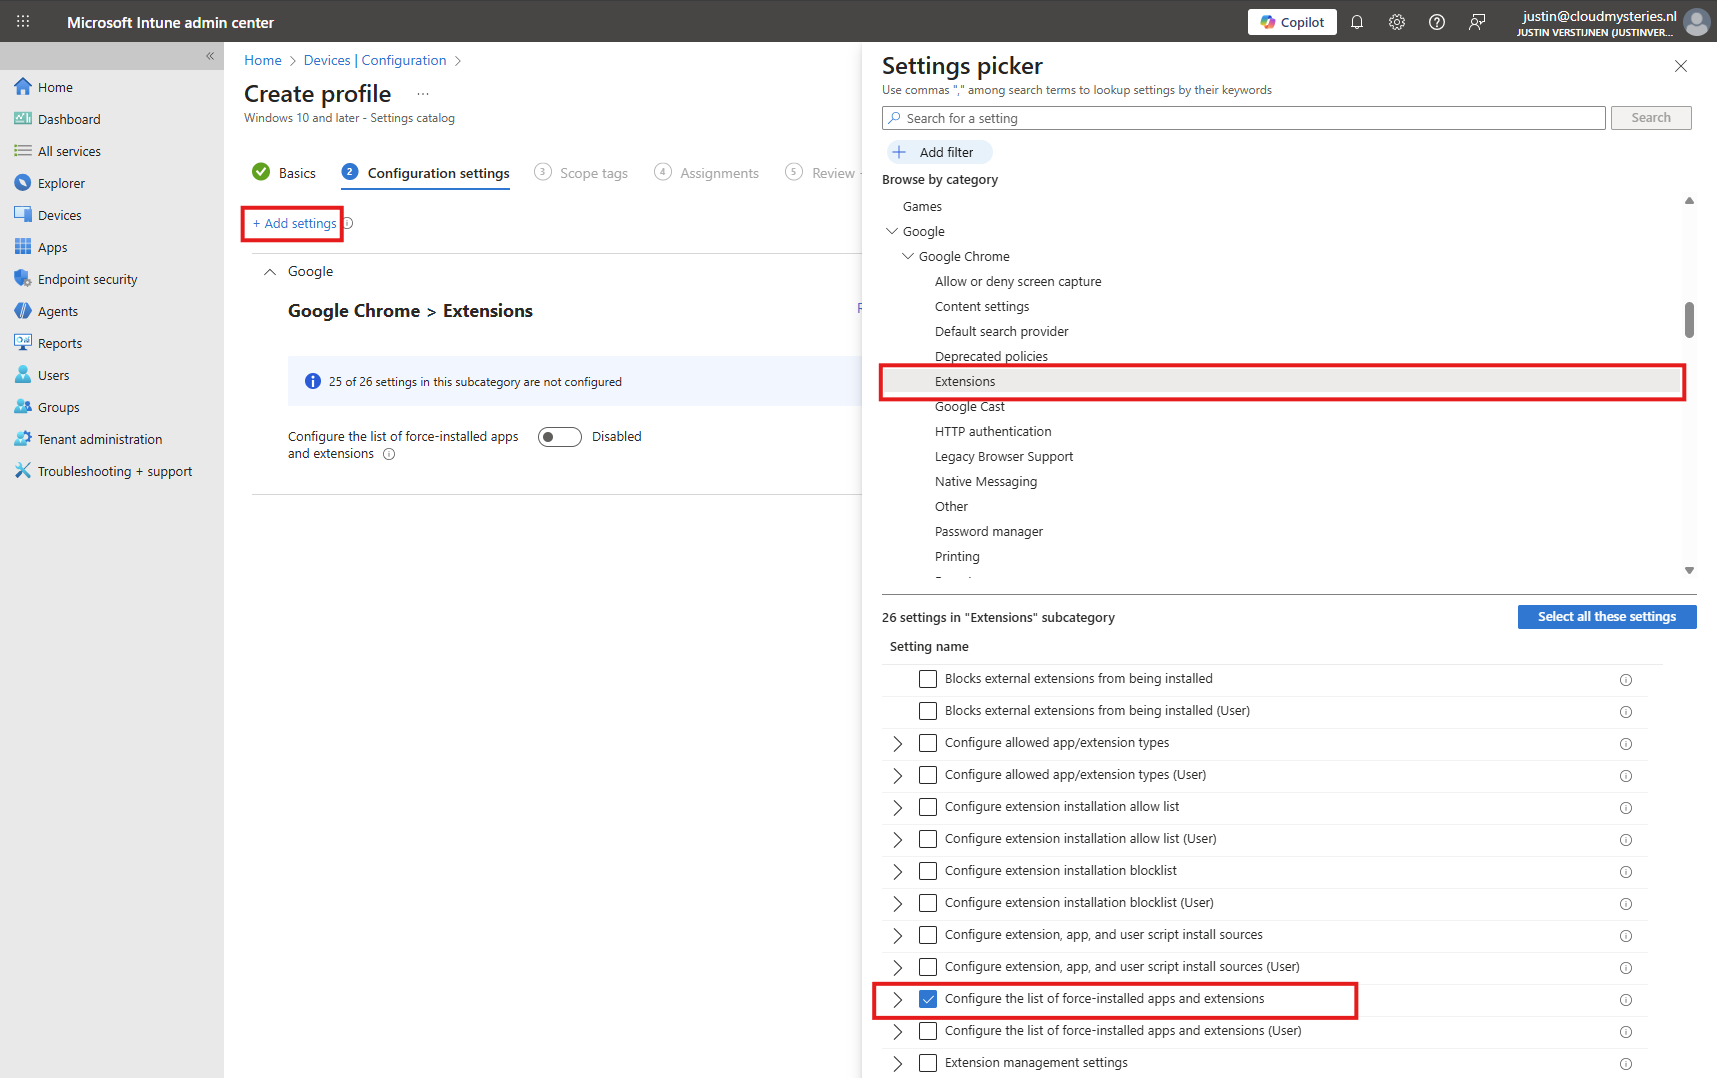
Select the option “Configure the list of force-installed apps and extensions”.
The same option exists with (User) attached, using that option means a user is able to delete the extension.
Now we can configure that option by setting the switch to “Enabled”.
We have to paste the Extension IDs here. You can find this in the Chrome Web Store in the URL (the part after the last /):
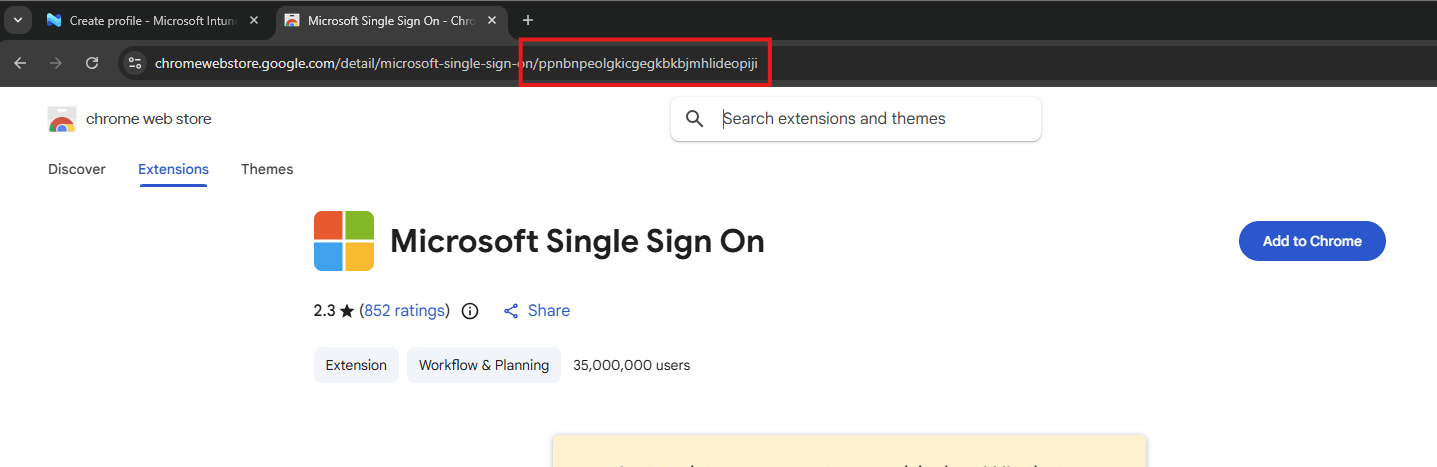
So we paste this value in the field, but you can add any extension, like ad blockers, password managers or others.
YAML
ppnbnpeolgkicgegkbkbjmhlideopiji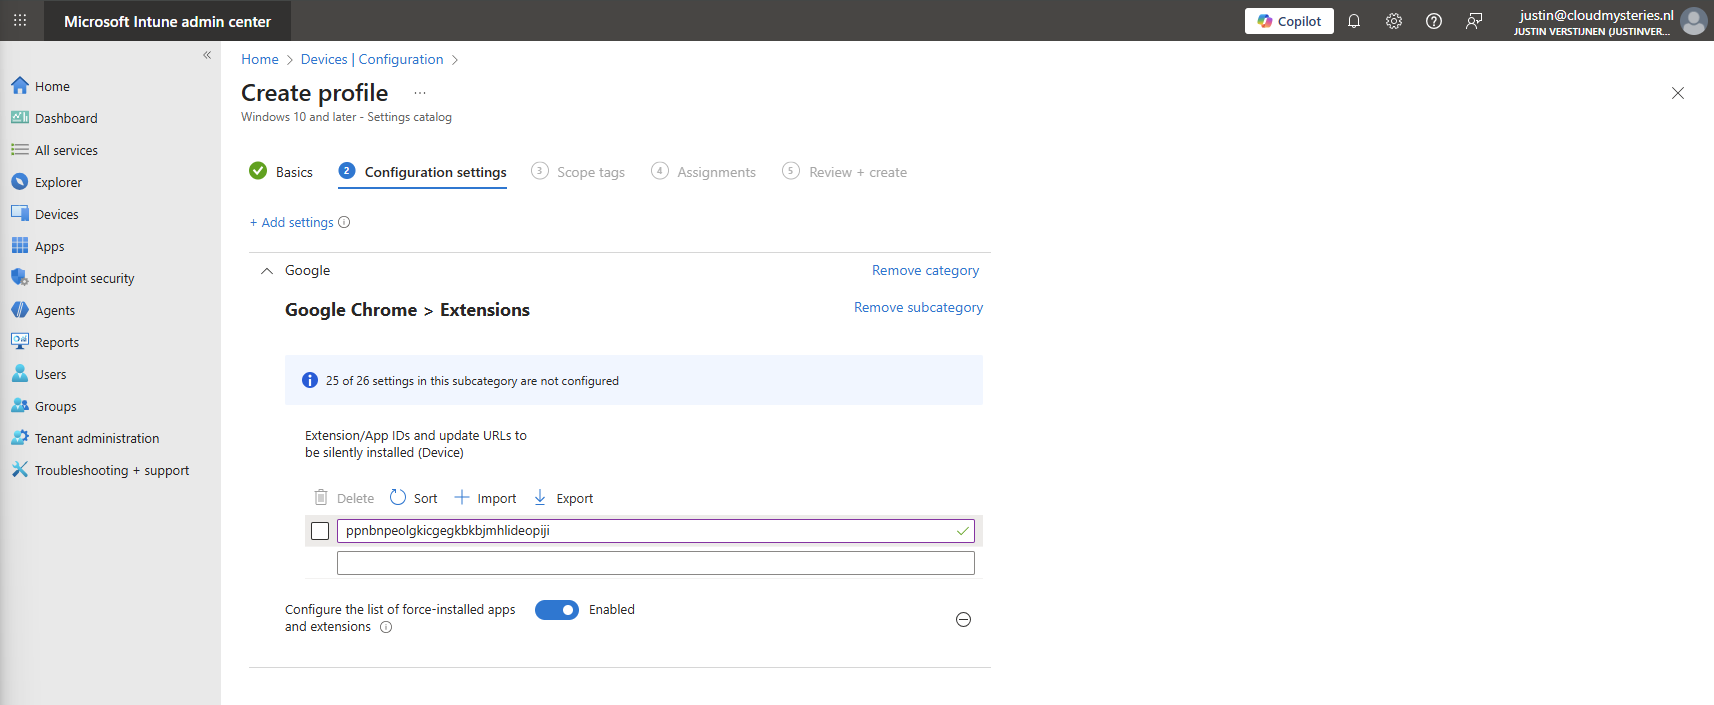
Click on “Next” twice. We can now assign this new policy to our devices. I picked the All Devices option here as I want this extension to be installed on all Windows devices.
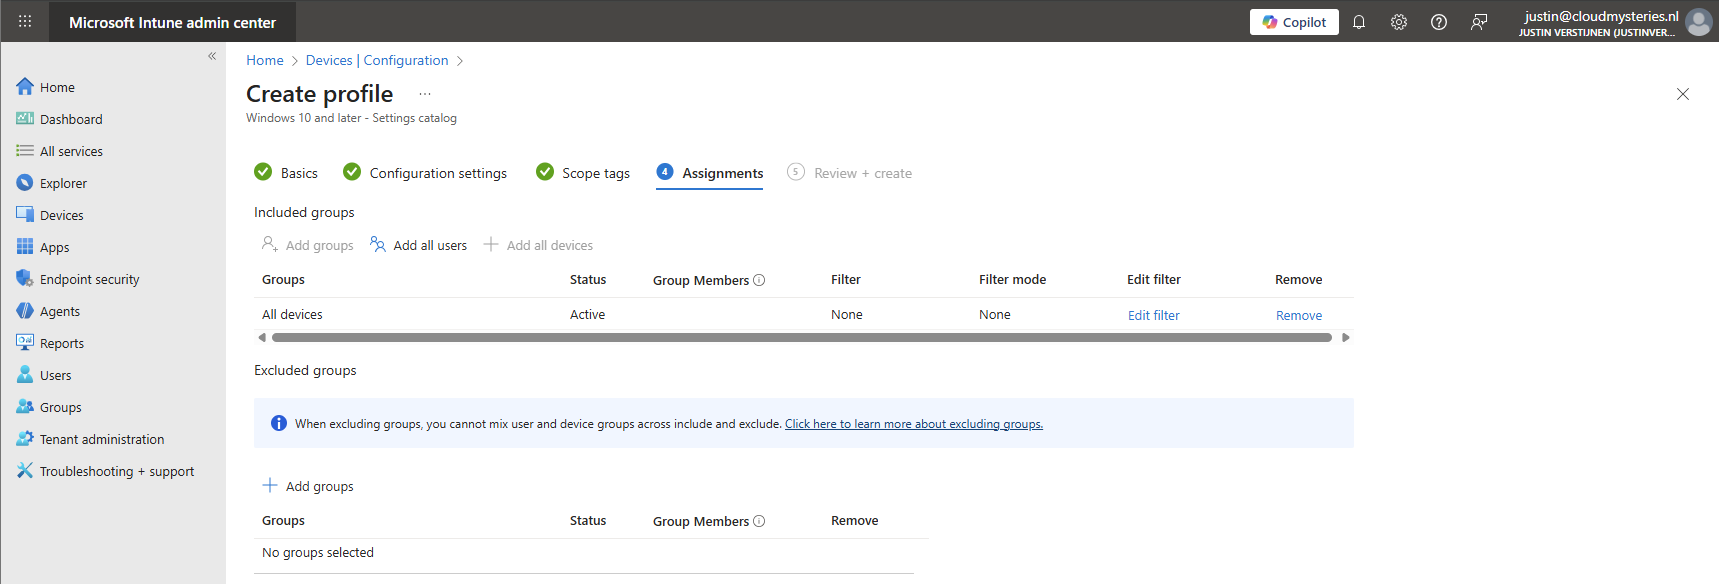
Create the policy by finishing the wizard. Let’s check the results here.
How to deploy the extension with Intune Platform Scripts
We can also deploy the extension through a PowerShell script. This is recommended if using other MDM solutions than Microsoft Intune. However, we can also deploy it in Intune as script by going to the Microsoft Intune Admin Center: https://intune.microsoft.com
From there, go to Devices -> Windows ->Scripts and remediations and then the tab “Platform scripts”. These are scripts that are automatically run once.
Create a new script for Windows 10 and later here.

Give it a name and description of the script:
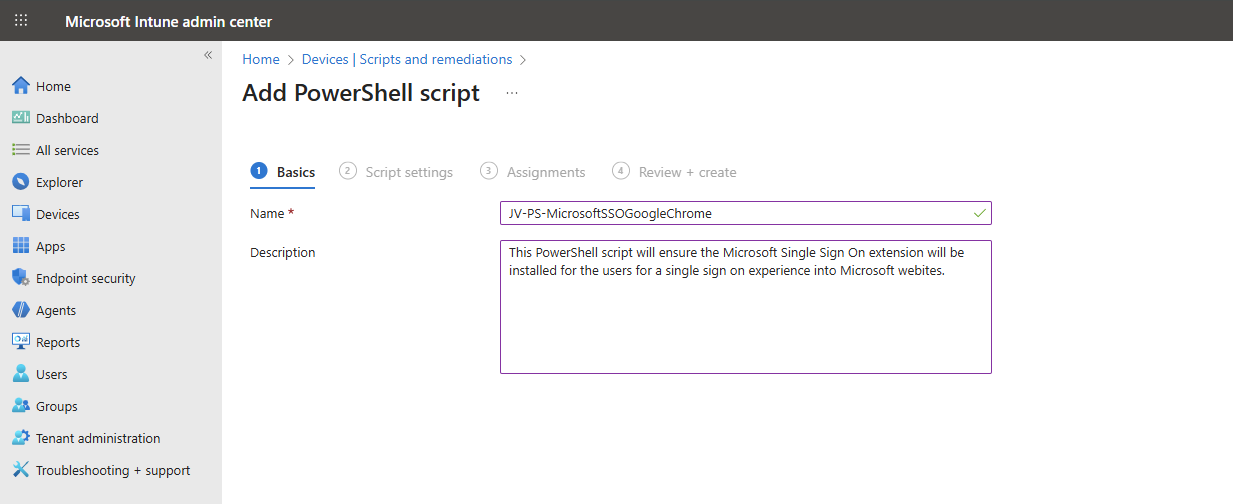
Click “Next” to open the script settings. To download my script, go to https://github.com/JustinVerstijnen/JV-CP-MicrosoftSSOGoogleChrome and download the .ps1 file.
Here import the script you just downloaded from my Github page.
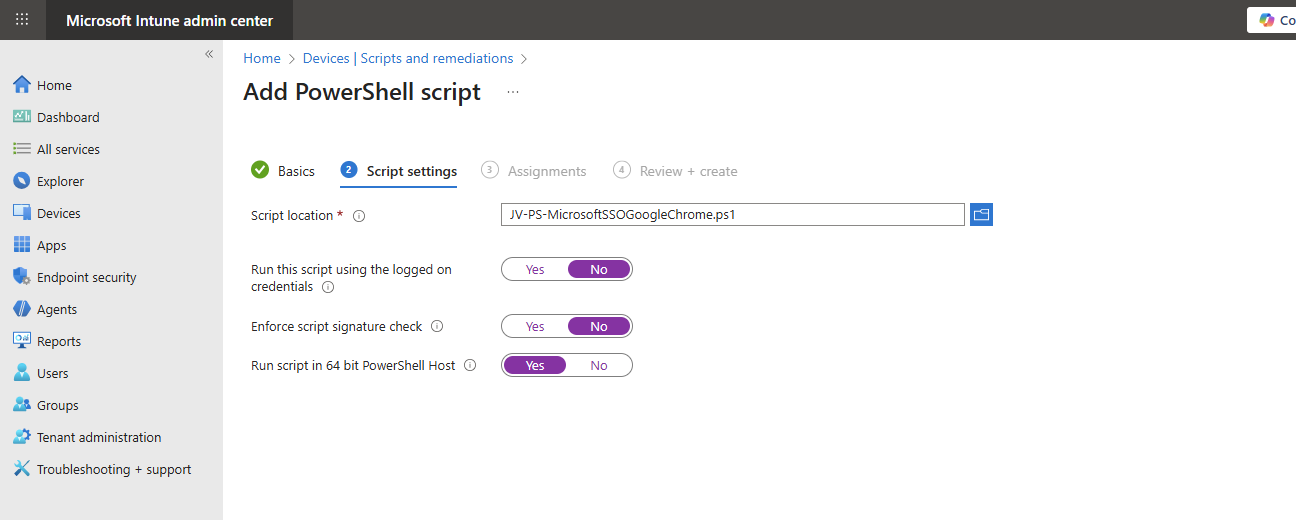
Then set the script options as this:
- Run this script using the logged on credentials: No
- Enforce script signature check: No
- Run script in 64 bit PowerShell Host: Yes
The script targets the whole machine by creating a registry key in the HKEY_LOCAL_MACHINE hive.
Then click “Next” and assign it to your devices. In my case, I selected “All devices”.
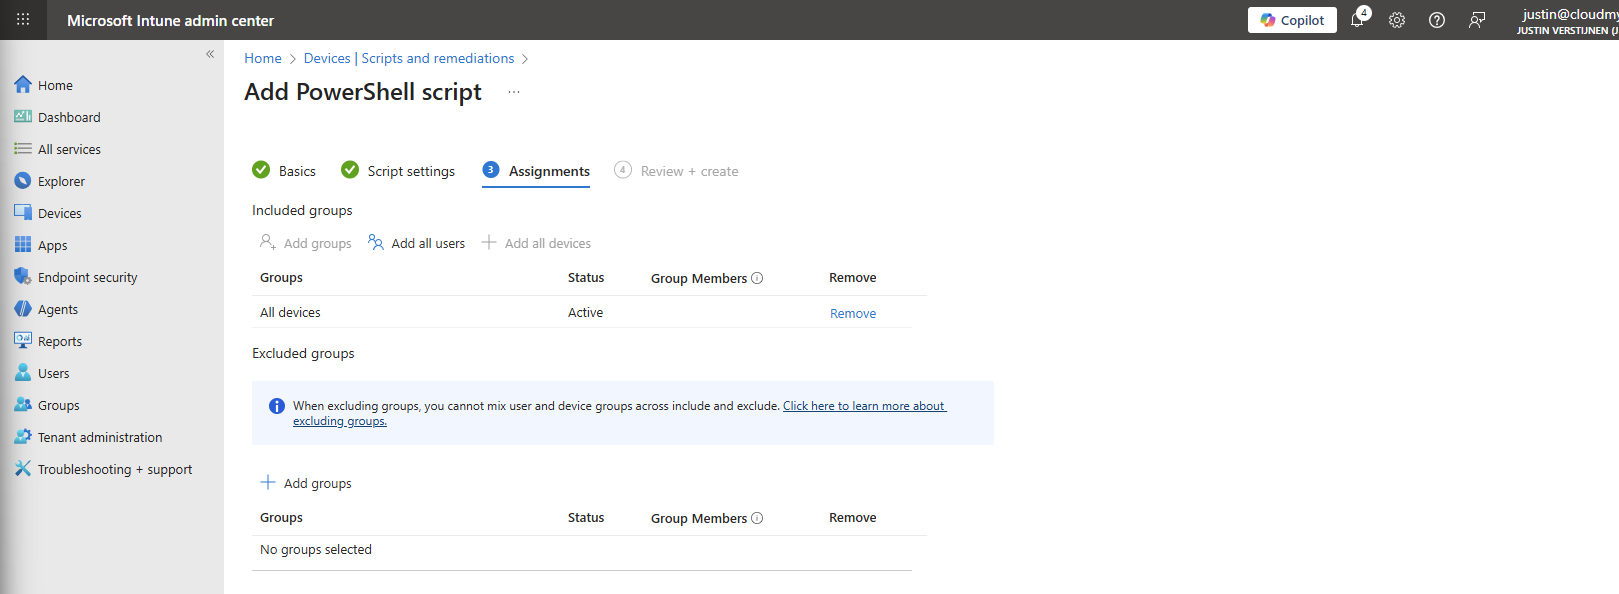
Click “Next” and then “Create” to deploy the script that will install the extension.
The results on the client machine
After assigning the configuration profile or PowerShell script to the machine, this will automatically be installed silently. After the processing is done, the extension will be available on the client machine:
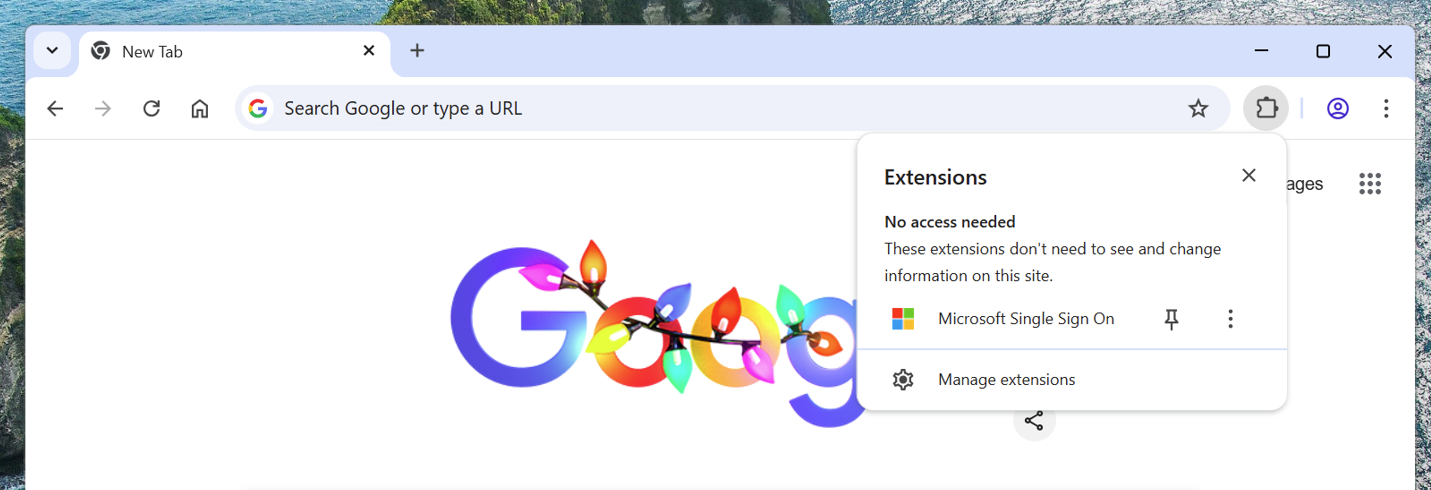
This doesn’t have to do much. We don’t need to configure it either, its only a pass of the token to certain Microsoft websites.
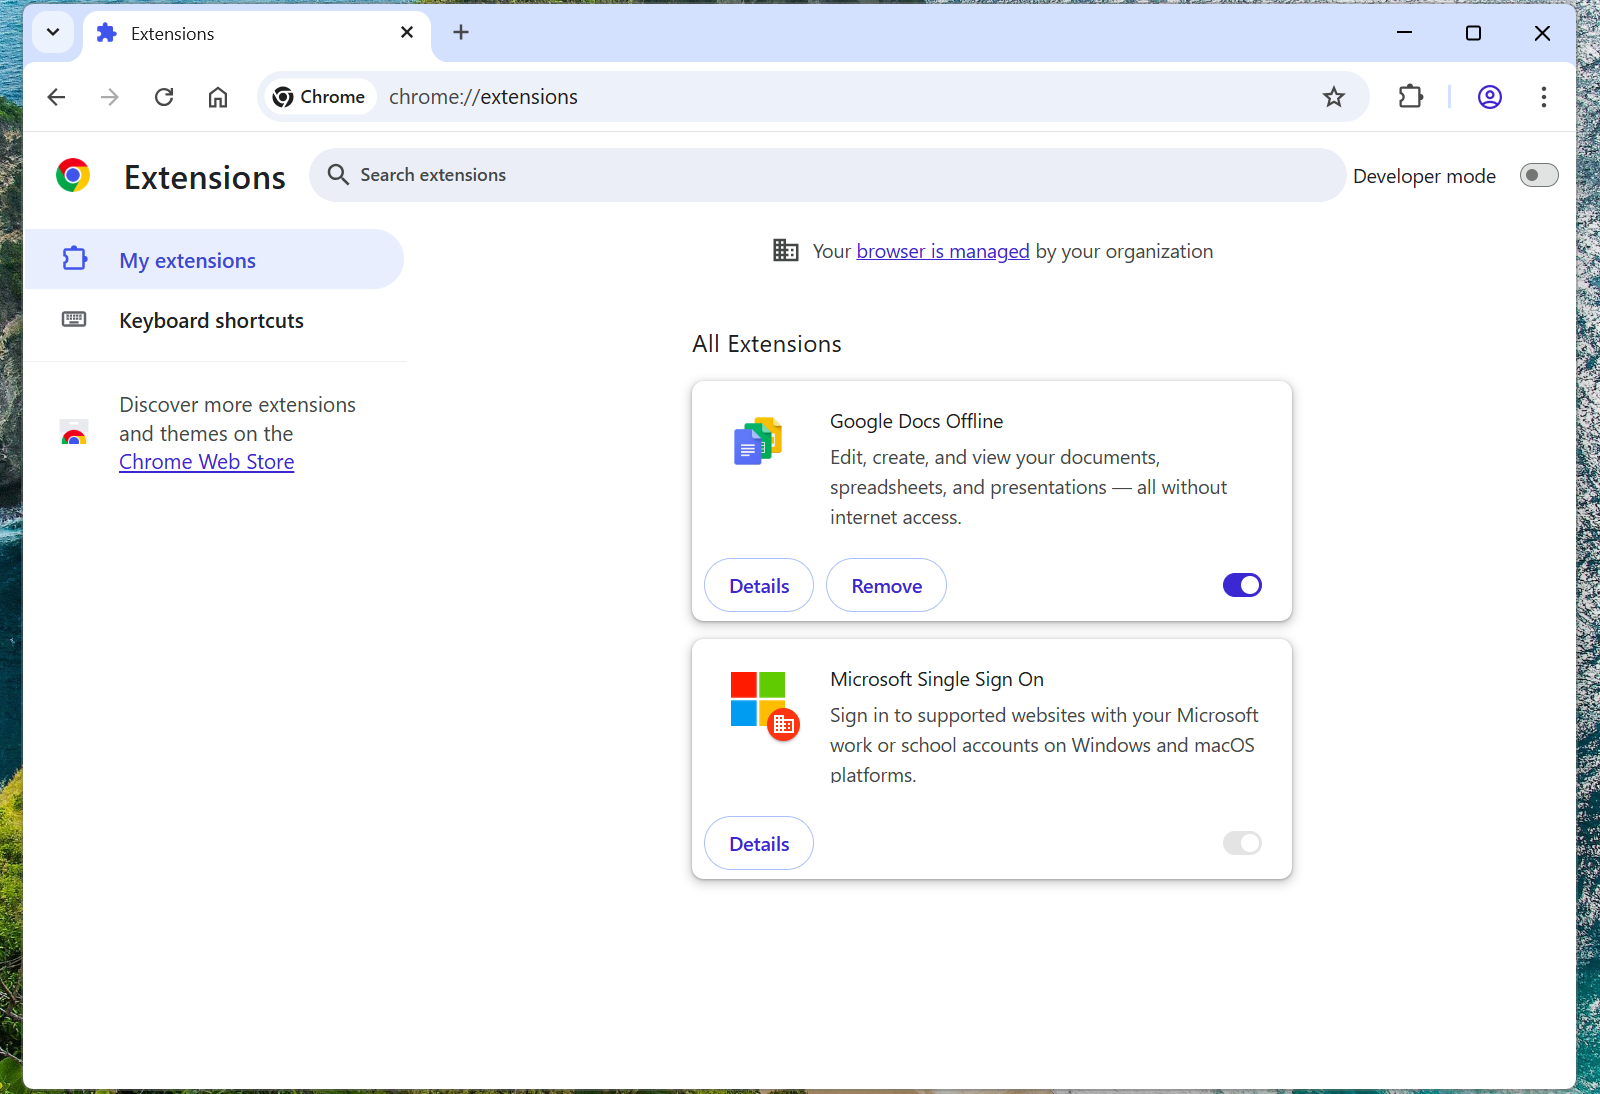
When going to the extensions, you see that it also cannot be deleted by the user:
Summary
The Google Chrome Microsoft SSO extension is a great way to enhance the user experience for end users. They now can login to Microsoft websites using their already received token and don’t need to get a new one by having to login again and doing MFA. We want to keep our systems secure, but too many authentication requests is annoying for the user.
Also the guide can be used to deploy other extensions for Google Chrome and Edge.
Thank you for reading this guide and I hope it was helpful.
Sources
These sources helped me by writing and research for this post;
End of the page 🎉
You have reached the end of the page. You can navigate through other blog posts as well, share this post on X, LinkedIn and Reddit or return to the blog posts collection page. Thank you for visiting this post.
If you think something is wrong with this post or you want to know more, you can send me a message to one of my social profiles at: https://justinverstijnen.nl/about/
If you find this page and blog very useful and you want to leave a donation, you can use the button below to buy me a beer. Hosting and maintaining a website takes a lot of time and money. Thank you in advance and cheers :)
The terms and conditions apply to this post.
Disable Windows Taskbar Widgets through Intune
Today a short guide on how to disable Windows Taskbar widgets through Intune. I mean this part of the Windows 11 taskbar:
Today a short guide on how to disable Windows Taskbar widgets through Intune. I mean this part of the Windows 11 taskbar:

Method 1: Settings Catalog
The easiest way to disable these widgets is through a Settings Catalog policy. Open up Microsoft Intune admin center and create a new policy through the Settings Catalog.
Search for “widget” and these options are available:
- News and Interests: Disable Widgets on Lockscreen
- News and Interests: Disable Widgets Board
- Widgets: Allow Widgets
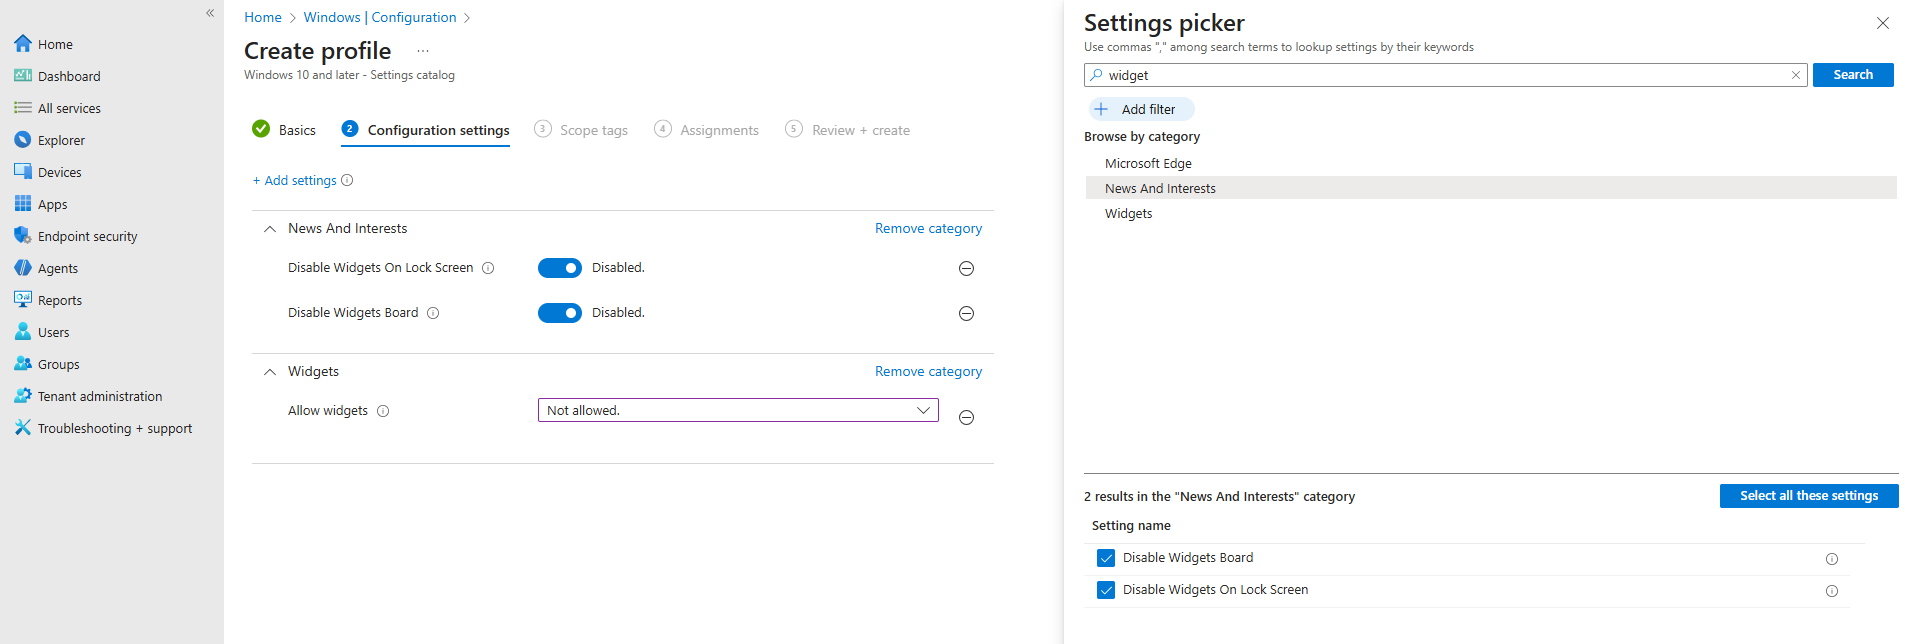
In my case, I have set all three options to disabled/Not allowed.
After you have assigned this to the device, all Widgets options are gone and the user experience will be a bit better. The endpoint must restart to apply the changes.
Method 2: Registry/PowerShell
You can achieve the settings also through PowerShell which does some registry changes. You can use this simple script:
POWERSHELL
$JVRegPath = "HKLM:\SOFTWARE\Policies\Microsoft\Dsh"

# Checking/creating path
If (!(Test-Path $JVRegPath)) {
    New-Item -Path $JVRegPath -Force | Out-Null
}

# 1. Disable Widgets Board
Set-ItemProperty -Path $JVRegPath -Name "AllowNewsAndInterests" -Type DWord -Value 0

# 2. Disable Widgets on Lock Screen
Set-ItemProperty -Path $JVRegPath -Name "AllowWidgetsOnLockscreen" -Type DWord -Value 0

# 3. Disable Widgets on Taskbar
Set-ItemProperty -Path $JVRegPath -Name "AllowWidgets" -Type DWord -Value 0
This sets 3 registry keys to the desired setting. In this case disabling widgets on the taskbar and lockscreen.
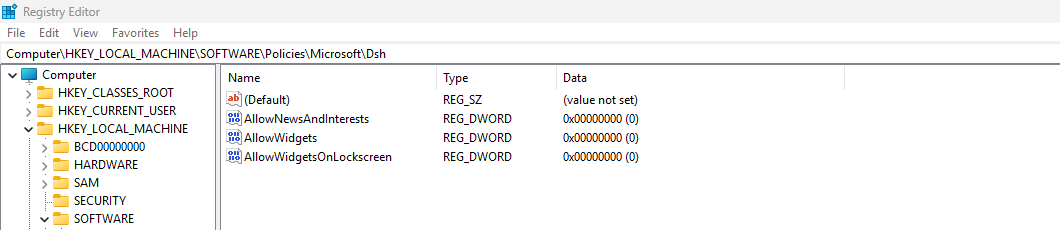
After these keys are set, the computer must reboot to apply the changes.
Summary
This short page explains 2 methods of disabling Widgets from the Windows Taskbar. This is something almost nobody uses and everyone dislikes.
Disabling this speeds up the device and enhances user experience.
Thank you for reading this guide and I hope it was helpful.
Sources
These sources helped me by writing and research for this post;
- None
End of the page 🎉
You have reached the end of the page. You can navigate through other blog posts as well, share this post on X, LinkedIn and Reddit or return to the blog posts collection page. Thank you for visiting this post.
If you think something is wrong with this post or you want to know more, you can send me a message to one of my social profiles at: https://justinverstijnen.nl/about/
If you find this page and blog very useful and you want to leave a donation, you can use the button below to buy me a beer. Hosting and maintaining a website takes a lot of time and money. Thank you in advance and cheers :)
The terms and conditions apply to this post.
Using and configuring Windows Backup for Organizations in Intune
Microsoft just released a new feature, Windows Backup for Organizations, which is a revolution on top of the older Enterprise State Roaming.
Microsoft just released a new feature, Windows Backup for Organizations, which is a revolution on top of the older Enterprise State Roaming.
Windows Backup for Organizations will help you and your users by saving different components of your Windows installation to make a the proces of a new installation or computer much easier. Especially when used with Windows Autopilot, this is a great addition to the whole Windows/Intune ecosystem.
In this guide I will dive into how it works, what is backed up and excluded and how to configure and use it.
Requirements
- Windows 11 with the latest feature updates installed for both creating and restoring backups
- Entra ID joined or Entra Hybrid joined device
- Microsoft Intune-capable license
- Around 15 minutes of your time
What is Windows Backup for Organizations?
Windows Backup for Organizations is a feature where Windows creates a backup of your Windows settings and Windows Store applications every 8 days. This will be saved to your Microsoft business account. If ever having to re-install your device or to use a new device, you can easily restore your old configuration. This is a revolution on top of the older Enterprise State Roaming feature, who did around 20% of this.
Enterprise State Roaming vs. Windows Backup for Organizations
Let’s compare what is included in this new Windows Backup for Organizations feature versus Enterprise State Roaming
| Item | Windows Backup for Organizations | Enterprise State Roaming |
| Windows Settings | ✅ | ✅ |
| Windows Personalization | ✅ | ❌ |
| Windows Store apps and data | ✅ | ❌ |
| Windows Desktop applications (Win32) | ❌ | ❌ |
Step 1: Enable Windows Backup for Organizations
To configure this new and great setting, go to Microsoft Intune and create a new configuration policy for Windows devices:
Then select Windows 10 and later, and the profile type “Settings catalog”.
Then click on create. Give the policy a name and a good description for your own documentation.
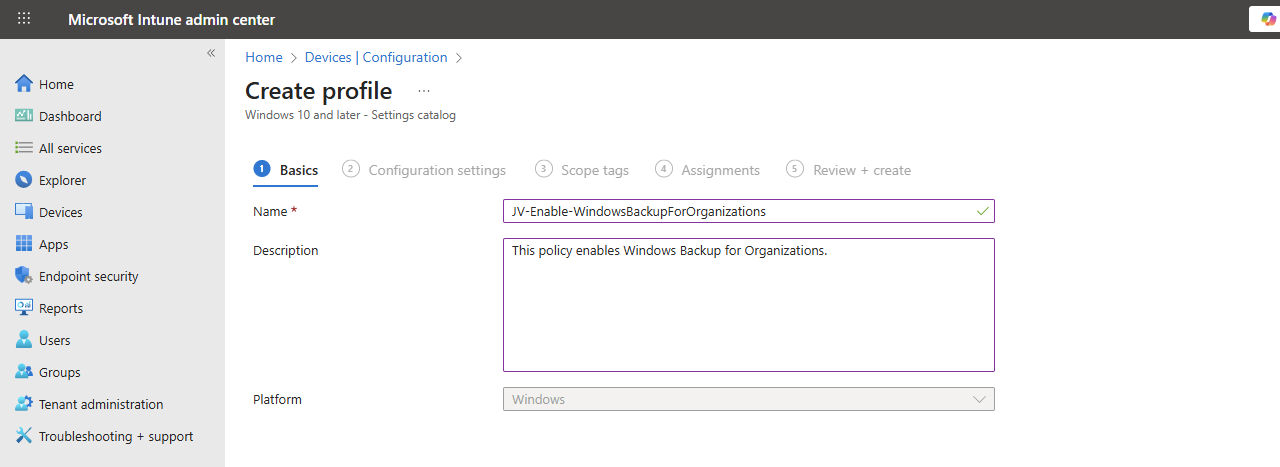
Click Next.
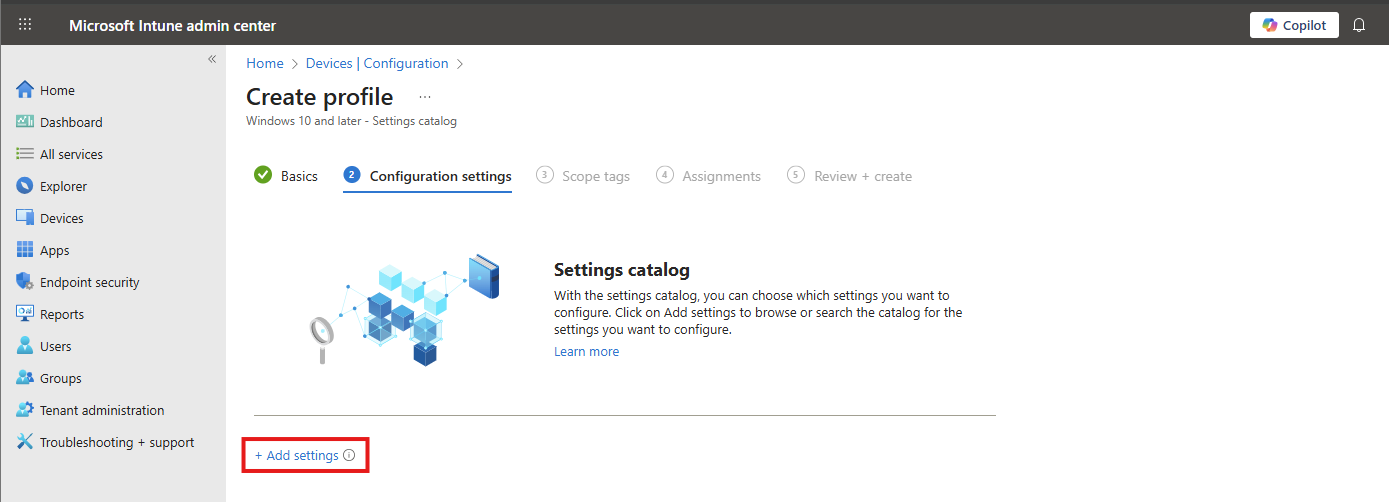
On the “Configuration settings” tab, click on “+ Add settings”. Navigate to this setting:
Administrative Templates -> Windows Components -> Sync your settings
Then lookup the setting-name: “Enable Windows Backup” and select it.
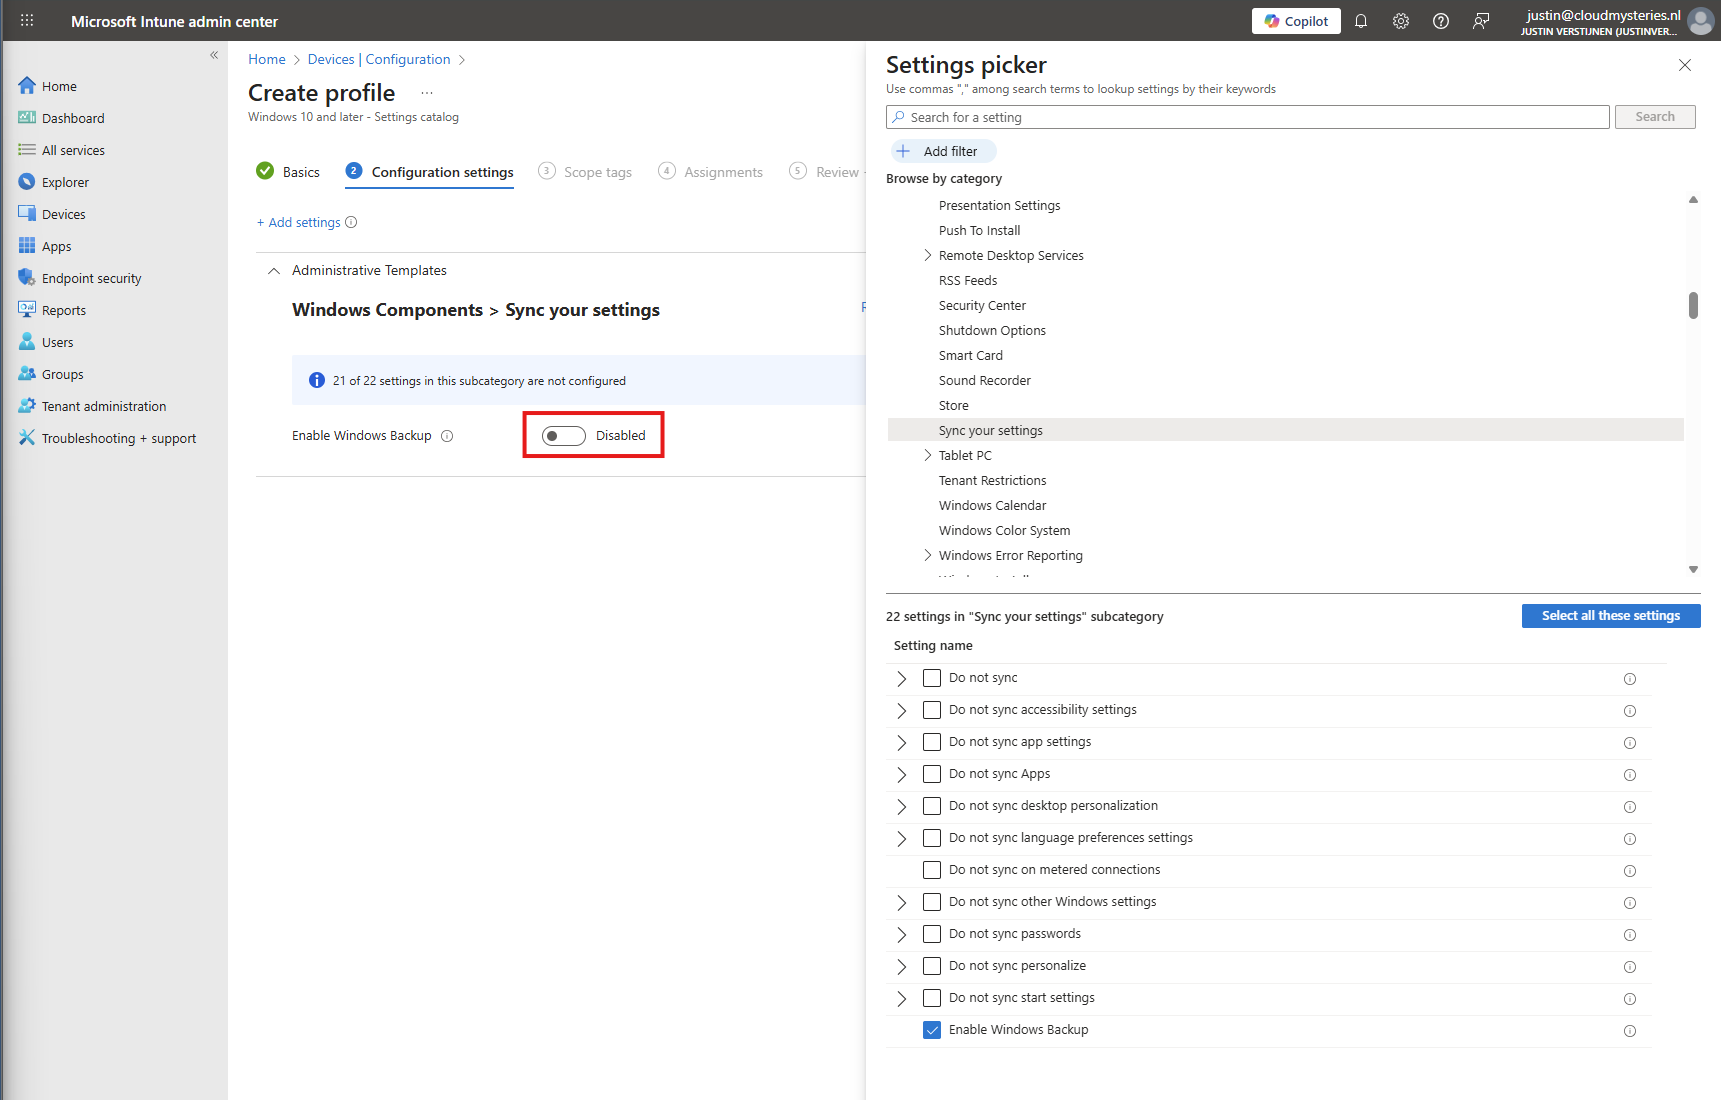
You can now enable the setting which will enable it on your device.
Then click “Next”, assign the policy to your devices.
Step 2: How to enable the restore of Windows Backup for Organizations
After enabling the the devices to make their back-up, we also need to configure that Windows shows automatically the older backups at the initial start (OOBE).
Head to Windows Devices -> Enrollment -> Windows Backup and Restore (preview)
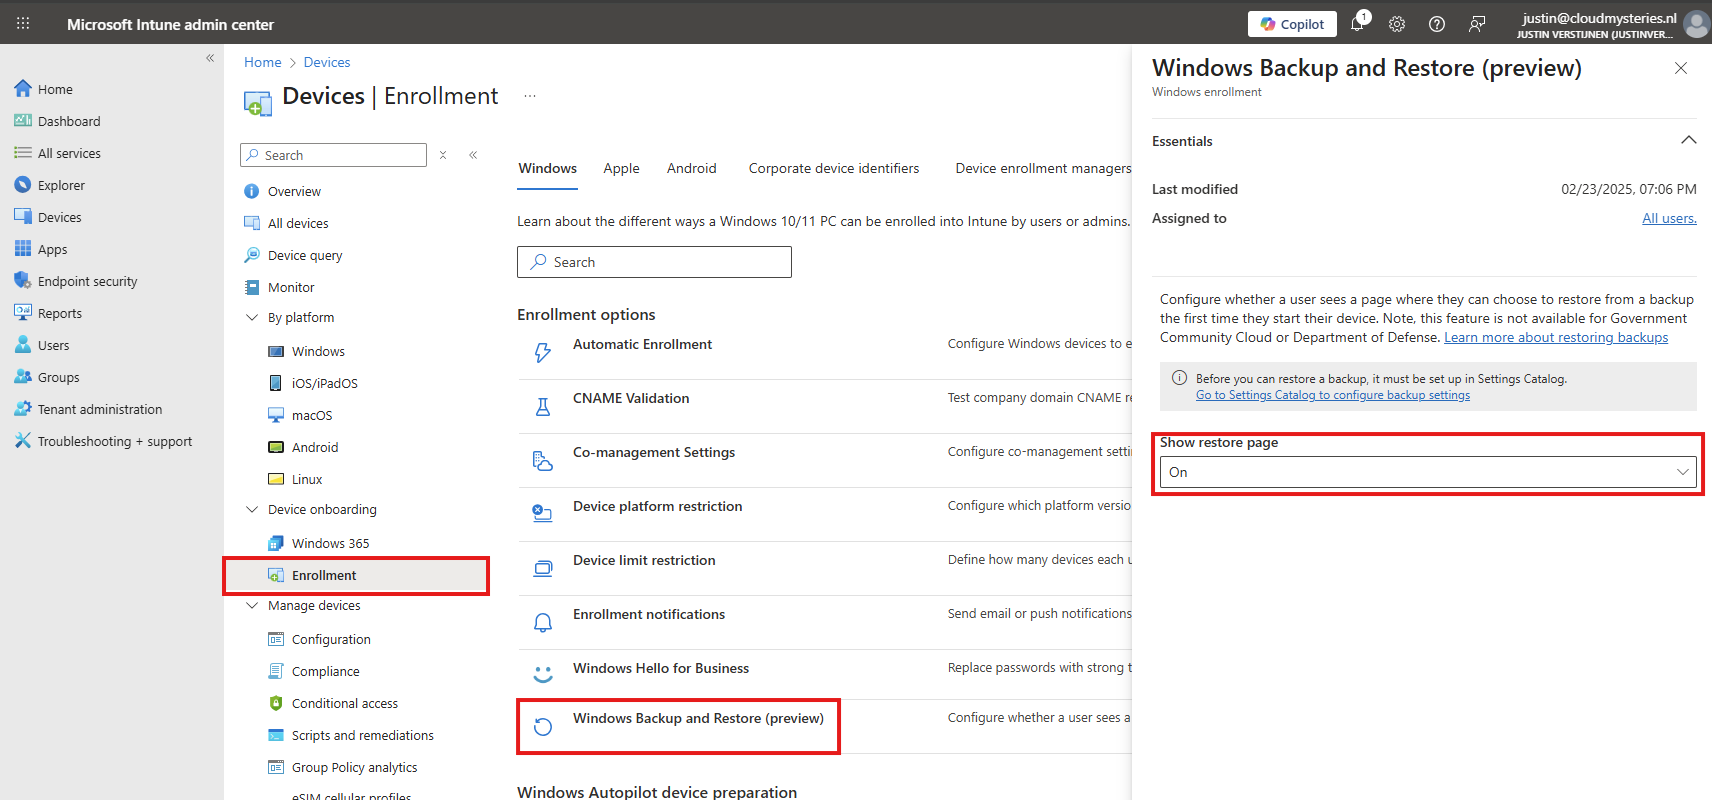
Select “On” to show the restore page. This will prompt the user (when an active backup is made) to restore their old configuration ath the Windows Out of the Box experience screen (OOBE)
Save the configuration to make this active.
Client-side configuration
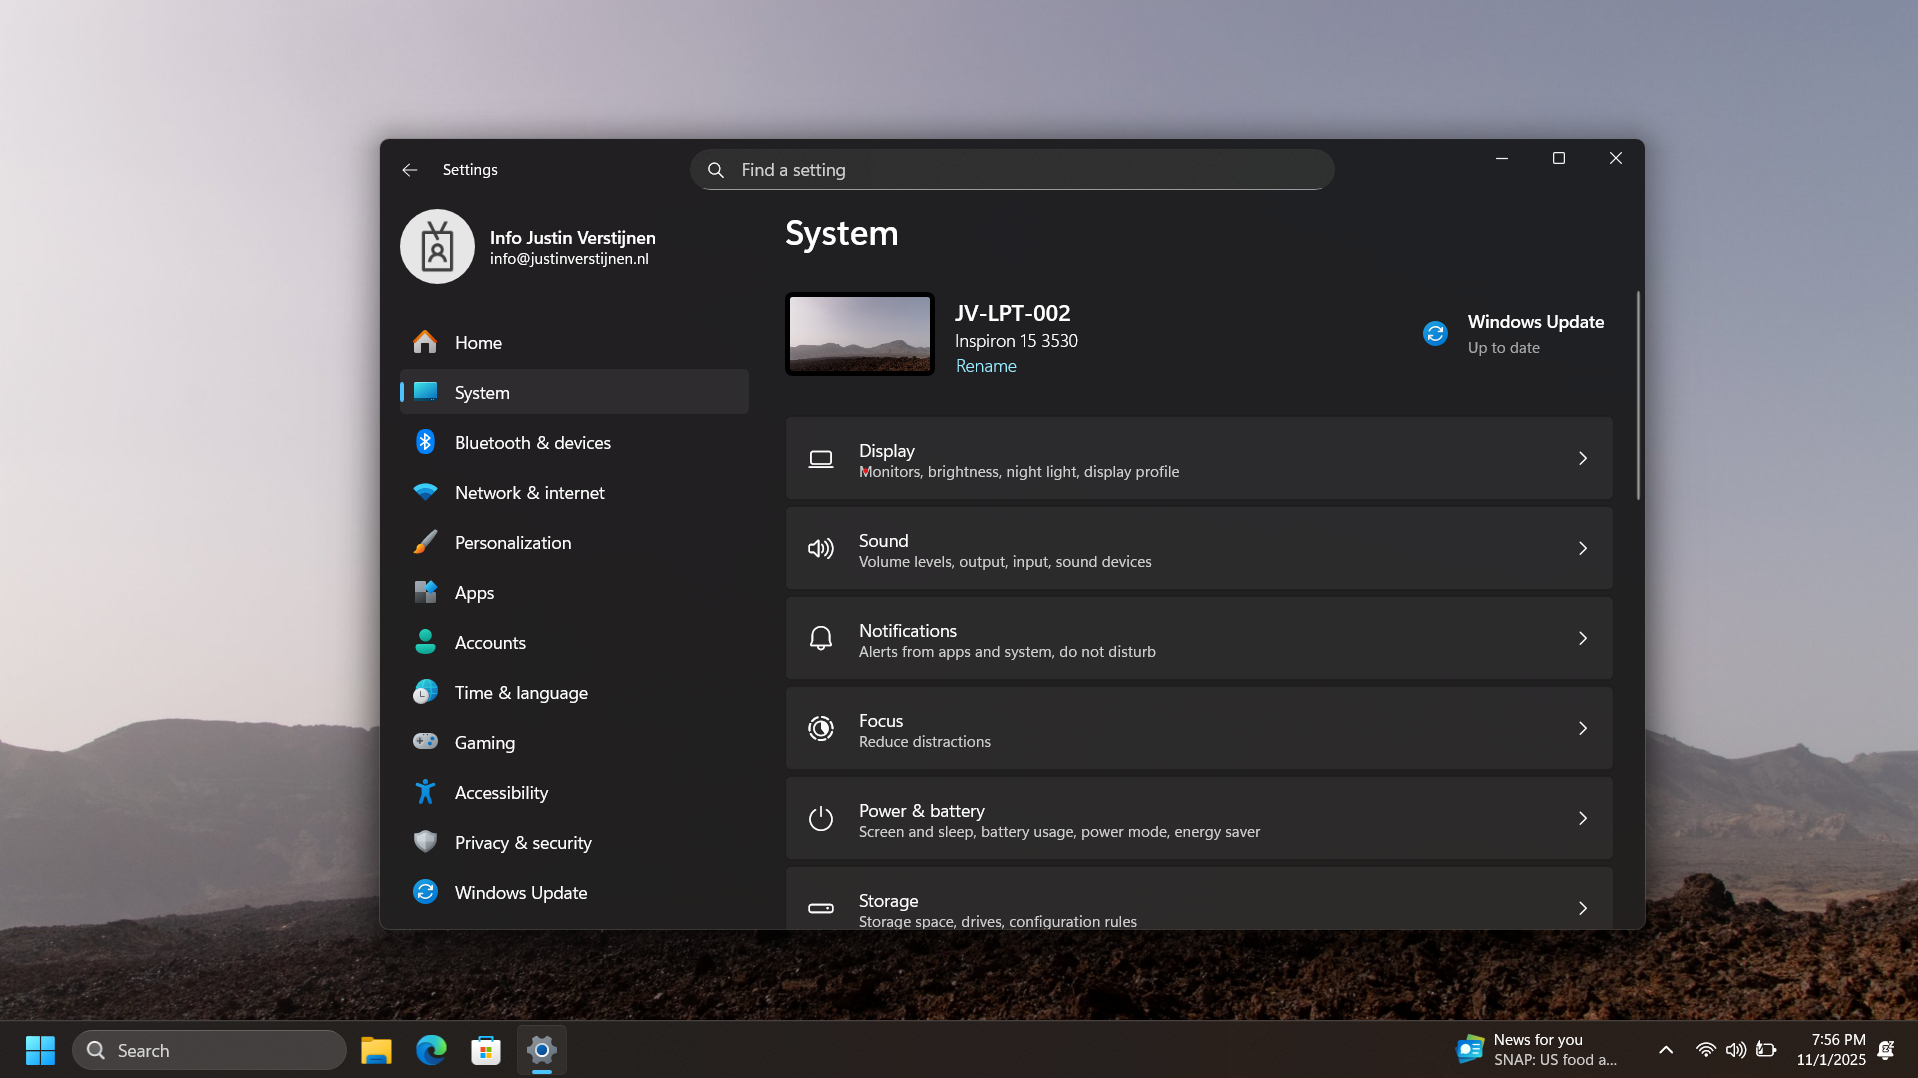
Users can also manually configure this new Backup in the Windows Settings:
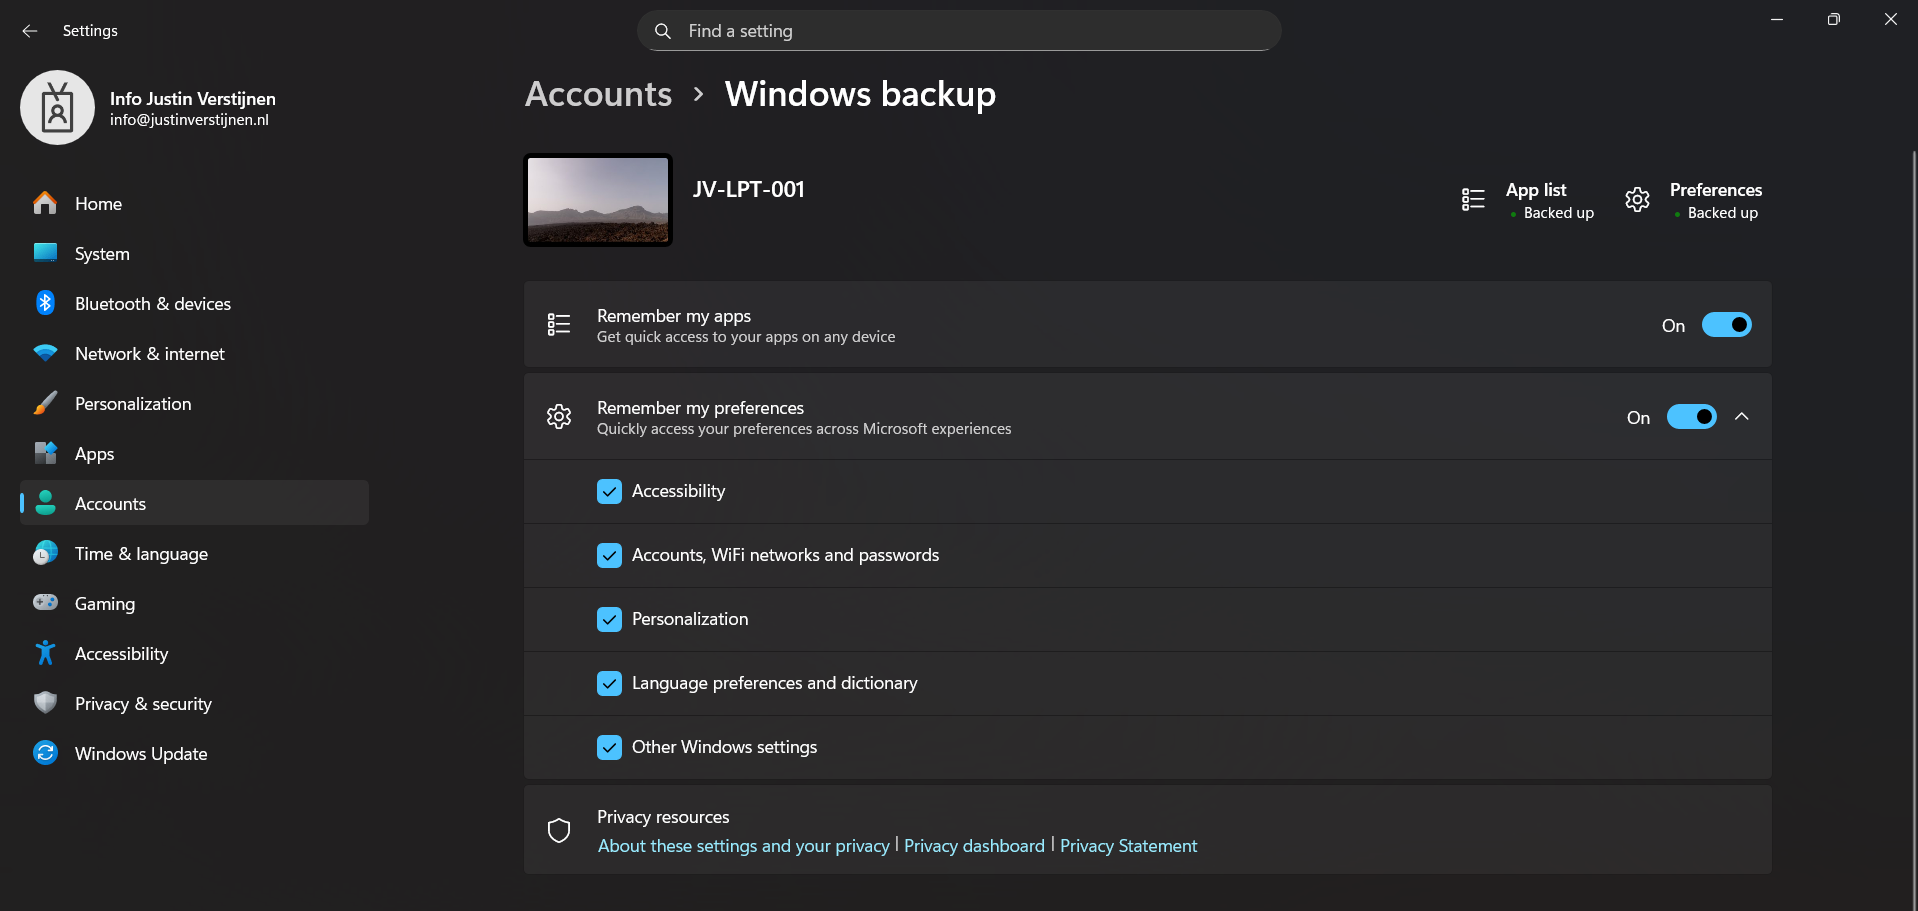
This is the overview after I have configured it in Intune and synced to my device. It automatically enabled the feature and should be ready to restore in case I’ll do a reinstall of my computer.
Restoring a backup (Step-by-step)
To restore the back-up made by Windows Backup for Organizations, let’s install a second laptop (JV-LPT-002) with the latest Windows updates (25H2).
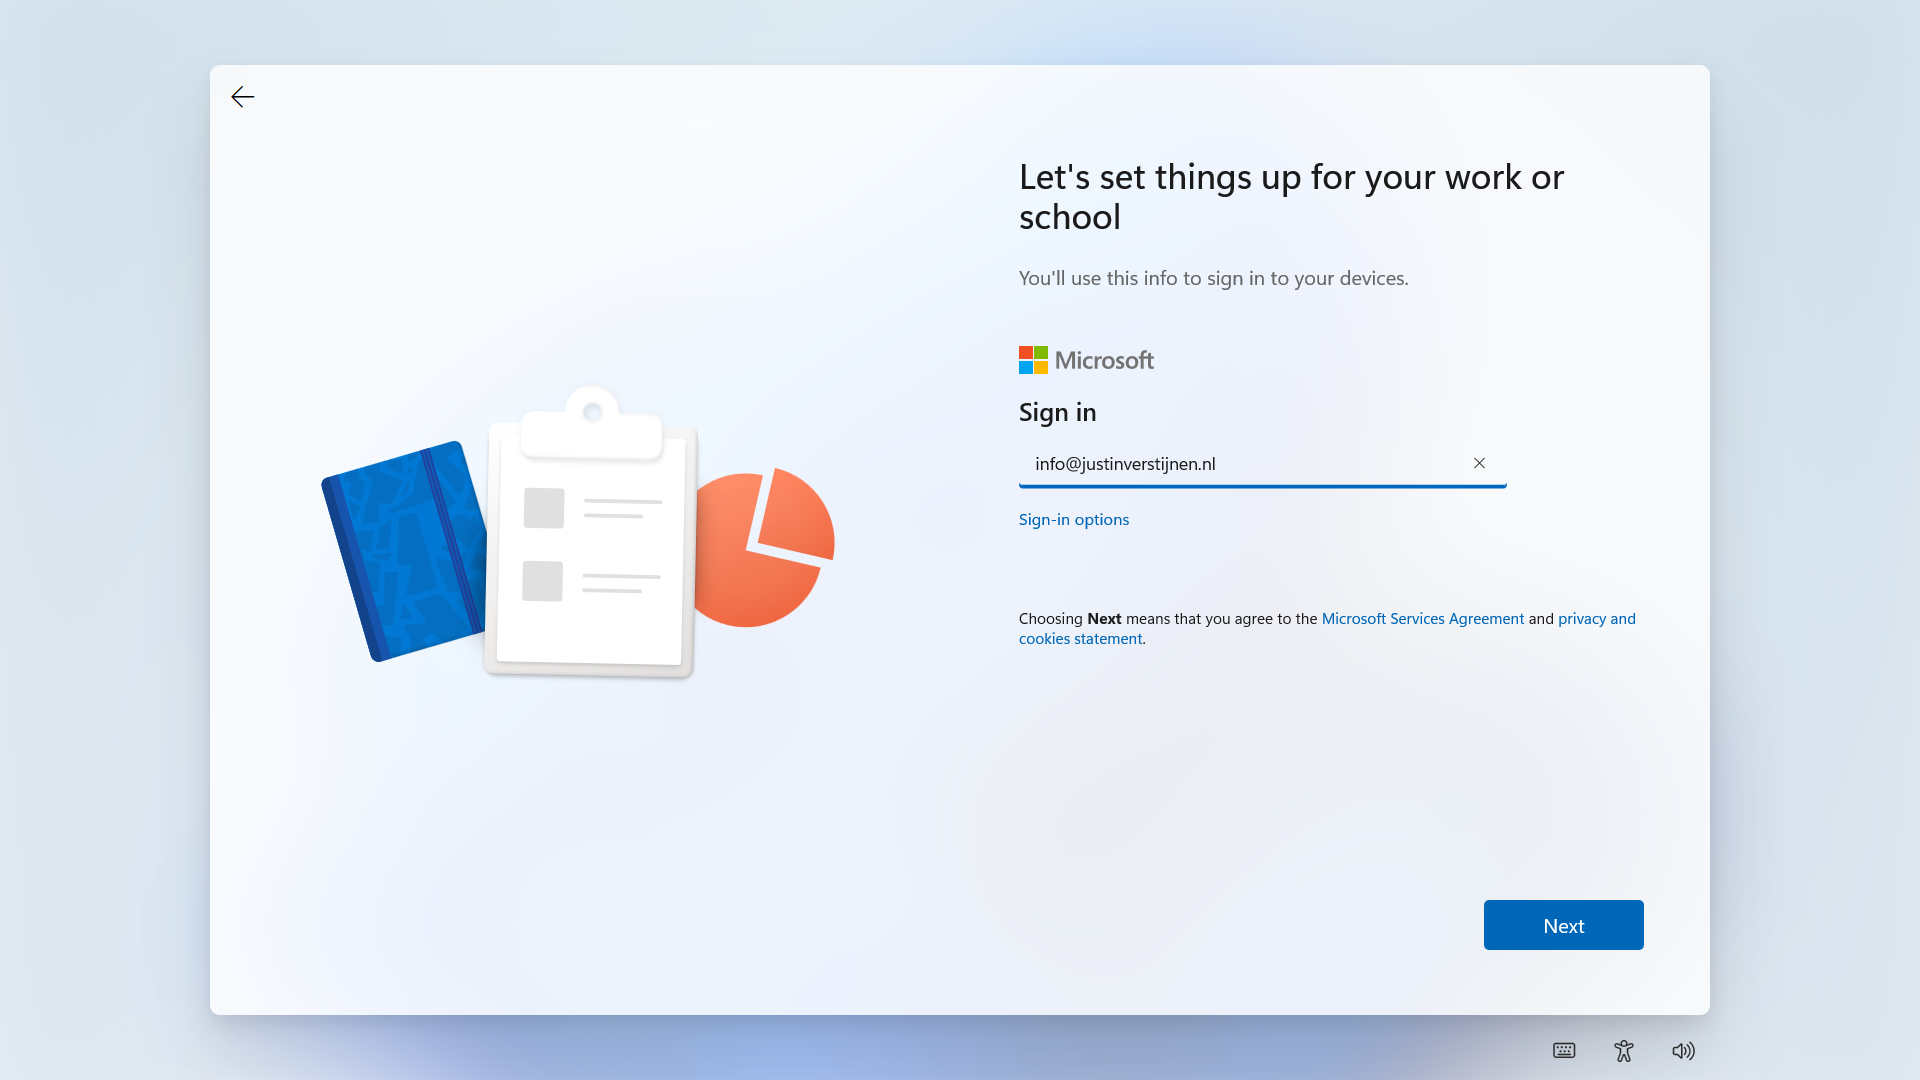
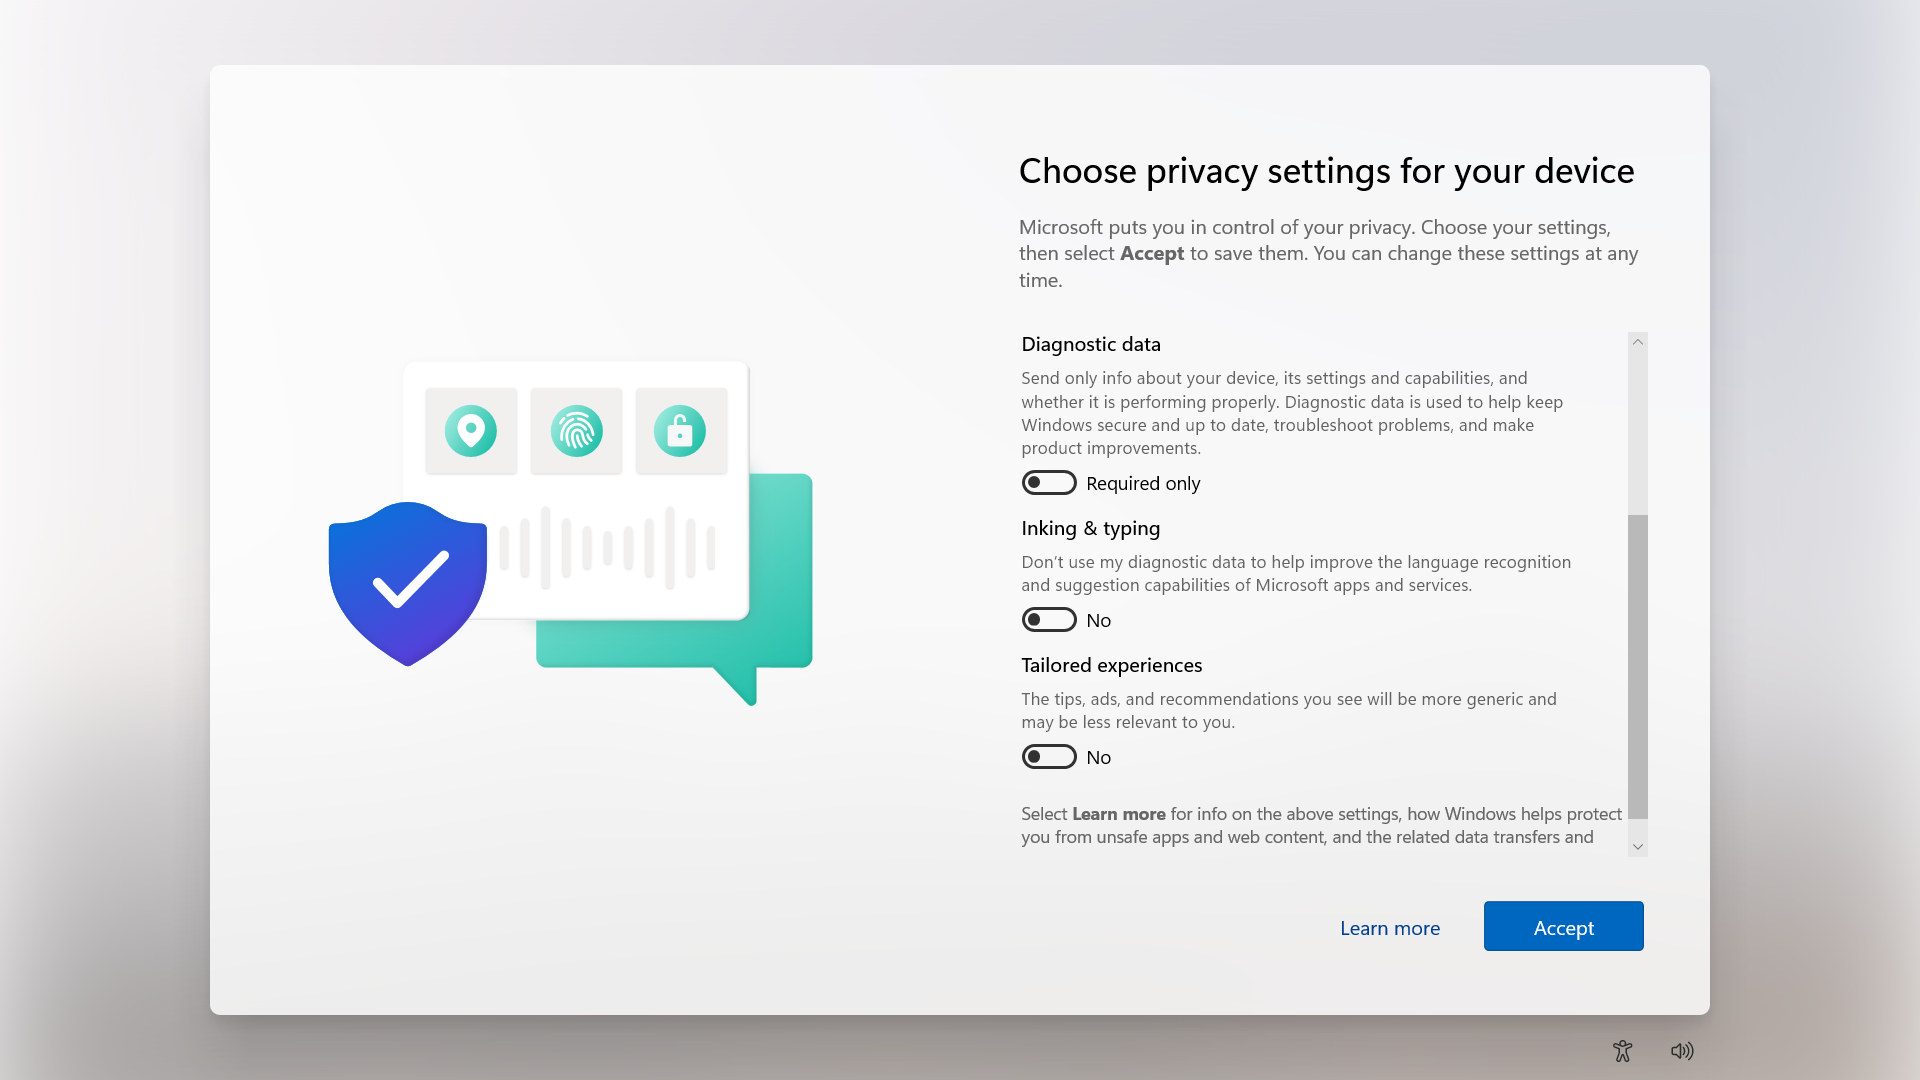
Now I will login to Windows with the same account as I logged in to the first laptop (JV-LPT-001).
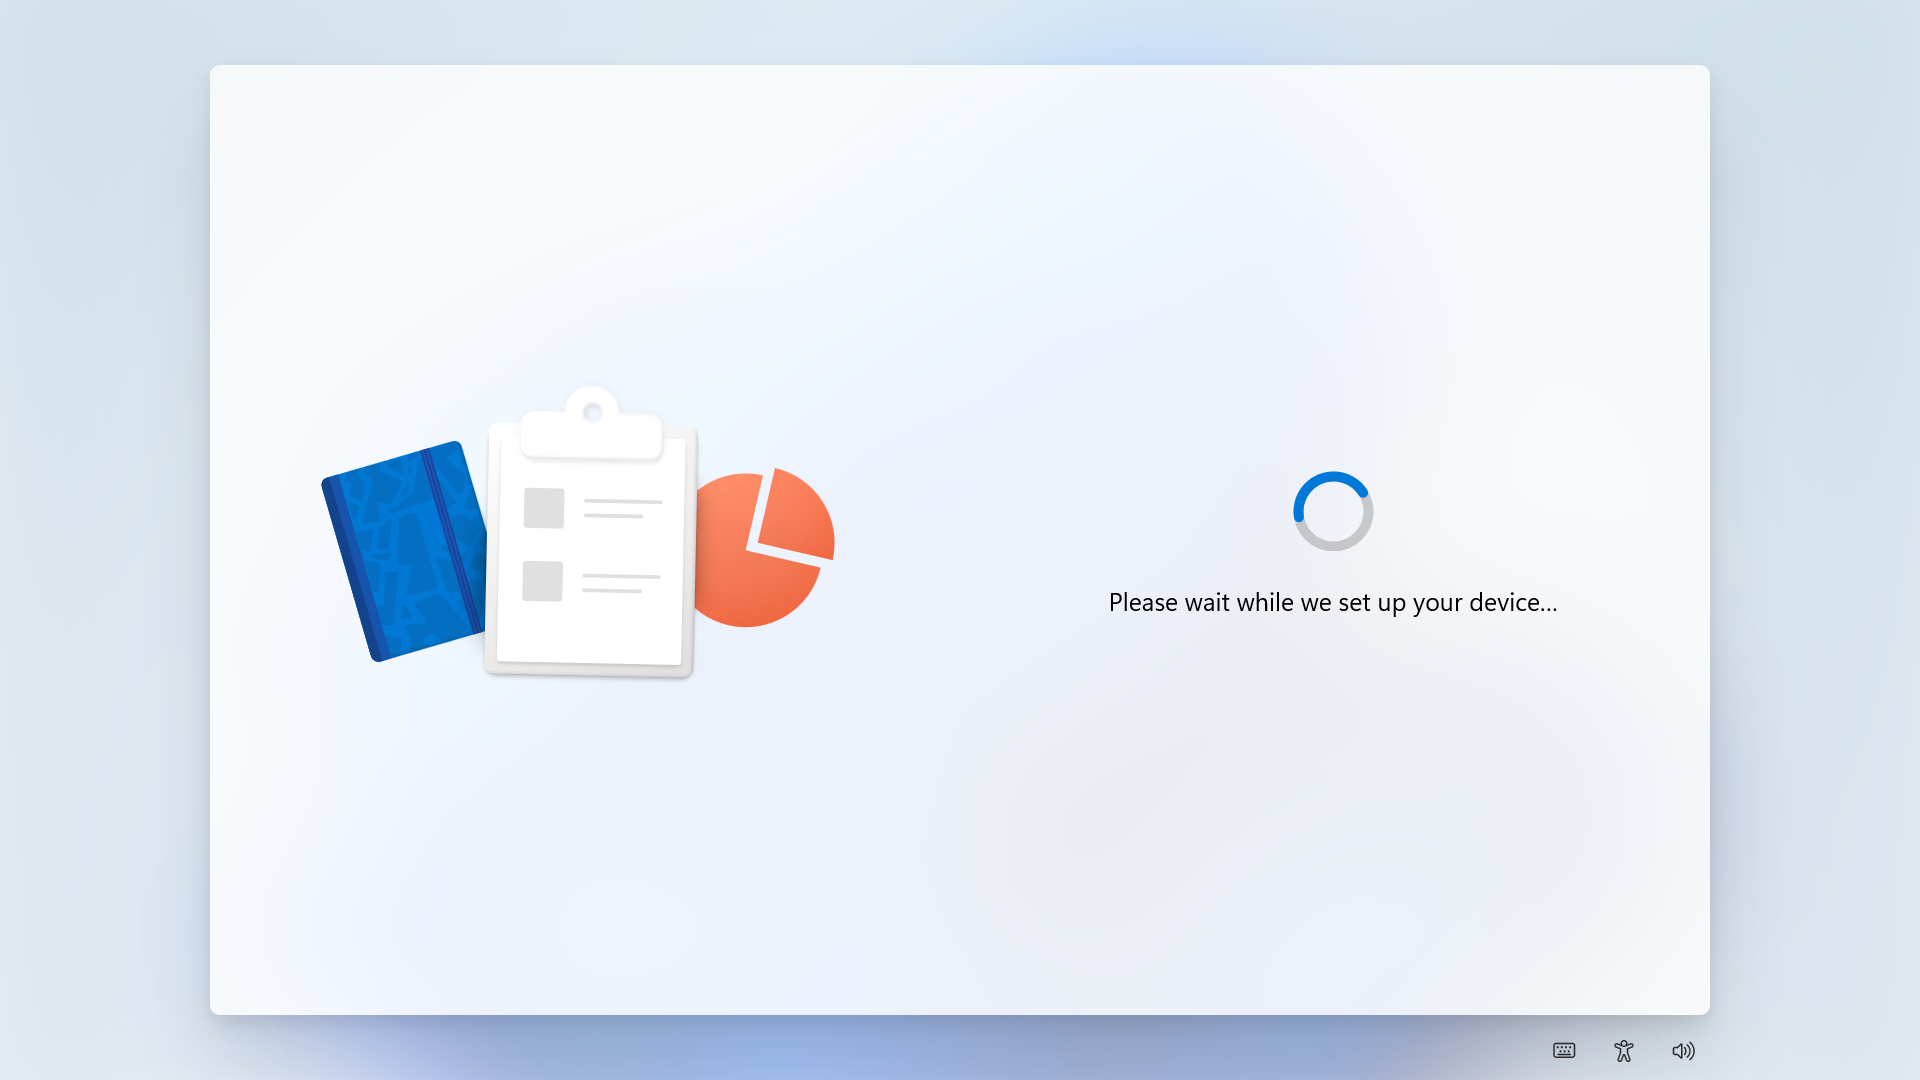
After succeeding the MFA challenge, Windows will process the changes and will get the additional information from our tenant.
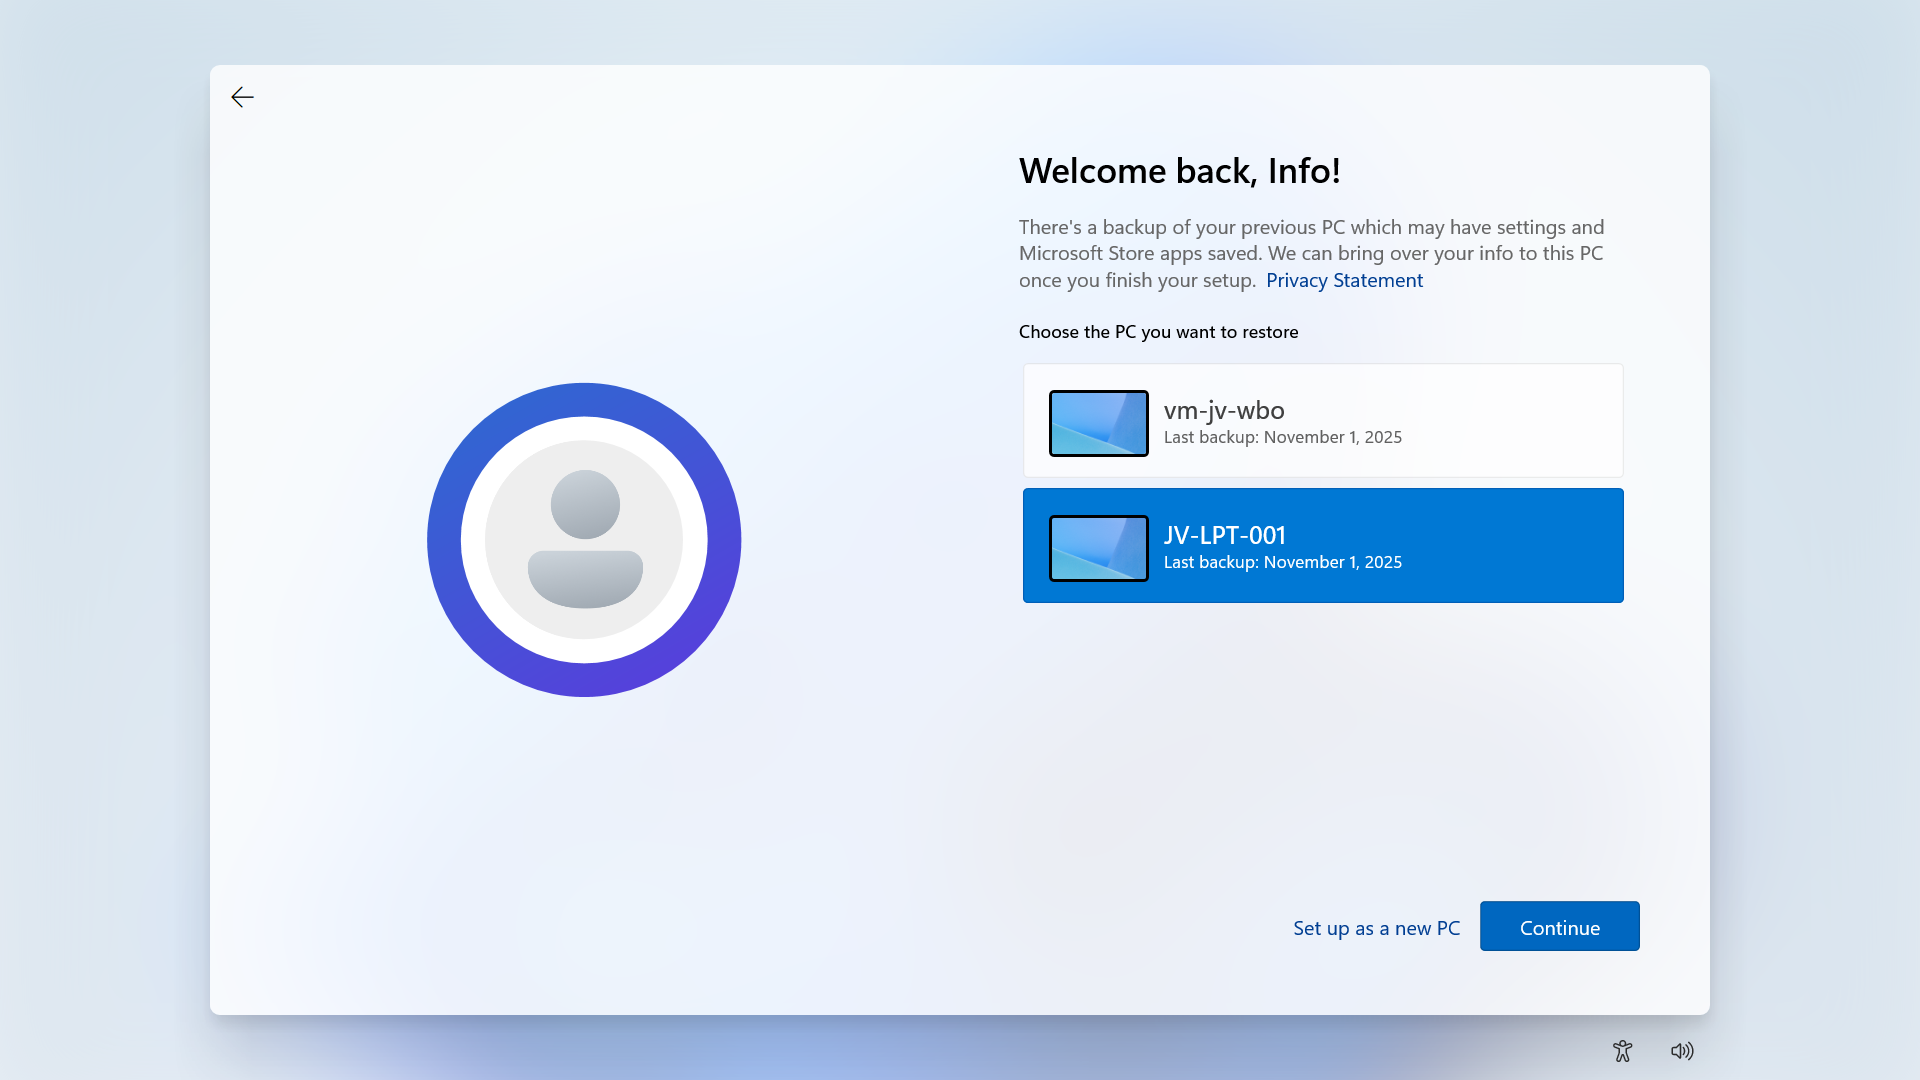
Then Windows will present you the options to restore a previously made backup. To get a better picture, I have made a second backup on a VM.
Now I will select the backup from the first laptop and click “Continue”.
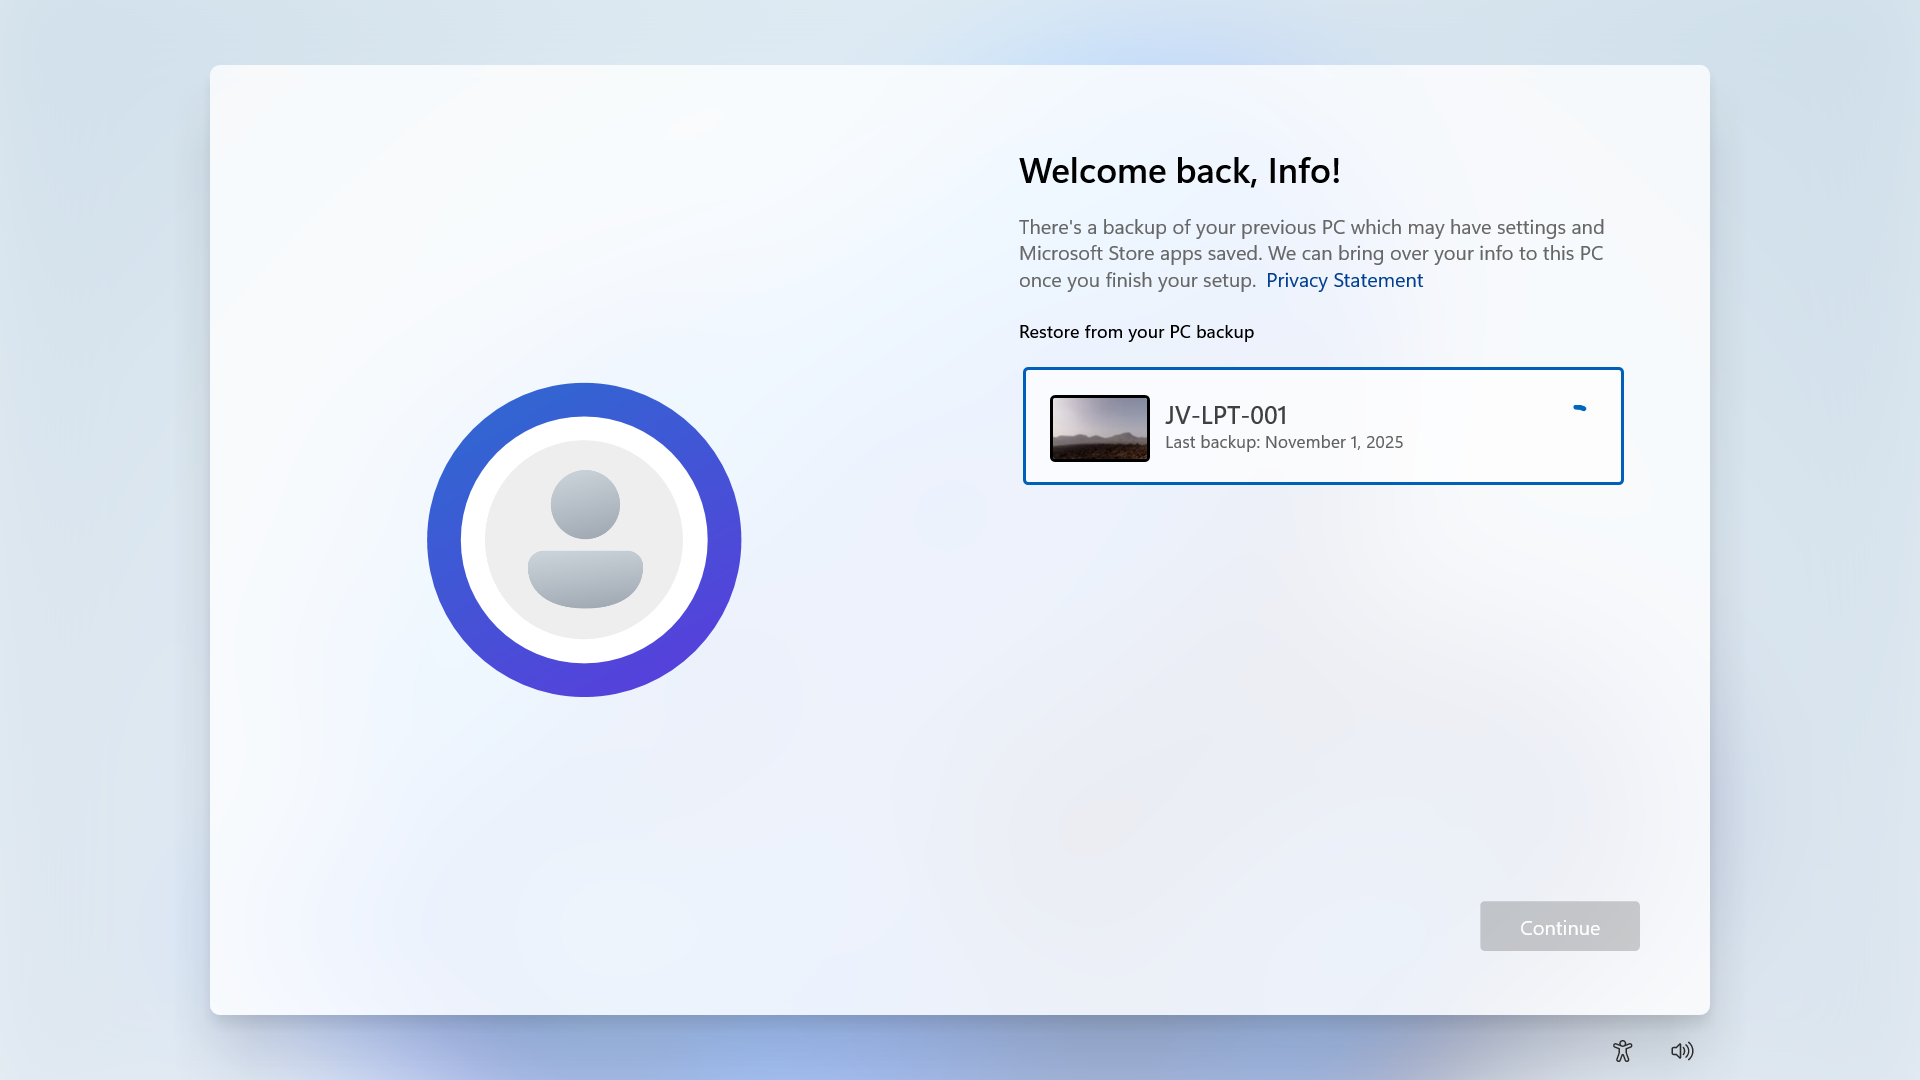
Now the backup will be restored.
Result/after restoring backup
After the backup has been restored, this was the state on the laptop without any manual change. It synced the dark mode I configured, the installed Windows Store apps, the Windows taskbar to the left and my nice holiday picture. All without any manual action after restoring.
As you can see, installing an new computer is alot easier with this new feature. We can easily restore an this configuration and minimizes the configuration we need to do for our new computer or installation.
Bonus: Create screenshots at Windows OOBE
The Windows Out of the Box experience screen is the first you’ll see when going to a fresh Windows installation. We can take screenshots here but with a little difficult.
You can do this by pressing Shift + F10 or Shift + Fn + F10. A cmd window will the open.
Type in PowerShell, and the use this command to take a screenshot:
POWERSHELL
Add-Type -AssemblyName System.Windows.Forms; Add-Type -AssemblyName System.Drawing; $width = 1920; $height = 1080; $bmp = New-Object Drawing.Bitmap($width, $height); $graphics = [Drawing.Graphics]::FromImage($bmp); $graphics.CopyFromScreen(0,0,0,0,$bmp.Size); $bmp.Save("C:\OOBE.png")Screenshots will be saved to C:\ to be backed-up after the OOBE flow.
Summary
Windows Backup for Organizations is a great feature, especially for end users to keep their personal Windows Settings saved into their account. This in combination with OneDrive will make reinstalls pretty easy as we only have to install applications. The rest will be handled by Microsoft in this way.
Sources
These sources helped me by writing and research for this post;
End of the page 🎉
You have reached the end of the page. You can navigate through other blog posts as well, share this post on X, LinkedIn and Reddit or return to the blog posts collection page. Thank you for visiting this post.
If you think something is wrong with this post or you want to know more, you can send me a message to one of my social profiles at: https://justinverstijnen.nl/about/
If you find this page and blog very useful and you want to leave a donation, you can use the button below to buy me a beer. Hosting and maintaining a website takes a lot of time and money. Thank you in advance and cheers :)
The terms and conditions apply to this post.
Remove Pre-installed Windows Store Apps with Intune
Since the latest Windows 25H2 update, we have a great new feature. We can now remove pre-installed Windows Store Applications which we…
Since the latest Windows 25H2 update, we have a great new feature. We can now remove pre-installed Windows Store Applications which we don’t want to ship with our devices. This helps us alot with both Windows 365 and Azure Virtual Desktop Personal deployments as with normal Intune-joined devices. The only downside is that Pooled Azure Virtual Desktop Deployments are not supported.
In this guide I will dive into this new setting and explain how to configure this and why this is a great update. The step-by-step guide shows how I have configured a policy that removes most of the non-productive apps from my PC.
The new feature described
In Intune we can now select which default shipped apps must be removed from Windows clients. Before, this was a complete package we had to use or remove with custom scripts, but now we can select the apps to remove (and deselect to keep).
Keep in mind, we have the following requirements for this new feature:
- Windows 11 25H2
- Education or Enterprise version
Also worth mentioning, removing an application needs a manual reinstall, which is easy to do.
Step by step configuration
We can configure the removal of these apps with a configuration profile in Microsoft Intune. I will create this from A to Z in this guide to fully explain how this works:
Open up Microsoft Intune Admin center (intune.microsoft.com).
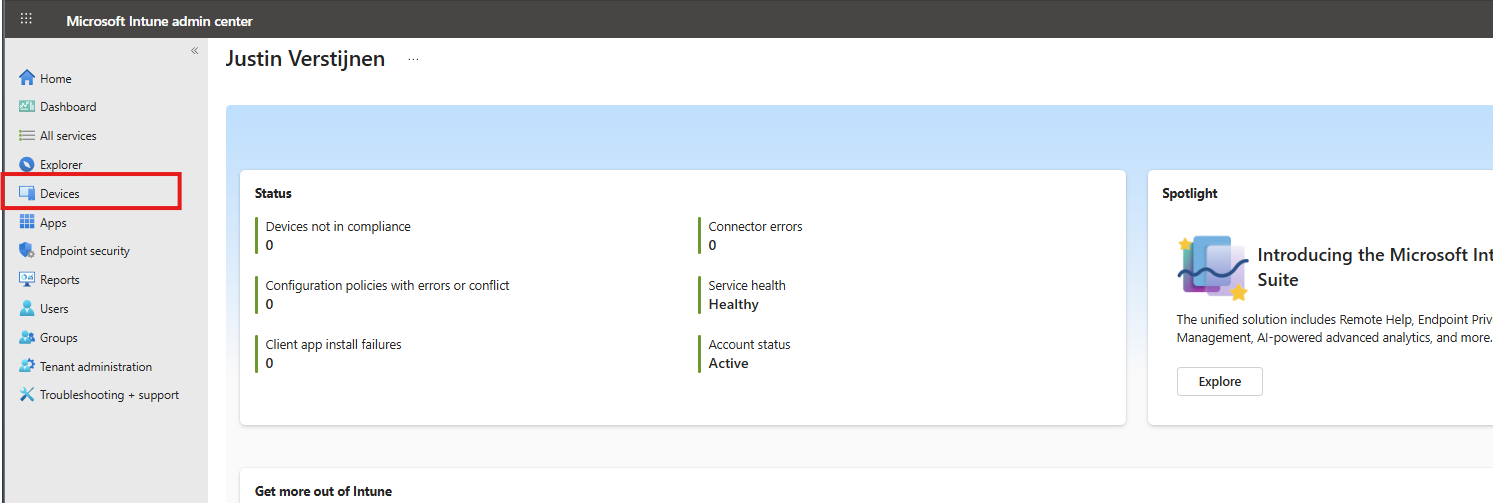
Then go to your Devices, and then Windows.
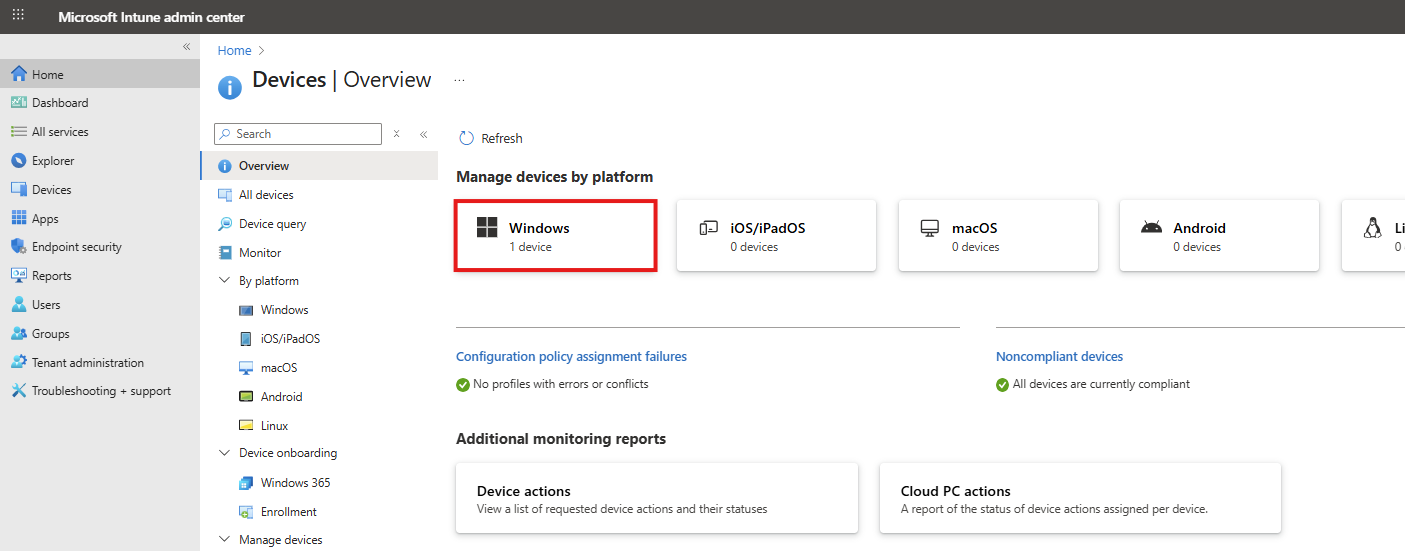
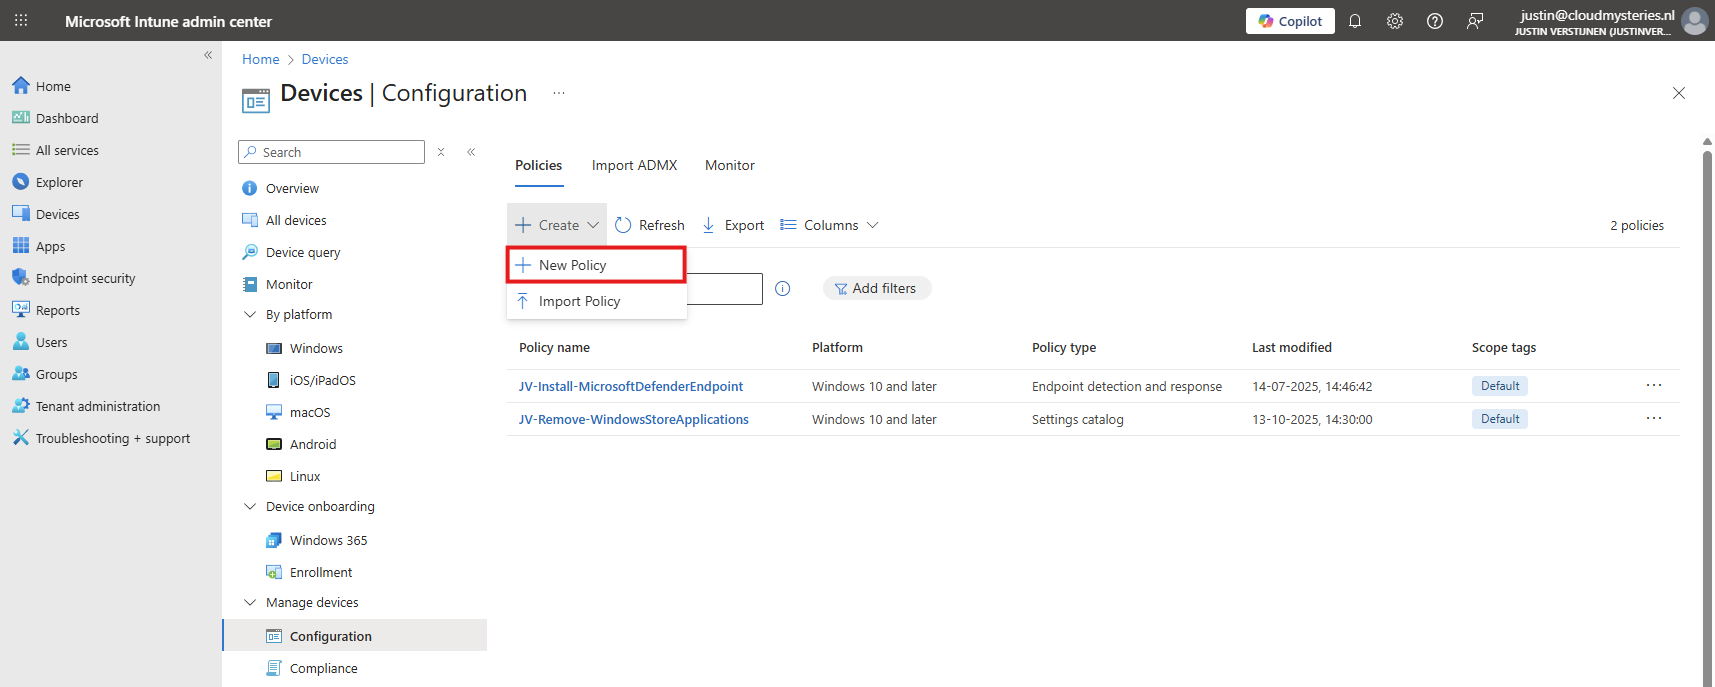
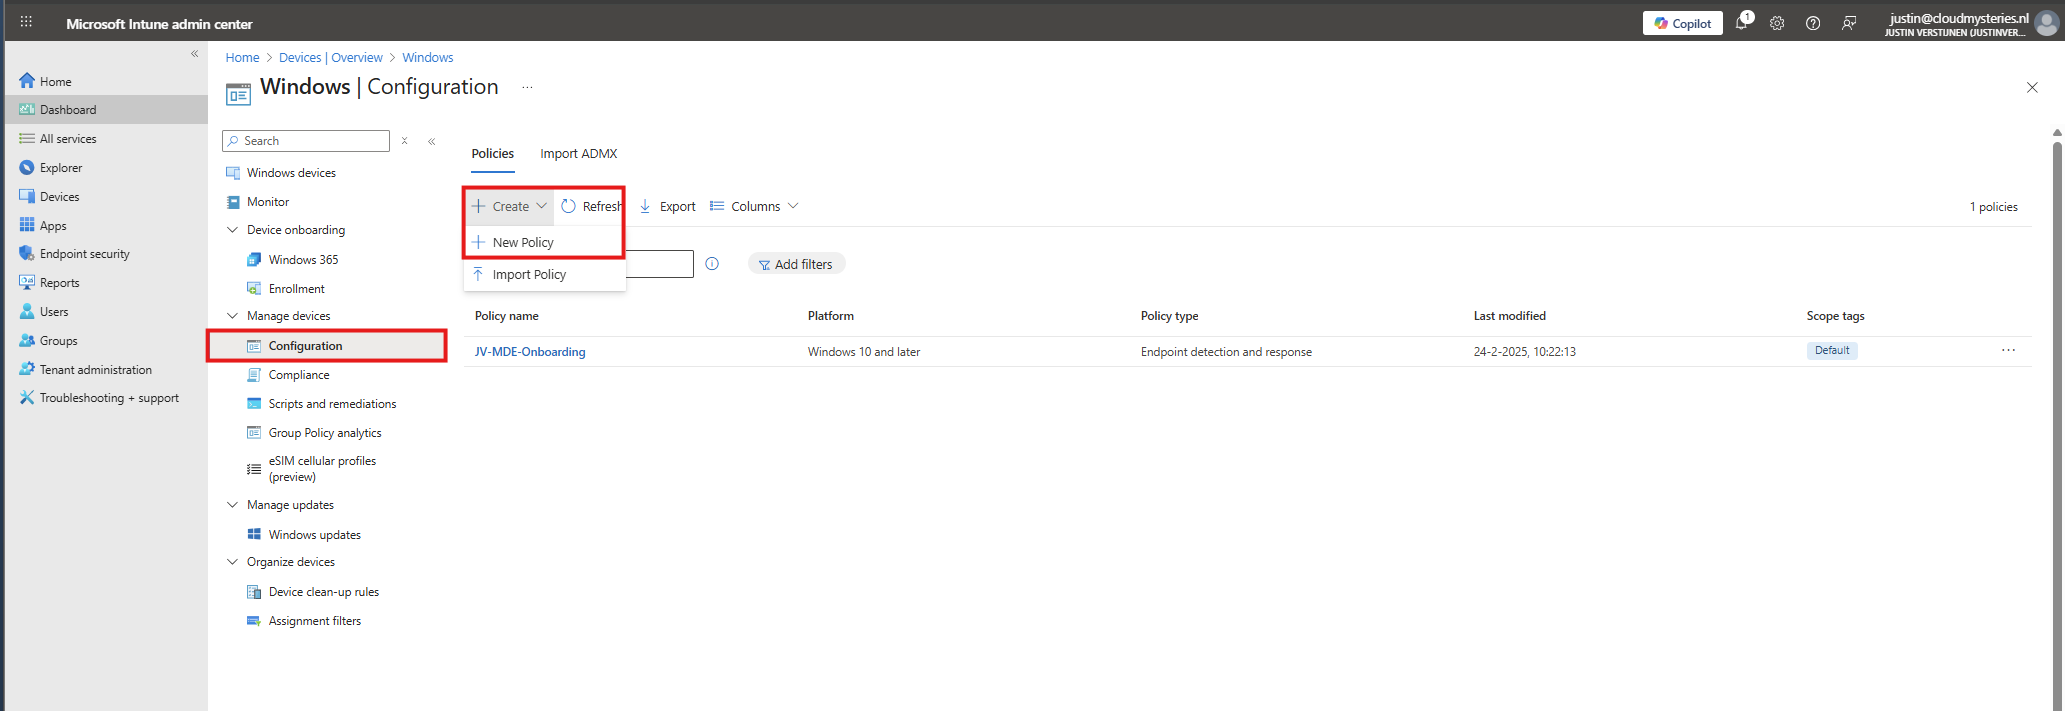
Then click on “Configuration” to view all the Windows-based Configuration Profiles. Here we can create a new profile for this setting. Click on “+ Create” and then “New Policy”.
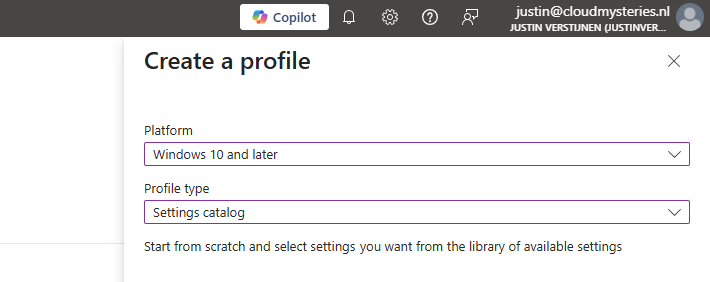
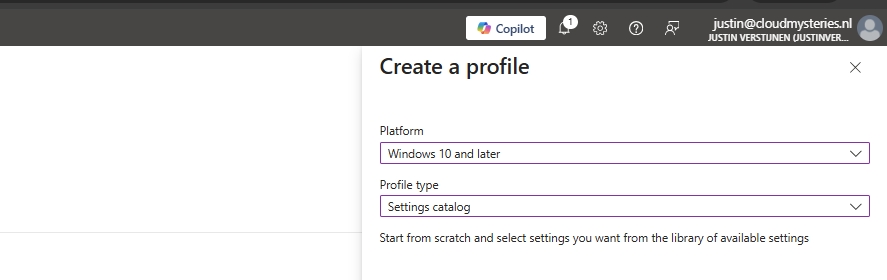
Select for Platform the “Windows 10 and later option”, and for Profile Type “Settings catalog”.
Then give the policy a recognizable name and description.

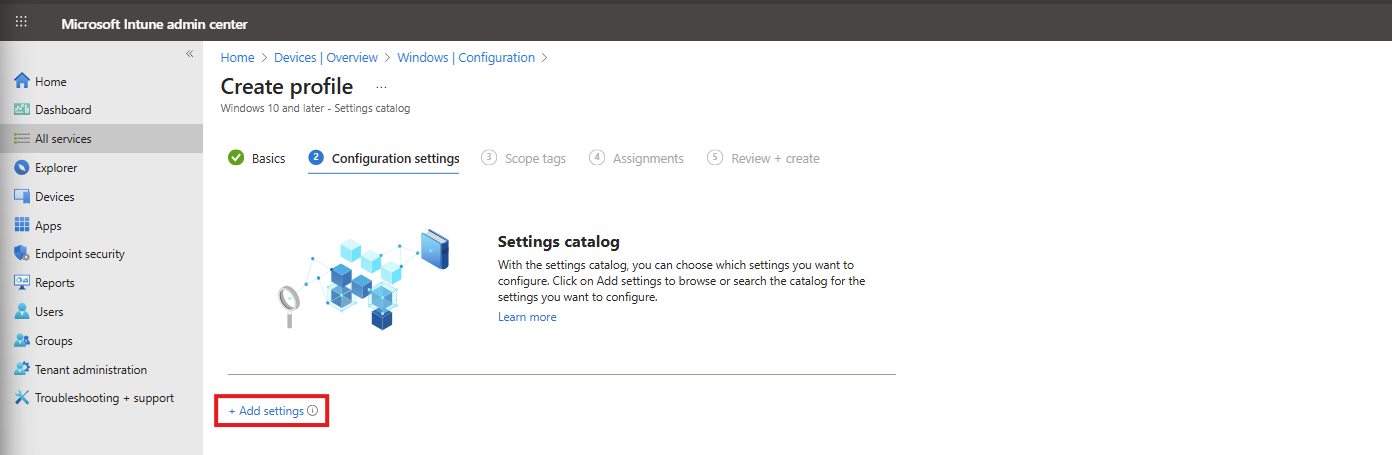
Then click “Next”. On the “Configuration settings” page, click on the “+ Add settings” button:
Then search for the setting in this location:
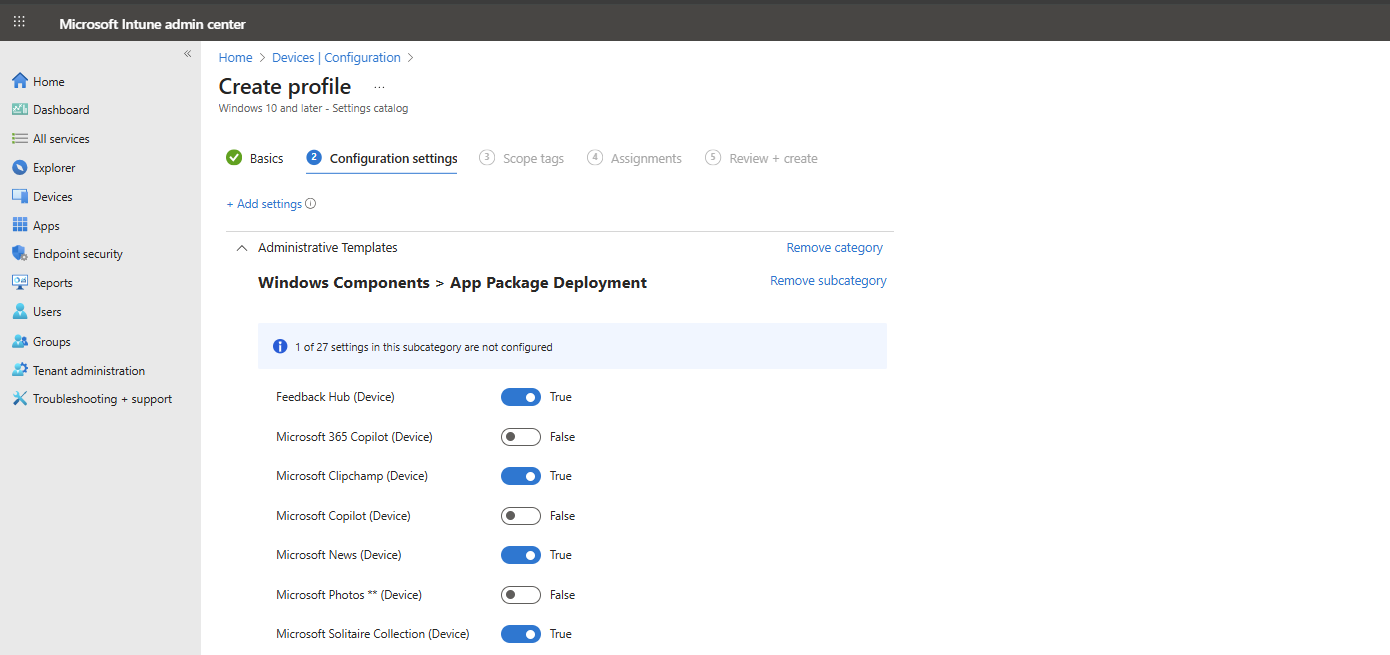
Administrative Templates -> Windows Components -> App Package Deployment
Then select the “Remove Default Microsoft Store packages from the system” option.
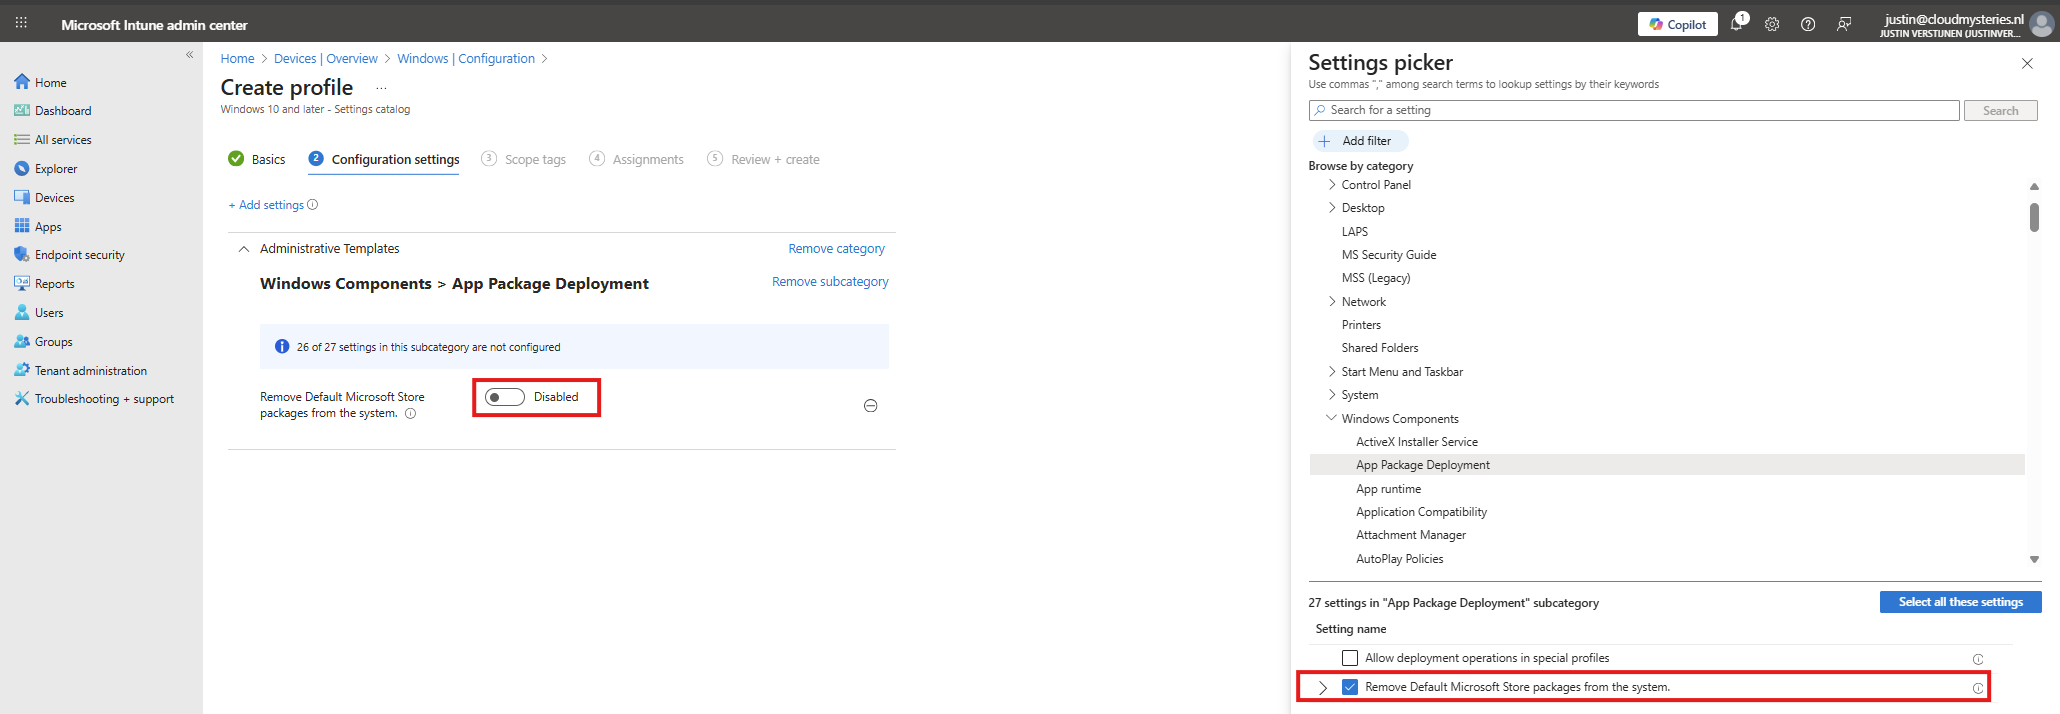
At the left side, flick the switch to “Enabled” and now we can select all apps to remove from Windows client devices.
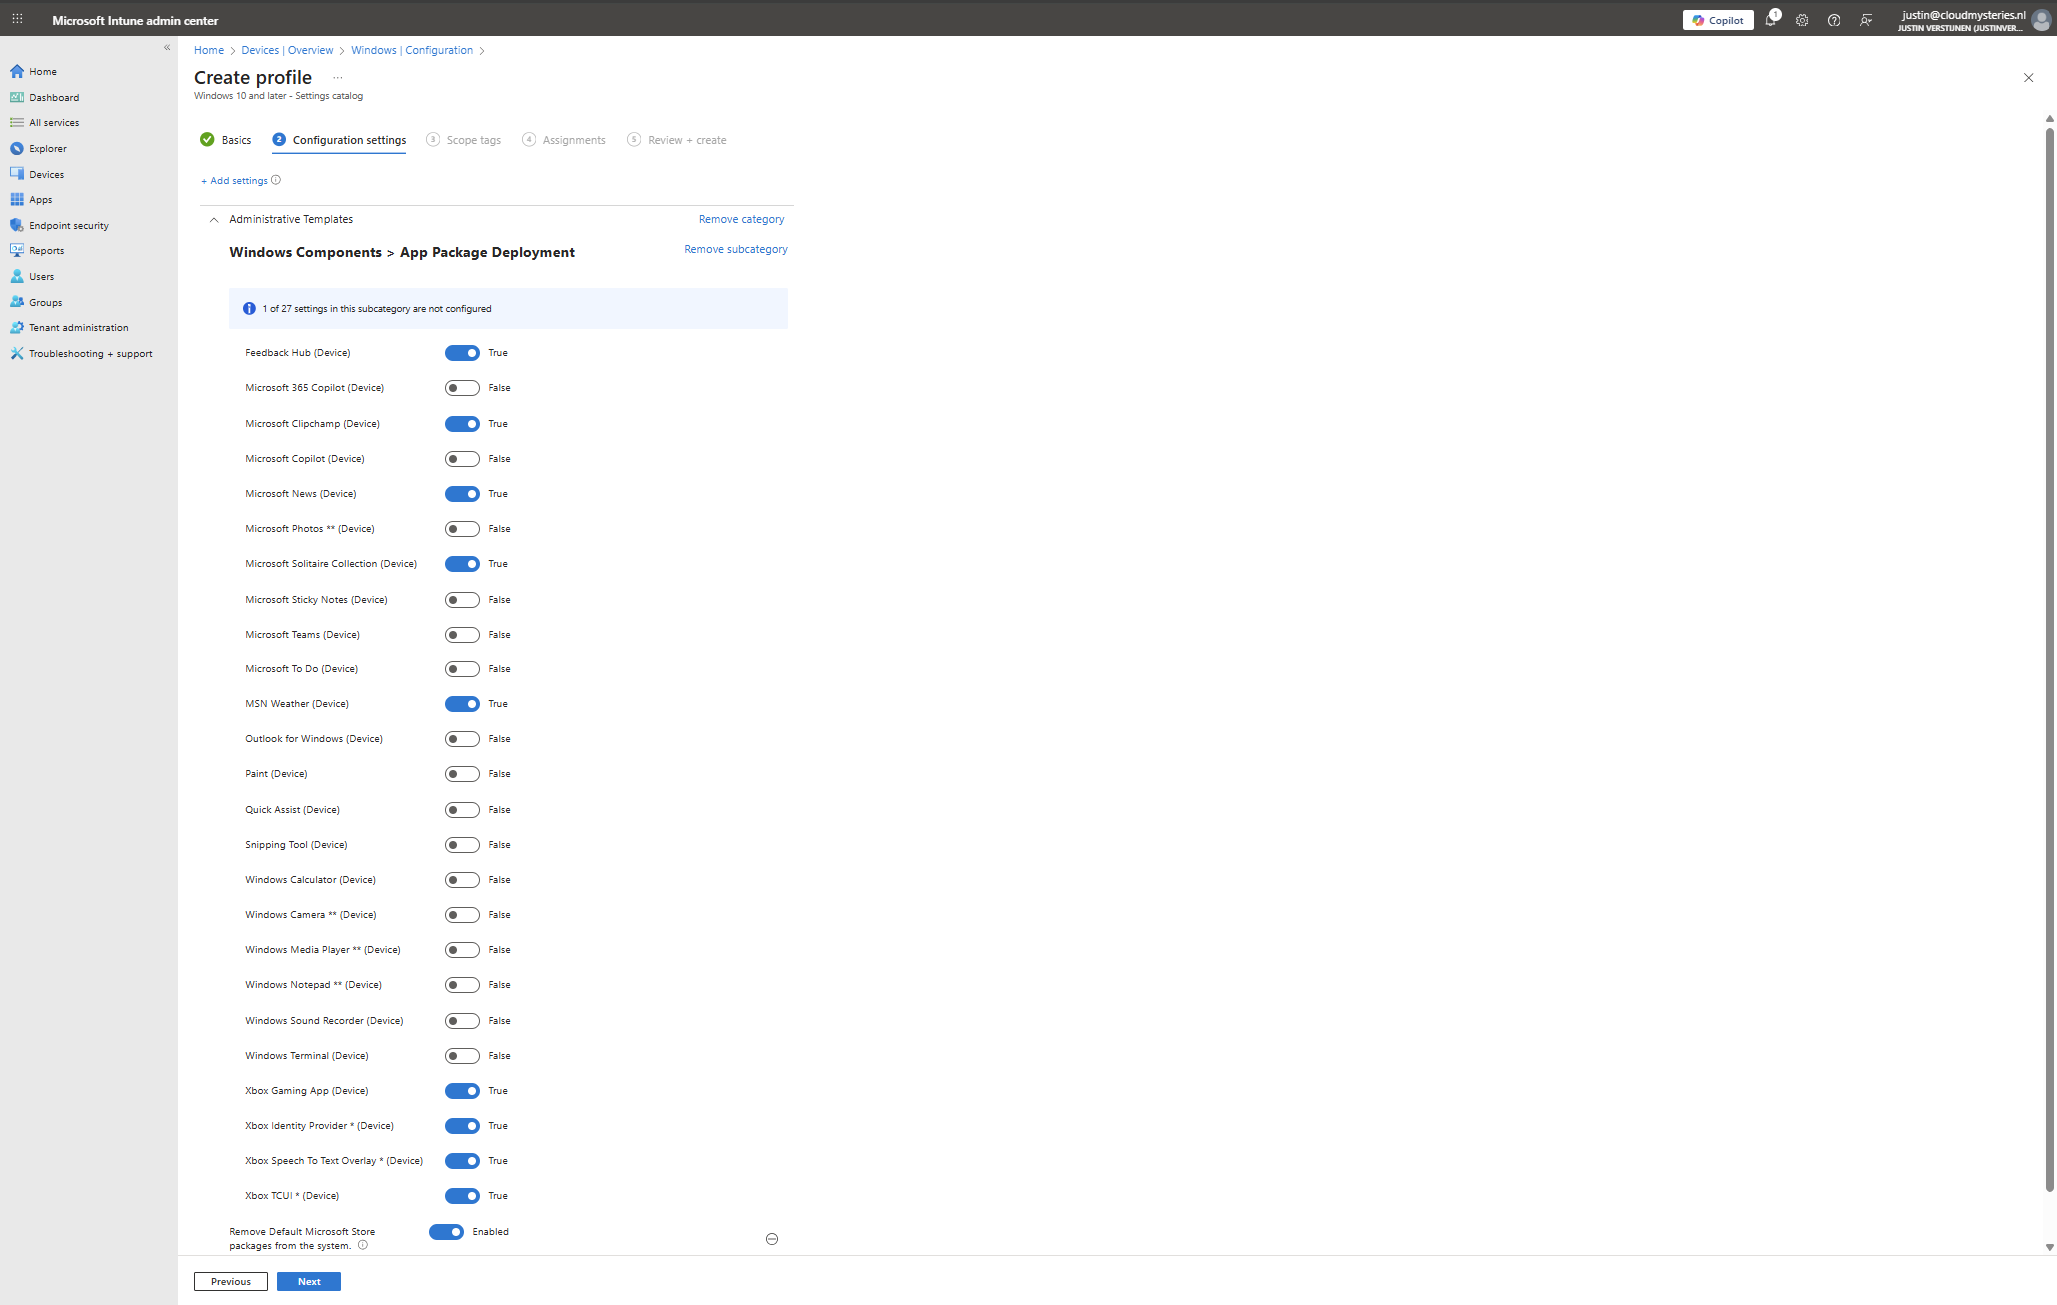
In this configuration, I want to leave all helpful tools installed, but want to remove non-business related applications like Xbox , Solitaire collection and Clipchamp.
You can make your own selection of course. After your apps to remove are selected, click “Next”. Then click “Next” again to assign the configuration profile to your devices. In my case, I select “All devices” but you can also use a manual or Dynamic group.
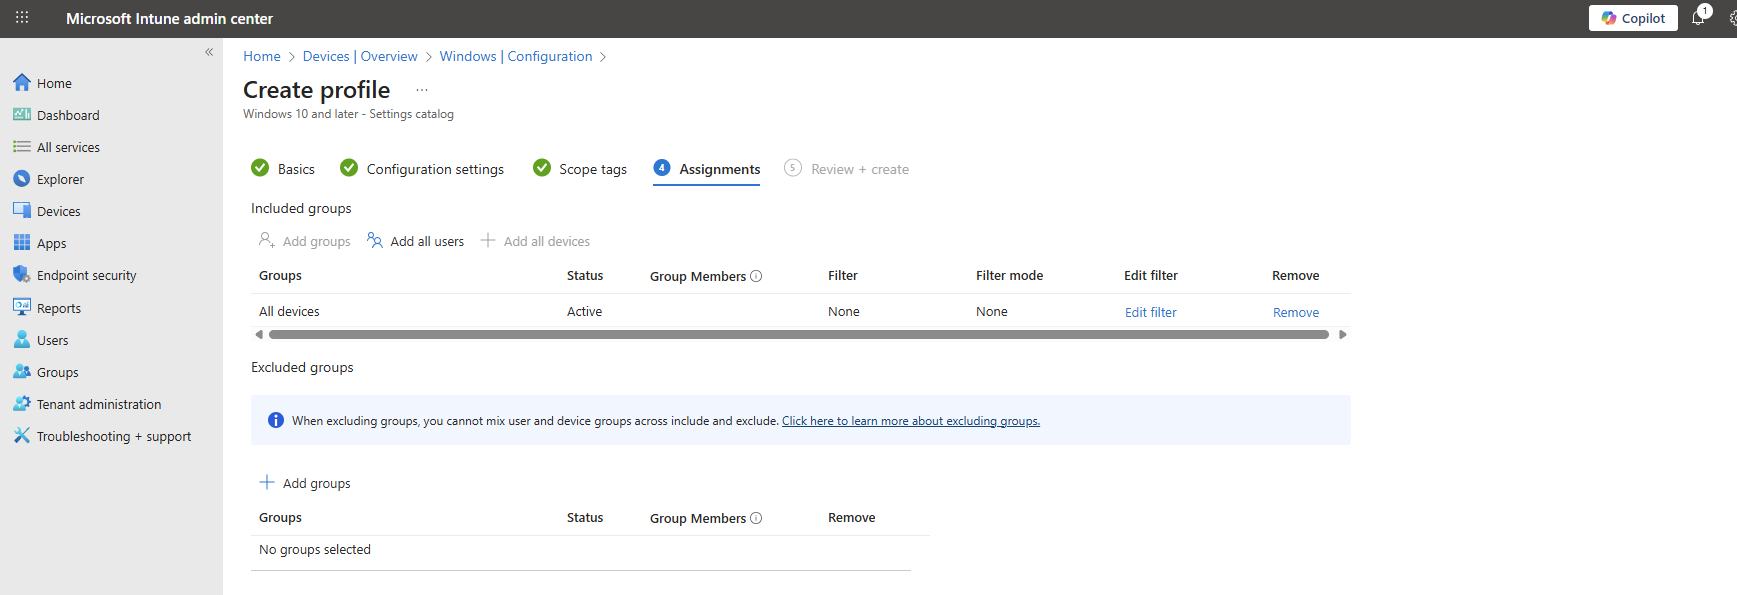
Now the policy is assigned and the actions will be applied the next time your device synchronizes with Microsoft Intune.
No Enterprise or Education?
In you don’t have Enterprise or Education licenses for Windows, I can highly recommend using this debloat script: https://github.com/Raphire/Win11Debloat
This script will help you in the Windows Experience by removing the selected apps, and helps with Windows Explorer settings.
Summary
This new feature is one of the greater updates to the Windows 11 operating system. Deleting applications you don’t need frees up some disk space and compute resources. Also, end-uders are not presented apps they should not use which makes the overall device experience alot better.
I hope I have made this clear to use and thank you for reading my post.
Sources
These sources helped me by writing and research for this post;
End of the page 🎉
You have reached the end of the page. You can navigate through other blog posts as well, share this post on X, LinkedIn and Reddit or return to the blog posts collection page. Thank you for visiting this post.
If you think something is wrong with this post or you want to know more, you can send me a message to one of my social profiles at: https://justinverstijnen.nl/about/
If you find this page and blog very useful and you want to leave a donation, you can use the button below to buy me a beer. Hosting and maintaining a website takes a lot of time and money. Thank you in advance and cheers :)
The terms and conditions apply to this post.
Starting out with Universal Print
Universal Print is a Microsoft cloud solution which can replace your Windows based printservices. It can be used to deploy printers to…
Universal Print is a Microsoft cloud solution which can replace your Windows based printservices. It can be used to deploy printers to endpoints, even to non-Windows devices in a cloud-only way.
Requirements
- Around 30 minutes of your time
- A license which includes Universal Printing
- Basic knowledge of Intune and Windows
What is Universal Printing?
Universal Printing is a cloud based service of Microsoft for installing, managing and deploying printers to end users in a modern way. This service eliminates the need for having to manage your own print servers and enables us to deploy printers in a nice and easy way. This is mostly HTTPS-based.
You can use Universal Print with printers in 2 ways:
- Universal Print-ready: This is only supported by modern printers, and can be directly connected to Universal Print
- Universal Print connector: For printers who doesn’t support native Universal Print Microsoft has a connector which can be installed in the same network as the printer to act as a print proxy. The downside is that this means extra administrative effort.
Pricing of Universal Print
To be clear of the costs of Universal Print:
Universal Print ready vs Connector
Registering a printer in Universal Print
Deploying printers with Intune
Managing Printing Preferences
Summary
Sources
These sources helped me by writing and research for this post;
- https://learn.microsoft.com/en-us/intune/intune-service/configuration/settings-catalog-printer-provisioning
- https://learn.microsoft.com/en-us/universal-print/get-access-to-universal-print?pivots=segment-commercial#list-of-subscriptions-that-include-universal-print-entitlement
- https://learn.microsoft.com/en-us/universal-print/get-access-to-universal-print?pivots=segment-commercial#print-job-volume
End of the page 🎉
You have reached the end of the page. You can navigate through other blog posts as well, share this post on X, LinkedIn and Reddit or return to the blog posts collection page. Thank you for visiting this post.
If you think something is wrong with this post or you want to know more, you can send me a message to one of my social profiles at: https://justinverstijnen.nl/about/
If you find this page and blog very useful and you want to leave a donation, you can use the button below to buy me a beer. Hosting and maintaining a website takes a lot of time and money. Thank you in advance and cheers :)
The terms and conditions apply to this post.