All pages referring or tutorials for PowerShell.
This is the multi-page printable view of this section. Click here to print.
PowerShell
- Windows Server Inventory Report Script
- Clean files on a schedule with Powershell script
- How to completely hide language bar/selector Windows 11
- Initial Installation script for Windows Azure VMs
- Installing Windows Updates through PowerShell (script)
- Disk cleaning script on Windows Azure VMs
- Skrepr Tech CI - PowerShell
- Get Device serial number on Windows 11 24H2 and up
- How to upload PowerShell script to Gallery with Github Actions
- Create AD users with on demand script
- How to Export Active Directory (AD) users fast and easy
- Set correct language and timezone on Azure VM
- Azure Stack HCI - Host your Virtual Desktops locally
- Get Windows Product Key with PowerShell
- Using PowerShell remote sessions
- How to enable Remote Group Policy update
- Bulk create Active Directory users with Powershell
Windows Server Inventory Report Script
To help us IT identifying certain configurations on a server and possible misconfigurations I have made a PowerShell script which creates a…
To help us IT identifying certain configurations on a server and possible misconfigurations I have made a PowerShell script which creates a complete overview of the current server configuration and exports it as a single HTML file.
In this post I will explain how to use it and how the script works.
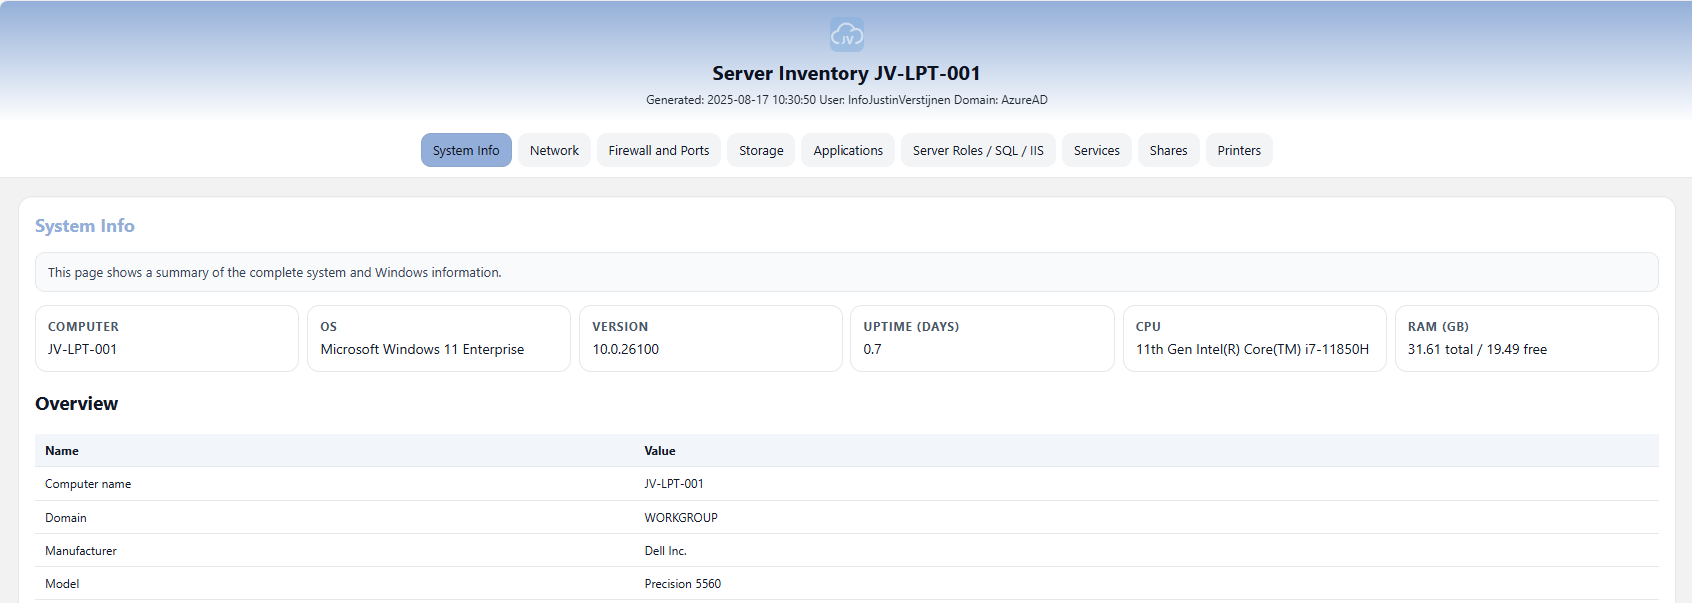
An example of the output of the script.
Where to download this script?
For the fast pass, my script can be downloaded here:
What does the Server Inventory script do?
The script I have made creates a full system configuration report which shows us a lot of information:
- Generic System information
- Network information
- Firewall configuration and Ports
- Storage information
- Applications
- Server roles, SQL and IIS configuration
- Services
- Configured shares
- Installed printers
How to use the script with Powershell Gallery
I have uploaded this script to the PowerShell Gallery for quick and easy installation/use. You can download and install the script by typing this into your PowerShell window:
POWERSHELL
Install-Script JV-ServerInventoryReportAt the question for the untrusted repository, answer “Yes to all” (A).

Now the script is installed, and we can execute it by running:
POWERSHELL
JV-ServerInventoryReportThis immediately runs the script and saves the output to your desktop folder.
How to use the script manually
To use the script, we need to do some steps. You can do it in your own way, but I show the most easiest way to run the script without compromising system security.
First download the script from GitHub:
Click on the blue button above. You now are on the GitHub page of the script.
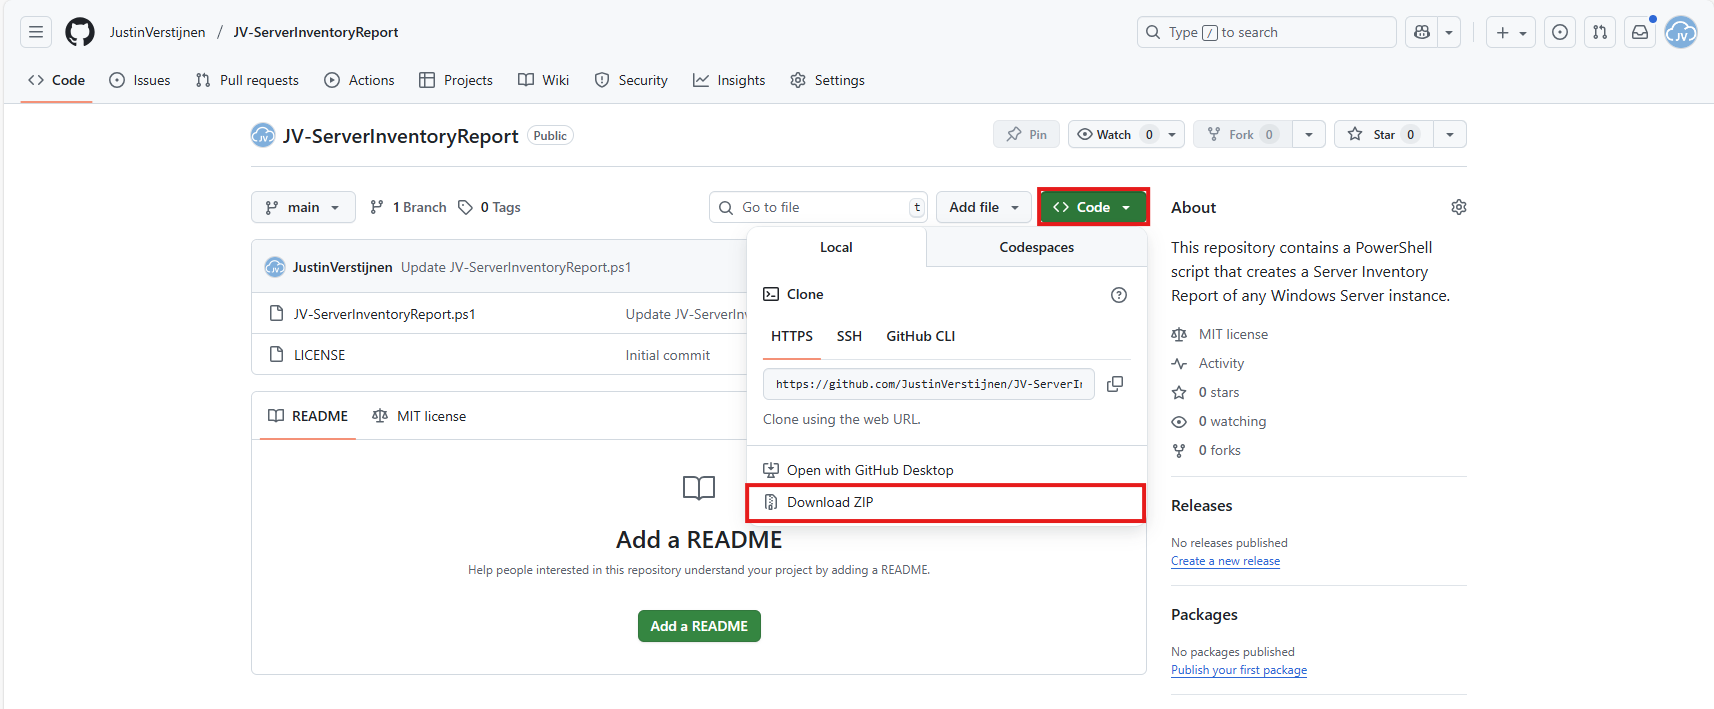
Click on “Code” and then “Download ZIP”.
Now place the files on the server where you want to install the script.
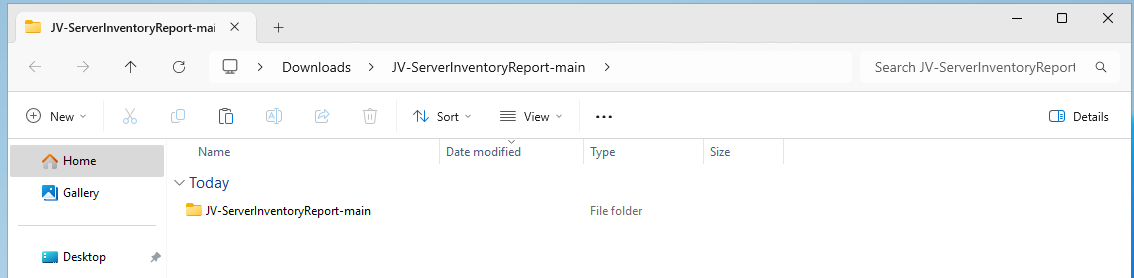
Unzip the file and then we can run the “Install” script. This must be run as administrator and temporarily without Execution Policy.
Open Powershell ISE as administrator.
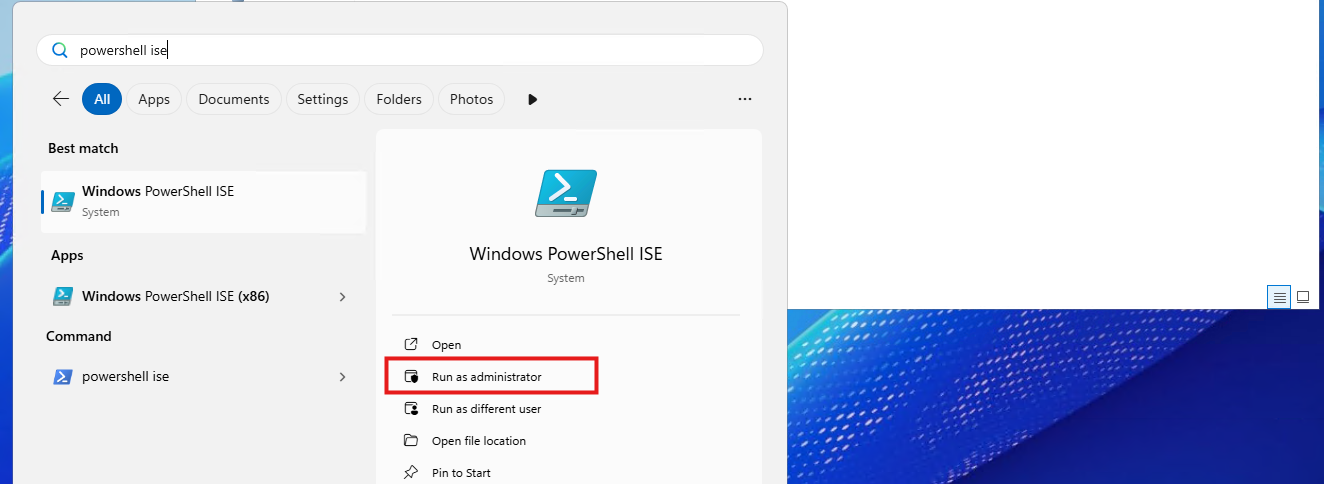
After opening PowerShell ISE and after authenticating, open the “Install” script.
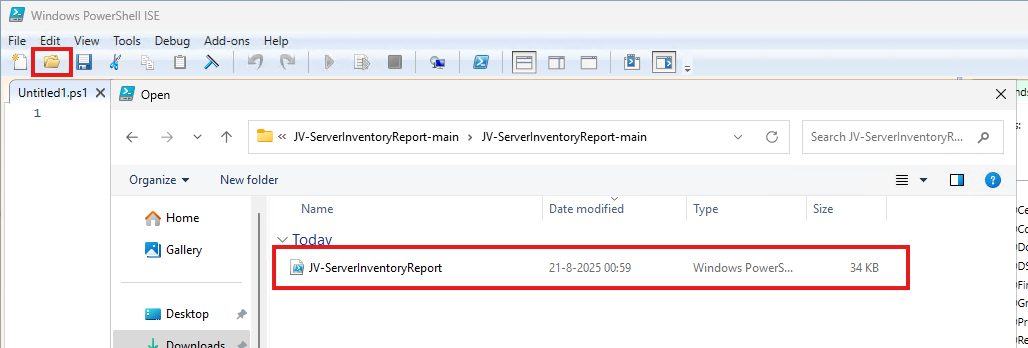
Review the script to understand what it does. This is always a recommendation before executing unknown scripts.
After reviewing, run the following command to temporarily disable the PowerShell execution policy:
POWERSHELL
Set-ExecutionPolicy Unrestricted -Scope ProcessThis disables the default PowerShell execution policy for only the duration of your PowerShell window. After closing PowerShell, every other window will have this enabled again.
Then run the script by clicking the “Play” button:

The script will run. This takes about 30 seconds. After it has been succesfully completed, the HTML-file will be placed on the desktop (or other location if you specify this while running).
POWERSHELL
PS C:\Users\justin-admin> Set-ExecutionPolicy Unrestricted -Scope Process

PS C:\Users\justin-admin> C:\Users\justin-admin\Downloads\JV-ServerInventoryReport-main\JV-ServerInventoryReport.ps1
Script made by...
     _           _   _        __     __            _   _  _
    | |_   _ ___| |_(_)_ __   \ \   / /__ _ __ ___| |_(_)(_)_ __   ___ _ __
 _  | | | | / __| __| | '_ \   \ \ / / _ \ '__/ __| __| || | '_ \ / _ \ '_ \
| |_| | |_| \__ \ |_| | | | |   \ V /  __/ |  \__ \ |_| || | | | |  __/ | | |
 \___/ \__,_|___/\__|_|_| |_|    \_/ \___|_|  |___/\__|_|/ |_| |_|\___|_| |_|
                                                       |__/
Report written to: C:\Users\justin-admin\Desktop\Server-Inventory_20250821_101816.html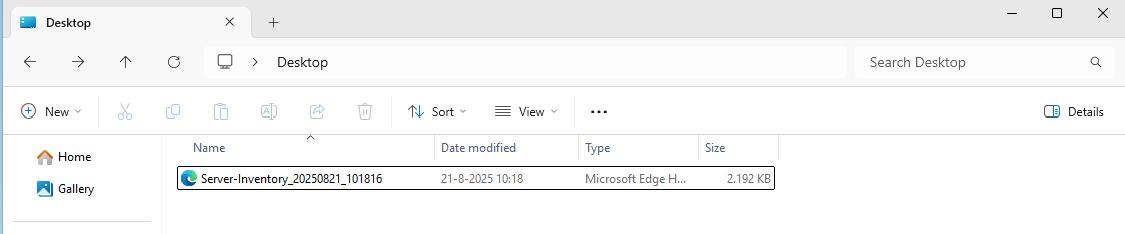
Then you can open this file with your favorite webbrowser and review the information.
Summary
This script provides a great and simple overview of the full server configuration. It places everything in nice and clear tables, while still granting access to the raw outputs it used to markup the tables.
Everything is placed in nice and clear tabs so information is categorized, and the information can be easily exported.
I hope my script is helpful for you and thank you for viewing.
Sources
These sources helped me by writing and research for this post;
- https://learn.microsoft.com/en-us/powershell/scripting/learn/ps101/09-functions?view=powershell-7.5
- https://learn.microsoft.com/en-us/powershell/module/microsoft.powershell.utility/convertto-html?view=powershell-7.5
End of the page 🎉
You have reached the end of the page. You can navigate through other blog posts as well, share this post on X, LinkedIn and Reddit or return to the blog posts collection page. Thank you for visiting this post.
If you think something is wrong with this post or you want to know more, you can send me a message to one of my social profiles at: https://justinverstijnen.nl/about/
If you find this page and blog very useful and you want to leave a donation, you can use the button below to buy me a beer. Hosting and maintaining a website takes a lot of time and money. Thank you in advance and cheers :)

The terms and conditions apply to this post.
Clean files on a schedule with Powershell script
Sometimes in IT, we have software or solutions that need to to save temporary files in your filesystem. Let’s say, a feed with logs or…
Sometimes in IT, we have software or solutions that need to to save temporary files in your filesystem. Let’s say, a feed with logs or CSV files that are saved, logs or back-ups like the Bartender software. The software itself doesn’t have a solution to clean up those files and after 2 years, the size can be massive.
To let this files clean on schedule I have created a Powershell script which cleans those files in specific folders after they are not modified in *specfied* days . You can define the folders and number of days at the parameters section of the script.
Note: Think out very carefully how long the retention must be. Deleting files is a irreverible action!
The clean script
The Powershell script for cleaning up files is on my GitHub page:
It starts with a parameter to define the amount of days you want to retain the files. It checks this at the last write time to the file.
After that, it defines the folders where it must check for files with no exclusion of file extensions. It removes all files and folders in the defined folders.
What does the script do?
The script is meant for cleaning specific files after X days. A great example of it in practice is if you have Bartender installed on a server. Bartender will every day save deleted database records to a file without it even bothering cleaning it up. After 2 years, such folder can be over 25GB’s. With this script, it only keeps 30 versions of the file. Assuming we have more retention on our backups, we don’t need any more than that.
The script works in this way:
- Ensuring it runs as Administrator
- Enable logging
- Saves a log file in the same directory with 5MB limit by default (can be adjusted to your needs)
- Searching for the files to be cleaned, which are older than the specified days
- Deleting the files and logging them for reference
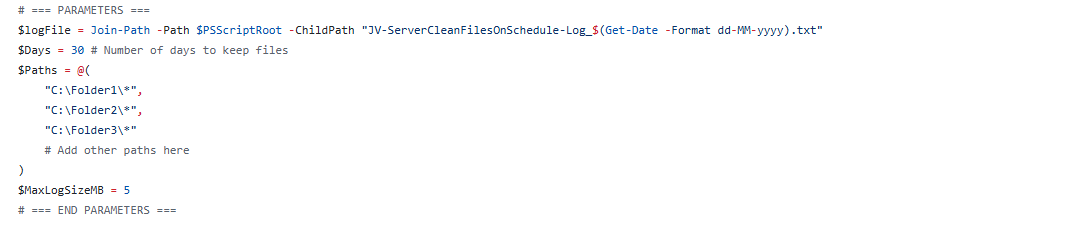
Script parameters for customization
At the beginning of the script, we can set some parameters for customization of the script. The rest of the script can be as-is to ensure it still runs.
I will refer to the line numbers of the script on GitHub:
- Line 14: Specify the number of days to keep files (typing 30 will keep files for 30 days)
- Line 15: Specify the paths. As this is an array, it must be comma-seperated except the last one. Keep this in mind. You can add as many folders as you want but be aware to not put in critical folders
- Line 21: Specify the maximum size of the log file. It will remove lines at the start of the file so the latest information is always available
Installing the clean script automatically
For installation with Task Scheduler I included an installation script that, by default, configures a task in the Windows Task Scheduler that runs it;
- Every first day of the month
- At hour 03:00
If these settings are great for you, you can leave them as-is.
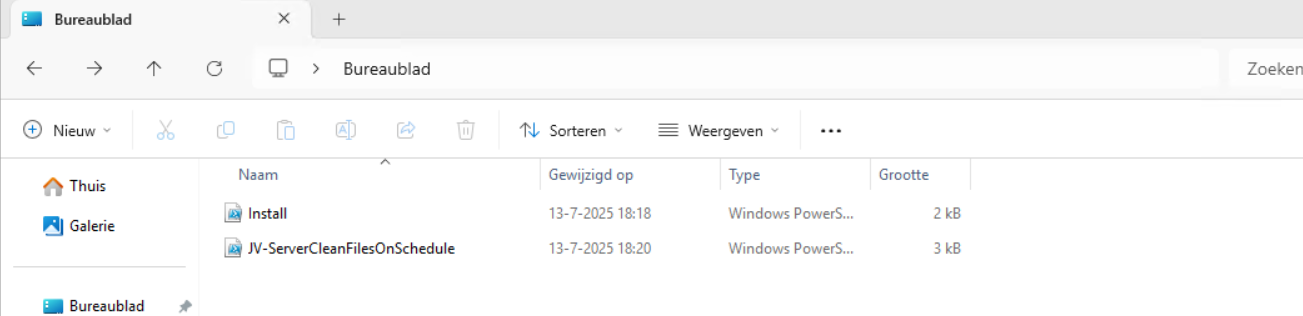
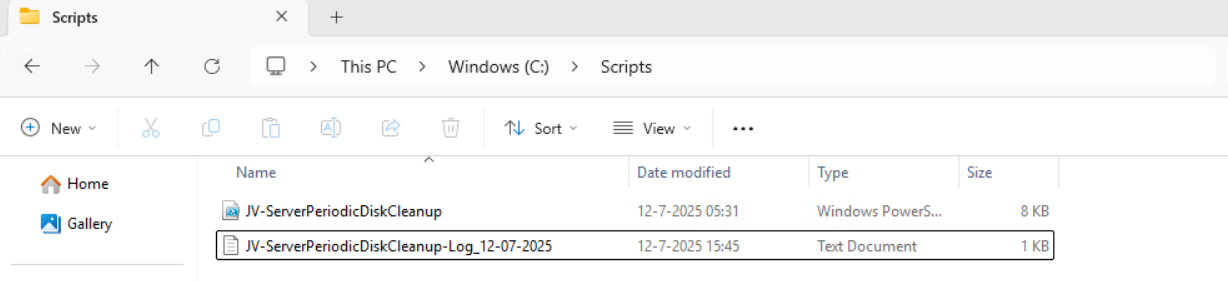
The Installation script creates a folder in C:\ named “Scripts” if not already there and places the cleaning script there.
Installation
Click on the blue button above. You now are on the Github page of the script.
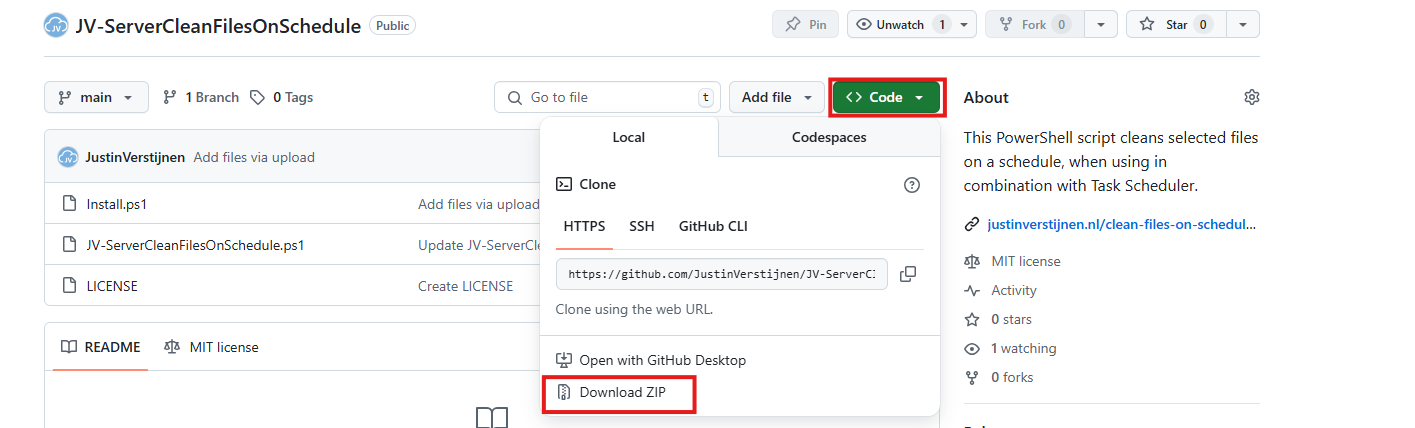
Click on “Code” and then “Download ZIP”.
Then place the files on the server where you want to install the script.
Open Powershell ISE as administrator.
Now open the “Install” script.
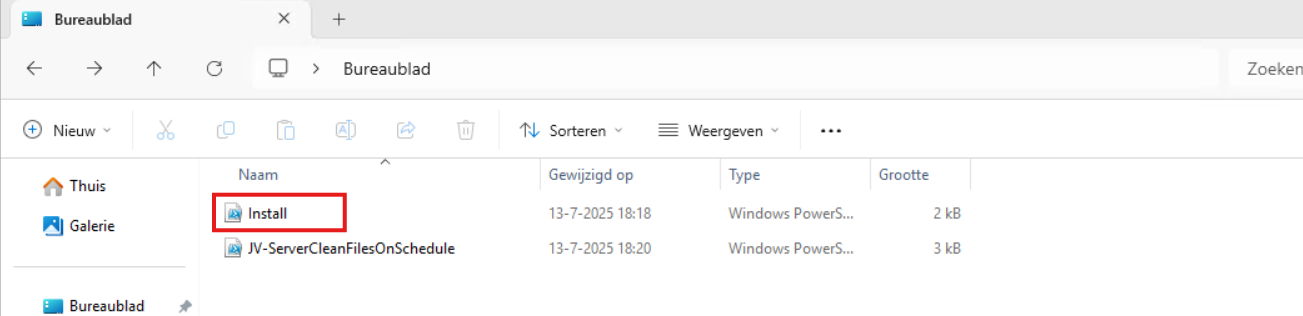
Review it’s default settings and if you feel at home in PowerShell, review the rest of the script to understand what it does.
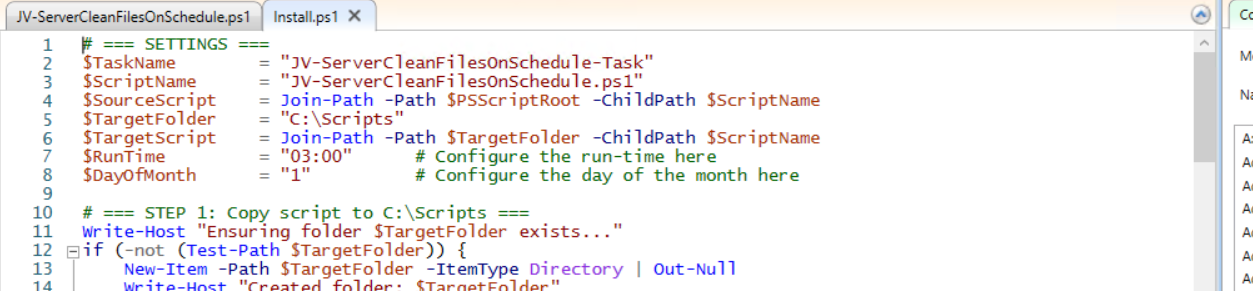
You can change the schedule very easily by changing the runtime: 0:00 till 23:59 and the day of month to specify the day number of the month (1-31).
After your schedule is ready, let’s ensure we temporarily bypass the Execution Policy by typing the command in the blue window below:
POWERSHELL
Set-ExecutionPolicy Unrestricted -Scope ProcessThis way the execution policy stays enabled but for this session only it’s been lowered. When you close the window, you have to type this again before be able to run scripts.
Execute the command, and when prompted to lower the policy, click Yes.
Now execute the Install script by clicking the green “Run” button:

After executing the script, we get the message that the task has been created succesfully:

Let’s check this in the Windows Task Scheduler:

As you can see, the script is succesfully installed to Task Scheduler. This ensures it runs every first of the month at 03:00 (or at your own defined schedule). Also, the script has been placed in C:\Scripts for a good overview of the scripts of the system.
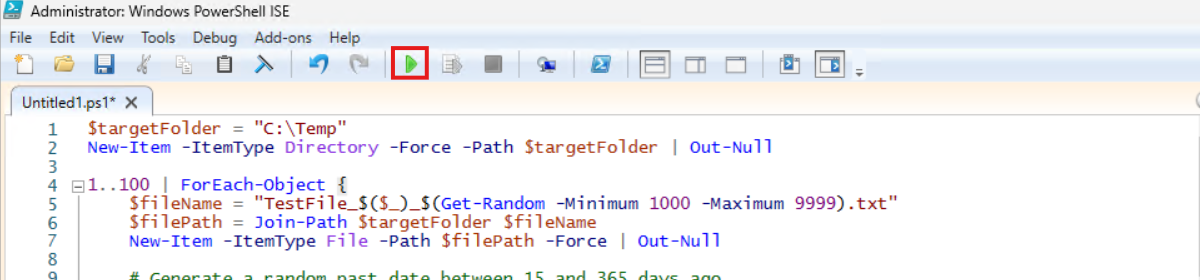
Using the script manually/demonstration
For demonstration of the clean script, I created a second, simple script that creates 100 dummy files in the C:\Temp directory. This with last write times between 15 and 365 days ago.
POWERSHELL
$targetFolder = "C:\Temp"
New-Item -ItemType Directory -Force -Path $targetFolder | Out-Null

1..100 | ForEach-Object {
    $fileName = "TestFile_$($_)_$(Get-Random -Minimum 1000 -Maximum 9999).txt"
    $filePath = Join-Path $targetFolder $fileName
    New-Item -ItemType File -Path $filePath -Force | Out-Null

    # Generate a random past date between 15 and 365 days ago
    $daysAgo = Get-Random -Minimum 15 -Maximum 365
    $randomDate = (Get-Date).AddDays(-$daysAgo)
    (Get-Item $filePath).LastWriteTime = $randomDate
    (Get-Item $filePath).CreationTime = $randomDate
}
After executing the script from my GitHub page, the files older than 30 days only must be removed while files between the 15 and 30 days must be retained.
Setting the PowerShell Execution Policy
Before we can run any of the scripts, we have to do a one-time bypass for the Powershell Execution Policy by typing the command in the blue window below:
POWERSHELL
Set-ExecutionPolicy Unrestricted -Scope ProcessThis way the execution policy stays enabled but for this session only it’s been lowered. When you close the window, you have to type this again before be able to run scripts.
Execute the command, and when prompted to lower the policy, click Yes.
Running the dummy files script
Now we can run the script itself by clicking the green “Play” button.
Now we have a folder with 100 files with random last write times:
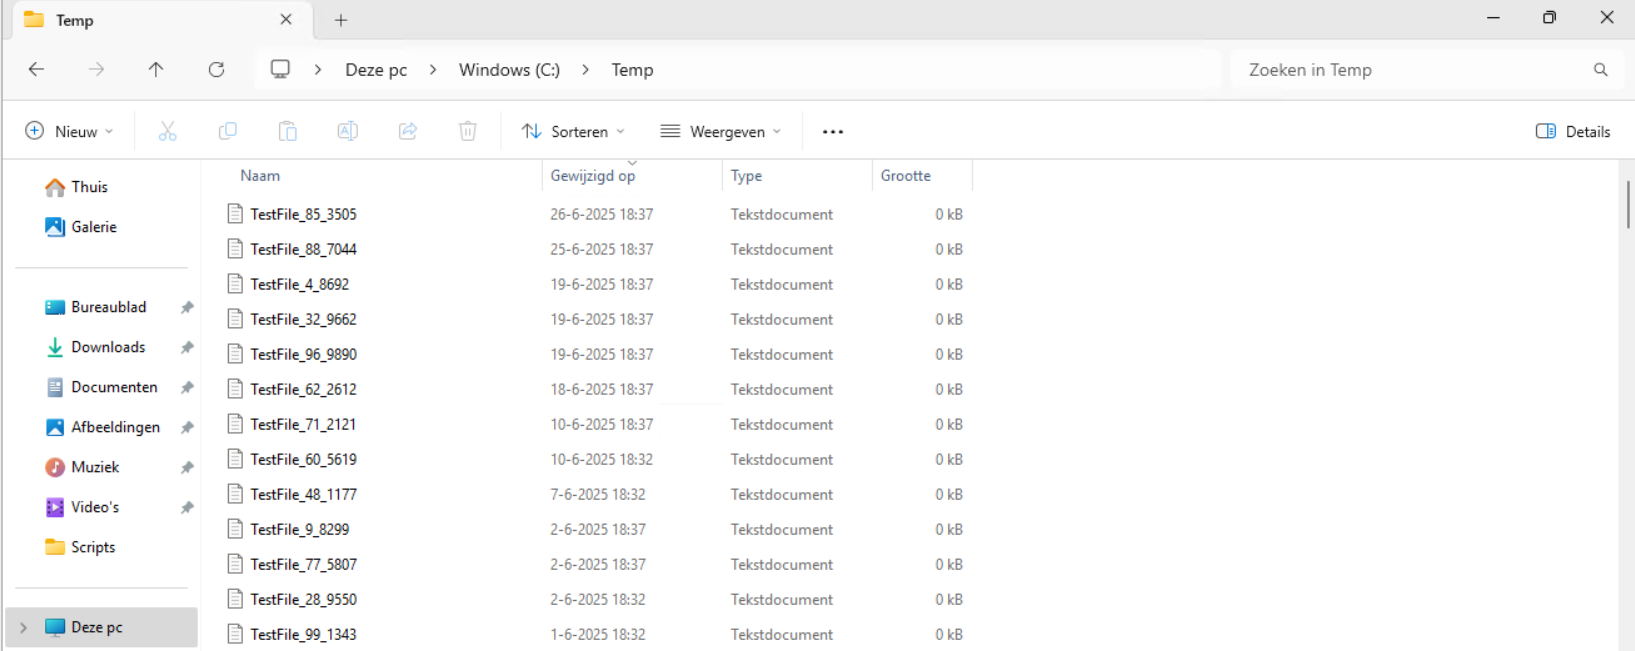
If we would execute the cleanup script, only the files from 18-6-2025 and newer will be retained.
Review the parameters on line 12 to 20, change them to your needs and then execute the script. I have changed the Paths to C:\Temp only.

The script will now delete every file older than the specified days:

Let’s take a look at the folder:
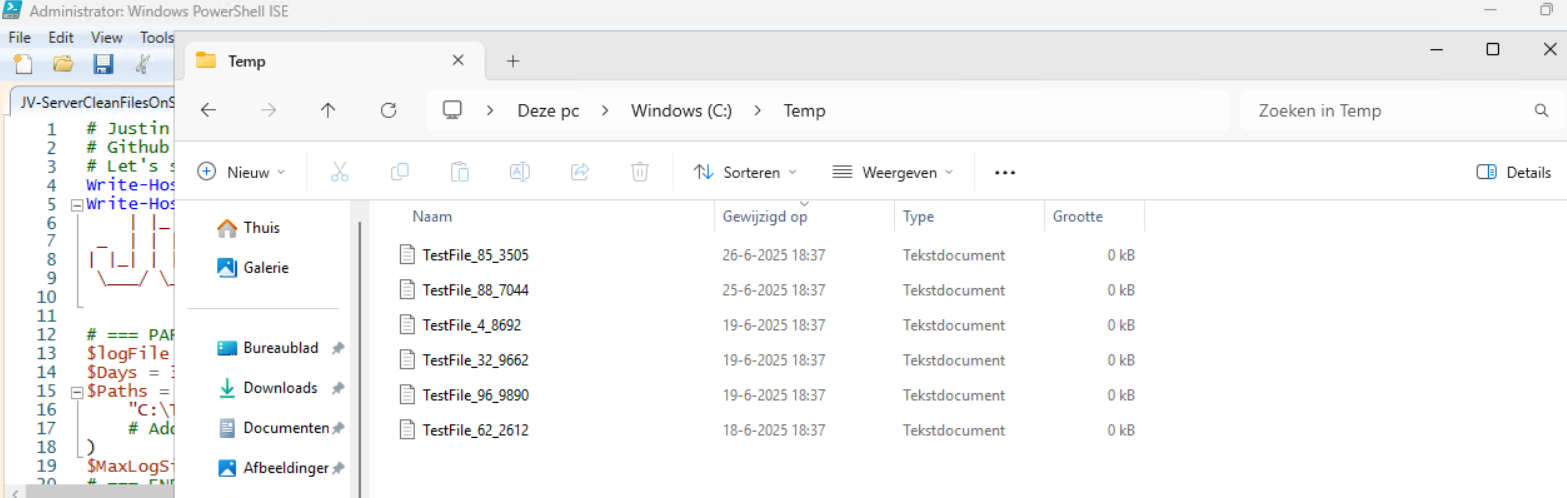
All cleared now and only versions younger than 30 days are retained.
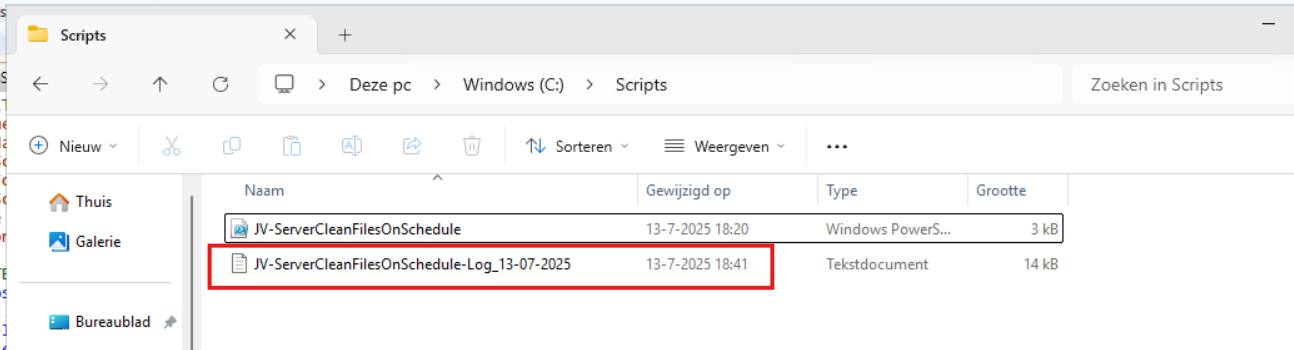
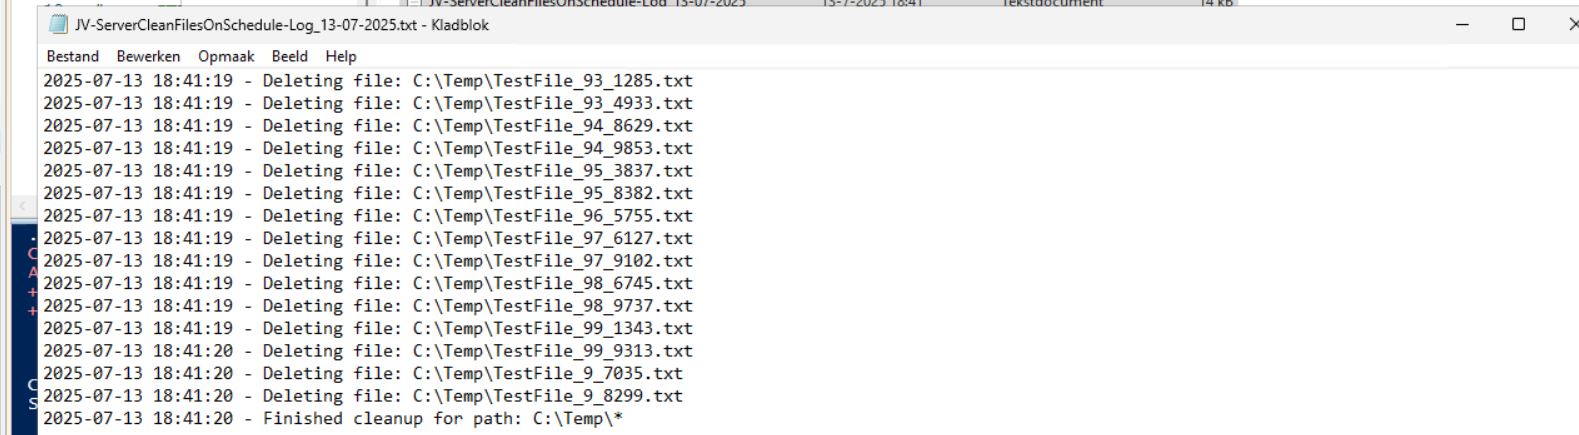
In the Script directory, a file is created, containing all the filenames it has removed:
Summary
This Powershell script can help cleaning up files in specific folders. mostly i use this for maintenance on servers where software is installed without proper retention settings of their temporary files. This script helps keeping your disks clean and indirectly improves the availability of your infrastructure.
Thank you for reading this guide and I hope this was helpful.
Sources
These sources helped me by writing and research for this post;
- https://learn.microsoft.com/en-us/powershell/module/microsoft.powershell.management/get-childitem?view=powershell-7.5
- https://learn.microsoft.com/en-us/powershell/scripting/learn/ps101/09-functions?view=powershell-7.5
End of the page 🎉
You have reached the end of the page. You can navigate through other blog posts as well, share this post on X, LinkedIn and Reddit or return to the blog posts collection page. Thank you for visiting this post.
If you think something is wrong with this post or you want to know more, you can send me a message to one of my social profiles at: https://justinverstijnen.nl/about/
If you find this page and blog very useful and you want to leave a donation, you can use the button below to buy me a beer. Hosting and maintaining a website takes a lot of time and money. Thank you in advance and cheers :)
The terms and conditions apply to this post.
How to completely hide language bar/selector Windows 11
One of the small things I experienced in one of the updates for Windows 11 (24H2) is that the language bar/selector get’s automatically…
One of the small things I experienced in one of the updates for Windows 11 (24H2) is that the language bar/selector get’s automatically visible on the Windows taskbar. In previous versions of Windows, this was only available when using multiple keyboard languages.
Because this can get very annoying, I researched on how to disable this button to clean up our taskbar and only use it for the applications and space we need.
Cause of appearance
In most cases, this button will appear automatically when more than 1 language is installed in Windows. However, after one of the updates for 24H2, it appeared for me on multiple PC’s. Especially the PC’s which were installed with the Dutch language.
When using the Dutch language, we also have to configure “United States International” as keyboard layout, or we get issues with some of the symbols.
How I removed the button
Initially, I started with browsing on the internet how to disable this button ans they all pointed to this registry key:
- Computer\HKEY_CURRENT_USER\Software\Microsoft\CTF\LangBar
And set the value for “ShowStatus” to 3. However, this didn’t work for me, but you can try this by running this command in PowerShell:
POWERSHELL
Set-ItemProperty -Path "HKCU:\Software\Microsoft\CTF\LangBar" -Name "ShowStatus" -Value 3The way I finally manage to disable the button is to run these commands.
First run this command. This disables the Input manager which loads the language switcher:
POWERSHELL
New-ItemProperty -Path "HKCU:\Software\Microsoft\CTF" -Name DisableThreadInputManager -PropertyType DWord -Value 1 -ForceThen run this command to disable the startup item for the Text Services Framework:
POWERSHELL
reg delete "HKCU\Software\Microsoft\Windows\CurrentVersion\Run" /v "ctfmon.exe" /fSummary
Because I want to share how I solved the problem doesn’t mean you should actually do this. Running these commands can interrupt some of your systems’ functions or other components. So only run them if you are familiar with your computer and be able to be up and running within an hour in case this happens.
If you managed to run the commands, I hope I helped you to get rid of this annoying bar :).
End of the page 🎉
You have reached the end of the page. You can navigate through other blog posts as well, share this post on X, LinkedIn and Reddit or return to the blog posts collection page. Thank you for visiting this post.
If you think something is wrong with this post or you want to know more, you can send me a message to one of my social profiles at: https://justinverstijnen.nl/about/
If you find this page and blog very useful and you want to leave a donation, you can use the button below to buy me a beer. Hosting and maintaining a website takes a lot of time and money. Thank you in advance and cheers :)
The terms and conditions apply to this post.
Initial Installation script for Windows Azure VMs
When deploying Windows VMs in Azure, we get the default settings. This means we get a 12-hour clock, standard UTC/Zulu timezone and such…
When deploying Windows VMs in Azure, we get the default settings. This means we get a 12-hour clock, standard UTC/Zulu timezone and such. For users like us in the Netherlands we want to change this but not by hand.
For this purpose I built this script. It sets the timezone for Western Europe and sets the clock to 24-hour system. It also does some bonusses like responding to ping and disabling the IE Enhanced Security as it’s mostly server focussed. We don’t change the Windows language and this stays English.
Where to download this script?
For the fast pass, my script can be downloaded here:
What does the Initial server installation script do?
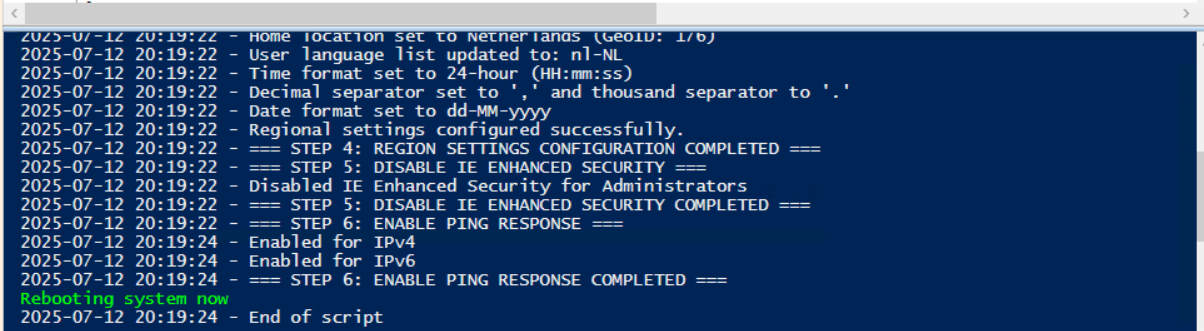
The script itself has 6 steps:
- Ensuring it runs as Administrator
- Enable logging
- Saves a log file in the same directory and with 100KB limit
- Setting the timezone to Western Euopean time (Amsterdam time)
- Setting regional settings for 24 hours clock
- Disables IE Enhanced Security
- Enables response to ping for local networks
- Reboots the server
Using the initial server installation script
To use the script, we must first download it from the Github page:
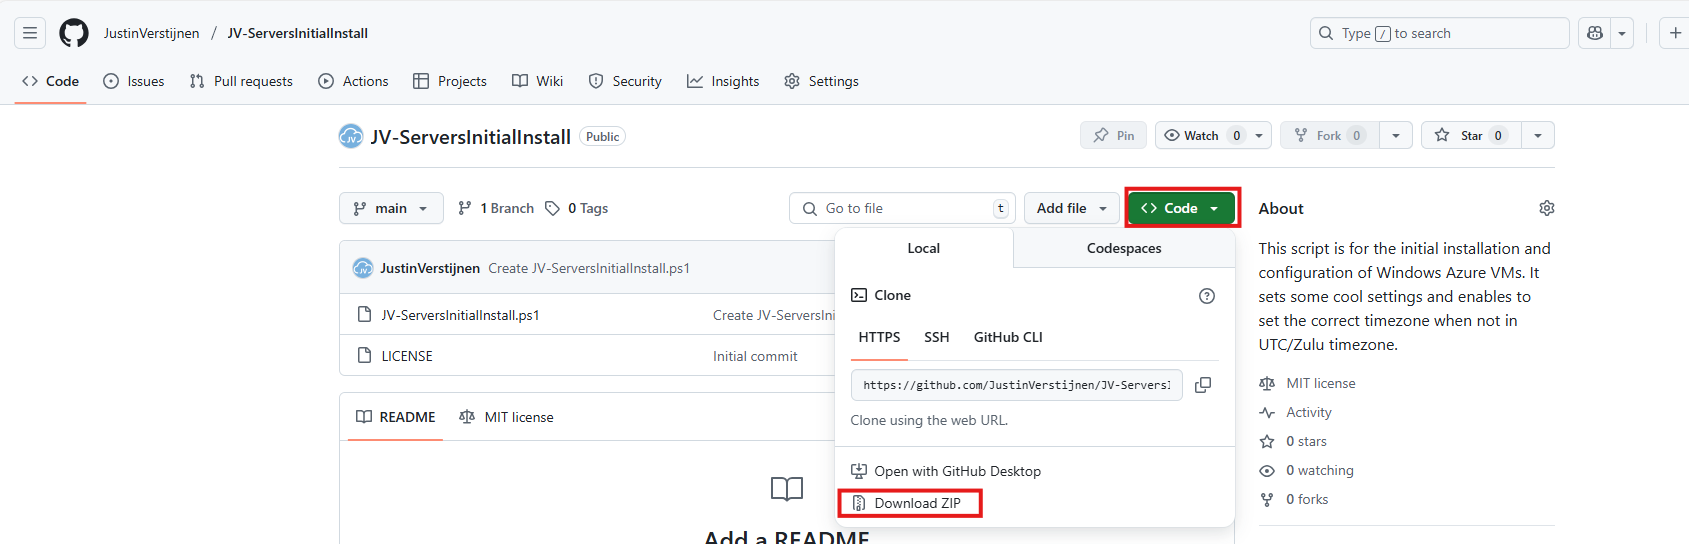
Click on “Code” and then “Download ZIP”.
Now place the script on the machine where it must run, If not already done so.
To run this in the most user-friendly way possible, open the PowerShell ISE as administrator:
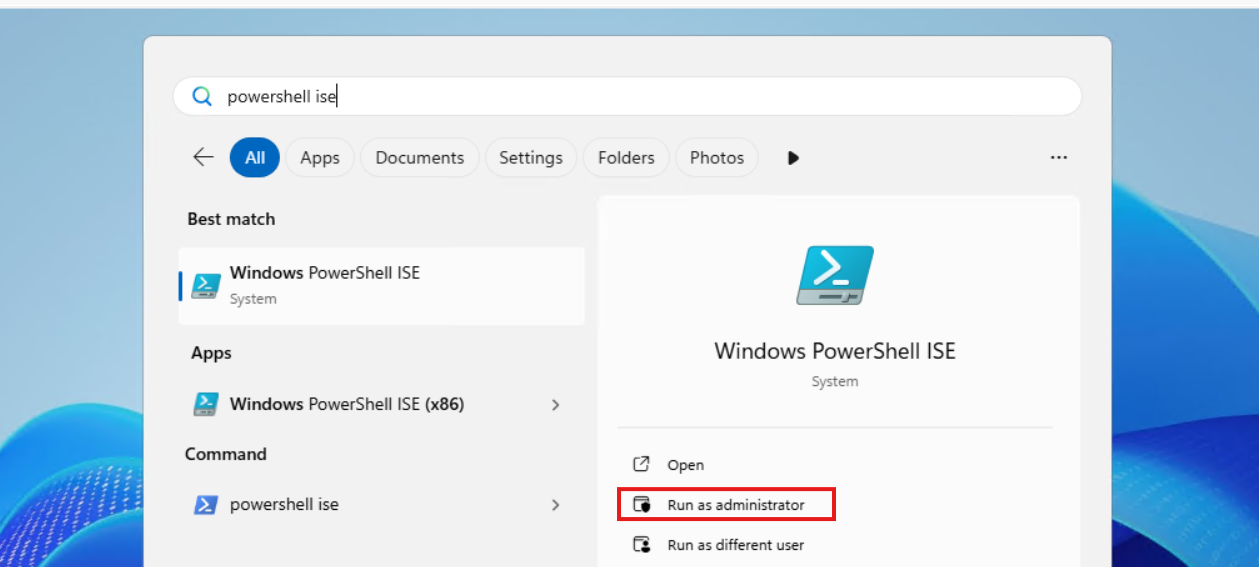
Type in your credentials and advance.
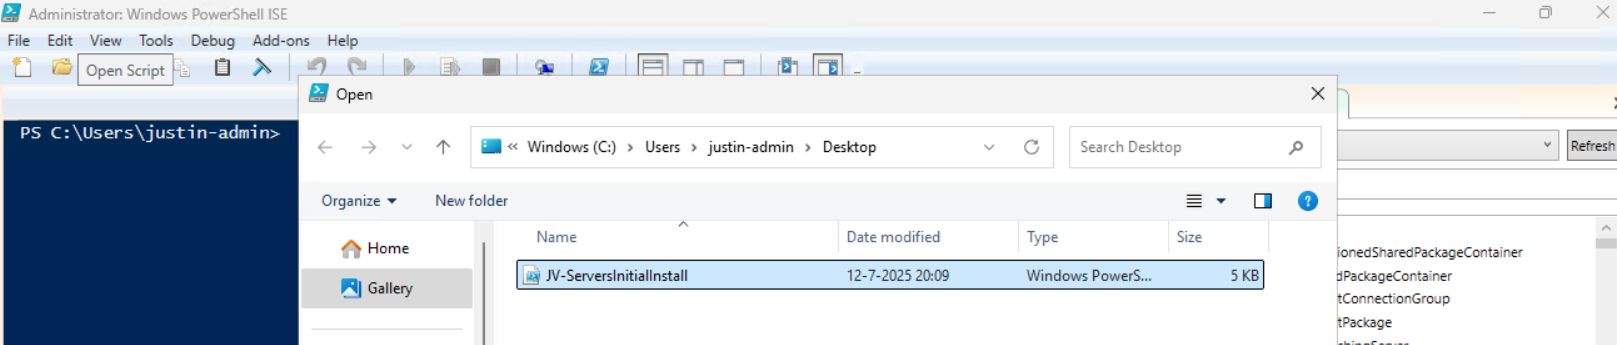
Now open the script by using the “Open” function:
Before we can run, we must change the Powershell Execution policy temporarily. We can do this by typing the command in the blue window below:
POWERSHELL
Set-ExecutionPolicy Unrestricted -Scope ProcessThis way the execution policy stays enabled but for this session only it’s been lowered. When you close the window, you have to type this again before be able to run scripts.
Execute the command, and when prompted to lower the policy, click Yes.
Now we are ready to execute the script. Double check the parameters section (Line 13 to 18) of the script to ensure this complies with your desired settings.

Then run the script:

This shows that the script runs and sets every setting correctly. After running correctly, the server will instantly reboot to apply all settings:
Summary
This is a great script to use for installing Windows Servers on initial. These are some settings we must do by hand normally but we can now to with a simple script. Also setting the correct timezone can sometimes be stupid as the timezone may roll back to the Azure default. This script ensures this doesn’t happen.
Thank you for reading the post and I hope the script is useful.
Sources
These sources helped me by writing and research for this post;
- https://learn.microsoft.com/en-us/windows/win32/intl/table-of-geographical-locations
- https://learn.microsoft.com/en-us/powershell/module/international/set-culture?view=windowsserver2025-ps
- https://learn.microsoft.com/en-us/powershell/module/international/set-culture?view=windowsserver2025-ps
End of the page 🎉
You have reached the end of the page. You can navigate through other blog posts as well, share this post on X, LinkedIn and Reddit or return to the blog posts collection page. Thank you for visiting this post.
If you think something is wrong with this post or you want to know more, you can send me a message to one of my social profiles at: https://justinverstijnen.nl/about/
If you find this page and blog very useful and you want to leave a donation, you can use the button below to buy me a beer. Hosting and maintaining a website takes a lot of time and money. Thank you in advance and cheers :)
The terms and conditions apply to this post.
Installing Windows Updates through PowerShell (script)
Sometimes we want to install updates by hand because of the need for fast patching. But logging into every server and installing them manually is a hell of a task and takes a lot of time.
I have made a very simple script to install Windows Updates by hand using PowerShell including logging to exactly know which updates there were installed for monitoring later on.
The good part about this script/PowerShell module is that it does support both Windows Client and Windows Server installations.
Where to download this script?
For the fast pass, my script can be downloaded here:
What does the Windows Updates script do?
The script I have made focusses primarily on searching for and installing the latest Windows Updates. It also creates a log file to exactly know what updates were installed for monitoring and documentation purposes.
The script itself has 6 steps:
- Ensuring it runs as Administrator
- Enable logging
- Saves a log file in the same directory and with 100KB limit
- Searching Windows Updates and installing them
- Rebooting server to apply latest updates
How to install the Windows Updates script automatically
For installation with Task Scheduler I included an installation script that, by default, configures a task in the Windows Task Scheduler that runs it;
- Every first day of the month
- At hour 03:00
If these settings are great for you, you can leave them as-is.
The Installation script creates a folder in C:\ named “Scripts” if not already there and places the cleaning script there.
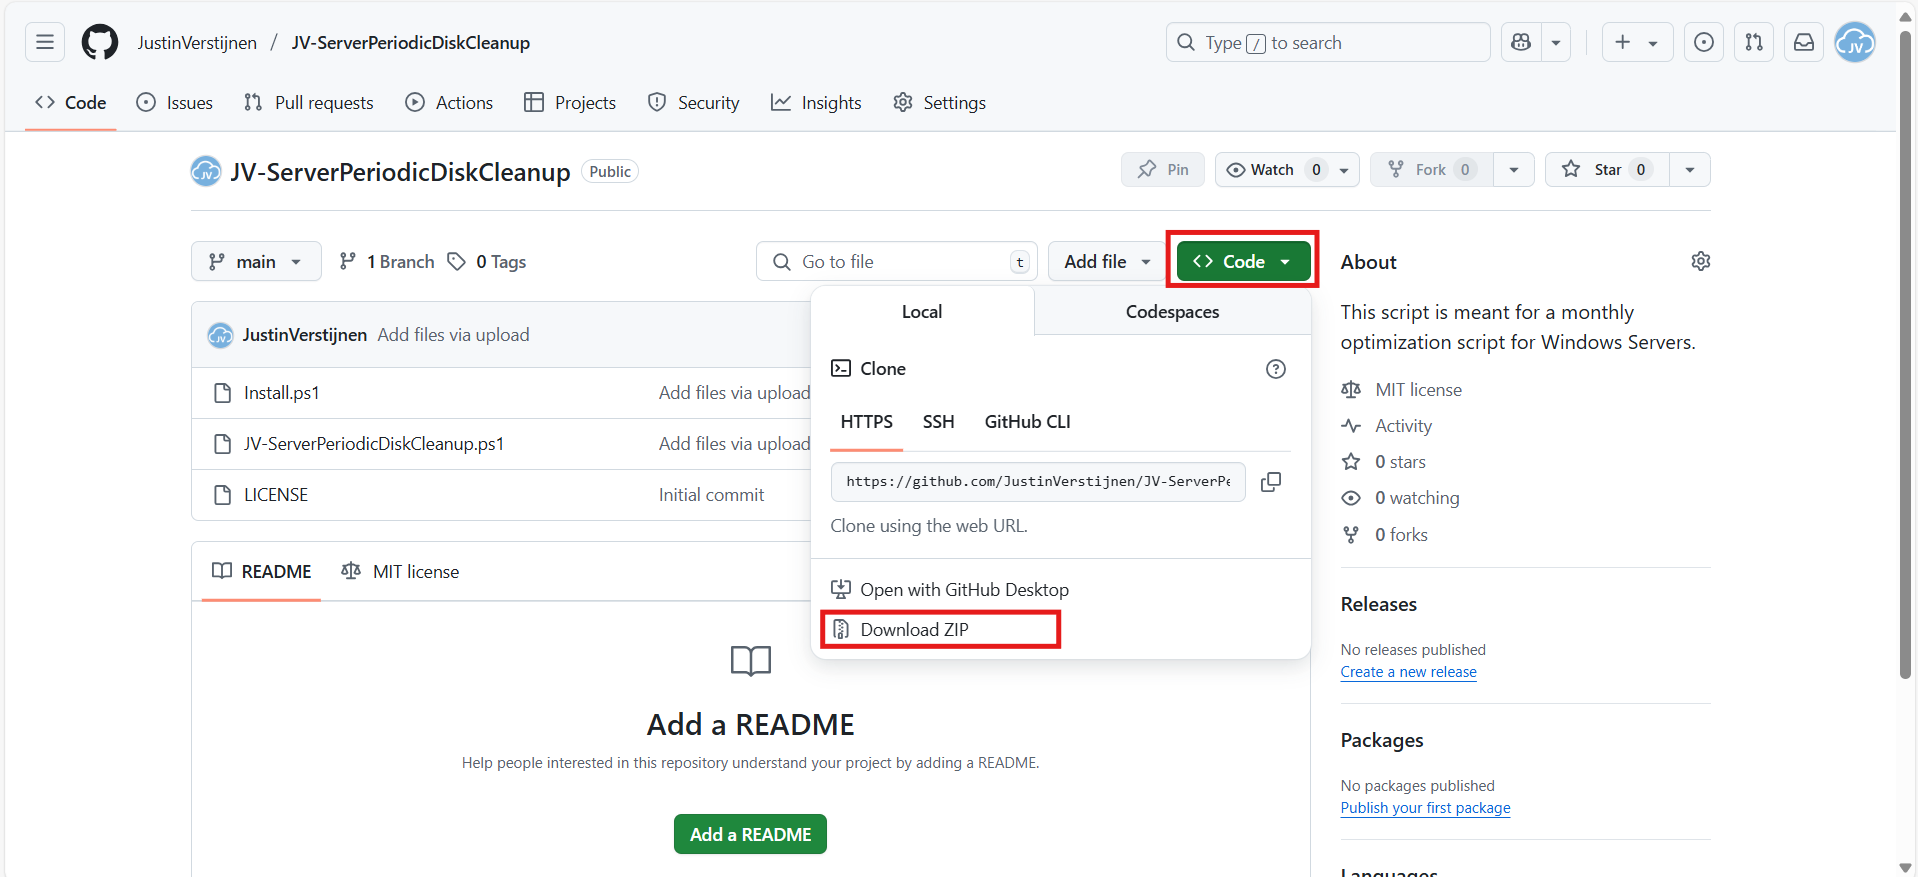
Installation
Click on the blue button above. You now are on the Github page of the script.
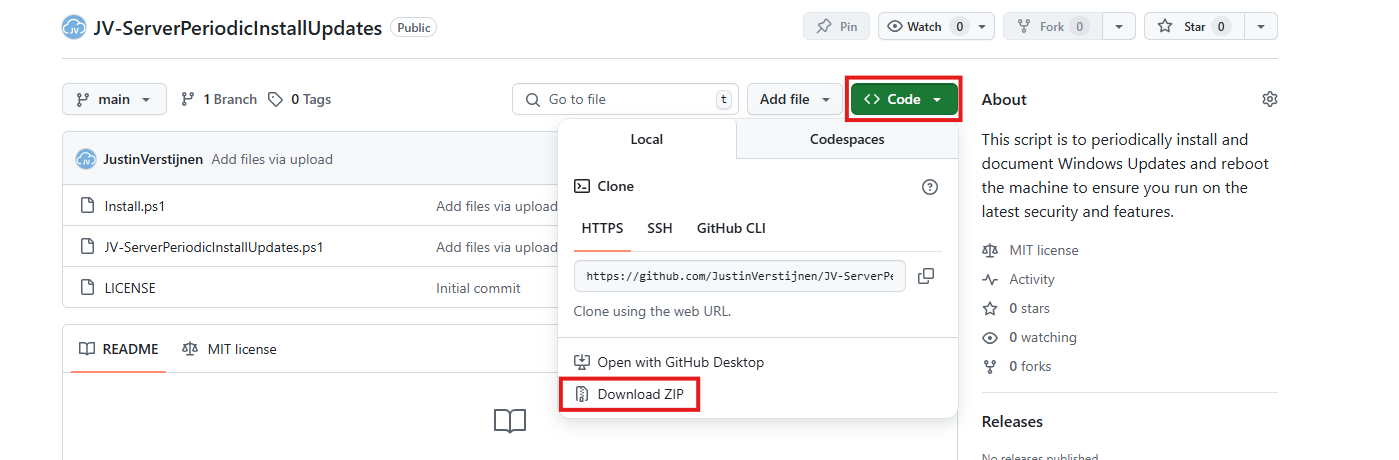
Click on “Code” and then “Download ZIP”.
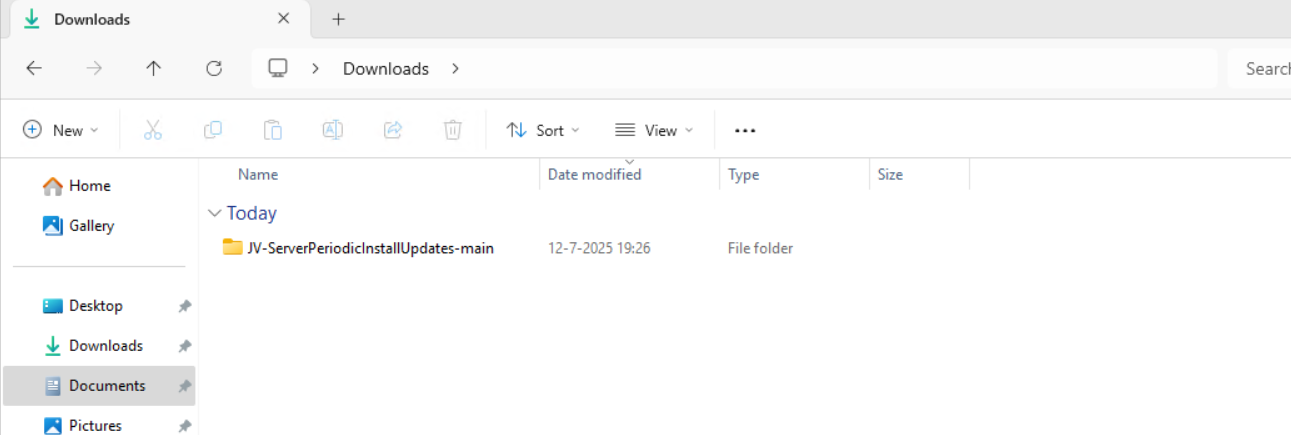
Now place the files on the server where you want to install the script.
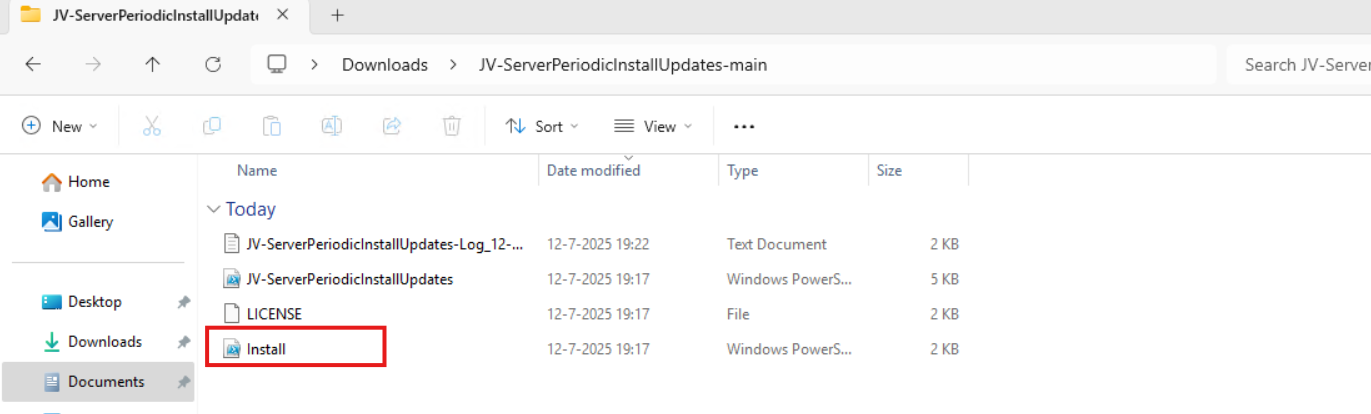
Unzip the file and then we can run the “Install” script. This must be run as administrator and temporarily without Execution Policy.
Open Powershell ISE as administrator.
Now open the “Install” script.
Review it’s default settings and if you feel at home in PowerShell, review the rest of the script to understand what it does.
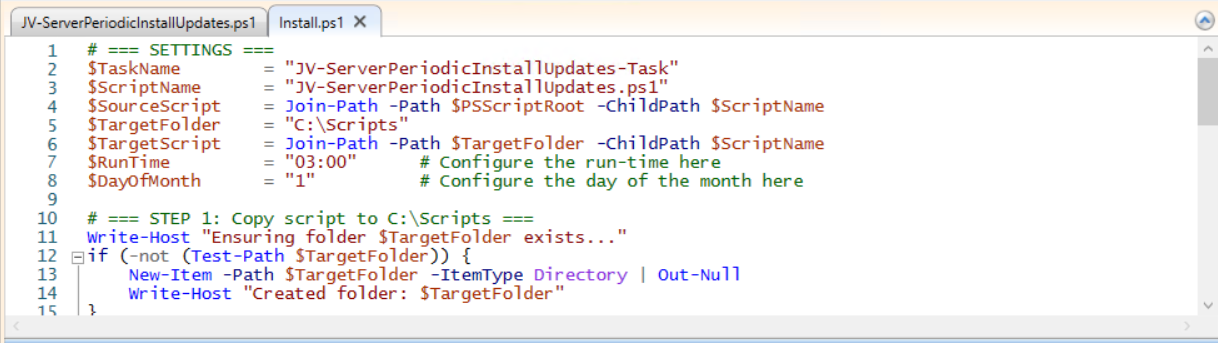
You can change the schedule very easily by changing the runtime: 0:00 till 23:59 and the day of month to specify the day number of the month (1-31).
After your schedule is ready, let’s ensure we temporarily bypass the Execution Policy by typing the command in the blue window below:
POWERSHELL
Set-ExecutionPolicy Unrestricted -Scope ProcessThis way the execution policy stays enabled but for this session only it’s been lowered. When you close the window, you have to type this again before be able to run scripts.
Execute the command, and when prompted to lower the policy, click Yes.
Now execute the Install script by clicking the green “Run” button:

After executing the script, we get the message that the task has been created succesfully:

Let’s check this in the Windows Task Scheduler:

As you can see, the script is succesfully installed to Task Scheduler. This ensures it runs every first of the month at 03:00 (or at your own defined schedule). Also, the script has been placed in C:\Scripts for a good overview of the scripts of the system.
How to install the Windows Update script manually
If you want to define your own schedule and script location, it can be better to install the script yourself or only using it when you need it.
Click on the blue Download button at the beginning of the page.
Click on “Code” and then “Download ZIP”.
Then place the ZIP file on the server where you want to install the disk cleanup script.
Move the script to the right location
Select the script and place it in your preferred location. My advice is to not install this in a user profile, but in a location accessible for all users. Like C:\Scripts.

I have placed the scipt into the correct folder. If you also want the script to run on a schedule, open up the “Task Scheduler” (taskschd.msc).
Creating the scheduled task
Do a “Right-mouse click” on the empty space and click on “Create New Task…”.
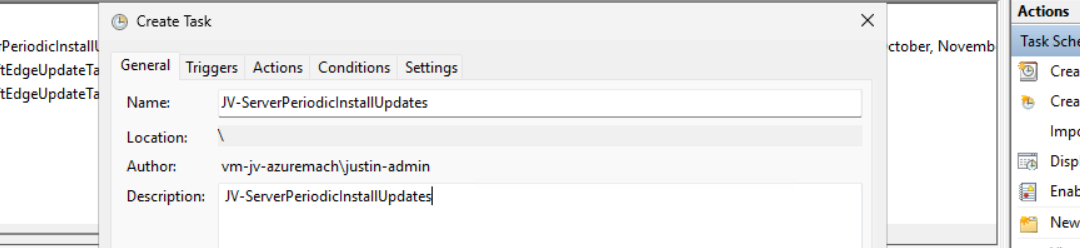
Give the task a name and description that alings with your documentation.
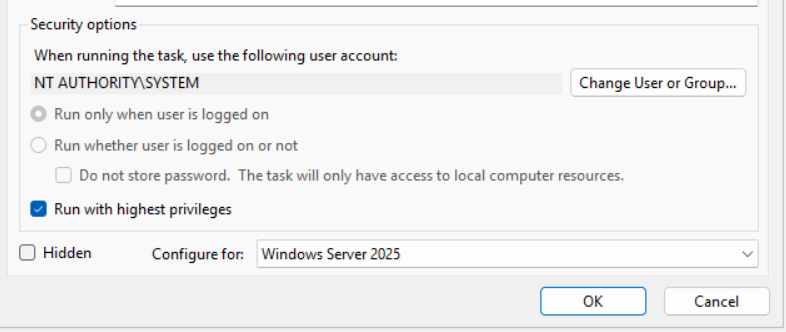
Then change the user to “SYSTEM” to run this in SYSTEM context for the highest privileges:
Then check the “Run with highest privileges” and select the highest OS possible in the “Configure for” dropdown menu.
Configure script trigger
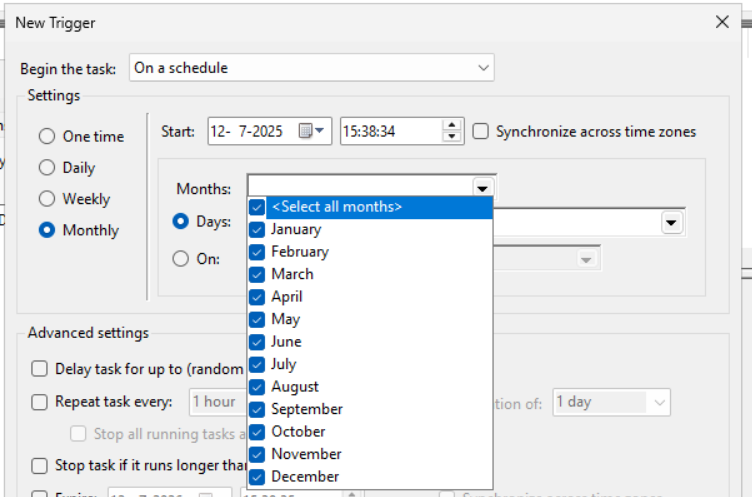
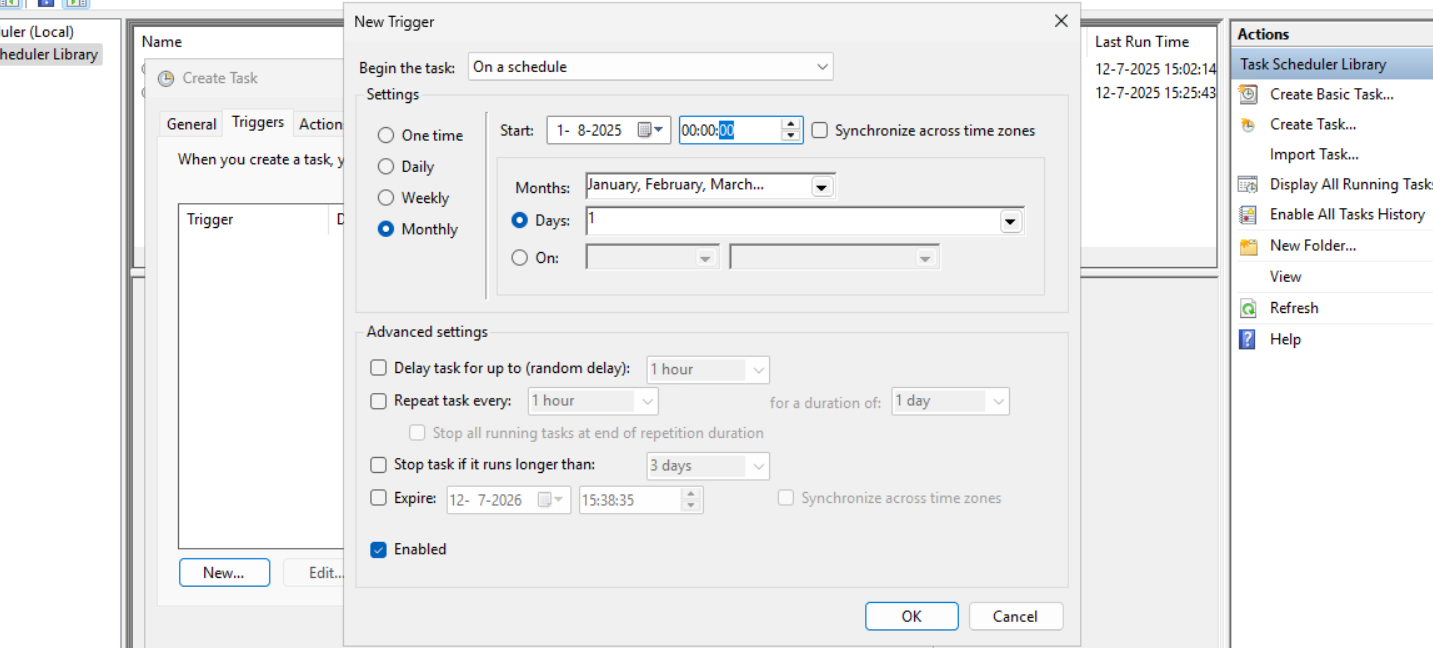
Go to the “Triggers” tab and add a new trigger.
Select “Monthly” and select all months. Then change the “Days” field to 1 to run it on the first day.
You can defer from this schedule if your environment needs that. This is just an example.
Now the page looks like this:
Configure script action
Click “OK” and go to the “Actions” tab. Create a new action.
In the “Program/Script” field, type in the following:
POWERSHELL
powershell.exeIn the “Add arguments (optional):” field, type in the following:
POWERSHELL
-ExecutionPolicy Bypass -File C:\Scripts\JV-ServerPeriodicInstallUpdates.ps1Now click on “OK” twice to create the task.
Testing the task
Now we can manually run the task to ensure it runs on a schedule too. Right click the task and click on “Run” to start the task.
As we can see, the script runs succesfully as it still runs after 30 seconds. This means the task and permissions are correct.

The script can take up to several hours when cleaning everything, depending on the server size.
In the folder of the script, a log file is created:
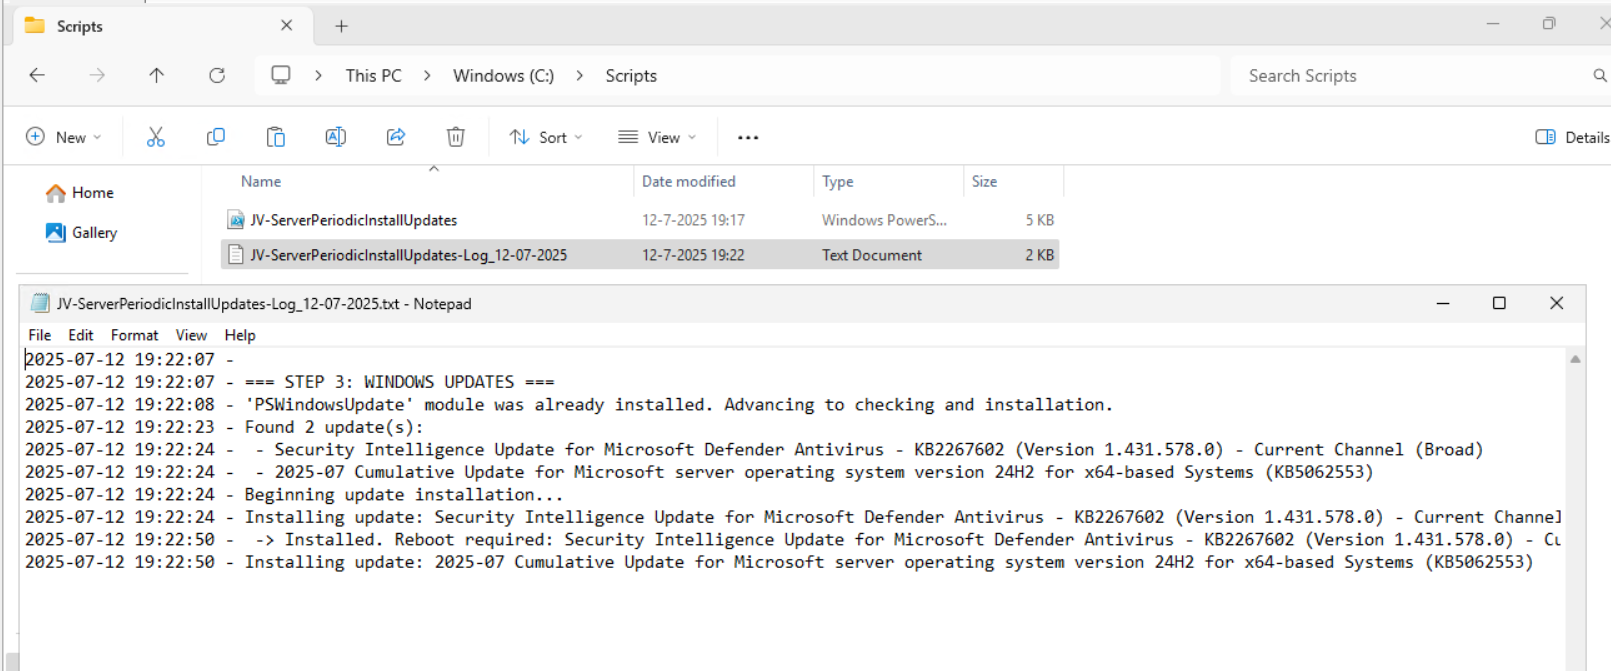
Every update installed will be logged for documentation and monitoring purposes. This can come in handy when an update unfortunately brings bugs with it so we can search for and remove this update.
Summary
Installing Windows Updates is critical for maintaining and securing your servers. In the history of IT, we did very often wait till we installed updates because of possible errors or misfunctioning with our applications but the price you pay with this approach, not being secured against zero day threats and vulnerabilities is much higher. We can’t install updates to much.
This script is useful when doing update installations by hand. When searching for automatic installation of Windows Updates in Azure, I would recommend using Azure Update Manager.
Sources
These sources helped me by writing and research for this post;
End of the page 🎉
You have reached the end of the page. You can navigate through other blog posts as well, share this post on X, LinkedIn and Reddit or return to the blog posts collection page. Thank you for visiting this post.
If you think something is wrong with this post or you want to know more, you can send me a message to one of my social profiles at: https://justinverstijnen.nl/about/
If you find this page and blog very useful and you want to leave a donation, you can use the button below to buy me a beer. Hosting and maintaining a website takes a lot of time and money. Thank you in advance and cheers :)
The terms and conditions apply to this post.
Disk cleaning script on Windows Azure VMs
On Windows Servers, a critical point is maintaining the disk space. If a disk fills up to the end, several errors can occur and impacting…
On Windows Servers, a critical point is maintaining the disk space. If a disk fills up to the end, several errors can occur and impacting the end-users experience of your applications. Something we definitely not want.
To help reducing this chance, I have created a PowerShell script that cleans up your server using built in tools of Windows. In this post, I will explain what the script does, how to install it and how to use it.
Where do download this script?
For the fast pass, my script can be downloaded here:
What does the disk cleanup script do?
The script I have made focusses primarily on cleaning up some folders we don’t need for the server to work. This consists of:
- Windows Update download cache of already installed updates
- TEMP folders
- Unused drivers
- Unused Event logs
- Google Chrome browsing cache
- Microsoft Edge browsing cache
- Recycle bins
The script itself has 6 steps:
- Ensuring it runs as Administrator
- Enable logging
- Saves a log file in the same directory and with 100KB limit
- Running Windows Cleanmgr-tool
- Simulating the Cleanmgr tool for all other local drives
- Deleting unused device drivers
- Removing cache for Chrome and Edge
- Rebooting the server.
How to install the Disk cleaning script Automatically
For installation with Task Scheduler I included an installation script that, by default, configures a task in the Windows Task Scheduler that runs it;
- Every first day of the month
- At hour 03:00
If these settings are great for you, you can leave them as-is.
The Installation script creates a folder in C:\ named “Scripts” if not already there and places the cleaning script there.
Installation
Click on the blue button above. You now are on the Github page of the script.
Click on “Code” and then “Download ZIP”.
Now place the files on the server where you want to install the script.
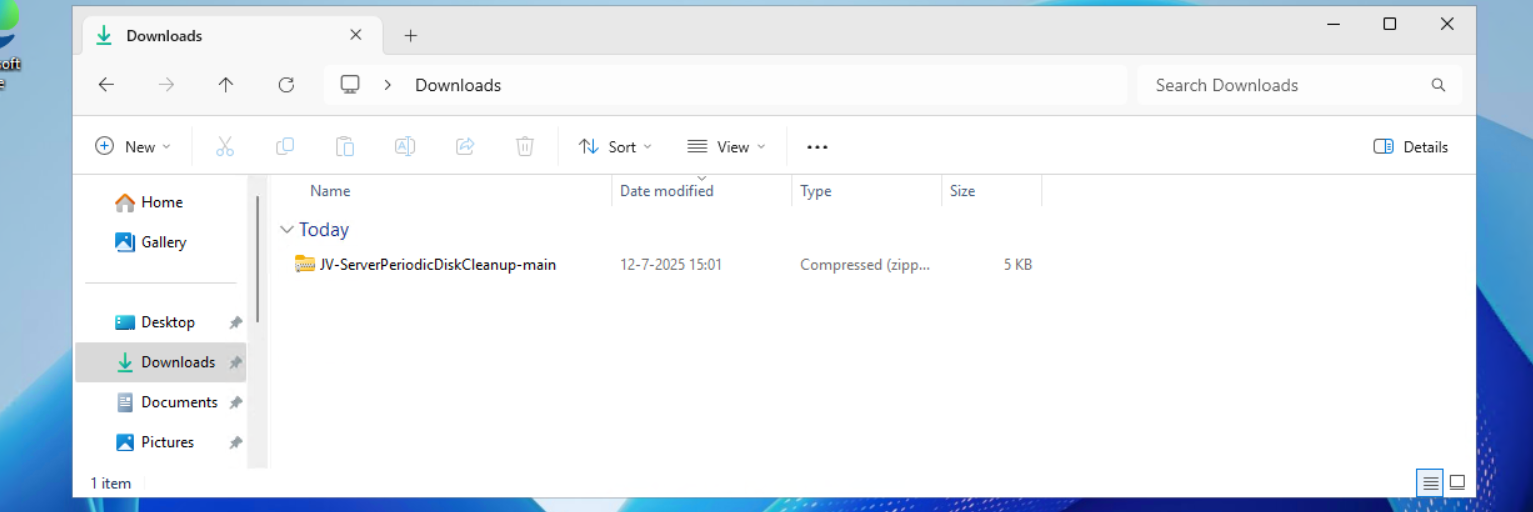
Unzip the file and then we can run the “Install” script. This must be run as administrator and temporarily without Execution Policy.
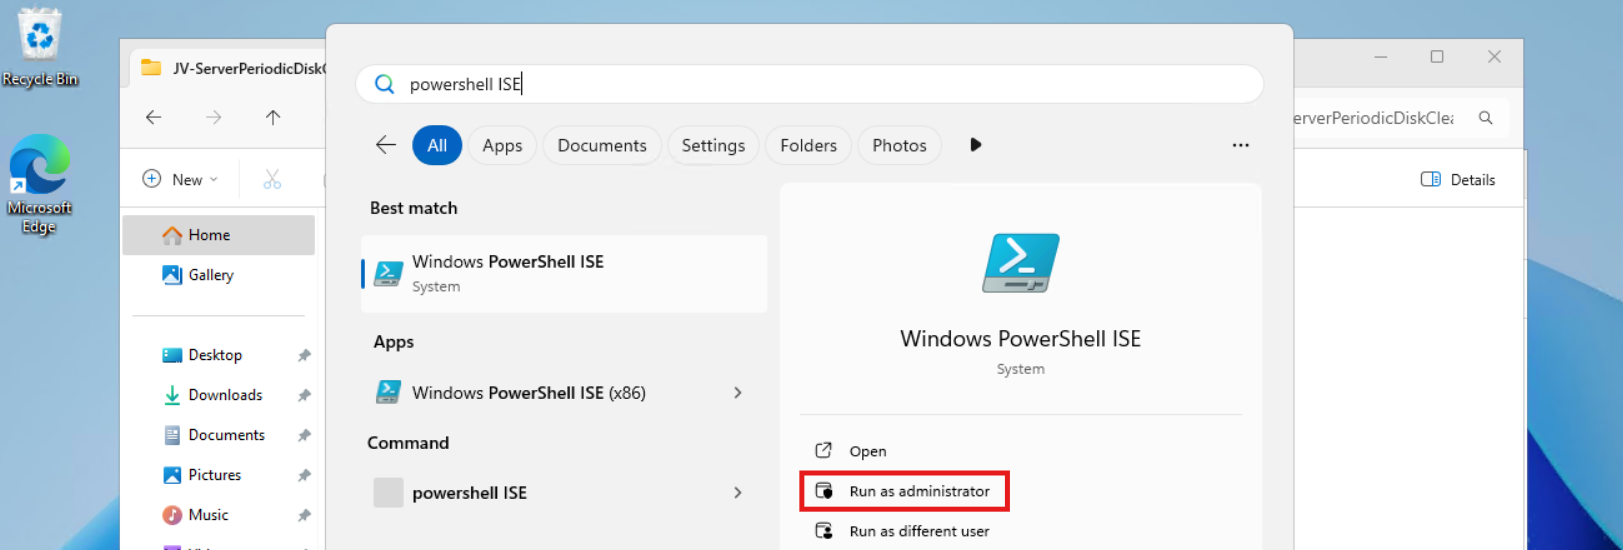
Open Powershell ISE as administrator.
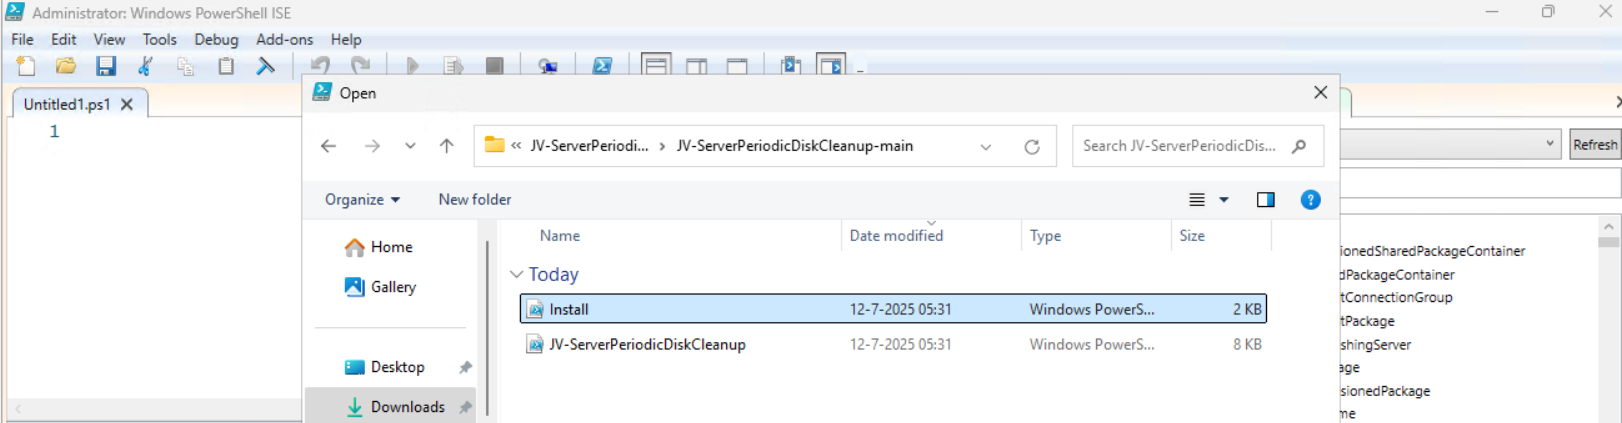
Now open the “Install” script.
Review it’s default settings and if you feel at home in PowerShell, review the rest of the script to understand what it does.
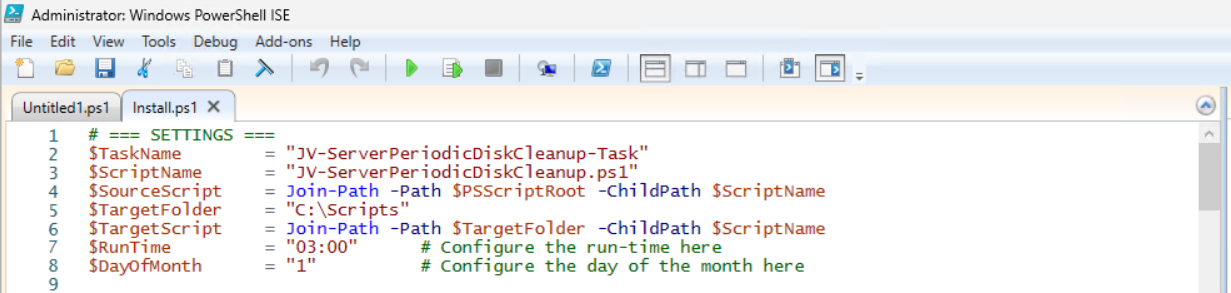
You can change the schedule very easily by changing the runtime: 0:00 till 23:59 and the day of month to specify the day number of the month (1-31).
After your schedule is ready, let’s ensure we temporarily bypass the Execution Policy by typing the command in the blue window below:
POWERSHELL
Set-ExecutionPolicy Unrestricted -Scope ProcessThis way the execution policy stays enabled but for this session only it’s been lowered. When you close the window, you have to type this again before be able to run scripts.
Execute the command, and when prompted to lower the policy, click Yes.

Now execute the Install script by clicking the green “Run” button:

After executing the script, we get the message that the task has been created succesfully:

Let’s check this in the Windows Task Scheduler:
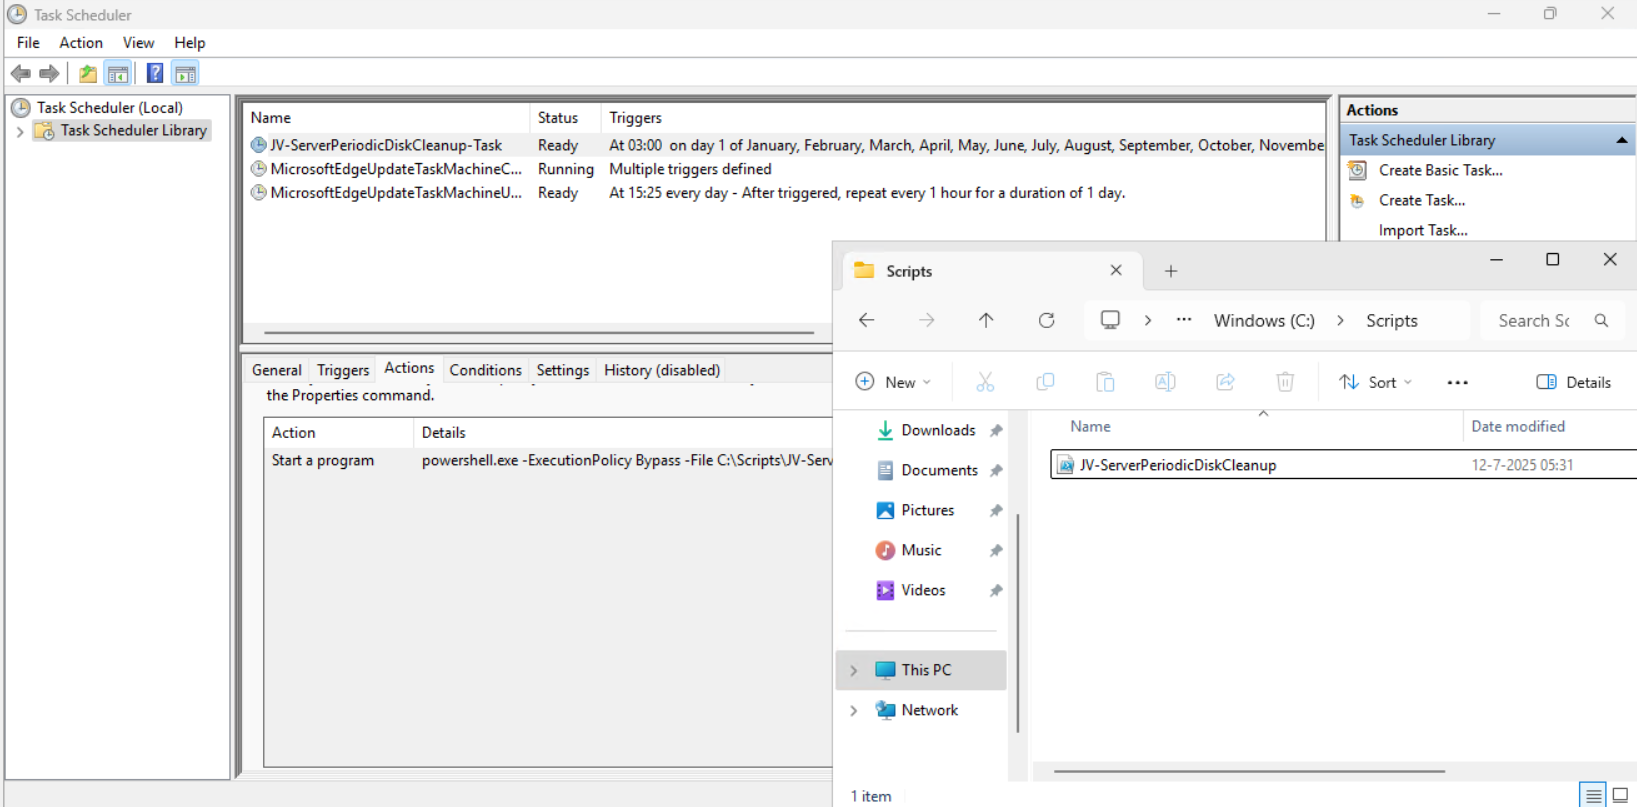
As you can see, the script is succesfully installed to Task Scheduler. This ensures it runs every first of the month at 03:00 (or at your own defined schedule). Also, the script has been places in C:\Scripts for a good overview of the scripts of the system.
How to install the Disk cleaning script manually
If you want to define your own schedule and script location, it can be better to install the script yourself or only using it when you need it.
Click on the blue Download button at the beginning of the page.
Click on “Code” and then “Download ZIP”.
Then place the ZIP file on the server where you want to install the disk cleanup script.
Move the script to the right location
Select the script and place it in your preferred location. My advice is to not install this in a user profile, but in a location accessible for all users. Like C:\Scripts.
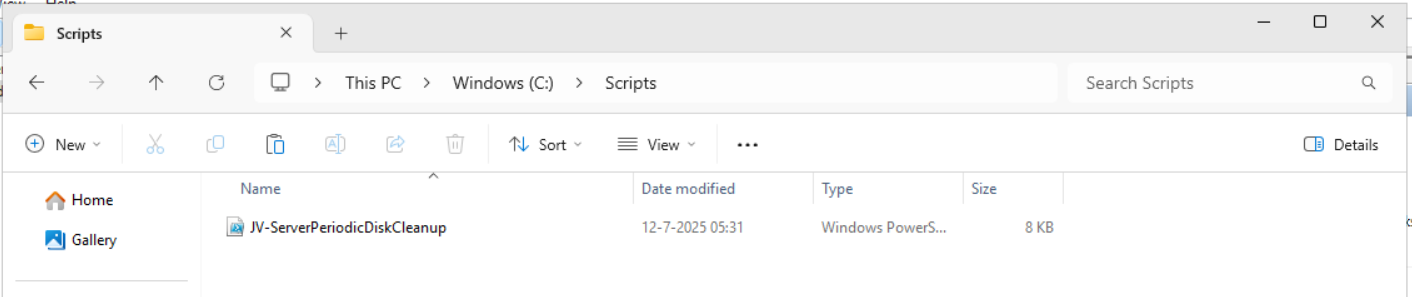
I have placed the scipt into the correct folder. If you also want the script to run on a schedule, open up the “Task Scheduler” (taskschd.msc).
Creating the scheduled task
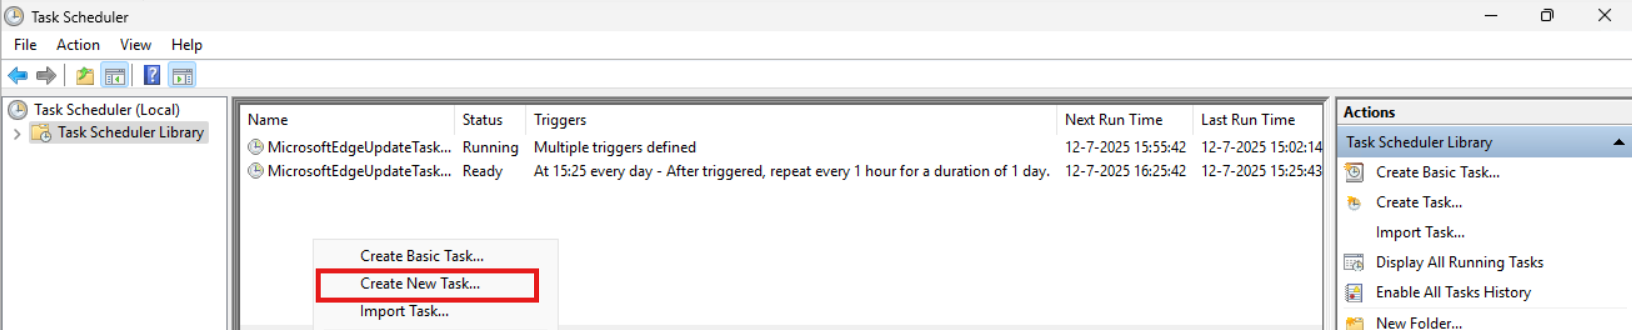
Do a “Right-mouse click” on the empty space and click on “Create New Task…”.
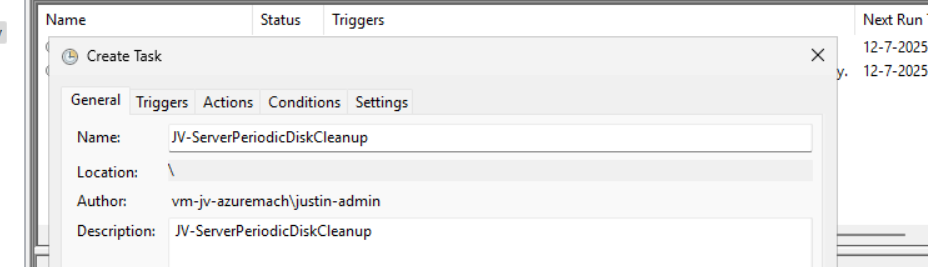
Give the task a name and description that alings with your documentation.
Then change the user to “SYSTEM” to run this in SYSTEM context for the highest privileges:
Then check the “Run with highest privileges” and select the highest OS possible in the “Configure for” dropdown menu.
Configure script trigger
Go to the “Triggers” tab and add a new trigger.
Select “Monthly” and select all months. Then change the “Days” field to 1 to run it on the first day.
You can defer from this schedule if your environment needs that. This is just an example.
Now the page looks like this:
Configure script action
Click “OK” and go to the “Actions” tab. Create a new action.
In the “Program/Script” field, type in the following:
POWERSHELL
powershell.exeIn the “Add arguments (optional):” field, type in the following:
POWERSHELL
-ExecutionPolicy Bypass -File C:\Scripts\JV-ServerPeriodicDiskCleanup.ps1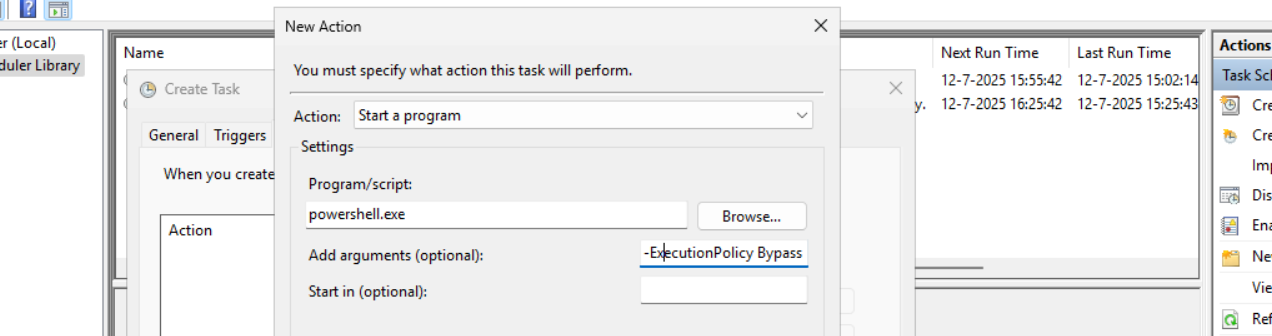
Now click on “OK” twice to create the task.
Testing the task
Now we can manually run the task to ensure it runs on a schedule too. Right click the task and click on “Run” to start the task.

As we can see, the script runs succesfully as it still runs after 30 seconds. This means the task and permissions are correct.

The script can take up to several hours when cleaning everything, depending on the server size.
In the folder of the script, a log file is created:
Summary
I think it’s a great way to use scripts like these once per month on your server. We can better be pro-actively cleaning up our servers than waiting till some issue occurs. However, my advice is to not run this script too often. Once or twice per month is good enough.
We IT guys’ work is to minimize disruptions and ensure end users don’t need to call us. If we IT guys are completely invisible and users think: “What are those guys even doing?”, then we do your jobs correctly.
Thank you for reading this post and I hope it was helpful.
Sources
These sources helped me by writing and research for this post;
End of the page 🎉
You have reached the end of the page. You can navigate through other blog posts as well, share this post on X, LinkedIn and Reddit or return to the blog posts collection page. Thank you for visiting this post.
If you think something is wrong with this post or you want to know more, you can send me a message to one of my social profiles at: https://justinverstijnen.nl/about/
If you find this page and blog very useful and you want to leave a donation, you can use the button below to buy me a beer. Hosting and maintaining a website takes a lot of time and money. Thank you in advance and cheers :)
The terms and conditions apply to this post.
Skrepr Tech CI - PowerShell
Dit is mijn Collective Intelligence voor mei 2025 over PowerShell. Ik ga hier wat leuke dingen over laten zien, zie de inhoud voor handige links naar de kopteksten.
Aan het einde heb ik nog een leuke praktijkopdracht waarin we een PowerShell module gaan installeren en uitvoeren.
Ik heb mijn best gedaan om de uitleg zo simpel maar duidelijk te geven, ook voor onze niet-technische mensen.
Wat is PowerShell?
Powershell is een shell en script taal en sinds Windows 8/Server 2012 de onderliggende CLI van Windows. Eigenlijk alles in de grafische interface van Windows wordt door Powershell verwerkt, zoals te zien in onderstaande afbeelding:
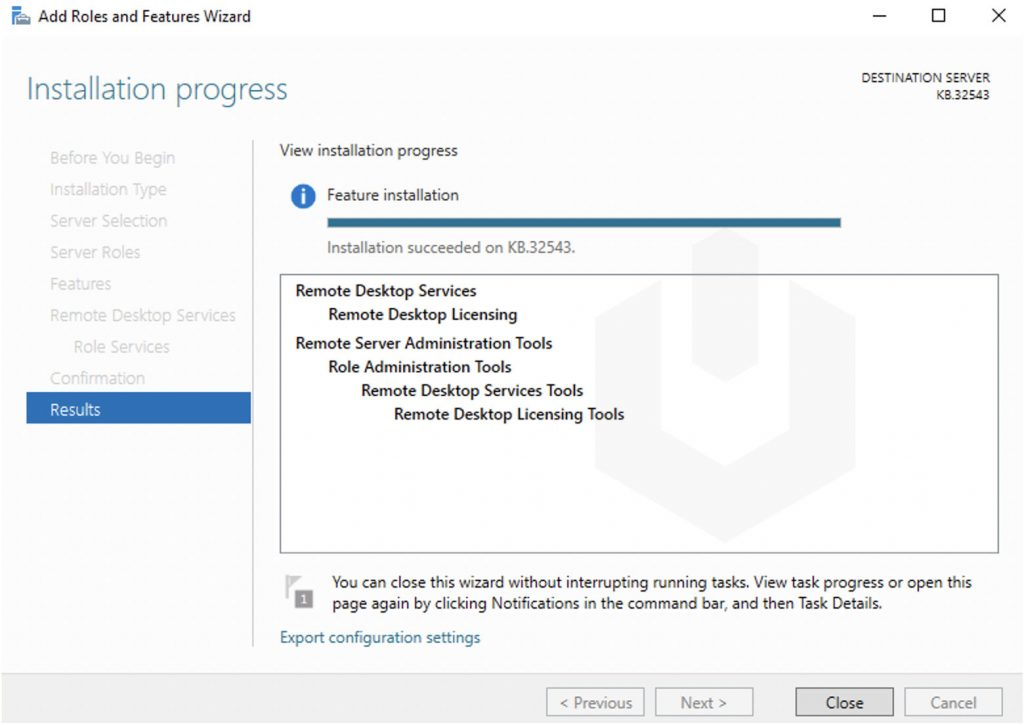
Klik op “Export configuration settings” en je krijgt:
POWERSHELL
# Zorg ervoor dat je PowerShell uitvoert als Administrator
# Installeer RSAT tools
Write-Host "Installing RSAT tools..."
Add-WindowsCapability -Online -Name "Rsat.RemoteAccess.Tools~~~~0.0.1.0"

# Installeer Remote Desktop Services tools
Write-Host "Installing Remote Desktop Services tools..."
Add-WindowsCapability -Online -Name "Rsat.RemoteDesktopServices.Tools~~~~0.0.1.0"

# Wacht tot de installatie voltooid is
Write-Host "De RSAT en Remote Desktop Services tools zijn geïnstalleerd."

# Optioneel: Controleer of de tools correct zijn geïnstalleerd
Write-Host "Controleren van geïnstalleerde tools..."
Get-WindowsCapability -Online | Where-Object {$_.Name -like "Rsat*" -or $_.Name -like "RemoteDesktopServices*"} | Format-Table -Property Name, State
Ziet er leuk uit, maar wat kun je er nu eigenlijk precies mee en wat levert het gebruik van PowerShell jouw precies op?
- Automatiseren
- Uniforme configuraties
- Tijd
- Beveiliging
Hoe werkt Powershell?
Microsoft heeft vanaf de oorsprong zijn best gedaan om de drempel voor het gebruik van Powershell zo laag mogelijk te maken. Vroeger met CMD en bij Linux zijn alle commando’s gekozen op basis van wie de tool maakte. Met Powershell hebben ze hier uniformiteit in gemaakt.
Een Powershell commando ziet er daarom ook altijd als volgt uit:
Werkwoord - Zelfstandig naamword (verb - noun)
Voorbeelden:
- Get-Item
- Install-WindowsFeature
- Test-NetConnection
- Write-Host
Windows PowerShell vs. PowerShell
Tegenwoordig zijn er 2 versies van Powershell beschikbaar:
- Windows Powershell
- Powershell
Het verschil hierin is voornamelijk dat Windows Powershell alle commando’s voor Windows bevat en de andere Powershell meer uniform is. Deze kan namelijk ook op Linux en Apple geinstalleerd worden.
Commando’s vs. Scripts
Nu kunnen we Powershell gebruiken als CLI taal waar we alle taken interactief moeten doen. Hiermee bedoelen we dat je alles zelf moet typen en eventueel een resultaat (output) van commando 1 in een comando 2 of zelfs 3 wil gaan gebruiken. Hiervoor moet je 3 regels typen en op enter klikken. Dit kost tijd en moeite.
Powershell is ook een script-taal en een script is hiermee precies zoals een film ook gemaakt wordt. Er wordt uitgedacht hoe een scene eruit ziet, wat er gebeurd, welke auto er crashed en wie die bestuurt, wie er dood gaat etc. Een Powershell script is niets anders, alleen wat gezelliger.
In een Powershell script kun je bijvoorbeeld alle gebruikers in een systeem ophalen en deze wijzigen. Stel je voor, een bedrijf krijgt naast een .nl domein ook een .com of .be domein en alle gebruikers moeten hierop ook te benaderen zijn.
Nu kun je ervoor kiezen om 500 gebruikers handmatig bij langs te gaan, of een simpel script te maken die dit voor je doet. Om je helemaal over de streep te halen om voor Powershell te gaan:
- Handmatig: 500 x 26 seconden is 13.000 seconden en ongeveer 3,5 uur werk
- Script: Inloggen 5 min, maken script: 25 min, testen 20 min, script 10 min en ongeveer 1 uur werk
Met dit voorbeeld hebben we dus 2,5 uur bespaard door Powershell te gaan gebruiken. Hoe complex ziet zo’n script er dan uit?
POWERSHELL
$allegebruikers     = Get-Mailbox
$nieuwedomeinalias  = "@justinverstijnen.be"

foreach ($user in $allegebruikers) {
  $primaryEmail = $user.PrimarySmtpAddress.ToString()
  $newAlias = $primaryEmail.Split('@')[0] + $nieuwedomeinalias
  Set-Mailbox $user.Identity -EmailAddresses @{Add=$newAlias} }
Lijkt complex maar is redelijk simpel na de uitleg, toch?
Variabelen, Strings en Booleans
Belangrijke componenten in Powershell zijn variabelen, strings en booleans. Vast wel eens van gehoord maar wat zijn het precies?
| Component | Extra uitleg | Voorbeeld |
| Variabele | Een object die steeds anders kan zijn op basis van input of error/succes | $allegebruikers $user $resultaat |
| String | Een stuk tekst. Vaak gebruikt voor output om deze naar een variabele of nieuw commando te schrijven. | “info@justinverstijnen.nl” “Succes” “Error” |
| Boolean | Een waarde die waar of niet waar kan zijn | $true $false |
Scripts vs. Modules
Nu hebben we scripts en modules in Powershell. 2 begrippen die op elkaar lijken maar net iets anders zijn;
- Script: Een script is een enkele harde lijst met taken en zal Powershell altijd van A tot Z uitvoeren
- Module: Een module is een interactieve lijst met taken en kan zich aanpassen aan de gebruiker met eigen functies. Zo kun je zelf commando’s maken met functions die weer onderliggend Powershell eigen commando’s/scripts uitvoeren voor het resultaat.
De taal van een module ziet er ongeveer zo uit:
POWERSHELL
# Functie 1: Welkomstbericht
function Get-WelcomeMessage {
    param (
        [string]$Name
    )
    if ($Name) {
        return "Welkom, $Name!"
    } else {
        return "Welkom, onbekende gebruiker!"
    }
}

# Functie 2: Optellen van twee getallen
function Add-Numbers {
    param (
        [int]$Number1,
        [int]$Number2
    )
    return $Number1 + $Number2
}
Een module moet altijd geinstalleerd worden in Powershell, en scripts kunnen direct vanaf een bestand uitgevoerd worden.
Powershell Tools
Er zijn verschillende tools om Powershell scripts en modules te schrijven. Deze kunnen van simpel naar complex gaan en je bent vrij om te kiezen welke je wilt gebruiken. Ik raad zelf aan om Windows Powershell ISE of VS Code te gebruiken, dit vanwege de ingebouwde foutcorrectie en aanbevelingen die jouw code verbetert alsof je in Word een aantal spelvauten maakt;
Een aantal voorbeelden van gratis software;
- Windows Kladblok
- Notepad++
- Windows Powershell ISE (Integrated Scripting Environment)
- Visual Studio Code
Praktijkvoorbeelden Powershell bij Skrepr Tech
Bij Skrepr Tech gebruik ik voor een paar dingen PowerShell om taken makkelijk uit te voeren en te automatiseren:
- AVD gebruikers Cameranu
- Ik heb hier een script gemaakt om met 1 druk op de knop alle AVD gebruikers te exporteren naar een CSV/Excel bestand voor de facturatie
- Emailadressen toevoegen Cameranu
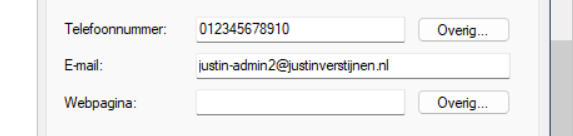
- Ik heb een script gemaakt die elke nacht alle gebruikers ophaalt en het invoerveld “Email” invult
- Schijfopruiming diverse klanten
- Bij een aantal klanten draait er een script op de server die eenmaal per week bepaalde mappen opschoont en bijvoorbeeld de laatste 90 versies bewaard
- AVD images maken
- Ik gebruik bij het maken van AVD images een script die de machine compleet naar het Nederlands zet, de juiste tijdzone instelt en het optimalisatiescript uitvoert
- AVD images voorbereiden
- Voor het voorbereiden van images, controleren op en verwijderen van pakketten die het voorbereiden verstoren
- Backup als de grafische interface niet werkt om verschillende redenen
De JVCollectiveIntelligenceMay2025 Powershell module
Om een kleine hands-on demo te geven van Powershell heb ik speciaal voor deze CI een Powershell module gemaakt die te installeren is. Dit is niet moeilijk.
Om de module te installeren kun PowerShell starten op je Windows apparaat en de commando’s invullen.
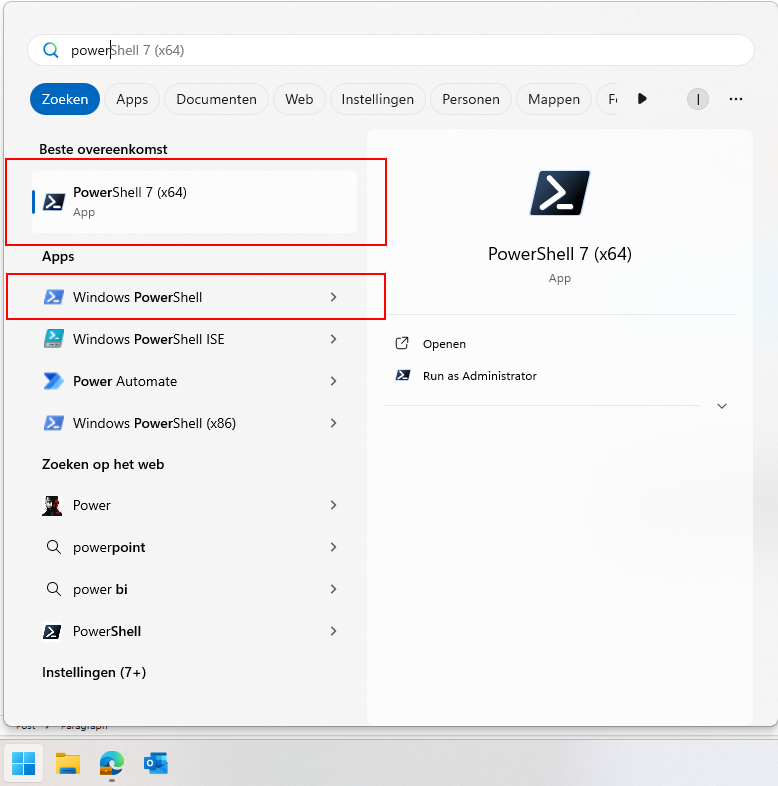
Beide gearceerde versies op Windows kun je hiervoor gebruiken.
In elk zwart vakje op deze pagina heb je rechts bovenin een kopieer-knop waarmee je makkelijk vanuit dit venster de commando’s kan kopieren en in PowerShell plakken. Om tekst te plakken in een PowerShell venster hoef je alleen maar in het venster de rechtermuisklik in te drukken. Na het plakken druk je op Enter en het commando wordt uitgevoerd.
Heb je een Apple apparaat? Balen voor jou. Je kan Powershell 7 dan hier downloaden: https://learn.microsoft.com/en-us/powershell/scripting/install/installing-powershell-on-macos?view=powershell-7.5#installation-via-direct-download
Let op: de werking op Mac is niet getest.
Stap 1: De module installeren
Open Powershell en voer het volgende commando uit:
POWERSHELL
Install-Module JVCollectiveIntelligenceMay2025 -Scope CurrentUserPowershell zal nu vragen of je zeker weet of de module geïnstalleerd mag worden. Druk eenmaal of tweemaal op y en druk op Enter.
Dit installeert de module die ik gemaakt heb waarmee we wat leuke commando’s kunnen uitvoeren die het verduidelijken wat Powershell doet op basis van de input.
Stap 2: Uitvoeren toestaan
Standaard heeft PowerShell een zogeheten uitvoerings-restrictie. Deze zorgt ervoor dat een gebruiker niet zomaar van alles kan uitvoeren op de computer. Zie het als een toegangscontrole voordat je een gebouw in mag in het echte leven.
Deze kunnen we voor de tijd van onze CI tijdelijk uitschakelen met het volgende commando:
POWERSHELL
Set-ExecutionPolicy Unrestricted -Scope ProcessDit schakelt de toegangscontrole tijdelijk uit voor alleen ons venster. Bij wegklikken van het venster staat deze controle weer aan.
Stap 3: De module laden
Nu kunnen we echt beginnen met de module inladen. Zie dit als het openen van een Word bestand waarna je eraan kan werken.
Dit doe je met dit commando:
POWERSHELL
Import-Module JVCollectiveIntelligenceMay2025Als dit gelukt is zonder foutmeldingen, dan kunnen we de commando’s van de module gebruiken.
Krijg je bij deze stap een foutmelding, roep dan even.
Stap 4: De module testen
Laten we nu eens testen of de module succesvol ingeladen is:
POWERSHELL
Test-ModuleJVCIAls je nu een bericht voor je krijgt dat de module succesvol geladen is kunnen we beginnen. Wordt de module niet gevonden, dan is er iets mis en roep dan even.
Stap 5: De module informatie verlenen
Je mag er bij deze stap voor kiezen om niet je echte gegevens te gebruiken. Vul hier dan neppe informatie in, dit verandert verder niets aan de uitkomst.
Wanneer de module wel succesvol geladen is kun je het onderstaande commando uitvoeren. Powershell vraagt nu om je naam:
POWERSHELL
Set-NameJVCIPowerShell reageert nu terug met jouw ingevulde naam omdat je hem dit hebt verteld. Dit wordt opgeslagen in een variabele.
Daarna kun je het volgende commando invullen. Powershell vraagt nu om je geboortejaar:
POWERSHELL
Set-BirthYearJVCINu weet Powershell hoe oud je bent en kan hiermee verdere berekeningen uitvoeren.
Daarna kun je het volgende commando invullen:
POWERSHELL
Set-FavoriteColorJVCINu weet Powershell ook jouw favoriete kleur, en kan daardoor de tekst hierop aanpassen.
Stap 6: De resultaten uitdraaien
Nu we PowerShell van alles over onszelf hebben verteld kunnen we dit uitdraaien. Dit doe je door het laatste commando uit te voeren:
POWERSHELL
Write-SummaryJVCIJe krijgt nu een overzicht met alles wat je hebt ingevuld, in jouw aangegeven favoriete kleur. Dit geeft weer wat je met Powershell onder andere zou kunnen doen. Informatie ophalen op basis van input, weergeven, dupliceren en berekeningen op uitvoeren.
Deze module geeft op een vrij simpele manier weer wat de mogelijkheden zijn van PowerShell, maar is wel rekening gehouden om dit zo snel en makkelijk mogelijk te doen. In echte gevallen zal een module of script veel uitgebreider zijn.
Bedankt voor het bijwonen van mijn CI, en de informatie blijft voorlopig beschikbaar op deze website. Mocht je nog een keer deze gids en de bijbehorende informatie willen volgen kan dat!
End of the page 🎉
You have reached the end of the page. You can navigate through other blog posts as well, share this post on X, LinkedIn and Reddit or return to the blog posts collection page. Thank you for visiting this post.
If you think something is wrong with this post or you want to know more, you can send me a message to one of my social profiles at: https://justinverstijnen.nl/about/
If you find this page and blog very useful and you want to leave a donation, you can use the button below to buy me a beer. Hosting and maintaining a website takes a lot of time and money. Thank you in advance and cheers :)
The terms and conditions apply to this post.
Get Device serial number on Windows 11 24H2 and up
With Windows 24H2 and the deprecation of WMIC, a easy command to find your devices’ serial number is gone. However, we can still look this up with Powershell.
With Windows 24H2 and the deprecation of WMIC, a easy command to find your devices’ serial number is gone. However, we can still look this up with Powershell.
Use the following command:
POWERSHELL
Get-WmiObject win32_bios | select SerialNumber
End of the page 🎉
You have reached the end of the page. You can navigate through other blog posts as well, share this post on X, LinkedIn and Reddit or return to the blog posts collection page. Thank you for visiting this post.
If you think something is wrong with this post or you want to know more, you can send me a message to one of my social profiles at: https://justinverstijnen.nl/about/
If you find this page and blog very useful and you want to leave a donation, you can use the button below to buy me a beer. Hosting and maintaining a website takes a lot of time and money. Thank you in advance and cheers :)
The terms and conditions apply to this post.
How to upload PowerShell script to Gallery with Github Actions
When using the PowerShell Gallery to upload and publish your scripts and PowerShell modules to the world it’s recommended to use Github Actions for CI/CD to automatically update your live packages on the PowerShell Gallery. At first, this looked somewhat complex to me but it’s relatively easy.
On this page I will show how I’ve uploaded scripts from Github to the PowerShell Gallery with using a Github Action.
Requirements
- Around 30 minutes of your time
- Github account
- Powershell Gallery account
- A PowerShell script for testing to actually upload to the PowerShell Gallery
Introduction to PowerShell Gallery
In short, the PowerShell Gallery is a public repository which contains PowerShell scripts and modules which all PowerShell users can download and install. All of this using some simple commands:
POWERSHELL
Install-Module ExchangeOnlineManagementThe official “ExchangeOnlineManagement” module is an example of a module dat is uploaded to the gallery which can be download. Before installing, the user needs administrative permissions, the Powershell execution policy applies and we have to accept downloading from the repository.
It has a report-system where malicious scripts and modules can get reported and the deleted, so we can state that it’s pretty secure to use the PowerShell Gallery.
Introduction to Github and Github Actions
Github is a industry-accepted repository hosting service. This allows you to create a repository for a custom solution which you have created, which can be complete applications, source code but in our case a Powershell script. The goal of Github is to publish your source code so others can use and learn from it. You can also create private repositories to share with only specific users.
Github Actions
Inside our Github repository, we have Github Actions which can automate processes for us. As we want to develop using Github, we want our new version automatically pushed to the PowerShell Gallery. Github Actions can do this for us.
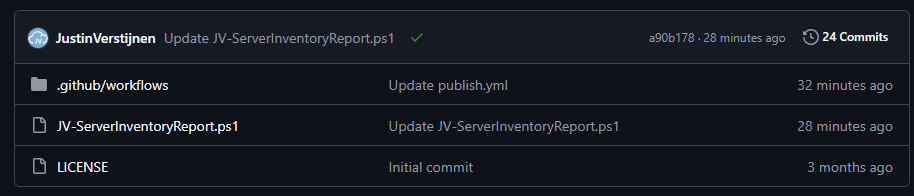
The action automatically kicks in every time a file in your repository is changed:
Step 1: Create a repository
Assuming you have a PowerShell script which is ready to upload to the PowerShell Gallery, we must first create a Github repository. Head to Github to do this.
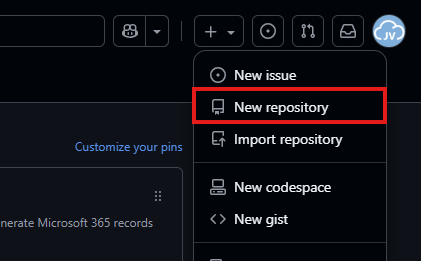
In the top-right corner, click on the “+” button and then on “New repository”.
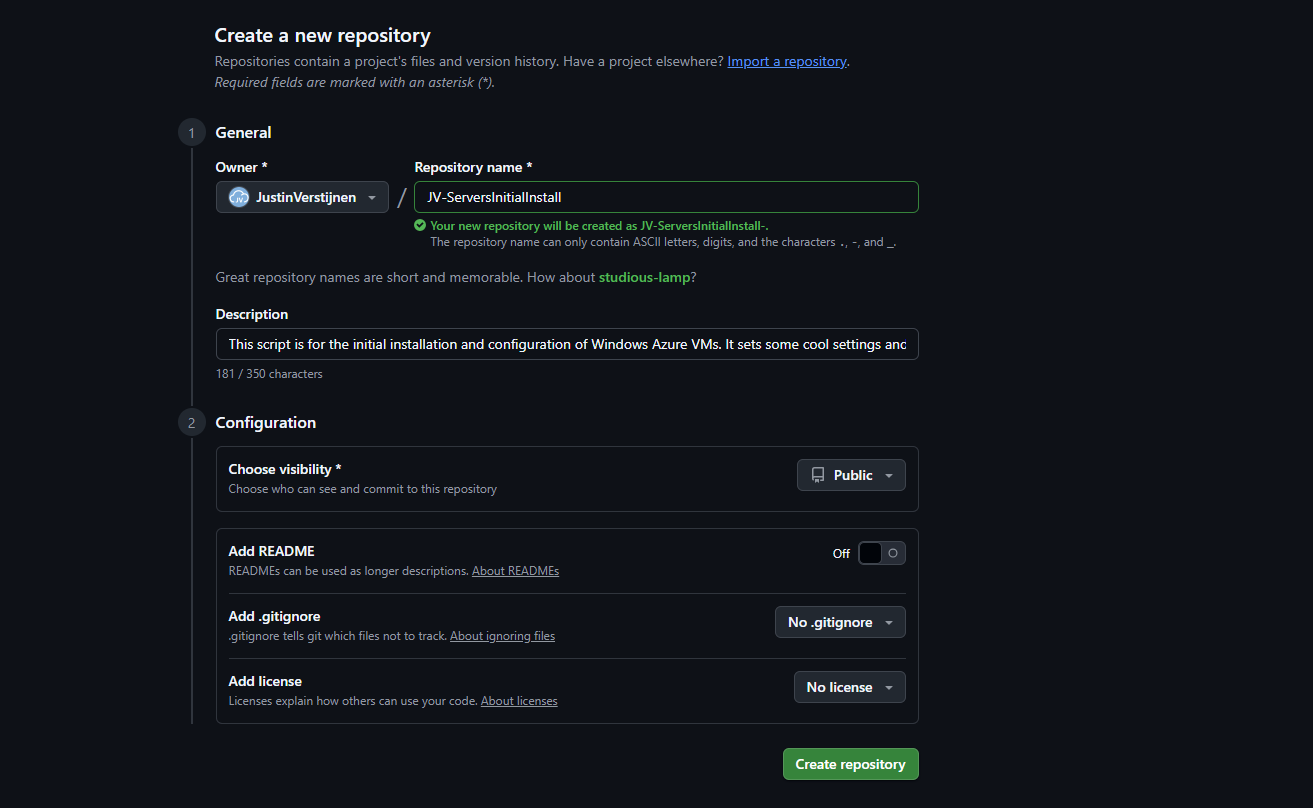
Give the repository a name and description, and determine the visibility. Then press “Create repository”.
For this solution to work, the repository can be either Public or Private. As we upload our script to a public reposity, we can also set this to “Public”. This gives users access to the “source code”.
Now the repository is created, and we can upload our PowerShell script to it.
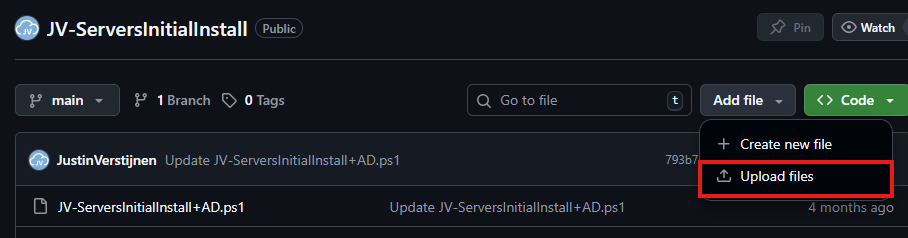
Select the script on your local machine, change the name and upload it to Github.
Step 2: Alter script for use with PowerShell Gallery
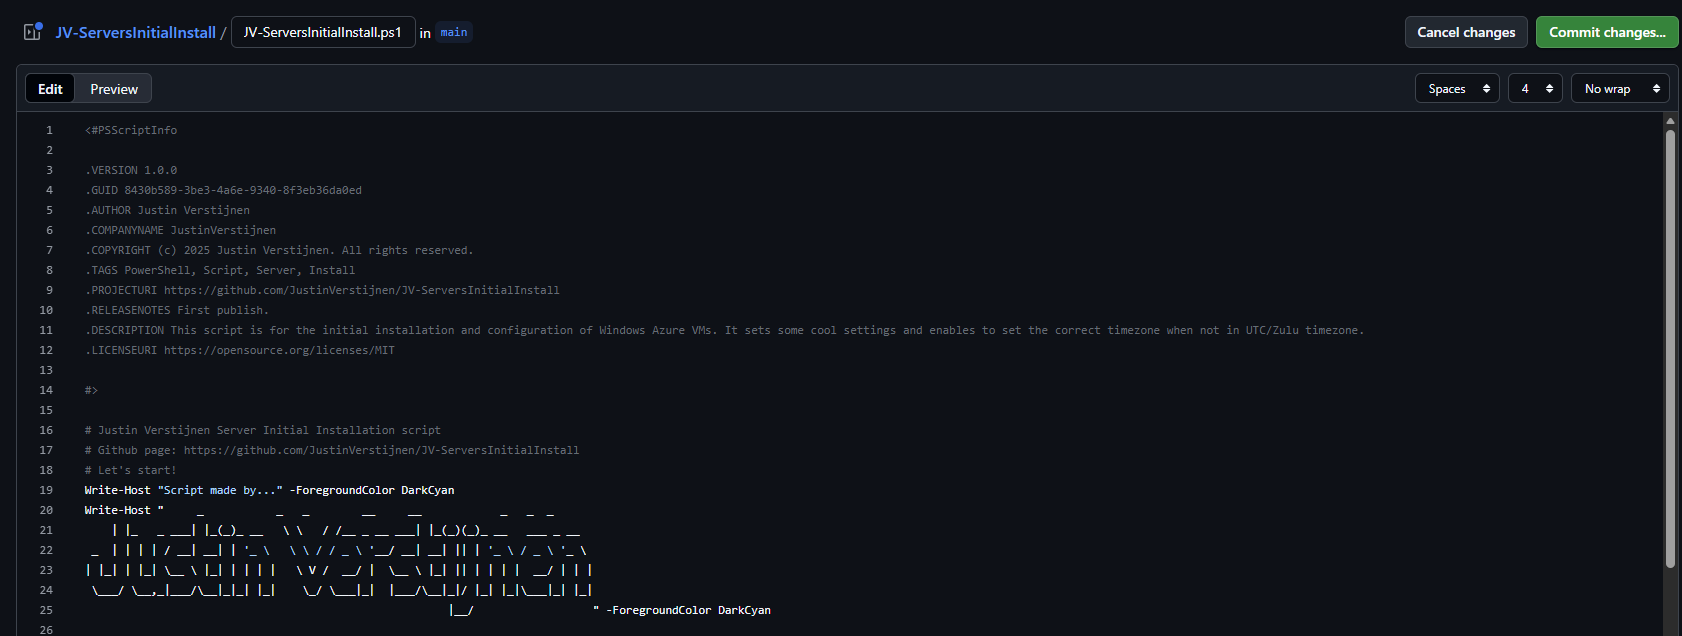
Because we upload our script to a public repository, we must define some metadata in our script. This includes an Author, tags, description and version number and such.
In Github, change your script and add this part to the top of the .ps1 file
POWERSHELL
<#PSScriptInfo
.VERSION 1.0.0
.GUID fb0384df-0dd8-4a57-b5e5-d3077c30a404
.AUTHOR Justin Verstijnen
.COMPANYNAME JustinVerstijnen
.COPYRIGHT (c) 2025 Justin Verstijnen. All rights reserved.
.TAGS PowerShell, Script, Example
.PROJECTURI https://github.com/JustinVerstijnen/JV-ServerInventoryReport
.RELEASENOTES First publish.
.DESCRIPTION A good description of your script
.LICENSEURI https://opensource.org/licenses/MIT
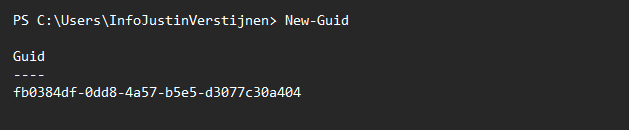
#>Change the information, and generate a new GUID with your own Powershell window:
POWERSHELL
New-GuidPowershell then generates a new GUID for you to use in your script:
My script looks like this now:
When you are done pasting and changing the script information, we can save the changes by pressing “Commit changes” twice.
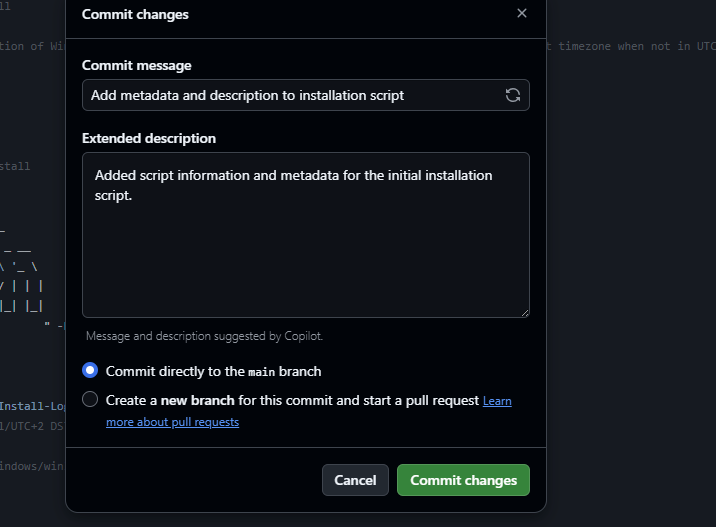
Press again to change the file, and we have prepared our script to be uploaded.
Step 3: Create an Powershell Gallery API key
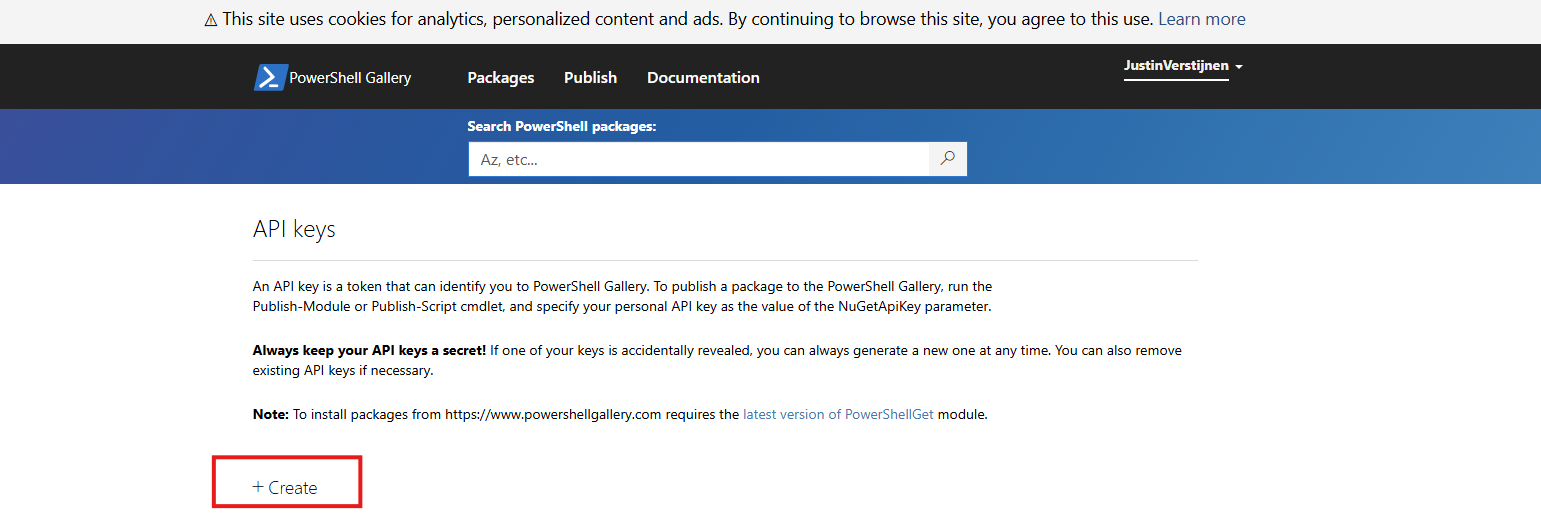
For Github to have access to our PowerShell Gallery account, we must create an API key. Head to the PowerShell Gallery.
Go to “API Keys”. Then click on “Create”.
Now we have to fill in some information. In general, it is best-practice to create an API key for every project/repository.
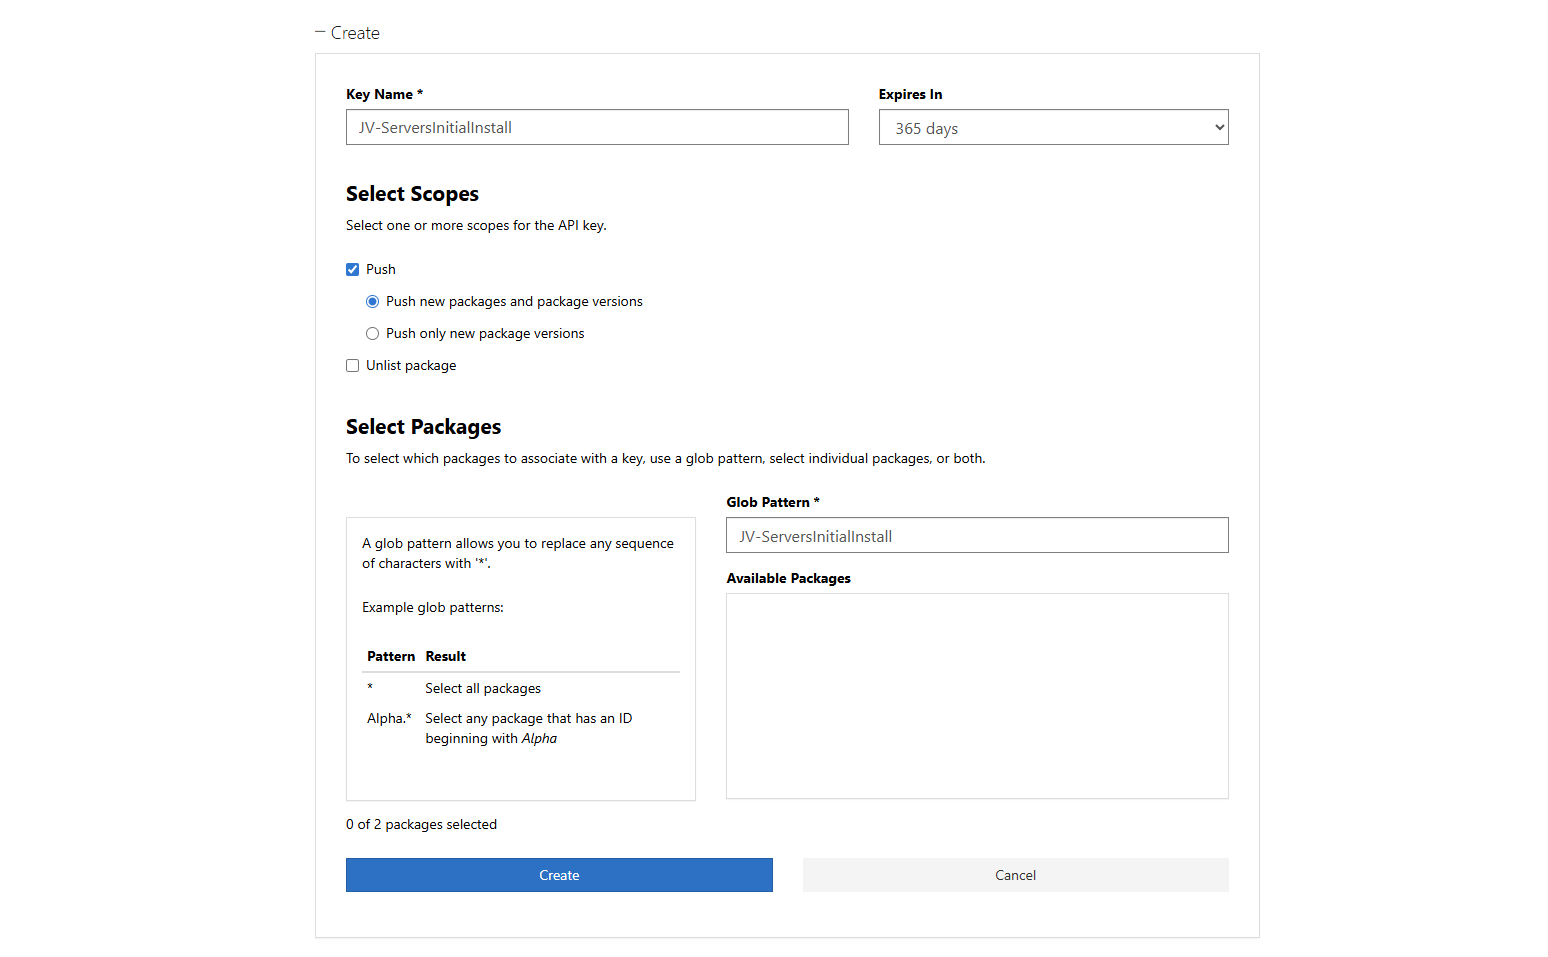
Click “Create” and that gives you the API key. You can only get the key now, so save it in a safe place like your Password manager.
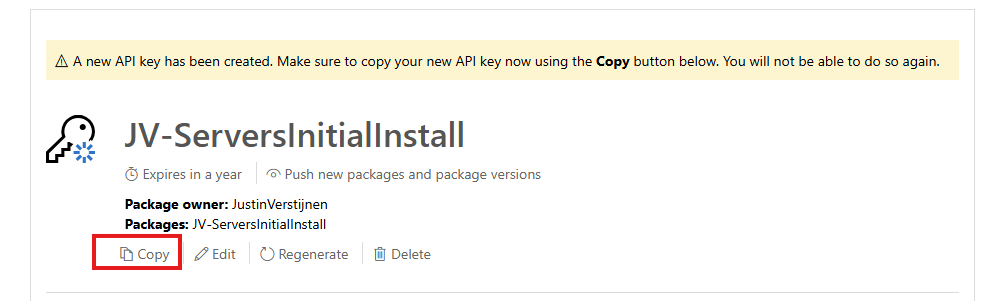
We need this API key in the next step.
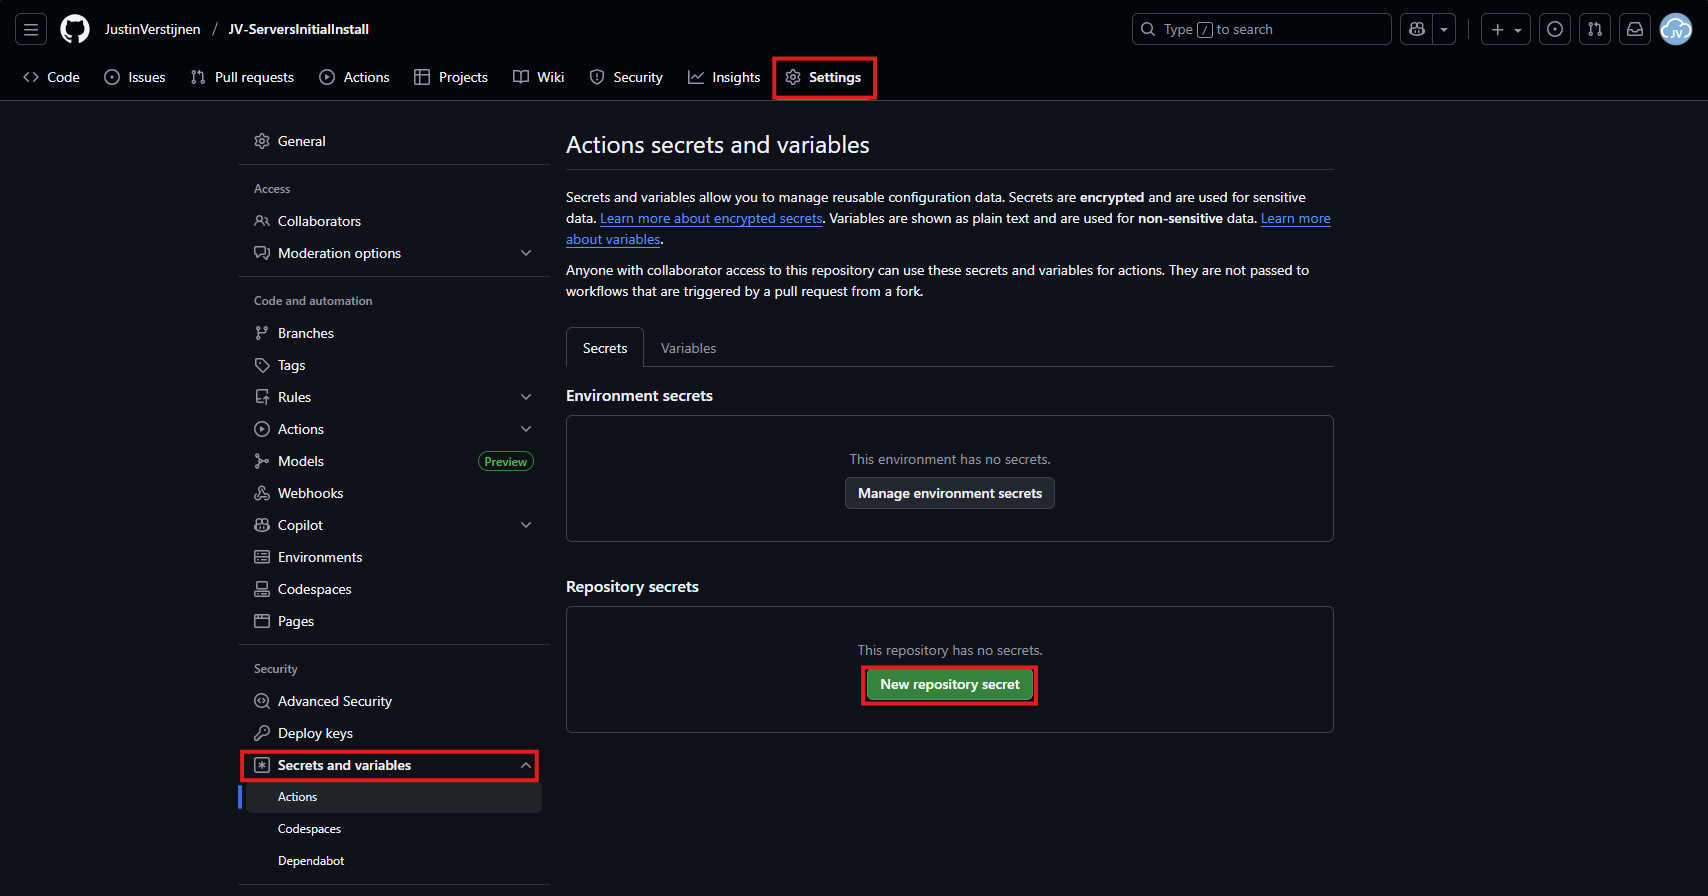
Step 4: Insert the API key
Now let’s head back to Github to insert our API key.
In your Github repository, go to “Settings”, then “Secrets and variables” and then create a new repository secret.
In the “Name” field, paste this:
JSON
PSGALLERY_API_KEYIn the “Secret” field, paste your just saved API key:
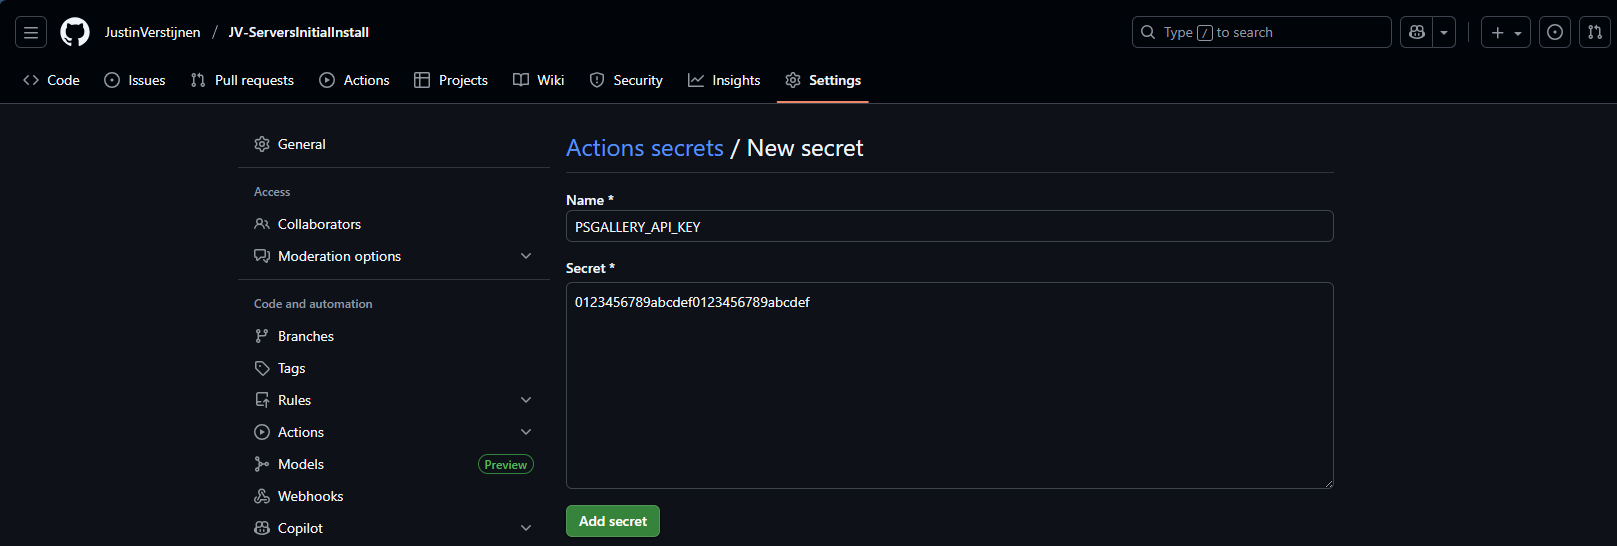
Click on “Add secret” to add the secret to your repository.
The API key is saved secretly, and in the code we refer to this secret. This is a best-practice to save API keys instead of plain text in your public code.
Step 5: Create your Github Action
Now we have the API key inserted, head back to the repository on Github and let’s create the Github Action that pushes our script automatically to the PowerShell Gallery.
An action is completely based on a single .yml (YAML) file which executes everytime the repository is changed. We will create this file now.
Click on “Add file” and then the option “Create new file”:
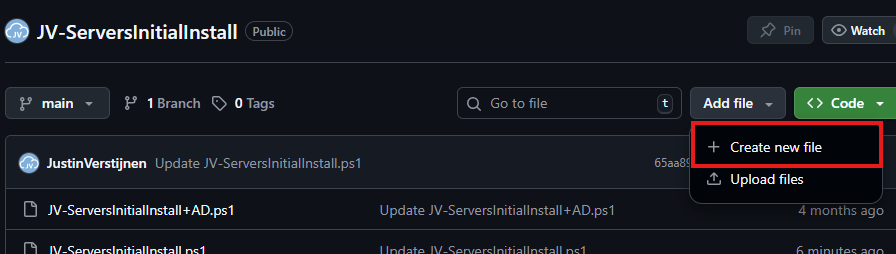
In the top-left corner, type or paste in:
JSON
.github/workflows/publish.ymlThen paste in this code below, which is a completely prepared action for exactly this use-case:
YAML
name: Publish PowerShell Script to PowerShell Gallery

on:
  push:
    branches:
      - main
    paths:
      - '**/*.ps1'
      - '.github/workflows/publish.yml'

jobs:
  publish:
    runs-on: windows-latest

    env:
      # Variables (change this to your script)
      SCRIPT_NAME: JV-ServersInitialInstall
      SCRIPT_PATH: ./JV-ServersInitialInstall.ps1
      DISPLAY_NAME: JV-ServersInitialInstall
      PSGALLERY_SECRET: ${{ secrets.PSGALLERY_API_KEY }}

    steps:
      - name: Checkout repository
        uses: actions/checkout@v4

      - name: Ensure NuGet and PowerShellGet are available
        shell: pwsh
        run: |
          Set-PSRepository -Name "PSGallery" -InstallationPolicy Trusted
          [Net.ServicePointManager]::SecurityProtocol = [Net.SecurityProtocolType]::Tls12

          if (-not (Get-PackageProvider -Name NuGet -ErrorAction SilentlyContinue)) {
              Install-PackageProvider -Name NuGet -MinimumVersion 2.8.5.201 -Force
          }

          Install-Module PackageManagement -Force -AllowClobber -Scope CurrentUser
          Install-Module PowerShellGet -Force -AllowClobber -Scope CurrentUser

      - name: Validate script metadata
        shell: pwsh
        run: |
          Test-ScriptFileInfo -Path "$env:SCRIPT_PATH"

      - name: Publish script to PowerShell Gallery
        shell: pwsh
        run: |
          $ErrorActionPreference = 'Stop'
          Publish-Script -Path "$env:SCRIPT_PATH" -NuGetApiKey "$env:PSGALLERY_SECRET" -Verbose

      - name: Confirm publication
        shell: pwsh
        run: |
          Write-Host "Successfully published $env:DISPLAY_NAME to PowerShell Gallery."
Change the information on lines 17, 18 and 19 to your own information and then save the file by clicking “Commit changes” in the top right corner. Make sure the script name and path exactly match your file name on the repository and do not change anything else.

For about a minute, this will show on the homepage of your repository:
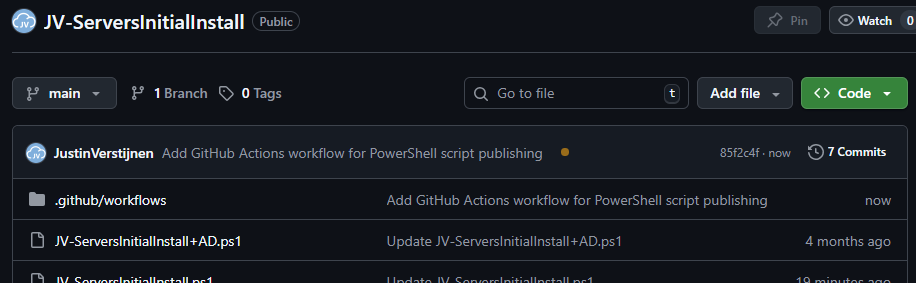
This means the Action is now actually processing the changes and publishing our new script. It will directly upload the script to the PowerShell Gallery for us.
Step 6: Checking the results
Now the the action has ran, and did not give any error. It must now be available on the PowerShell Gallery.

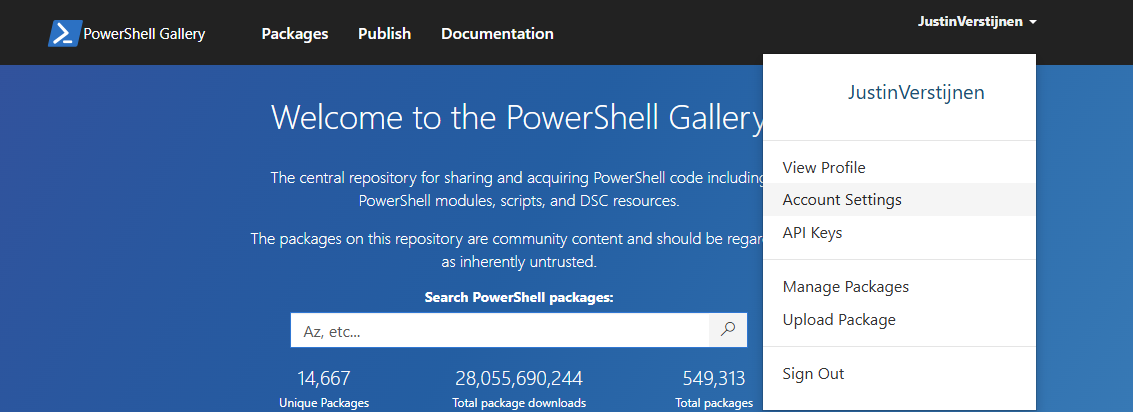
Lets head back to the PowerShell Gallery to check the status. Click on your profile, and then on “Manage Packages”.
Here we see that the packages has been uploaded:

If you click on it you get actual instructions to install the script on your computer and we will see the information we have added to the script:

Pretty cool in my opinion.
Step 7: Installing and testing the script
Now we have our script on the PowerShell Gallery, we can actually download and execute the script using some simple commands.
Do not execute my example script, unless you know what you are doing.
Open PowerShell on your testing environment and execute this command with your script name to install your newly uploaded script.
POWERSHELL
Install-Script -Name JV-ServersInitialInstallAfter executing this command you need to need to answer some questions:
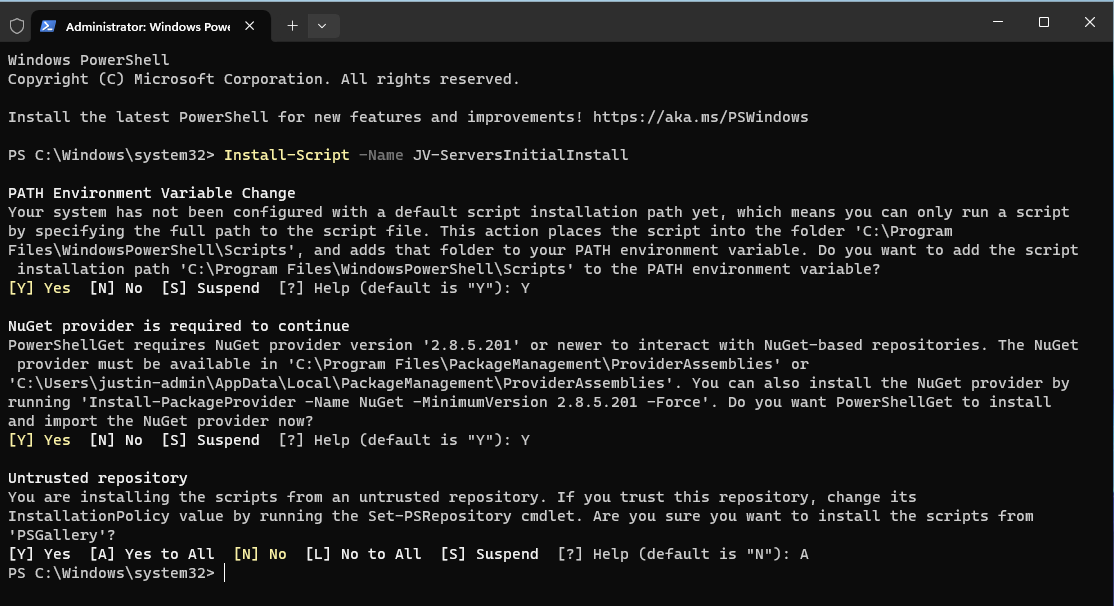
In order to actually run the script, you need to answer all with Yes/All.
After the script is installed, we can run it with your script name:
POWERSHELL
JV-ServersInitialInstall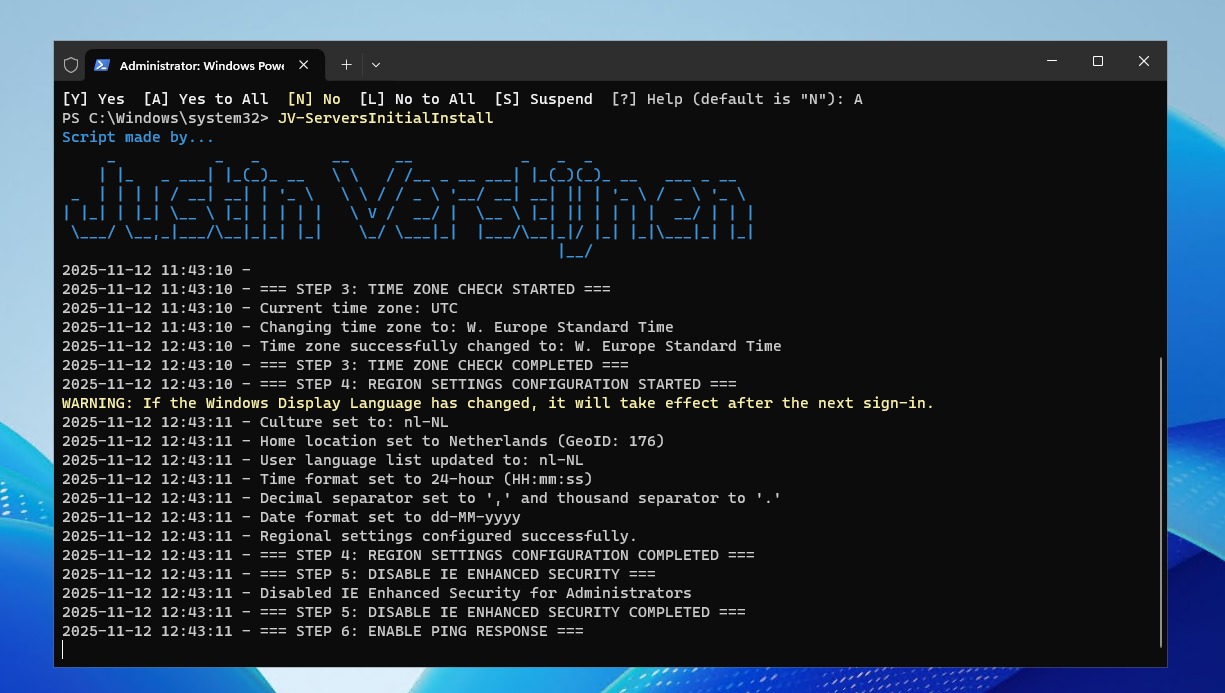
The script will run directly which is very nice and useful for mass use.
Conclusion
This setup for uploading scripts to the PowerShell Gallery is really great. We can change our script on one place and it will automatically upload to the live gallery for users to download.
Sources
These sources helped me by writing and research for this post;
- https://learn.microsoft.com/en-us/powershell/gallery/getting-started?view=powershellget-3.x
- https://docs.github.com/en/actions/get-started/understand-github-actions
Thank you for reading this guide and I hope it was helpful.
End of the page 🎉
You have reached the end of the page. You can navigate through other blog posts as well, share this post on X, LinkedIn and Reddit or return to the blog posts collection page. Thank you for visiting this post.
If you think something is wrong with this post or you want to know more, you can send me a message to one of my social profiles at: https://justinverstijnen.nl/about/
If you find this page and blog very useful and you want to leave a donation, you can use the button below to buy me a beer. Hosting and maintaining a website takes a lot of time and money. Thank you in advance and cheers :)
The terms and conditions apply to this post.
Create AD users with on demand script
Today I have a PowerShell script that creates users by asking the user what to fill in. This works by having a fully prepared “New-ADUser” command with all the properties filled in to have all users using the same attributes.
Today I have a PowerShell script that creates users by asking the user what to fill in. This works by having a fully prepared “New-ADUser” command with all the properties filled in to have all users using the same attributes.
I will explain how this script works on this page.
The create AD users on demand script
For the fast pass, the script can be downloaded from my GitHub page:
The script described
The script is relatively easy and consists of 4 steps:
- Importing the modules needed
- Asking the user about on what details the user must be created
- Making everything ready, creates the user and adds him to the defined security groups
- Prints everything in the command window for a summary
Parameters and Attributes
The script contains a set of pre-defined attributes which you can change to your own settings:
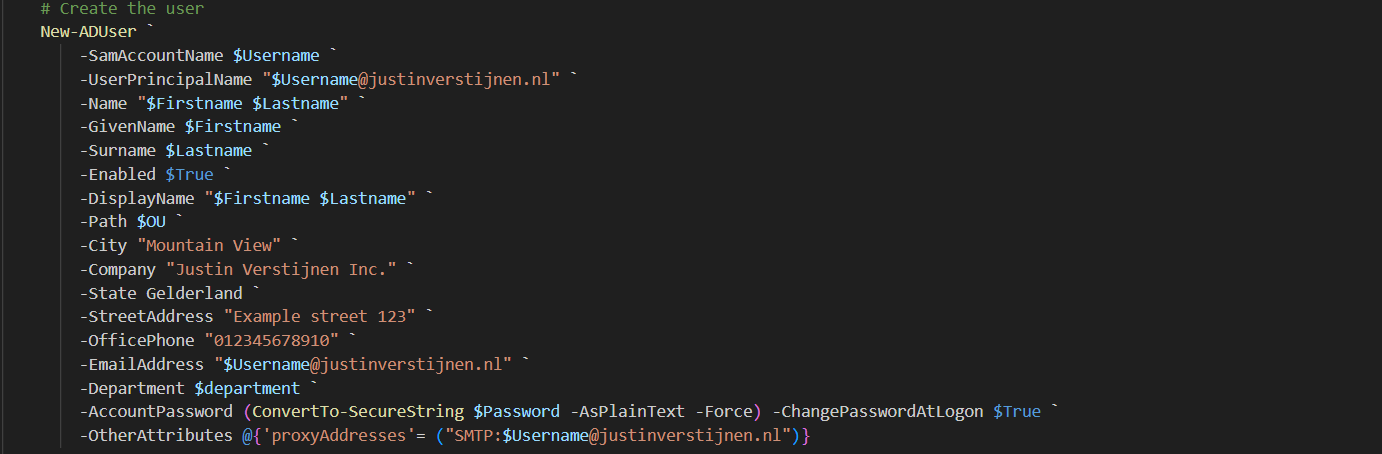
You can change all of these settings, but I advice you to not change any $variables because that will break the script.
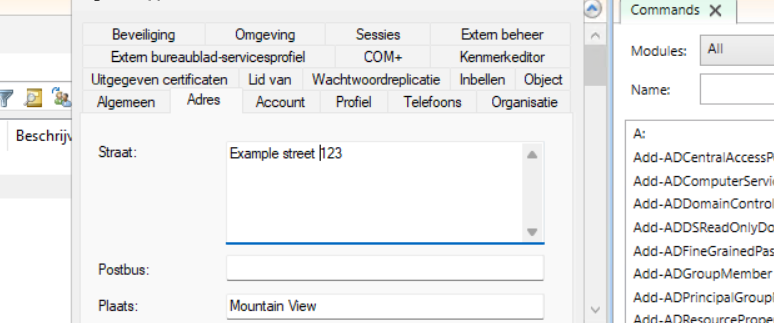
On line 12 to 14, you have a parameter that specifies the OU to create the user in:

Change this to your own OU when using. You can find this by enabling the “Advanced Features” in the “View” menu and then going to the OU properties and the “Attributes”.
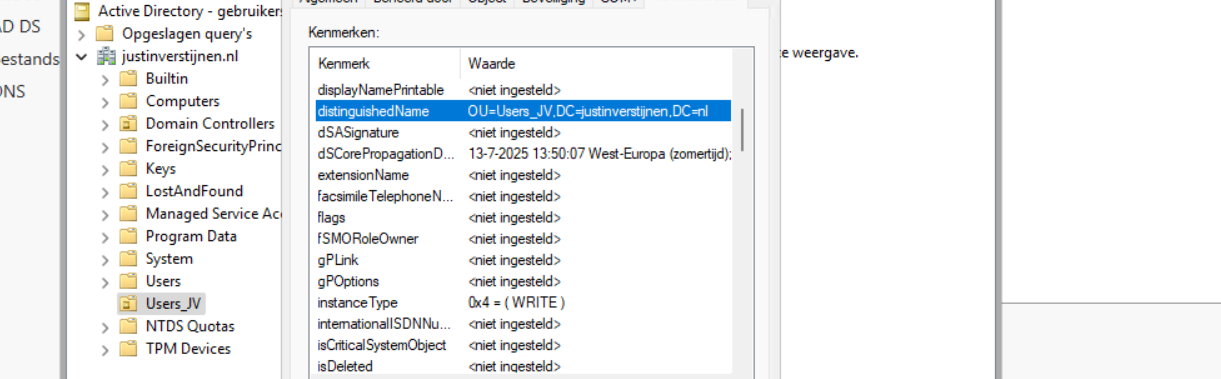
Search for the “DistinguishedName” attribute and copy that value.
Using the create AD users on demand script
To use my create ad users script, go to my GitHub page and download the script there:
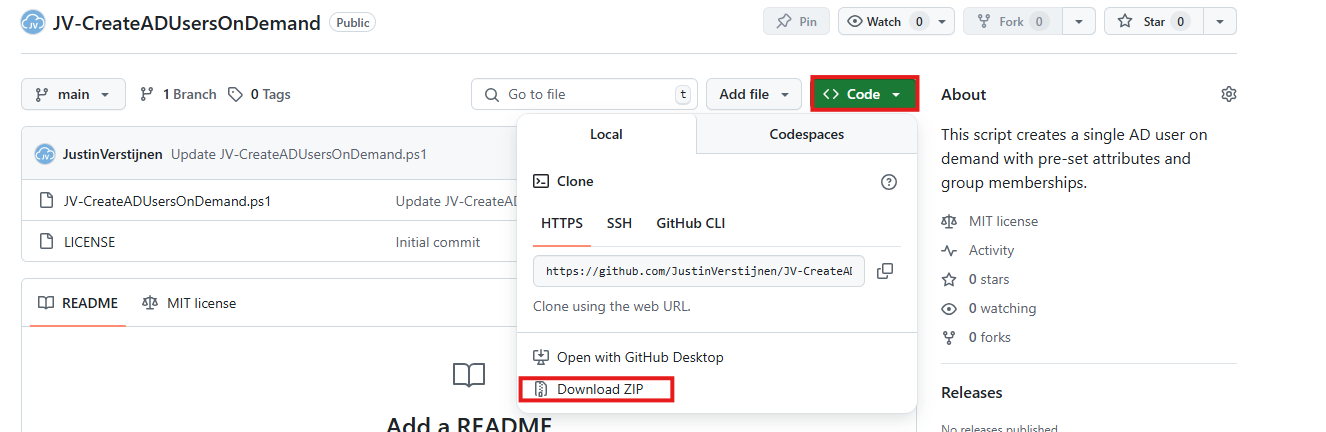
Click on “Code” and then on “Download ZIP”.
Then place the ZIP file on your Active Directory management server.
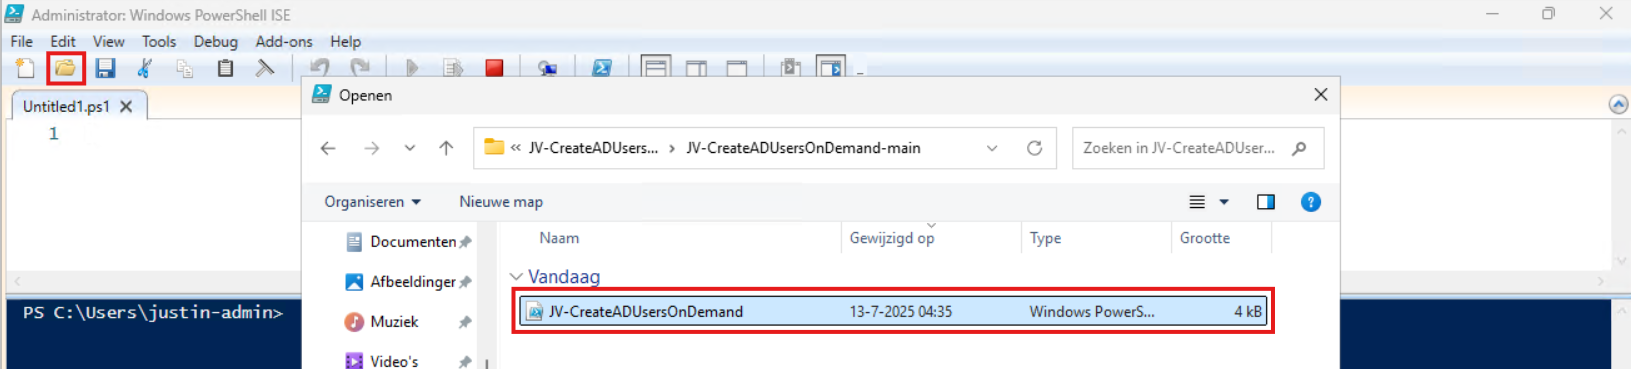
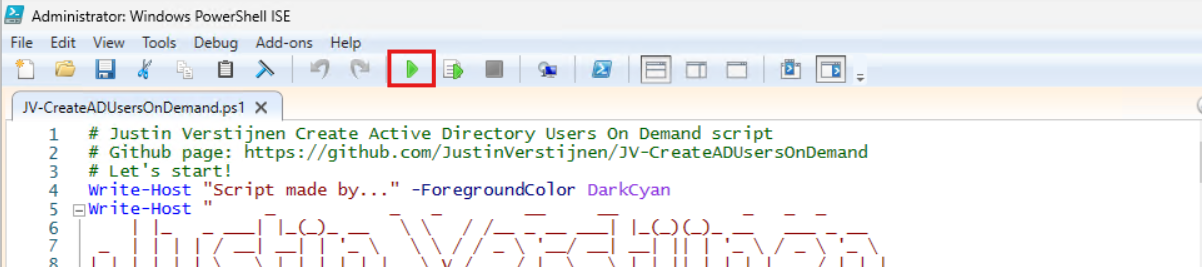
Open PowerShell ISE as Administrator:
Verify your credentials if needed and then use the “Open” function of PowerShell ISE and open the script file:
Review:
- The parameters and set the correct OU (line 12 to 14)
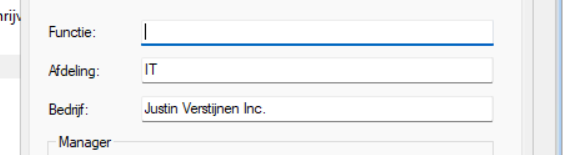
- The attributes for the user (line 41 to 57)
Correct those if needed.
Before we can run the script, we have to do a one-time bypass for the Powershell Execution Policy by typing the command in the blue window below:
POWERSHELL
Set-ExecutionPolicy Unrestricted -Scope ProcessThis way the execution policy stays enabled but for this session only it’s been lowered. When you close the window, you have to type this again before be able to run scripts.
Execute the command, and when prompted to lower the policy, click Yes.
Now we can run the script itself by clicking the green “Play” button.
Now the script will ask the details for the user:
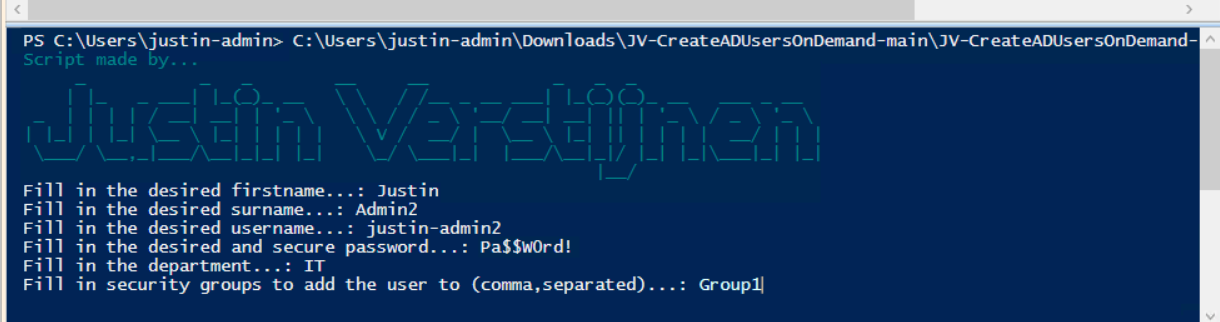
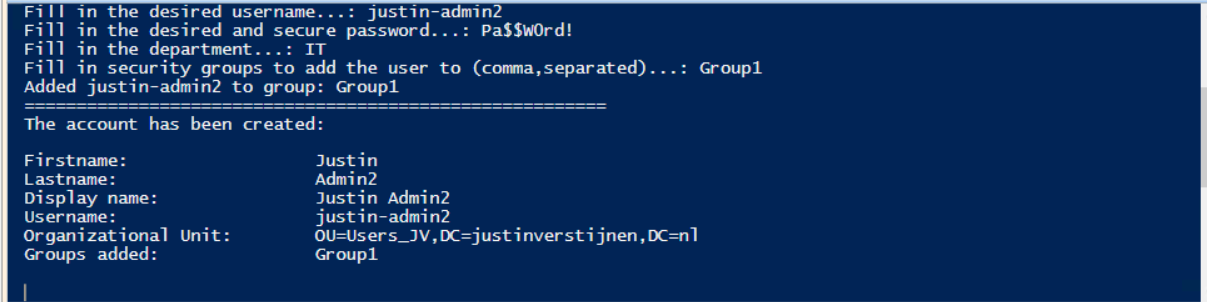
After filling this in and hit Enter, the user will be created almost instantly:
Now let’s take a look in the Active Directory Users and Computers snap-in (dsa.msc):
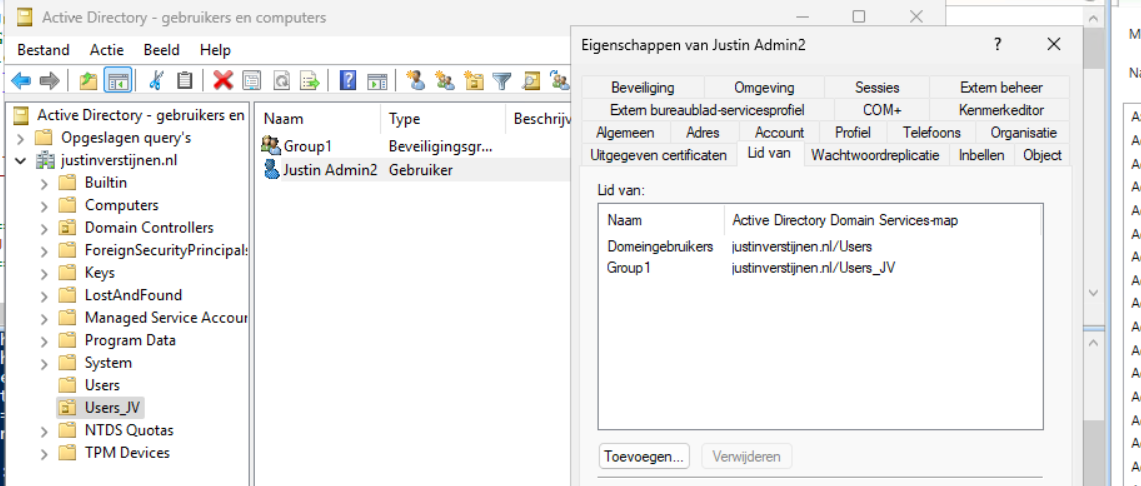
The user is succesfully created in the desired OU and Group1 has been added to the member of list. Also the extra attributes has been added to the user:
Summary
This script can ultimately be used when all users must be created in the same way. Let’s say, the emailaddress field must always be filled in, or the address or department. Those are steps that often will be skipped in real life. Using a pre-determined script will ensure this is always filled in.
Thank you for reading this post and I hope it is helpful.
Sources
These sources helped me by writing and research for this post;
End of the page 🎉
You have reached the end of the page. You can navigate through other blog posts as well, share this post on X, LinkedIn and Reddit or return to the blog posts collection page. Thank you for visiting this post.
If you think something is wrong with this post or you want to know more, you can send me a message to one of my social profiles at: https://justinverstijnen.nl/about/
If you find this page and blog very useful and you want to leave a donation, you can use the button below to buy me a beer. Hosting and maintaining a website takes a lot of time and money. Thank you in advance and cheers :)
The terms and conditions apply to this post.
How to Export Active Directory (AD) users fast and easy
Sometimes we need to export all of our AD users. The one time for applying changes, sometimes for monitoring the inventory but often for licensing purposes.
At this page I will show you how to export all your AD users fast and easy.
The Export AD users script:
For the fast pass, I uploaded the script to my Github page:
How to export the AD users by hand
To export the users without using a script, navigate to your Active Directory management server and open up Powershell. We will do all the action the script above does, but then by hand and type in every command separately.
Type in the first command to ensure the correct module is loaded:
POWERSHELL
Import-Module ActiveDirectoryThen we can execute the command to query all AD users:
POWERSHELL
$adusers = Get-ADUser -filter * -Properties UserPrincipalName,Mobile,Givenname,sn,name | select UserPrincipalName,Mobile,Givenname,sn,nameThis saves all the users in the $adusers variable. Now let’s print this list:
POWERSHELL
$adusersThis shows all users in the PowerShell window itself, but we are able to export this to a CSV file:
POWERSHELL
$adusers | Export-Csv "C:\Users\$env:USERNAME\Desktop\AD_Export.csv" -NTI -Delimiter ";"This gives us a nice and “Excel-ready” export of all the AD users. It is also very clean, but you can add or remove extra attributes from Active Directory from the second command.
For a complete list of all the attributes that can be used, visit this Microsoft Learn article.
Summary
This page shows an easy way to export all your AD users in a great and readable way. It also has some possibilities for customization but it shows how to do it in the most simple way possible. I also included a automatic way and a manual/by hand way to learnexactly what happens.
Thank you for reading and I hope it was helpful.
Sources
These sources helped me by writing and research for this post;
- https://learn.microsoft.com/en-us/powershell/module/activedirectory/get-aduser?view=windowsserver2025-ps#filter
- https://learn.microsoft.com/en-us/powershell/scripting/learn/ps101/03-discovering-objects?view=powershell-7.5#active-directory
End of the page 🎉
You have reached the end of the page. You can navigate through other blog posts as well, share this post on X, LinkedIn and Reddit or return to the blog posts collection page. Thank you for visiting this post.
If you think something is wrong with this post or you want to know more, you can send me a message to one of my social profiles at: https://justinverstijnen.nl/about/
If you find this page and blog very useful and you want to leave a donation, you can use the button below to buy me a beer. Hosting and maintaining a website takes a lot of time and money. Thank you in advance and cheers :)
The terms and conditions apply to this post.
Set correct language and timezone on Azure VM
By default, all Azure VMs are set to English language and UTC/Zulu timezone. This will work for a great portion of the Azure VM users but…
By default, all Azure VMs are set to English language and UTC/Zulu timezone. This will work for a great portion of the Azure VM users but there are users in other parts of the world too. Like in the Netherlands, where I live we are 1 or 2 hours ahead of that timezone depending on the season.
Also, in the case of Azure Virtual Desktop, we want to present our users their native language as system language. For this case, I have made a script to correct those settings.
The script to set the language and timezone on Azure VM
For the fast pass, I have the script here:
Download the script from GitHub
The script steps described
The script consists of 7 steps:
- Ensuring the script runs as Administrator
- Querying current language (as it must remove it later on)
- Installing the new language pack
- Change the system language and regional settings
- Sets new timezone
- Sets new language for all current and new users
- Removing old language and reboots VM
Using the script
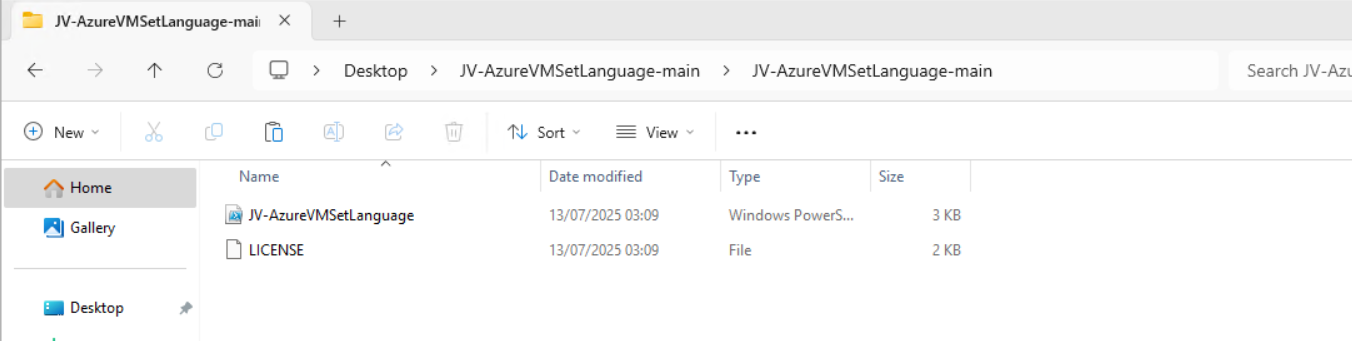
To use my script, download it from Github and place it on your newly created or existing Azure VM.
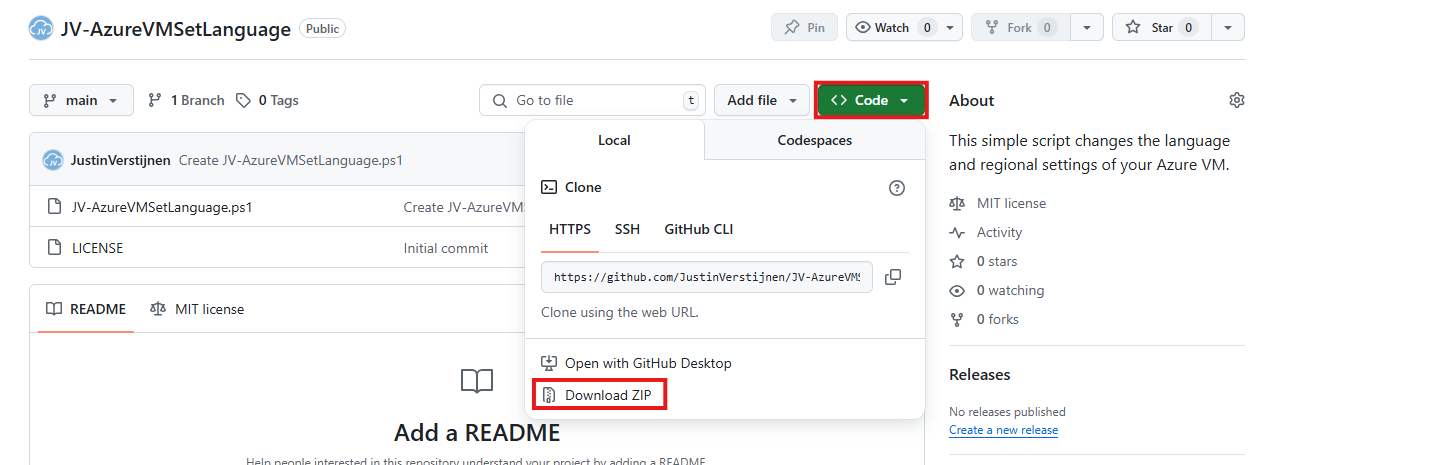
Click on “Code” and then on “Download ZIP”.
Place the ZIP file on your server. Then unzip it so we can navigate to the script itself.
Now we can execute this script. The easiest way is to open the PowerShell ISE version as this eliminates navigating to the script by hand.
Open PowerShell ISE as Administrator:
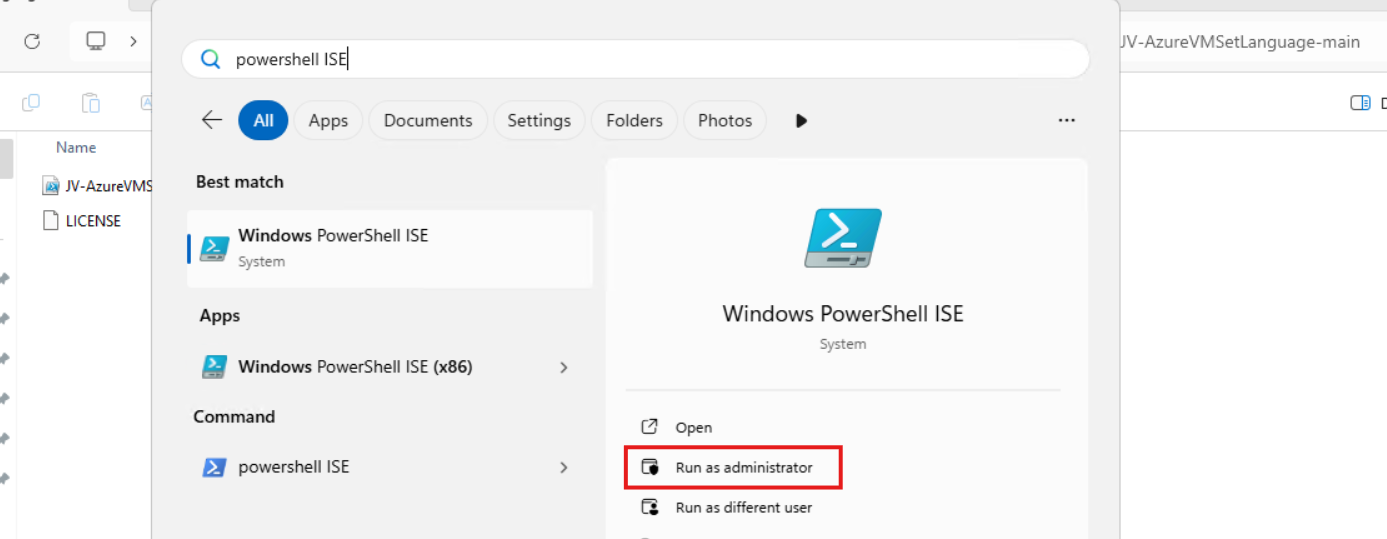
Verify your credentials if needed and then use the “Open” function of PowerShell ISE and open the script file:
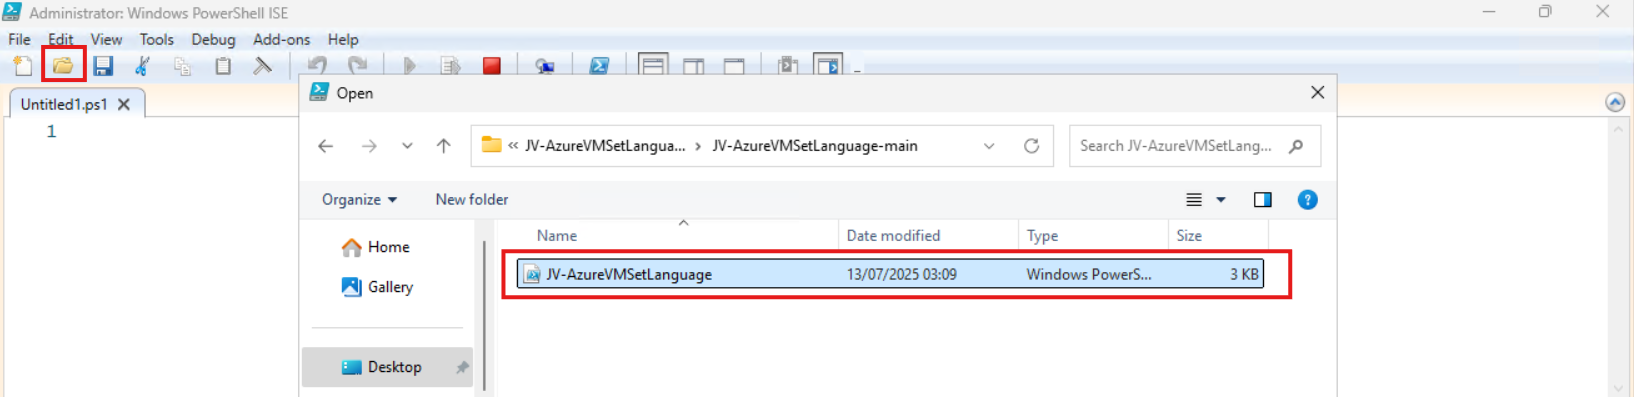
The script will now be opened and review the parameters on line 12 till 16:

By default, everything is set to “Dutch” but you can change them. I added links to the corresponding artices of Microsoft to quickly lookup what your settings must be. The links are also added to the sources at the bottom of this post.
Before we can run the script, we have to do a one-time bypass for the Powershell Execution Policy by typing the command in the blue window below:
POWERSHELL
Set-ExecutionPolicy Unrestricted -Scope ProcessThis way the execution policy stays enabled but for this session only it’s been lowered. When you close the window, you have to type this again before be able to run scripts.
Execute the command, and when prompted to lower the policy, click Yes.

Now we can run the script itself by clicking the green “Play” button.
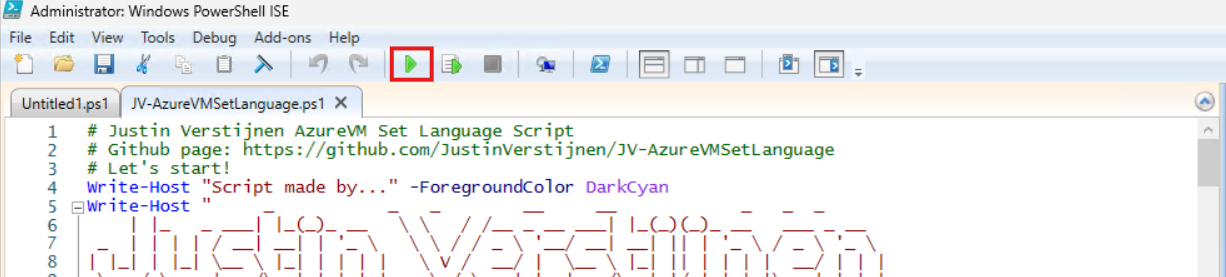
The script can take up to 20 minutes, so have a little patience.
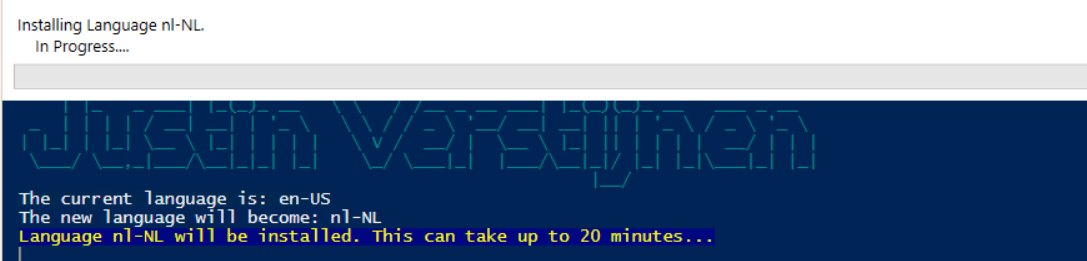
After every task is completed the server will reboot and you will be presented with the new settings.
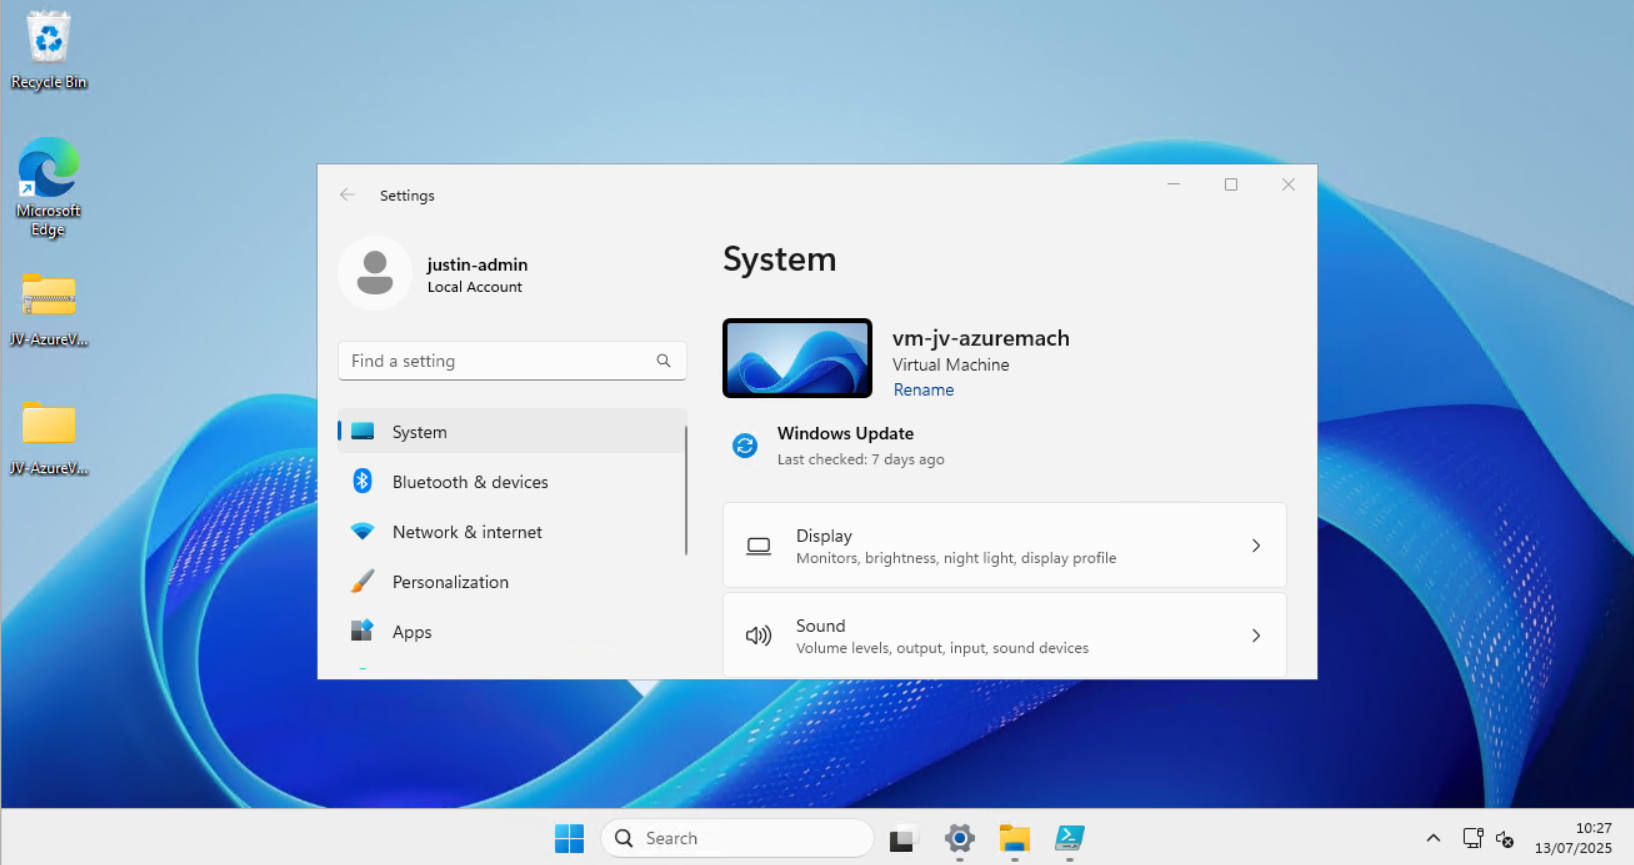
Before and after the script
Before the script ran, my machine looked like this:
After the script ran, my machine looked like this:
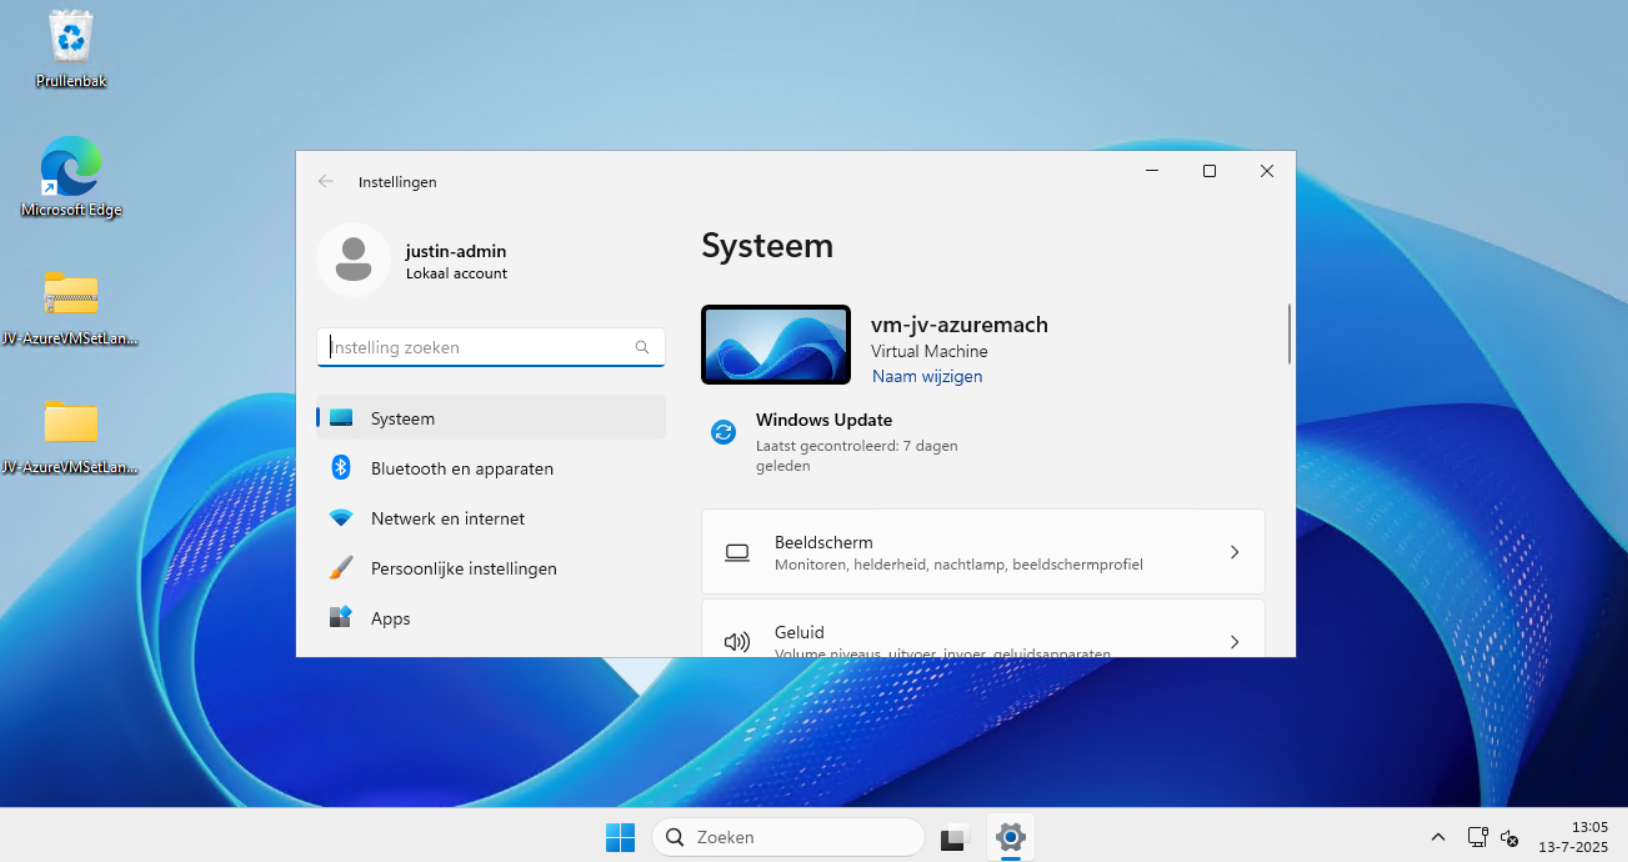
Perfectly in Dutch settings and ready to go.
Setting 24 hour-clock
Because of usability of my script, I did not include the use of the 24 hour clock because Windows does this because of the culture settings. If wanting to set this manually, you can execute these commands in PowerShell manually:
POWERSHELL
$24hclock = Get-UICulture

($24hclock.DateTimeFormat).ShortTimePattern = 'HH:mm'

Set-Culture $24hclock
This sets the time indication to 24-hour clock system.
Summary
In the beginning of creating Azure VMs this was something I found to be annoying. This was exactly the reason I wrote the script. This is especially useful when deploying Azure Virtual Desktop machines, as you want to present the users with their native language. We IT guys often like the systems in English so for us, it’s no problem.
I hope the script is useful and thank you for reading.
Sources
These sources helped me by writing and research for this post;
- https://learn.microsoft.com/en-us/linkedin/shared/references/reference-tables/language-codes
- https://learn.microsoft.com/en-us/windows-hardware/manufacture/desktop/default-time-zones?view=windows-11#time-zones
- https://learn.microsoft.com/en-us/windows/win32/intl/table-of-geographical-locations
- https://learn.microsoft.com/en-us/powershell/module/languagepackmanagement/set-systempreferreduilanguage?view=windowsserver2025-ps
End of the page 🎉
You have reached the end of the page. You can navigate through other blog posts as well, share this post on X, LinkedIn and Reddit or return to the blog posts collection page. Thank you for visiting this post.
If you think something is wrong with this post or you want to know more, you can send me a message to one of my social profiles at: https://justinverstijnen.nl/about/
If you find this page and blog very useful and you want to leave a donation, you can use the button below to buy me a beer. Hosting and maintaining a website takes a lot of time and money. Thank you in advance and cheers :)
The terms and conditions apply to this post.
Azure Stack HCI - Host your Virtual Desktops locally
Azure Stack HCI is a solution for Microsoft Azure to host Azure resources on your own hardware and location. This soun…
Introduction to Azure Stack HCI
Azure Stack HCI is a solution for Microsoft Azure to host Azure resources on your own hardware and location. This sounds traditional but can help to boost your Azure resources for your customer and/or use case.
For example, with Azure Stack HCI it is possible to host some Azure Virtual Desktop hosts in your own network to boost performance by decreasing latency. Also it is possible to use GPU enabled software on this.
Azure Stack HCI became part of Azure Local after writing this post, see more information here: https://azure.microsoft.com/en-us/products/local
Supported Azure Services
The supported Azure services at the moment of writing are:
- Windows and Linux VMs
- Azure Virtual Desktop session hosts
- Containers
- AKS (Azure Kubernetes Services)
- SQL
- Azure Functions
- Logic Apps
- Event Grid
- And more: https://azure.microsoft.com/en-us/products/azure-stack/hci/
Requirements to follow this guide
You need the following to follow this guide and make sure to minimize errors:
- 2 Physical/Virtual servers for Azure Stack HCI nodes (1 for the single node cluster setup further in this guide)
- 1 Domain Controller server
- Powershell module AsHciADArtifactsPreCreationTool installed
- Azure CLI installed
- An ISO for Azure Stack HCI (Download from Azure Portal)
- An Azure subscription where you have the following permissions
- Key Vault Contributor
- Windows Admin Center Admin Login
- Contributor
- A resource group in Azure where you have the following permissions
- Key Vault Data Access Administrator
- Key Vault Secrets Officer
- Key Vault Contributor
- Storage Account Contributor
- A Azure storage account which is the cluster witness (needed for quorum)
In my guide, i will focus on creating a cluster with 2 nodes. I have included and tested the steps to create a single-server cluster too:
Multi node cluster setup Single node cluster setup
My environment
My environment consists of one physical server with 3 VMs on it. In a production environment it is better to physically segment the HCI cluster nodes to multiple fault domains. This setup is purely for educational purposes. In production environments, one hardware error will result in 100% outage
I create a Multi-node server cluster to experiment with Stack HCI. The environment looks like this.
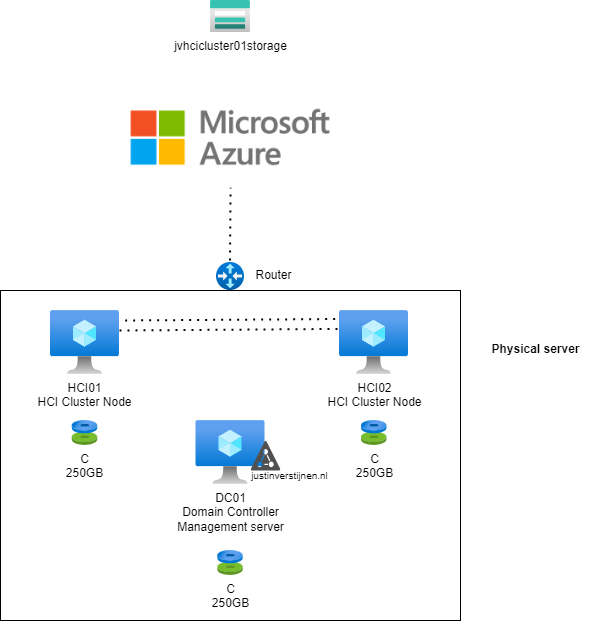
- 2 nodes (HCI01 and HCI02)
- 1 domain controller (DC01)
- In Azure: 1 storage account
In Azure i have a single resource group where i want to deploy my cluster into:
1. Multi-node setup guide
1.1 Installing nodes for the cluster
The installation of Azure Stack HCI is very straight-forward, and the same as installing Windows 11 or Windows Server. At the time you follow this guide i think you understand how to do this.
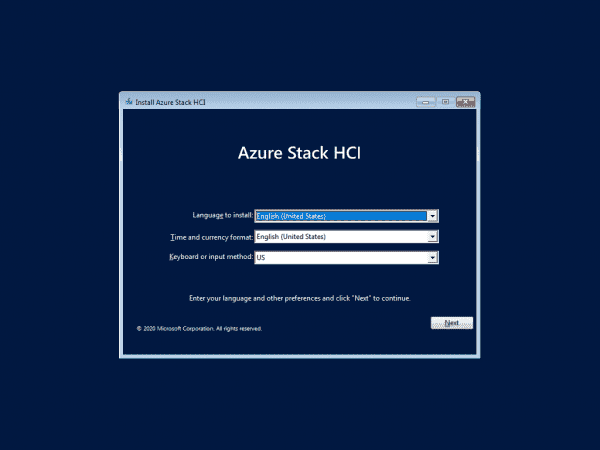
Install Azure Stack HCI on both of the nodes. Sit back or get a cup of coffee because this will take around 15 minutes :). To not waste time, my advice is to prepare the Active Directory during the installation.
1.2 Prepare Active Directory
We have to prepare our Active Directory for the coming change, the introduction of a new Cluster. This cluster will be settled in its own OU for future machines. Unfortunately, this OU cant be created through the GUI and has to be created with PowerShell.
Create a new Active Directoy forest when you don’t have one.
On the domain controller/management server, you have to first install the following Powershell module:
POWERSHELL
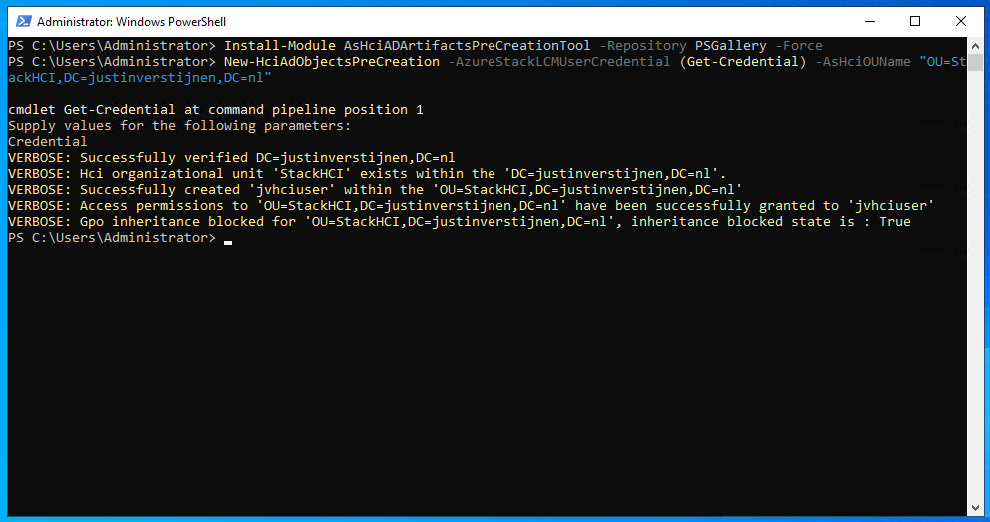
Install-Module AsHciADArtifactsPreCreationTool -Repository PSGallery -ForceAfter that, create a new OU for your HCI nodes by using the HCI module (only possible with this module). Change the name of your desired OU to your needs. I created it with the command below:
POWERSHELL
New-HciAdObjectsPreCreation -AzureStackLCMUserCredential (Get-Credential) -AsHciOUName "OU=StackHCI,DC=justinverstijnen,DC=nl"At the credential section, you have to specify a new user who can manage the HCI cluster and is used as service account. The user must comply with the following requirements:
- No special characters in username
- Password must me 12 characters at minimum
- Username may NOT be in DOMAIN\User or USER@DOMAIN format
I created my user like shown below:
The module accepted my account:
When going to the Active Directory Users and Computers center, you see the changes are processed succesfully:
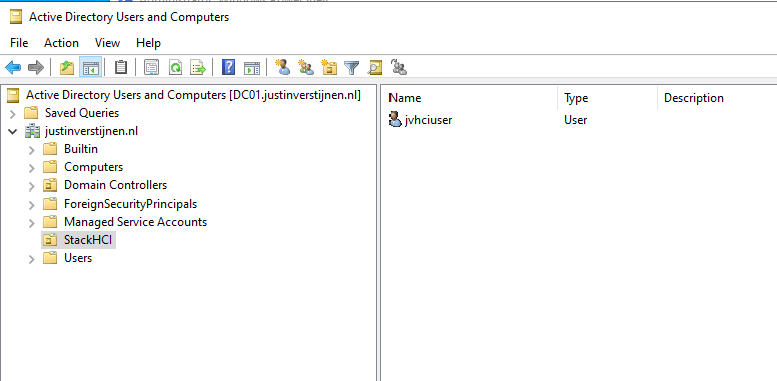
Now we have configured the Active Directory and we can go on to configure the cluster nodes.
1.3 Preparing the cluster nodes
After the installation and preparation of the nodes we can perform a default configuration of the nodes through sconfig:
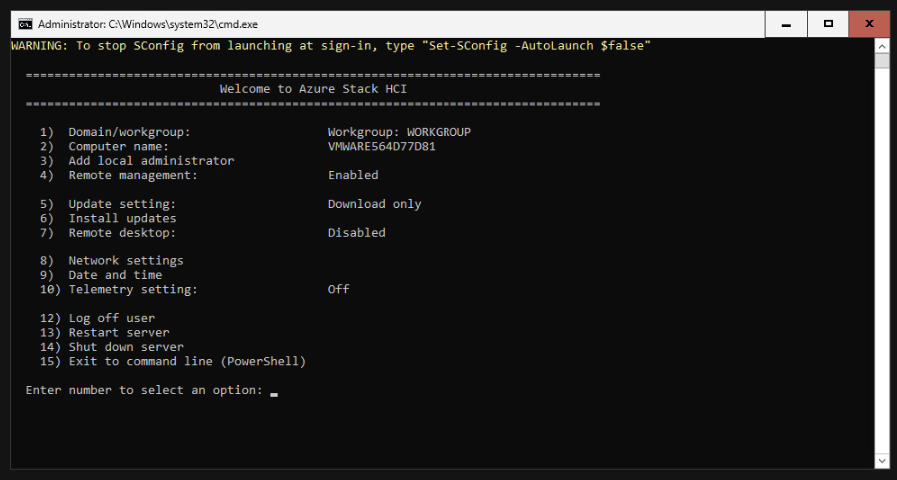
This menu is the same as on server-core installations of Windows Server. Navigate through the menu by using the numbers and the extra options you get afterwards.
I have done the following steps on both of the nodes:
- Changed computer-name
- Downloaded the latest updates
- Enabled remote-management and enabled response to Ping (4 -> 3)
- Changed DNS server to:
- Preferred server: my domain controller
- Alternate server: DNS of my ISP provider
Note: do NOT join your nodes to Active Directory, otherwise the wizard to create a cluster will fail.
The result after these steps.
After the basic configuration of the nodes is complete, we have to do the following pre-configuration steps on every node:
Install Hyper-V (needed for virtualization purposes)
POWERSHELL
Enable-WindowsOptionalFeature -Online -FeatureName Microsoft-Hyper-V -AllAfter installation of this feature, restart the node. You can do this with the following command:
POWERSHELL
Restart-ComputerWhen the node is restarted, install the needed Powershell modules. Install these on all of the nodes.
POWERSHELL
Install-Module AzsHCI.ARCinstaller -Force
Install-Module Az.Accounts -Force
Install-Module Az.ConnectedMachine -Force
Install-Module Az.Resources -Force
After installing all the needed modules, we can register every node to Azure Arc. We can perform this by running the commands below and change the parameters:
POWERSHELL
$AzureSubscription = "SUBSCRIPTION ID"
$AzureTenantID = "TENANT ID"

Connect-AzAccount -SubscriptionId $AzureSubscription -TenantId $AzureTenantID -DeviceCode
Now you have to login via the Device code on a browser on your local computer or management server. This is because the Azure Stack HCI operating system doesn’t have a browser and doesn’t support interactive login.
Now we have to run another command with parameters:
POWERSHELL
$AzureResourceGroup = "Resource Group Name"
$AzureARMtoken = (Get-AzAccessToken).Token
$AzureAccountID = (Get-AzContext).Account.Id

Invoke-AzStackHciArcInitialization -SubscriptionId $AzureSubscription -ResourceGroup $AzureResourceGroup -TenantId $AzureTenantID -Region westeurope -ArmAccessToken $AzureARMtoken -AccountID $AzureAccountID -Cloud "AzureCloud"
Now the node will be registered to Azure Arc. This will take around 10 minutes.

After some minutes, the nodes appear in the Azure portal:
Now we have achieved this, we don’t need the nodes anymore and we can close the connections to it. The rest of the cluster/node configuration will be done in the Azure Portal. This was just the setup of the nodes itself.
After the machines appear in the Azure Portal, the service will install the needed extensions on all of the cluster nodes. You can’t go further before all the extensions are installed. You can follow the status by clicking on one of the cluster nodes and the open the blade “Extensions”.
All of the nodes must have at least 3 extensions and the status must be “Succeded”.
1.4 Creating the cluster in the Azure Portal
Now we have prepared everything, and we can create the cluster in the Azure portal now.
Go to Azure Arc and open the blade “Azure Stack HCI”:
Select the option “Deploy cluster”
We now have to fill in some details. Next to a HCI cluster, Azure needs a Key Vault to store some secrets for encryption purposes. We have to create that in this wizard:
After that, we have to validate our cluster nodes by Azure to check if all pre-requisites are done:
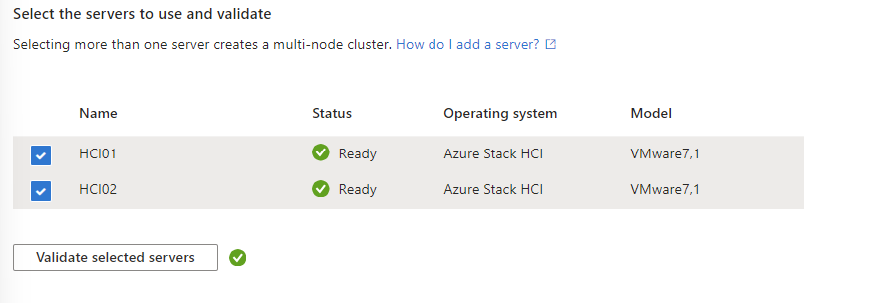
After succesfully validating the nodes, we can go further in the wizard.
On the tab “Configuration”, i chose for a new configuration:
On the tab “Networking”, i chose for “Network switch for storage”. This means if there is a network switch between the servers. In my environment, i am using VMware as Hypervisor for my cluster nodes. This has a internal switching system and has no direct link to the PCIe connected network interface.
Further, you have the option to segment your cluster network by using different network links for:
- Management
- Traffic between nodes
- Storage network
In my environment i chose to group all traffic. In real world and business critical environments, it is often better to segment the traffic to increase performance and security.
After that step, we have to configure network connectivity. Select the network interface and at the IP configuration section, keep in mind at the DNS servers you need connection to your domain controller.
When everything is filled in correctly, we can advance to the “Management” tab.
At the Management Tab, you can define a location name tag. After that you need to define your storage account which will be used to keep the cluster online when a node is offline. In clustering, you always need to have your cluster online for 50% of your nodes + 1 witness.
Then we have to configure our Active Directory domain and OU. The OU has to be the distinguished name which you can find by using the “Attribute Editor” tab on a OU in Active Directory.
Also we have a deployment account and a local administrator account:
- Deployment account: is the account we created in step 1.2
- Local administrator: is the account on the cluster nodes we created after installation of Stack HCI OS
Fill in those details and click Next: Security
We want the highest level of security, so we choose the recommended settings:
After that we can go to the tab “Validation”. Here we have to validate the complete configuration of the cluster:
2. Steps for creating a single-node cluster
Microsoft doesn’t officially support a single node cluster, but you can create this. When you want to configure this, most of the steps must be done in PowerShell.
For testing, this is a great way to explore the service. My advice in a production environment is to use 2 or more nodes at minimum.
2.1 Testing cluster configuration prior to creating
To test your current configuration of all nodes, run a pre-creation check. A cluster has to succeed all the validation tests, otherwise the configuration is not supported by Microsoft and therefore not production-ready.
On the Management-server, run the following command:
POWERSHELL
Test-Cluster -Node HCI01 -Include "Storage Spaces Direct", "Inventory", "Network", "System Configuration"Te result i got is the following:
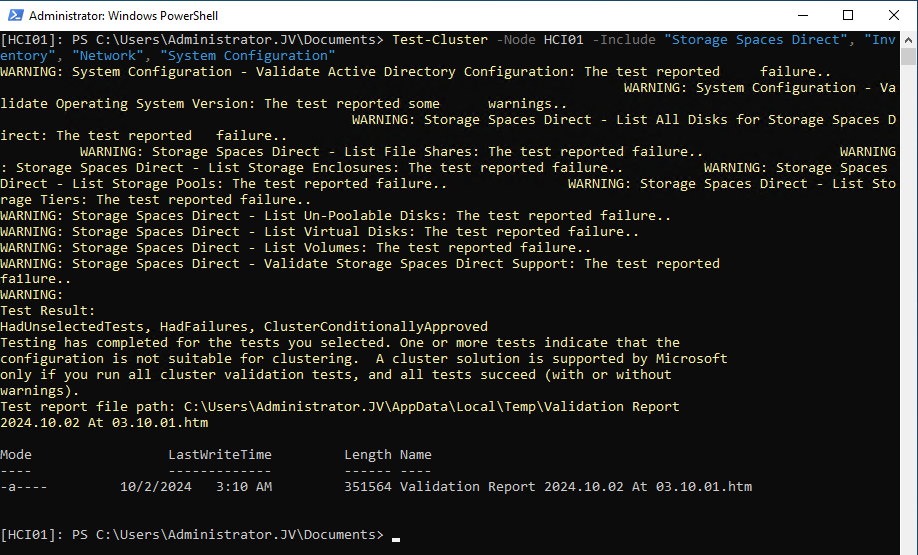
It gives us the steps we have to fix first before creating the cluster. We get the warnings because at this point we didn’t have everything configured. The following components needs configuration
- Active Directory
- Operating System version
- Storage Spaces Direct
2.2 Prepare Active Directory
Create a new Active Directoy forest when you don’t have one.
Then, install the needed HCI Powershell module when you don’t have it already:
POWERSHELL
Install-Module AsHciADArtifactsPreCreationTool -Repository PSGallery -ForceAfter that, create a new OU for your HCI nodes by using the HCI module (only possible with this module). Change the name of your desired OU to your needs. I created it with the command below:
POWERSHELL
New-HciAdObjectsPreCreation -AzureStackLCMUserCredential (Get-Credential) -AsHciOUName "OU=StackHCI,DC=justinverstijnen,DC=nl"At the credential section, you have to specify a new user who can manage the HCI cluster and is used as service account. The user must comply with the following requirements:
- No special characters in username
- Password must me 12 characters at minimum
- Username may NOT be in DOMAIN\User or USER@DOMAIN format
I created my user like shown below:
The module accepted my account:

2.3 Prepare the drives
Before creating the cluster we have to prepare the drives for using Storage Spaces Direct. THis means, clearing them, setting them to read/write mode and setting them as “Primordial”
This can be done with the following commands:
On the management-server, define all your cluster nodes by using their computer name of Active Directory:
POWERSHELL
$ServerList = "HCI01"Then prepare the drives with these commands (run all at once) with the following commands:
POWERSHELL
Invoke-Command ($ServerList) {
    Update-StorageProviderCache
    Get-StoragePool | ? IsPrimordial -eq $false | Set-StoragePool -IsReadOnly:$false -ErrorAction SilentlyContinue
    Get-StoragePool | ? IsPrimordial -eq $false | Get-VirtualDisk | Remove-VirtualDisk -Confirm:$false -ErrorAction SilentlyContinue
    Get-StoragePool | ? IsPrimordial -eq $false | Remove-StoragePool -Confirm:$false -ErrorAction SilentlyContinue
    Get-PhysicalDisk | Reset-PhysicalDisk -ErrorAction SilentlyContinue
    Get-Disk | ? Number -ne $null | ? IsBoot -ne $true | ? IsSystem -ne $true | ? PartitionStyle -ne RAW | % {
        $_ | Set-Disk -isoffline:$false
        $_ | Set-Disk -isreadonly:$false
        $_ | Clear-Disk -RemoveData -RemoveOEM -Confirm:$false
        $_ | Set-Disk -isreadonly:$true
        $_ | Set-Disk -isoffline:$true
    }
    Get-Disk | Where Number -Ne $Null | Where IsBoot -Ne $True | Where IsSystem -Ne $True | Where PartitionStyle -Eq RAW | Group -NoElement -Property FriendlyName
} | Sort -Property PsComputerName, Count
This will give no output when succeeded:
2.4 Creating the cluster
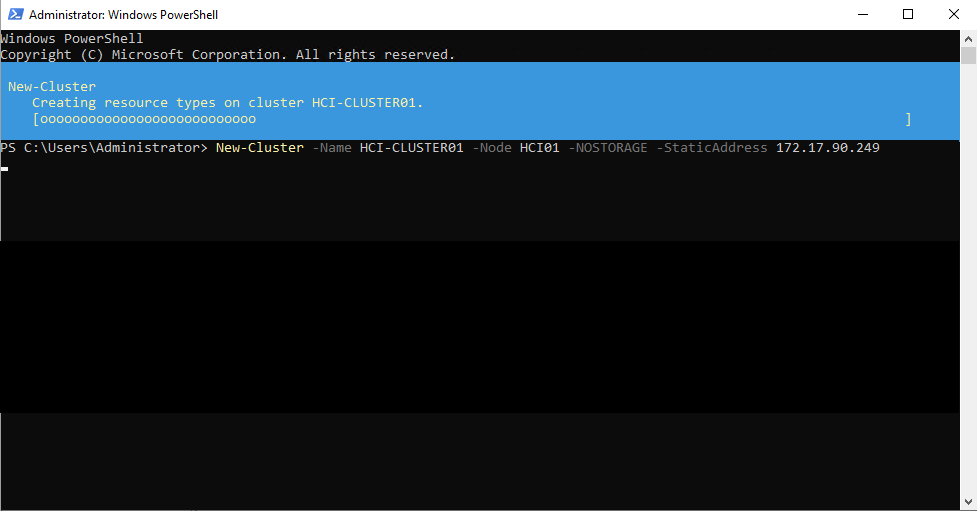
POWERSHELL
New-Cluster -Name HCI-CLUSTER01 -Node HCI01 -NOSTORAGE -StaticAddress 172.17.90.249After creating the cluster, we have to enable Storage Spaces Direct, but without Cache. We do this with the following command:
POWERSHELL
Enable-ClusterStorageSpacesDirect -CacheState Disabled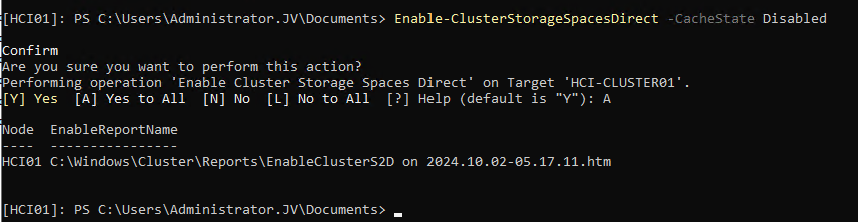
The output shows the command has been processed succesfully.
2.5 Update Cluster Functional Level
To fully let your cluster work, you have to update the functional level of the cluster. This is a version of the language the nodes use to speak with each other.
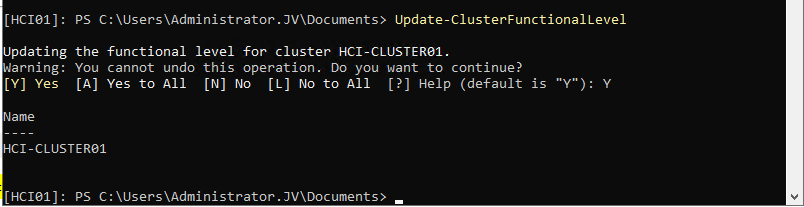
2.6 Creating Cluster Shared Volume
After everything for the cluster has been created, we have to create a Cluster Shared Volume (CSV). We can also do this from Powershell but can also be done with the Server Manager.
For Powershell, run the following command:
POWERSHELL
New-VirtualDisk -StoragePoolFriendlyName S2D* -FriendlyName CSVDisk -Size 240GB -ResiliencySettingName SimpleMy output was:
2.7 Register the cluster to Azure Stack HCI
After you configured everything of the local server we have to register the cluster to Azure Arc/Stack HCI. We can do this by following these steps:
First, register the needed resource providers in the Azure Portal. You can find this under your active subscription where you want to register the Cluster.
Register the following resource providers here:
- Microsoft.AzureStackHCI
- Microsoft.HybridCompute
- Microsoft.HybridConnectivity
- Microsoft.GuestConfiguration
By registering the resource providers, you enable every setting needed to use the service in your subscription. Microsoft does not enable everything by default to save its infrastucture from unneeded load.
After the Resource Providers are registered, we can finally register our cluster to Azure Arc. Go back to your HCI nodes and install the Azure StackHCI Powershell module:
POWERSHELL
Install-Module -Name Az.StackHCIAfter installing the module on every HCI cluster node, we can register the cluster node to Azure. You have to do this on every node, and this cannot be done through Powershell Remote.
POWERSHELL
Register-AzStackHCI -SubscriptionId "SUBSCRIPTION ID" -ResourceGroupName jv-test-stackhci -TenantId "TENANT ID" -Region westeurope -ResourceName HCI01Here you need to login via https://microsoft.com/devicelogin
After that step, you have to wait around 10 minutes for the registration to be done.
2.8 Azure Stack HCI in the Azure Portal
You can access Azure Stack HCI in the Azure Portal:
Here you can manage the nodes and clusters.
To actually create resources on the hardware on-premises through Azure Stack HCI, you have to configure a Arc Resource Bridge. This is a connection between the host OS of the cluster nodes and Azure. We can configure this through Windows Admin Center, which can be enabled on the cluster nodes.
Summary
Azure Stack HCI is the newest evolution in hybrid setups, where you want to leverage as much as possible from the Azure services, but want the flexibility of using your own hardware and increasing security and performance. Another pro of this setup is that you can save costs by not using the expensive servers on Azure with certain needs, like GPU-enabled machines.
End of the page 🎉
You have reached the end of the page. You can navigate through other blog posts as well, share this post on X, LinkedIn and Reddit or return to the blog posts collection page. Thank you for visiting this post.
If you think something is wrong with this post or you want to know more, you can send me a message to one of my social profiles at: https://justinverstijnen.nl/about/
If you find this page and blog very useful and you want to leave a donation, you can use the button below to buy me a beer. Hosting and maintaining a website takes a lot of time and money. Thank you in advance and cheers :)
The terms and conditions apply to this post.
Get Windows Product Key with PowerShell
Sometimes we need to have the original installed Windows Product Key just for documentation purposes. We simple can do this with…
Sometimes we need to have the original installed Windows Product Key just for documentation purposes. We simple can do this with one command in PowerShell:
POWERSHELL
(Get-ItemProperty -Path "HKLM:\SOFTWARE\Microsoft\Windows NT\CurrentVersion\SoftwareProtectionPlatform").BackupProductKeyDefault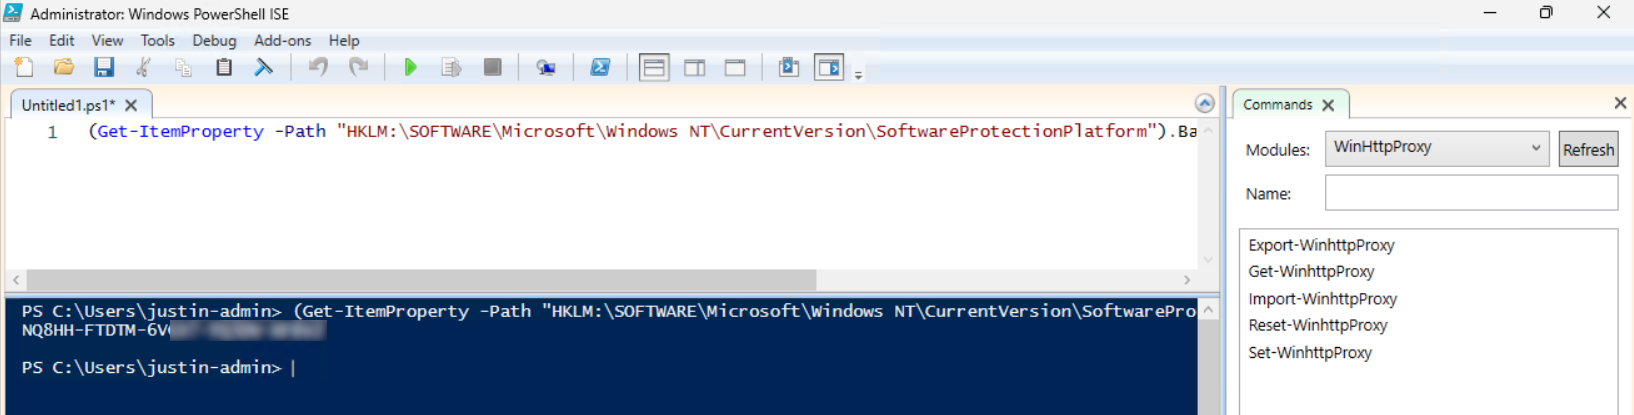
Please note that I am not encouraging software abuse or pirating, just sharing a tip to make our IT life a bit easier. It happens that a server or computer gets installed and we forget to document the product key or just to match it with our known information.
End of the page 🎉
You have reached the end of the page. You can navigate through other blog posts as well, share this post on X, LinkedIn and Reddit or return to the blog posts collection page. Thank you for visiting this post.
If you think something is wrong with this post or you want to know more, you can send me a message to one of my social profiles at: https://justinverstijnen.nl/about/
If you find this page and blog very useful and you want to leave a donation, you can use the button below to buy me a beer. Hosting and maintaining a website takes a lot of time and money. Thank you in advance and cheers :)
The terms and conditions apply to this post.
Using PowerShell remote sessions
In this guide i explain how to use PowerShell remote sessions, what they are and how to configure your systems to use this. Also some…
PowerShell Remote Sessions can be a great way to administer your virtual machines, cluster-nodes or physical Windows-based devices. With a Powershell remote session you can execute powershell commands on a remote device.
It works the best with servers in a specific management subnet. I do not recommend to administer client devices with Powershell because this can be a huge security risk.
Requirements
- Management computer/Priveleged Access Workstation
- 15-20 minutes of your time
- Management server and endpoints are Active Directory joined
Starting out
Before we can use Powershell to administer remote computers, we need to enable two things:
- 1. WinRM service (Endpoint): This is a service in Windows that enables remote management. Powershell Remote relies greatly on this service so we have to enable this on the endpoint. By default it is disabled due to its security reasons.
- 2. Trusted Hosts (Management server): This has to be configured on your management server. This is a whitelist to protect against security threats who can abuse this option. Here you configure to what machines (name/IP-address) you can connect to.
1. Configure Windows Remote Management (WinRM)
On the endpoint you have to enable WinRM. This can be done manually with one simple command, or at scale with Group Policy.
Simple and one command:
POWERSHELL
winrm quickconfigAt scale with Group Policy:
Create a new or use an existing Group Policy object and go to:
Computer Configuration > Policies > Administrative Templates > Windows Components > Windows Remote Management (WinRM) > WinRM Service.
Pick the option: “Allow remote server management through WinRM”
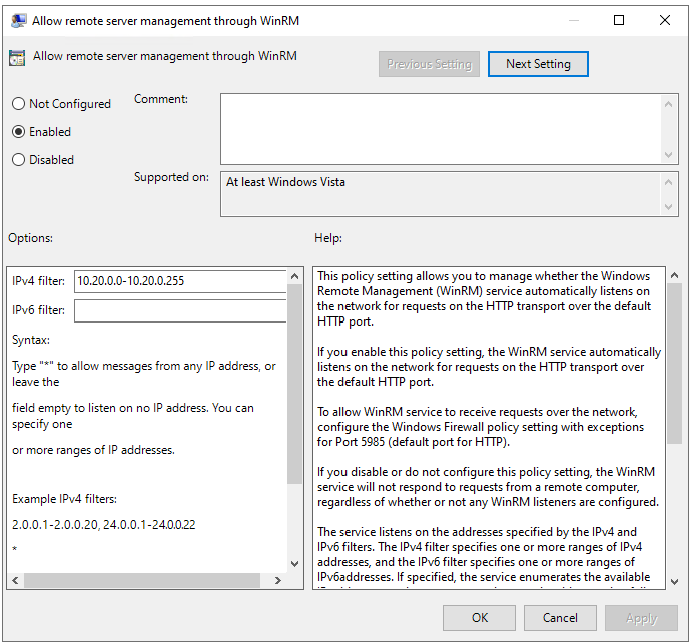
Here we can define from what IP-addresses we can use WinRM for a more secure use of WinRM.
After this option we have to allow WinRM access in the Windows Firewall to work. This also has to be done on the endpoint.
In the GPO, go to:
Computer Configuration -> Policies -> Windows Settings -> Windows Defender Firewall with Advanced Security
Create a new Inbound rule based on a Predefined rule:
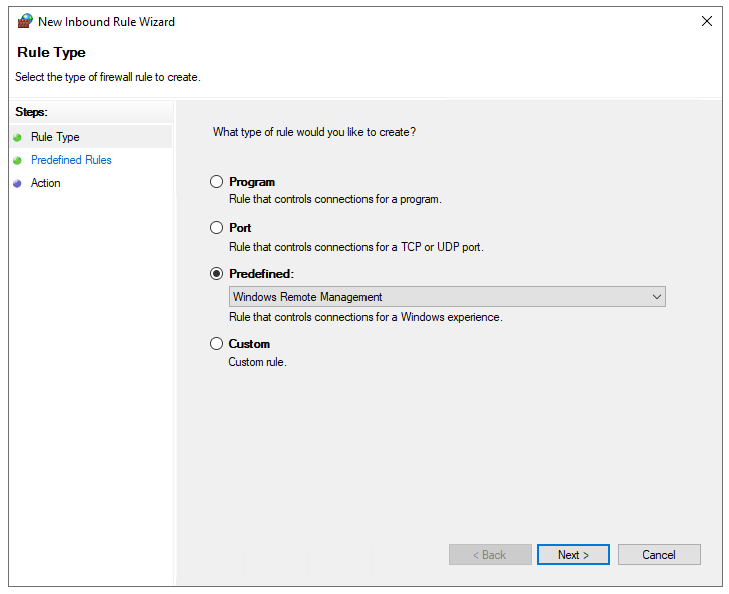
Click next till the wizard is done.
Now we have a GPO to enable WinRM on all endpoints. Apply this to the OU with the endpoints and wait for the GPO to apply. In the meantime we can configure TrustedHosts on our management workstation.
2. Configure TrustedHosts
To configure your trustedhosts you can use a simple command on your management server:
POWERSHELL
Set-Item WSMan:\localhost\Client\TrustedHosts #IP-address#You can use IP-addresses, DNS-names, FQDNs and wildcards. To add a whole subnet (like 10.20.0.0/24) to your trustedhosts list, use the following command:
POWERSHELL
Set-Item WSMan:\localhost\Client\TrustedHosts -Value "10.20.0.*"Another really unsafe option is to add everything to your TrustedHosts list (not recommended):
POWERSHELL
Set-Item WSMan:\localhost\Client\TrustedHosts -Value "*"One small note: we use the command Set-Item. This will set the complete TrustedHosts setting to the setting in your command and will overwrite all existing entries. We can also use the following command to add an entry with keeping the current configuration:
POWERSHELL
Add-Item WSMan:\localhost\Client\TrustedHosts -Value "10.20.0.*"If you have set this up like one of the methods above, we are all set and done.
3. Setting up an PowerShell Remote session
To start using a PowerShell remote session after you have done all the prerequisites, use the command below:
POWERSHELL
Enter-PSSession -ComputerName 10.20.0.1You get a prompt to logon with your credentials. The account has to be member of the local Administrators group.
Now we are logged in and we can execute commands like being locally on the server.
POWERSHELL
[JV-TEST-SERVER]: PS C:\Users\justinverstijnen\Documents>4. Managing multiple endpoints remotely
To automate some tasks, we can execute commands on our management server on multiple remote endpoints. Think about a group policy update, starting a service or a script that has to be executed directly without restarting the servers to make it work.
We can do this with the Invoke-Command command. In the brackets we can paste our script or command to execute on the endpoints.
POWERSHELL
Invoke-Command -Computername Server1,Server2,Server3,Server4,Server5 -Scriptblock {gpupdate /force}5. Multiple sessions and session persistence
With Powershell remoting we can also save sessions in a parameter. We mostly use this to execute a script on multiple servers. This can also be done to use it with the Invoke-Command above This works like:
POWERSHELL
$sessions = New-PSSession -ComputerName Server01, Server02, Server03

Invoke-Command -Session $sessions -ScriptBlock { gpupdate /force }
The way this works is that you save the connections in a variable and you use this as a whole to execute your commands. Makes it simple for executing commands at scale.
Summary
PowerShell remote is a very handy tool to remote connect to a endpoint/server. In practice we want to use simple and GUI-based tools but we have to dig into console commands at some point. For example, if you accidentally stop the Remote Desktop service or during a system outage.
End of the page 🎉
You have reached the end of the page. You can navigate through other blog posts as well, share this post on X, LinkedIn and Reddit or return to the blog posts collection page. Thank you for visiting this post.
If you think something is wrong with this post or you want to know more, you can send me a message to one of my social profiles at: https://justinverstijnen.nl/about/
If you find this page and blog very useful and you want to leave a donation, you can use the button below to buy me a beer. Hosting and maintaining a website takes a lot of time and money. Thank you in advance and cheers :)
The terms and conditions apply to this post.
How to enable Remote Group Policy update
This guide explains how to perform Remote Group Policy updates and how to do the initial configuration needed.
Group Policy update to multiple computers
Sometimes you want to force a group policy update on multiple computers. Often when i am configuring Azure Virtual Desktop Session Hosts i need this option instead of logging into all hosts and executing the command manually.
There is a option in Group Policy management to force a group policy update to all computers in a OU:

Actually, this only works after you configured this on the remote computers. The good part is, there is a way to do this with Group Policy!
Errors explained
When you do not configure remote group policy update, you get errors like:
- 0x8007071a
- The remote procedure call was cancelled
These state that access to the remote computer cannot be established, which is actually because of security reasons.
Enable remote Group Policy update
To enable remote Group Policy update with a GPO, create a new GPO or use an existing one:
Go to the settings for the Windows Firewall:
Computer Configuration -> Policies -> Windows Settings -> Security Settings -> Windows Defender Firewall with Advanced Security
Create 2 new inbound rules based on a predefined sets:
- Remote Scheduled Tasks Management
- Windows Management Instrumentation
Select all rules of both of the predefined rulesets.
After this link the GPO to the right OU and do a last manual GPupdate or wait for the scheduled GPupdate to finish.
Performing remote Group Policy updates
You can use the Group Policy update option in Group Policy Management (gpmc.msc) to perform a group policy update on all computers in a OU.
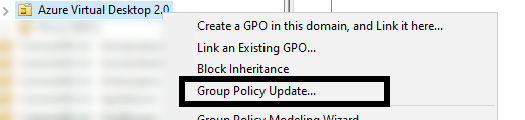
After that you will get succeeded notifications:
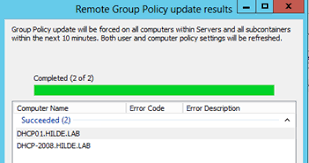
Summary
Remote Group Policy update is an excellent way to manage traditional Active Directory computers and updating them remotely instead of physically walk to the computers to perform the update yourself. Even on Microsoft Azure servers, it is a very handy tool because updating policies can be done through your central management server.
Thank you for reading this guide!
End of the page 🎉
You have reached the end of the page. You can navigate through other blog posts as well, share this post on X, LinkedIn and Reddit or return to the blog posts collection page. Thank you for visiting this post.
If you think something is wrong with this post or you want to know more, you can send me a message to one of my social profiles at: https://justinverstijnen.nl/about/
If you find this page and blog very useful and you want to leave a donation, you can use the button below to buy me a beer. Hosting and maintaining a website takes a lot of time and money. Thank you in advance and cheers :)
The terms and conditions apply to this post.
Bulk create Active Directory users with Powershell
This page will share a PowerShell script to create bulk AD users with Powershell. Click here for more information…
When it comes to creating users for Active Directory, especially in new implementations, you want to minimize the time needed to create the accounts. This is possible by creating the AD users with Powershell.
Requirements
- Minimal knowledge of Powershell
- An Active Directory environment
Full script for creating AD users
Here is the full script including CSV that creates the ad users:
Show PowerShell script on Github
Step 1: Prepare CSV
Fill in the CSV file with all required information.
The script I am using and sharing at this page has the following headings:
CSV
firstname,lastname,username,passwordThis is a very simple and effective manner where the script will base additional information like the emailaddress and proxyaddress attributes on the username.
Step 2: Change parameters
The script has the domain justinverstijnen.nl everywhere in it. This has to be changed at the following lines to your own preference:
- UserPrincipalName
- Path (Distinguished Name of OU)
- EmailAddress
- OtherAttributes
Step 3: Run PowerShell script to create AD users
Download the script file and copy the script and csv file to the same folder on the destination server. After that run the script and it will create the users.
Note: If you want to bypass the Powershell Execution Policy in the most effective and secure way possible, use the following command:
POWERSHELL
Set-ExecutionPolicy RemoteSigned -Scope ProcessThis will allow all scripts to be runned in the Powershell window till it is closed. After closing the window, running scripts will be blocked again till running this command again.
After running this command you can navigate to the folder where the CSV file and PS1 file are located and run the script by using:
POWERSHELL
.\bulk_user.ps1
End of the page 🎉
You have reached the end of the page. You can navigate through other blog posts as well, share this post on X, LinkedIn and Reddit or return to the blog posts collection page. Thank you for visiting this post.
If you think something is wrong with this post or you want to know more, you can send me a message to one of my social profiles at: https://justinverstijnen.nl/about/
If you find this page and blog very useful and you want to leave a donation, you can use the button below to buy me a beer. Hosting and maintaining a website takes a lot of time and money. Thank you in advance and cheers :)
The terms and conditions apply to this post.