Azure Virtual Desktop V6/V7 VMs imaging
Categories:
When I first chose to use V6 or V7 machines with Azure Virtual Desktop, I ran into some boot controller errors about the boot controller not supporting SCSI images.
- The VM size ‘Standard_E4as_v7’ cannot boot with OS image or disk. Please check that disk controller types supported by the OS image or disk is one of the supported disk controller types for the VM size ‘Standard_E4as_v7’. Please query sku api at https://aka.ms/azure-compute-skus to determine supported disk controller types for the VM size. (Code: InvalidParameter)
- This size is not available because it does not support the SCSI disk controller type.
Because I really wanted to use higher version VMs, I went to research on how to solve this problem. I will describe the process from creating the initial imaging VM, to capture and installing new AVD hosts with our new image.
The problem described
When using V6 and higher version Virtual Machines in Azure, the Boot Controller will also change from the older SCSI to NVMe. When using local VM storage, this could give a pretty disk performance increase but not really for Azure Virtual Desktop. We mostly use managed disks here so we don’t use that storage.
This change means that we have to also use a NVMe capable image storage, and this brings us to Azure Compute Gallery. With this Azure solution, we are able to do image versioning and has support for NVMe enabled VMs.
I used the managed images option in the past, as this was the most efficient option to deploy images very fast. However, NVMe controller VMs are not supported by those managed images and we can install up to V5 only.
| VM Version | Boot controller |
| v1-4 | SCSI |
| v5 | SCSI |
| v6 | NVMe |
| v7 | NVMe |
CPU performance v5 and v7 machines
Because I wondered what the performance difference could be between similar v5 and v7 machines in Azure, I did two benchmark tests on both machines. Both using these software:
- Geekbench 6
- Passmark PerformanceTest
This gave pretty interesting results:
| Benchmark software | E4s_v5 | E4as_v7 |
| Geekbench 6 Single Core | 1530 | 2377 |
| Geekbench 6 Multi Core | 3197 | 5881 |
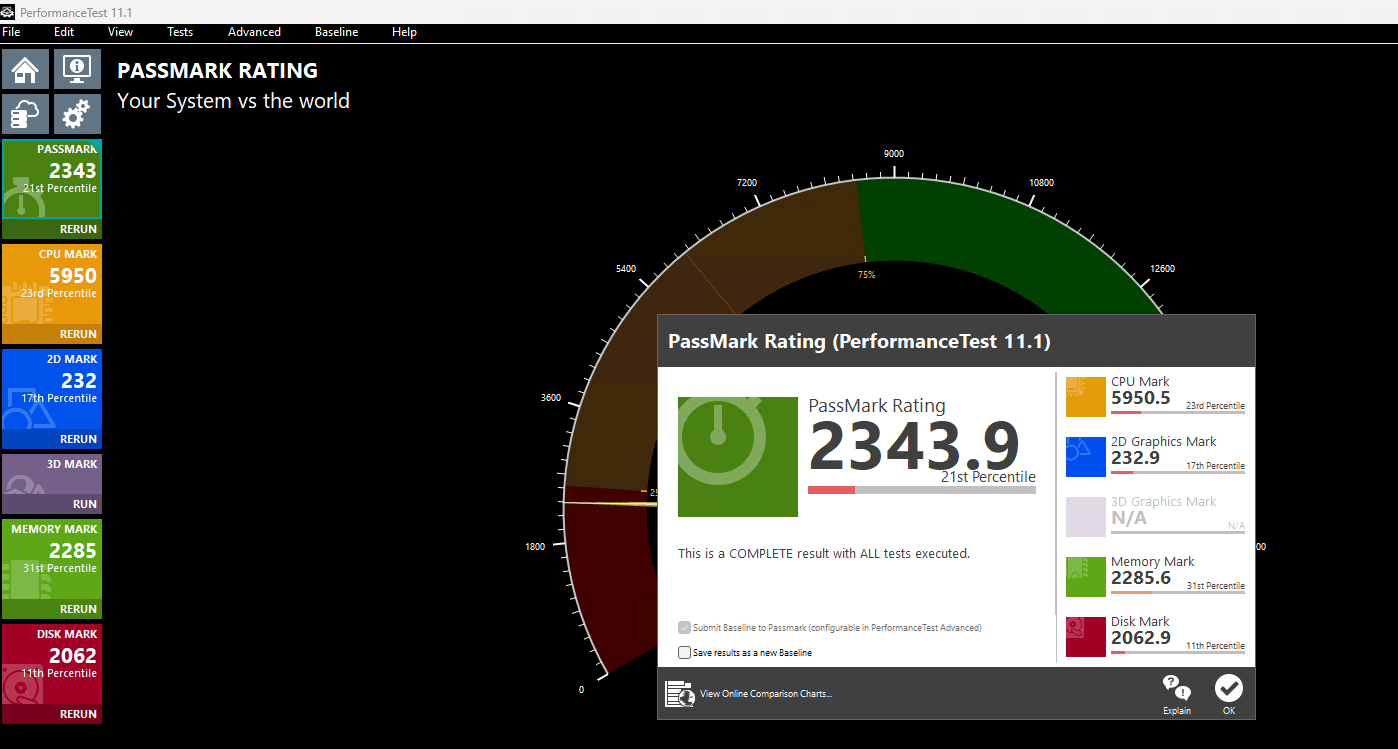
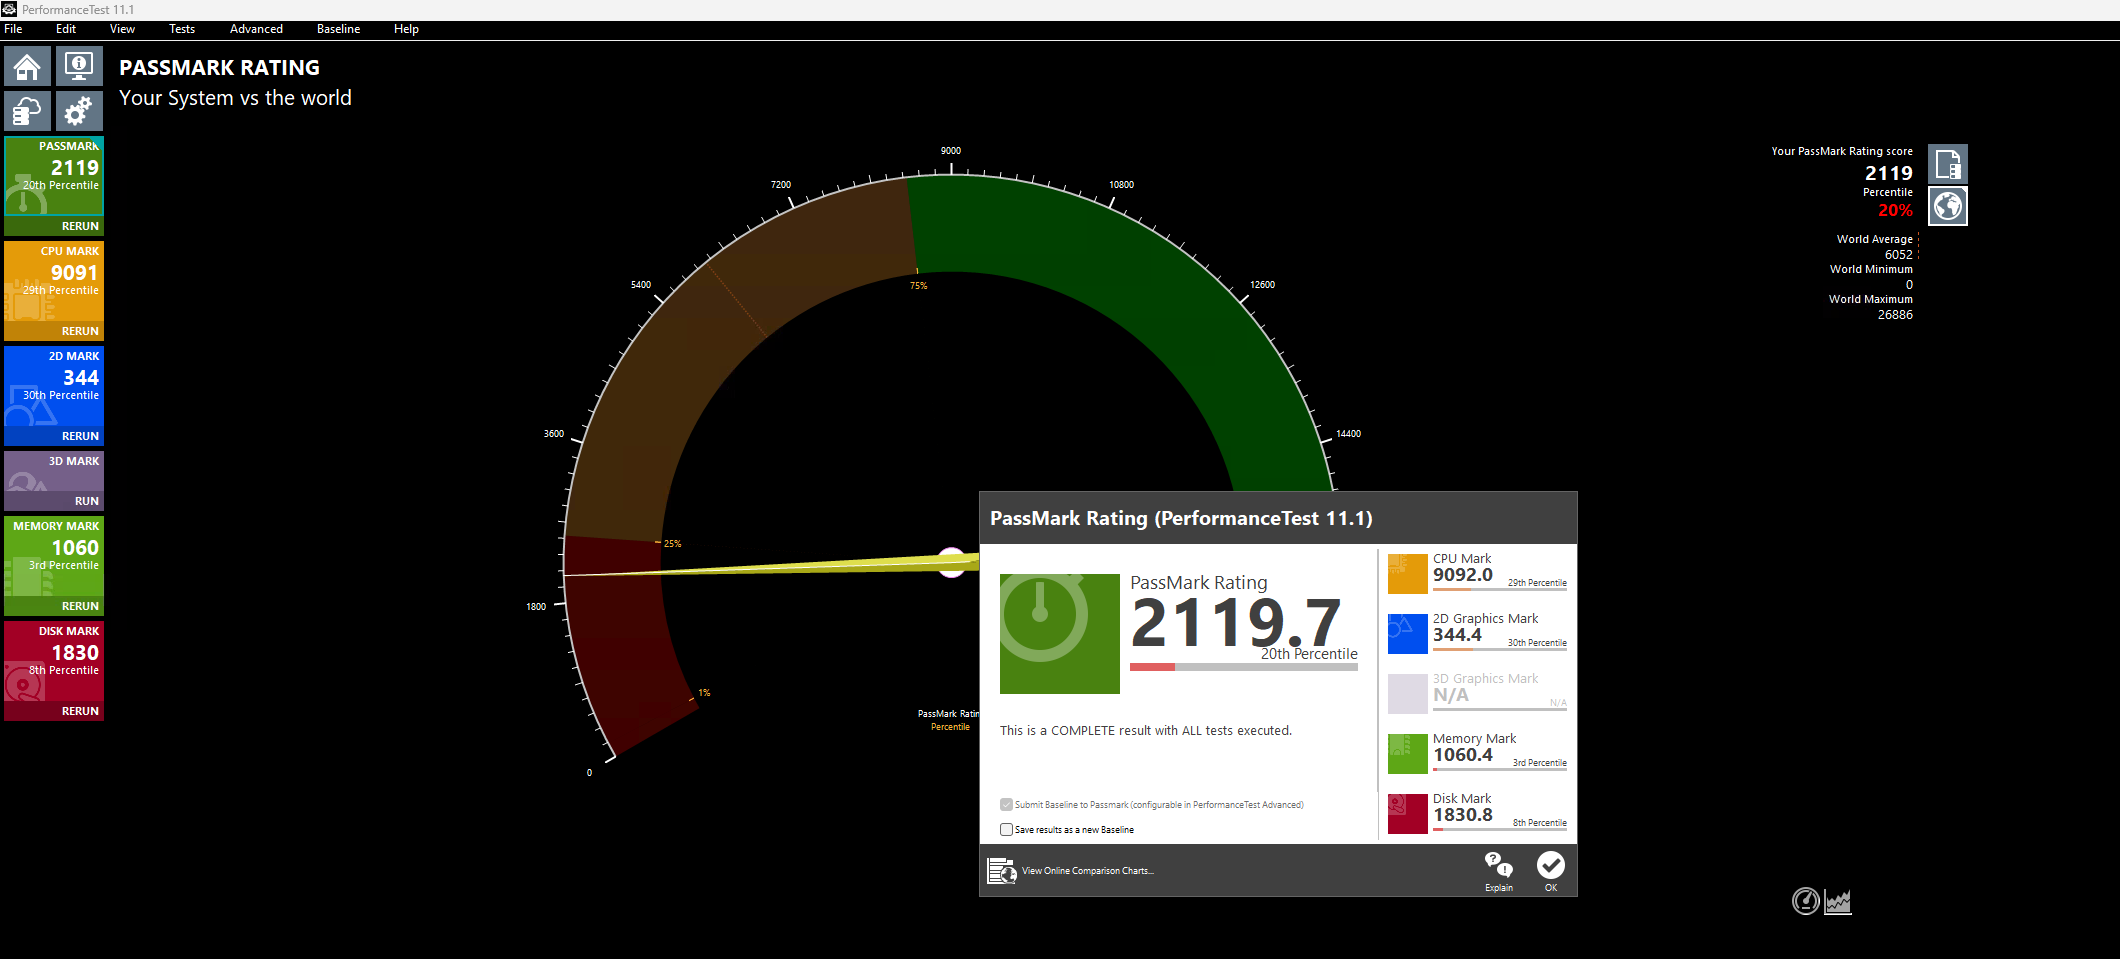
| Passmark CPU | 5950 | 9092 |
This result would indicate a theoretical CPU performance increase of around 55%.
Click here for benchmark results
Step 1: Creating an imaging PC
Let’s start by creating our imaging PC. This is a temporary VM which we will do all our configurations on before mass deployment. Think of:
- Installing applications
- Installing dependencies
- Installing latest Windows Updates
- Optimizations
- Configuring the correct language
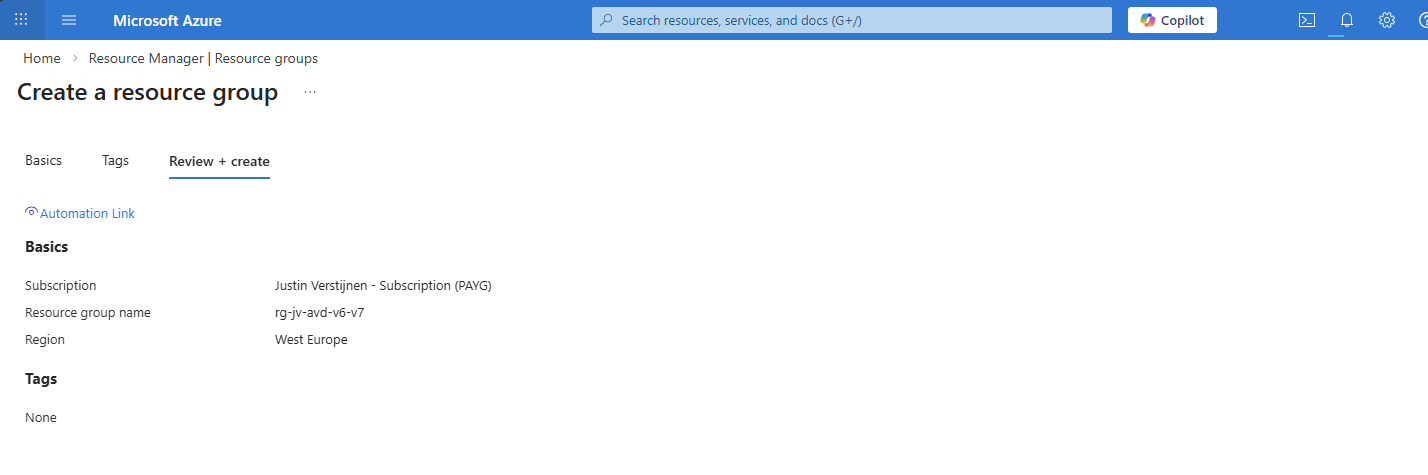
In the Azure Portal (https://portal.azure.com), create a resource group if not already having one for this purpose.
Now let’s go to “Virtual Machines” to create a temporary virtual machine. My advice is to always use the exact same size/specs as you will roll out in the future.

Create a new virtual machine using your settings. I chose the RDP top be opened so we can login to the virtual machine to install applications and such. Ensure you select the Multi-session marketplace image if you use a Pooled hostpool.
The option “Trusted launch virtual machines” is mandatory for these NVMe based VM sizes, so keep this option configured.
This VM creation process takes around 5 minutes.
Step 2: Virtual Machine customizations
Now we need to do our customizations. I would advise to do this in this order:
- Execute Virtual Desktop Optimization Tool (VDOT)
- Configuring the right system language
- Install 3rd party applications
Connect to the virtual machine using RDP. You can use the Public IP assigned to the virtual machine to connect to:
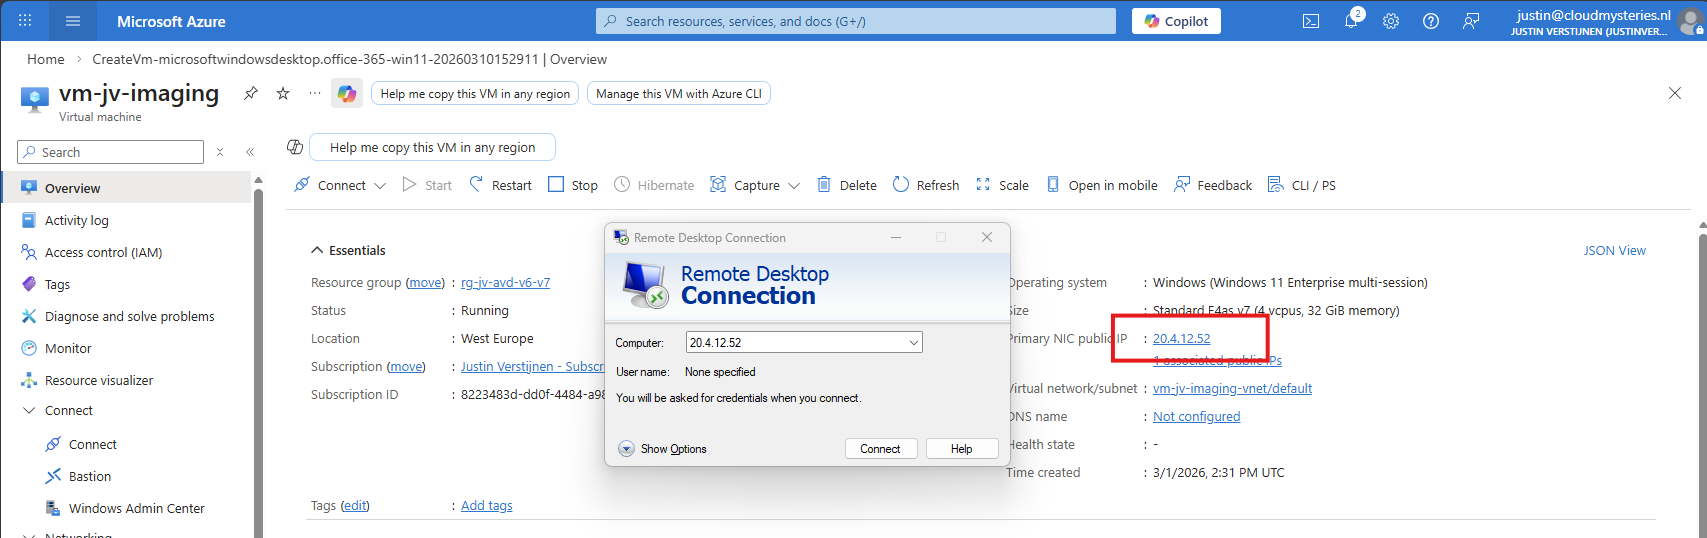
After logging in with the credentials you spefidied in the Azure VM wizard we are connected.
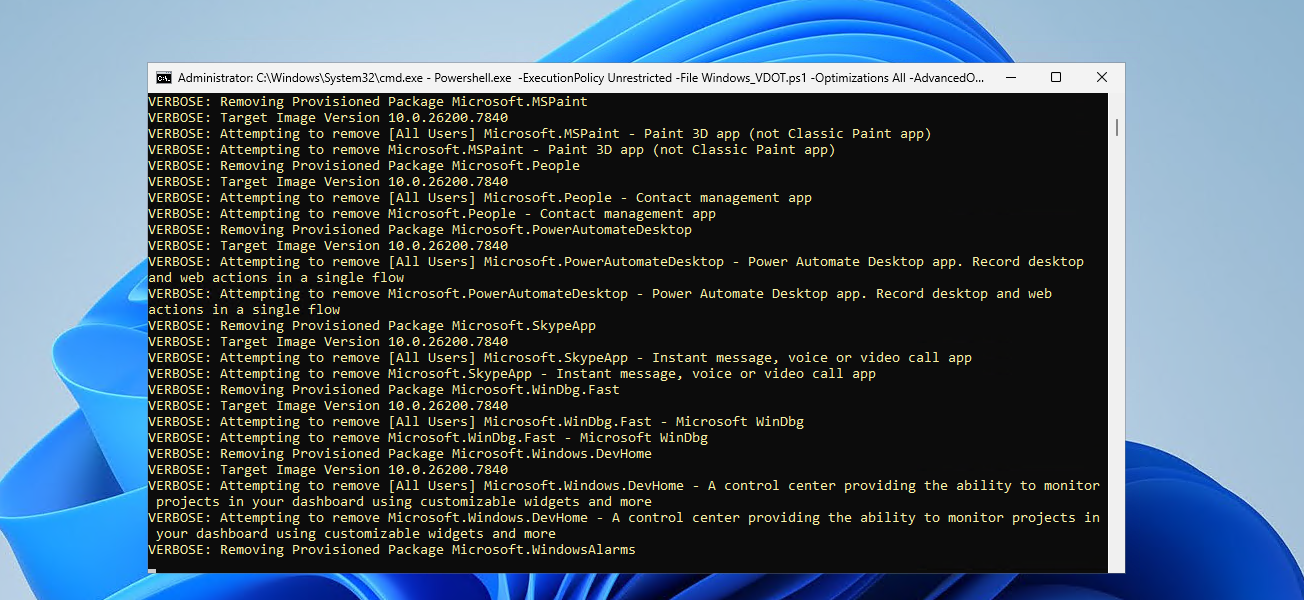
First I executed the Virtual Desktop Optimization tool:
Then ran my script to change the language which you can find here: https://justinverstijnen.nl/set-correct-language-and-timezone-on-azure-vm/
And finally installed the latest updates and applications. I dont like preview updates in production environments so not installed the update awaiting.
Step 3: Sysprepping the Virtual Machine
Now that we have our machine ready, it’s time to execute an application called sysprep. This makes the installation ready for mass deployment, eliminating every driver, (S)ID and other specific information to this machine.
You can find this here:
- C:\Windows\System32\Sysprep\sysprep.exe
Put this line into the “Run” window and the applications opens itself.
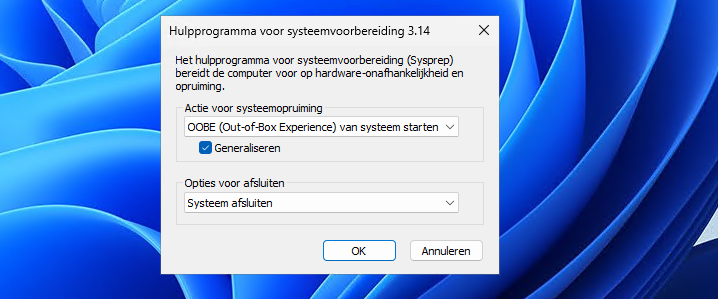
Select “Generalize” and choose the option to shutdown the machine after completing.
If getting an error that Bitlocker Drive Encryption is enabled, execute this command to disable it (you can re-enable it after deployment):
PowerShell
manage-bde -off C:
Wait for around 15 minutes to finish decryption, then try Sysprep again.
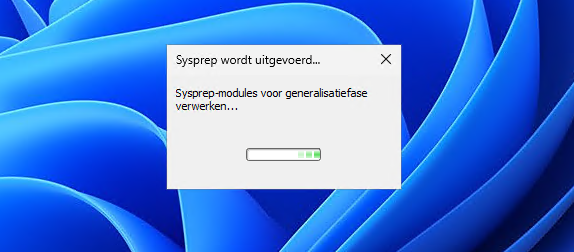
The machine will now clean itself up and then shutdown. This process can take up to 20 minutes, in the meanwhile you can advance with step 4.
Step 4: Create Azure Compute Gallery instance
Before we can capture the VM, we must first create a space for it. This is the Azure Compute Gallery, a managed image repository inside of your Azure environment.
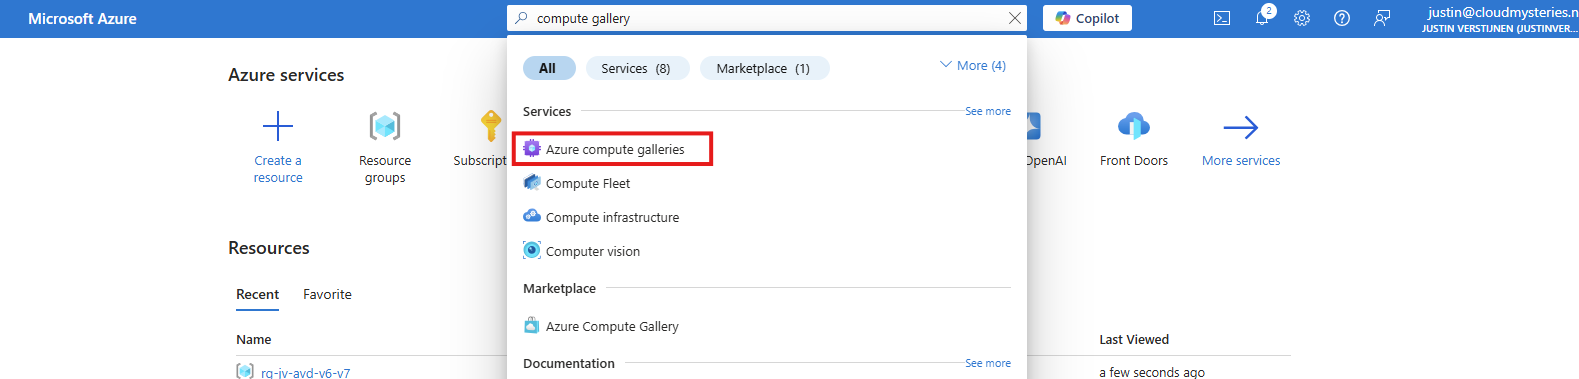
Go to “Azure compute galleries” and create a new ACG.
Give the ACG a name and place it in the right Subscription/Resouce Group.
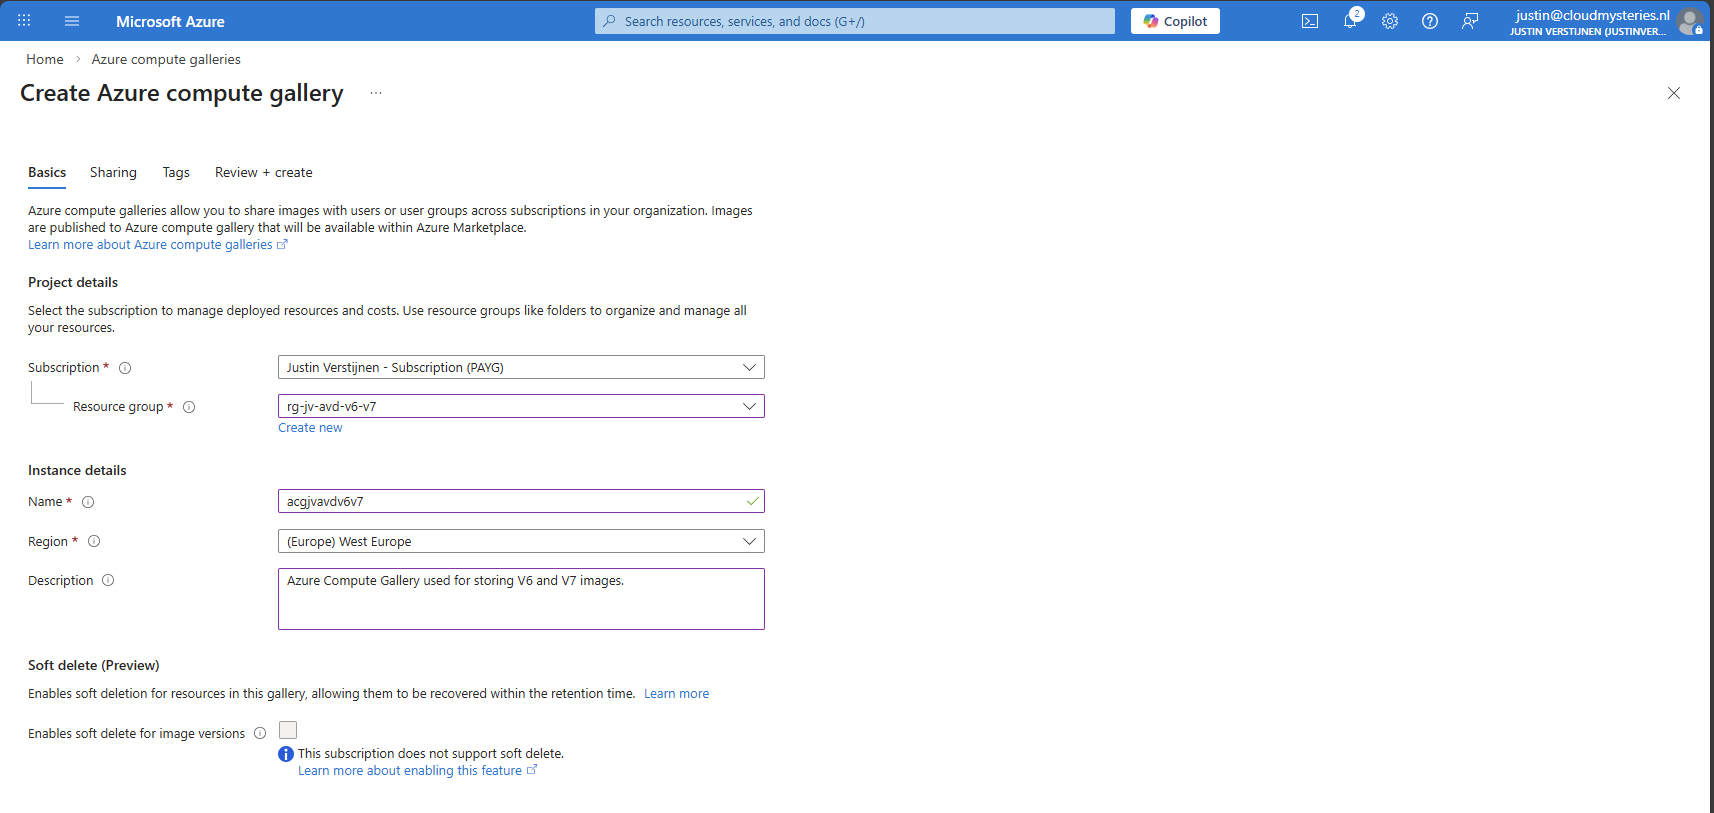
Then click “Next”.
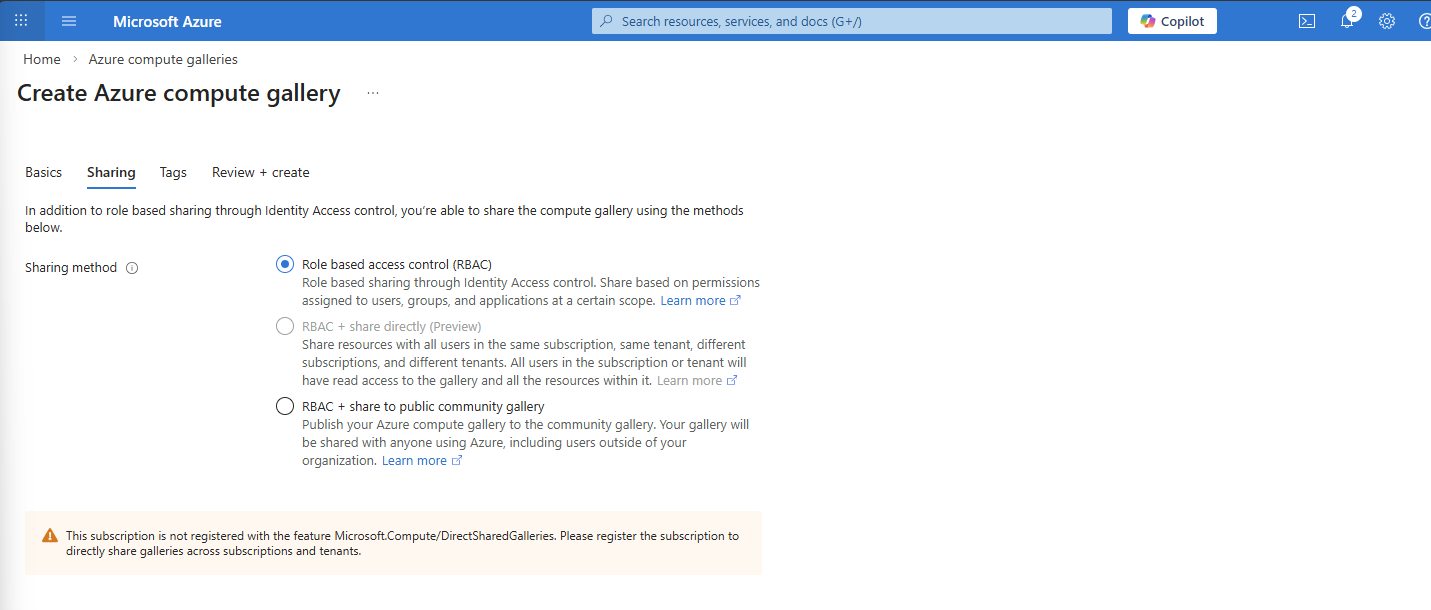
I use the default “RBAC” option at the “Sharing” tab as I dont want to publicy share this image. With the other options, you could share images acros other tenants if you want.
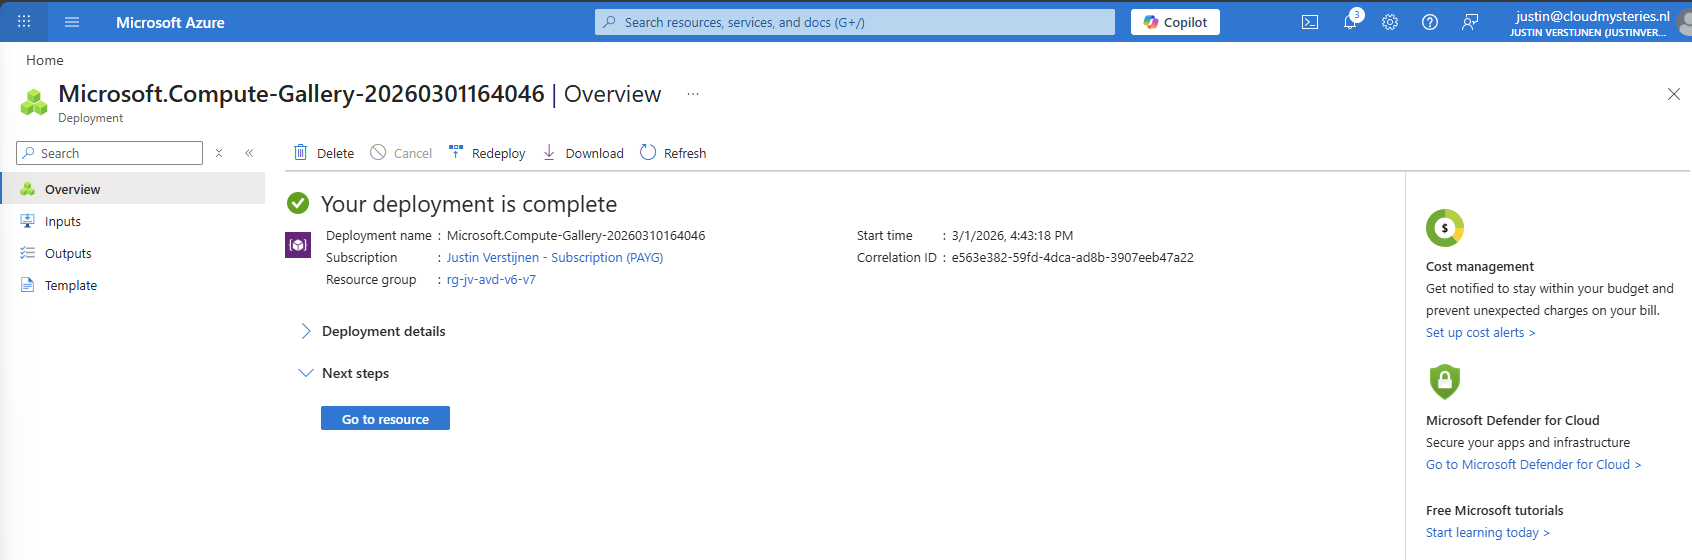
After finishing the wizard, create the Compute Gallery and wait for it to deploy which takes several seconds.
Step 5: Capture VM image and create VM definition
We can now finally capture our VM image and store it in the just created ACG. Go back to the virtual machine you have sysprepped.
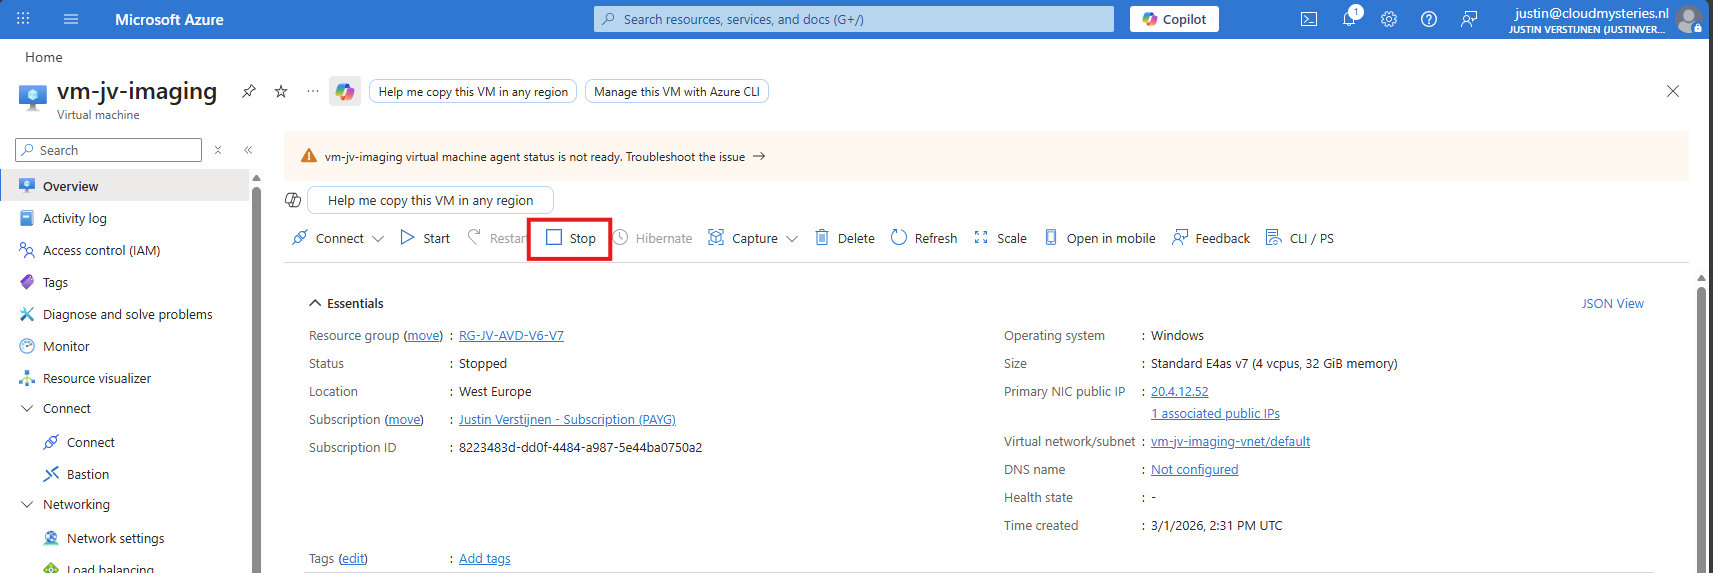
As it is “Stopped” but not “Deallocated”, we must first click “Stop” to deallocate the VM. This is because the OS itself gave the shutdown command but this does not really de-allocate the machine, and is still stand-by.
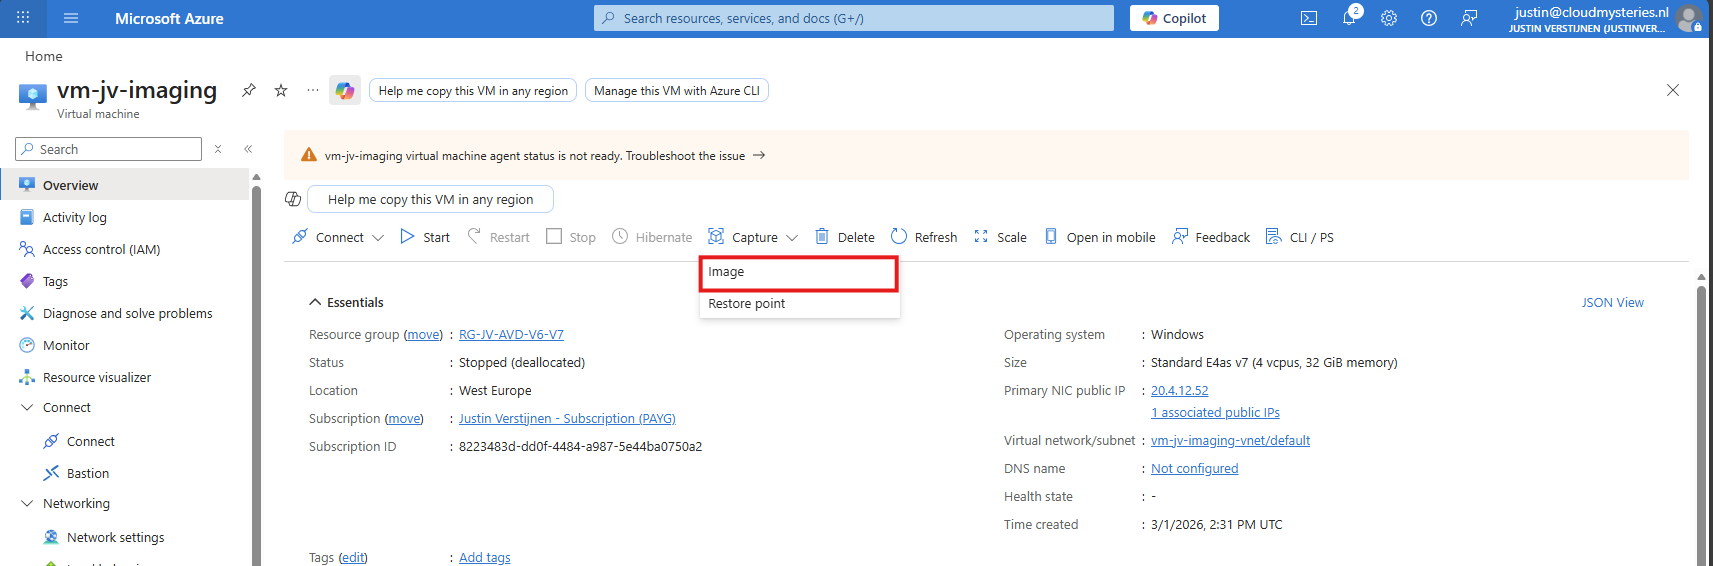
Now click “Capture” and select the “Image” option.
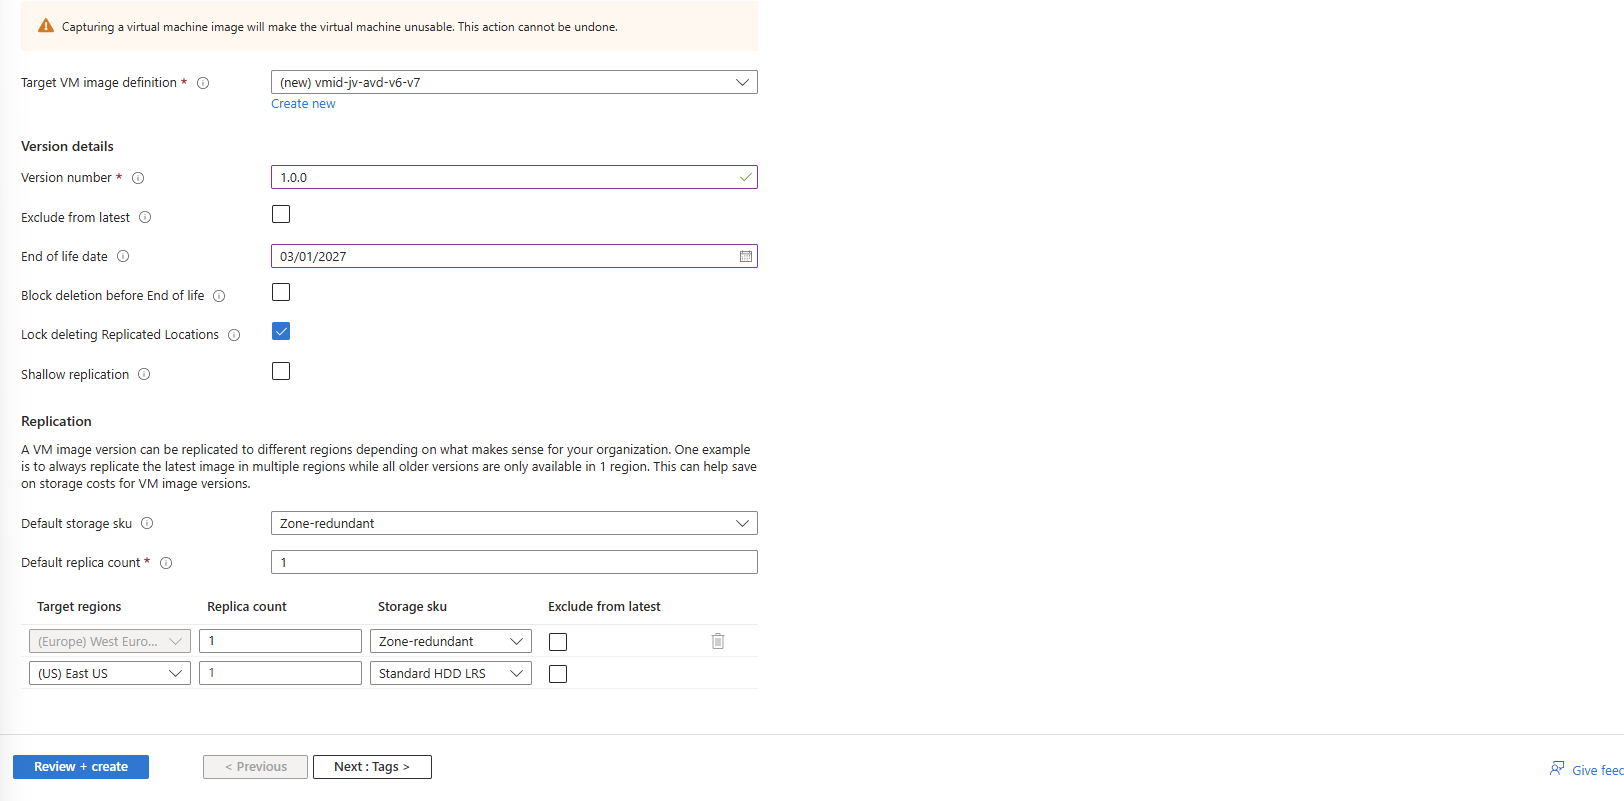
Now we get a wizard where we have to select our ACG and define our image:
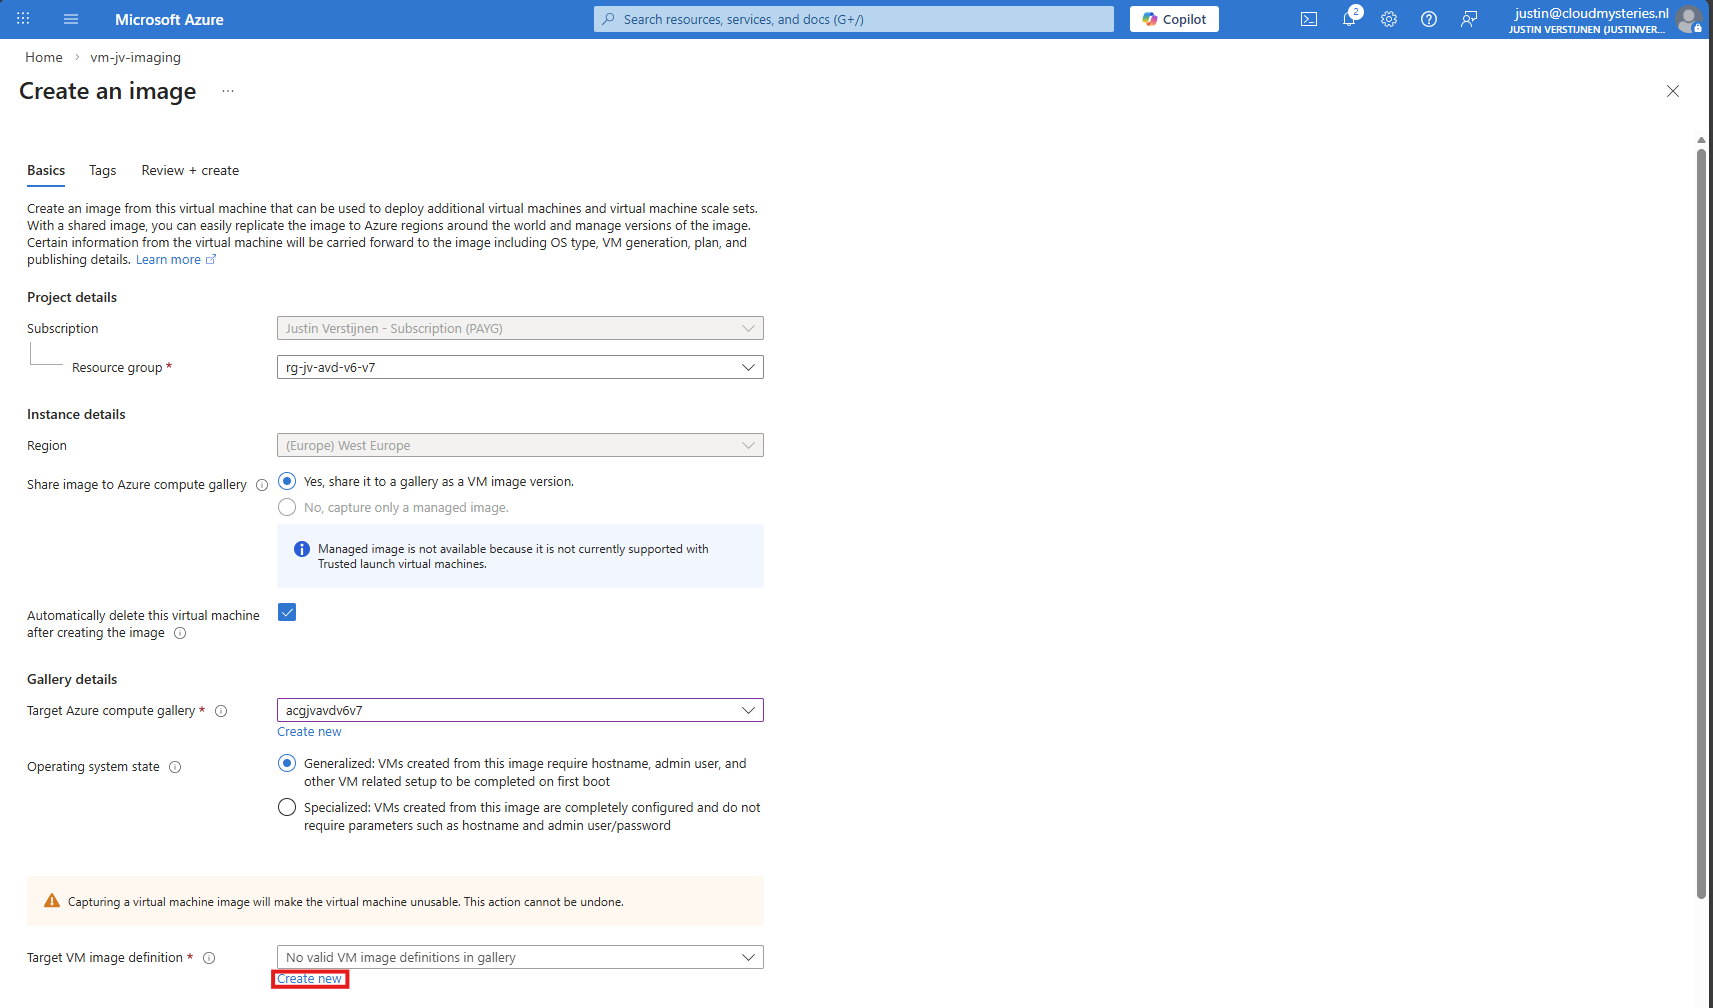
Click on “Create new” to create a new image definition:
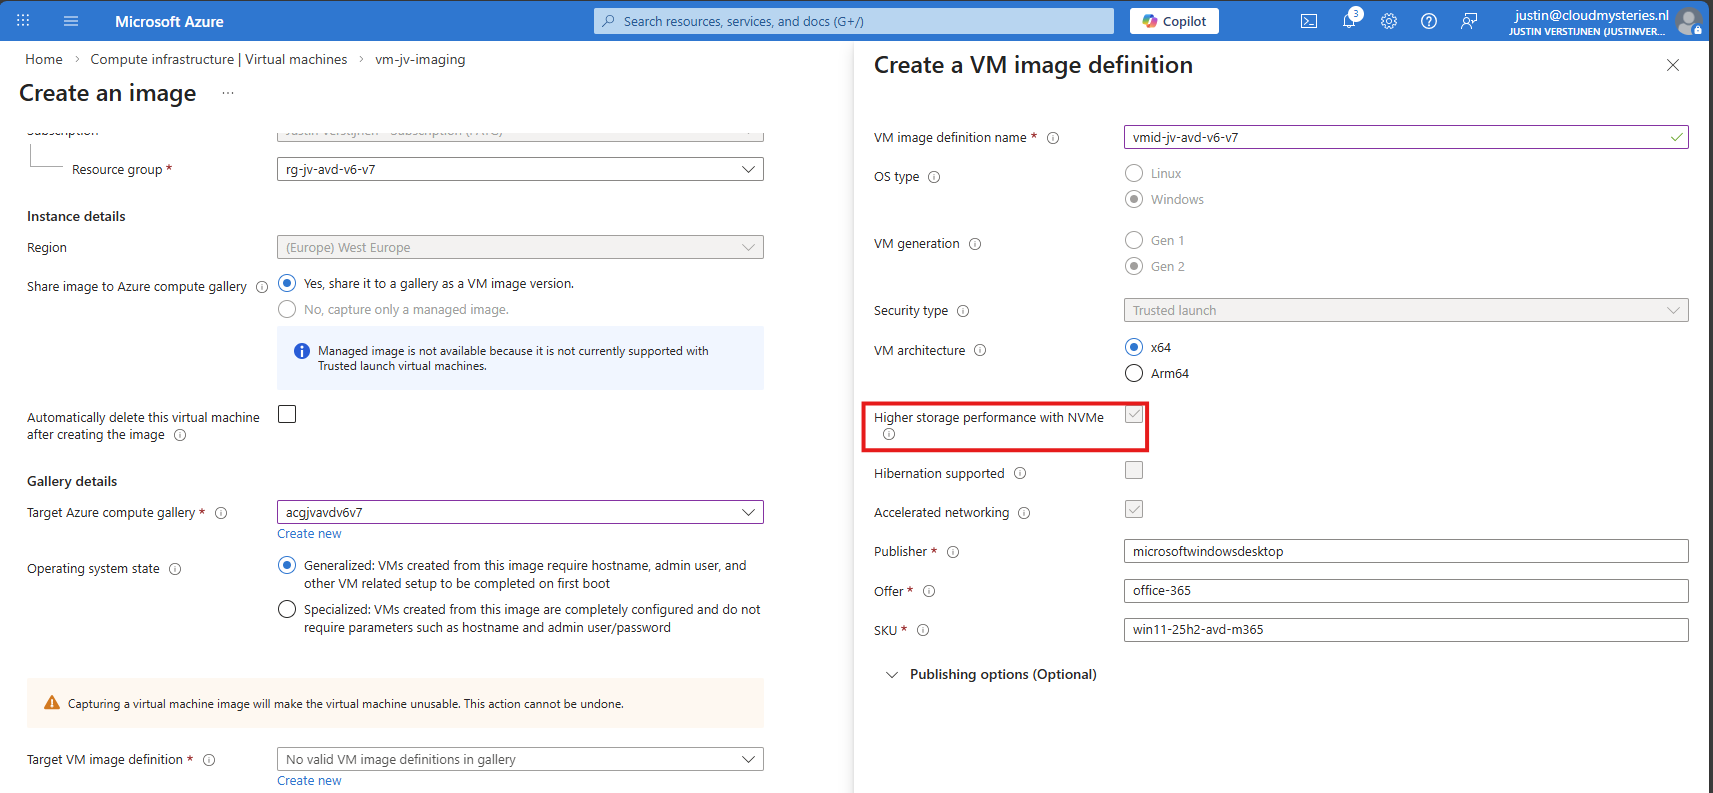
Give this a name and ensure that the check for “NVMe” is checked. Checking this mark enables NVMe support, while also still maintaining the SCSI support. Finish the versioning of the image and then advance through the wizard:
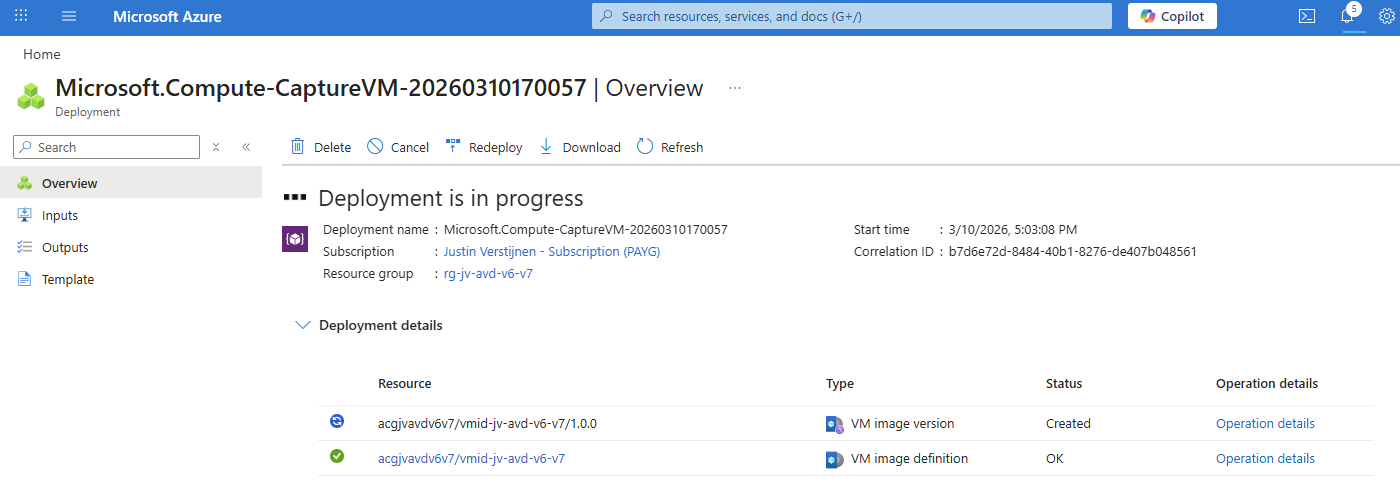
The image will then be created:
Checking image disk controller types
If you want, you can check the VM support of your image using this simple Azure PowerShell scipt:
$rg = "your resourcegroup"
$gallery = "your gallery"
$imageDef = "your image definition"

$def = Get-AzGalleryImageDefinition `
    -ResourceGroupName $rg `
    -GalleryName $gallery `
    -Name $imageDef

$def.Features | Format-Table Name, Value -AutoSize
This will result something like this:
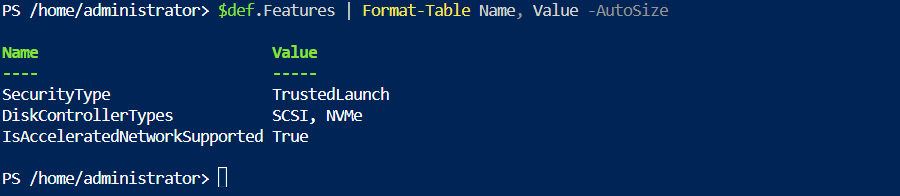
This states at the DiskControllerTypes that it supports both SCSI and NVMe for a broad support.
Step 6: Deploy the new NVMe image
After the image has captured, I removed the imaging PC from my environment as you can do in the image capture wizard. I ended up having these 3 resources left:
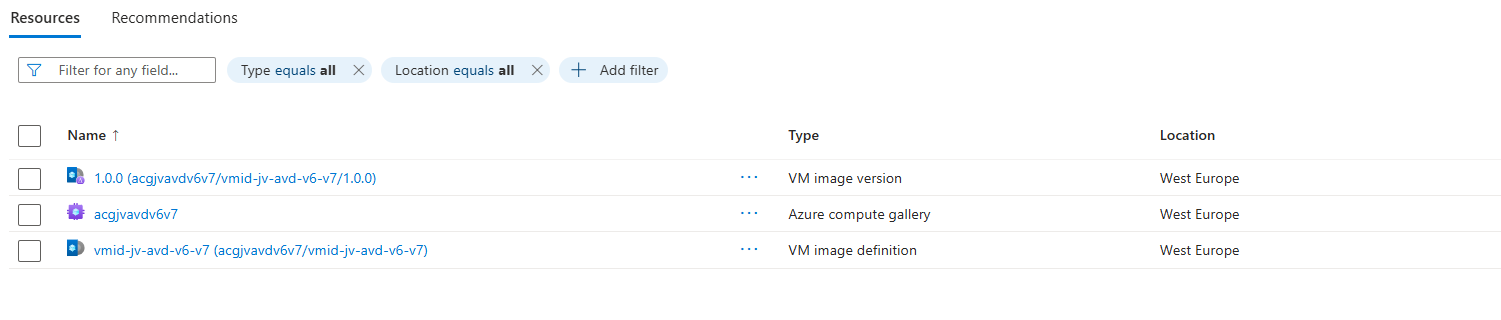
These resources should be kept, where the VM image version will get newer instances as you capture more images during the lifecycle.
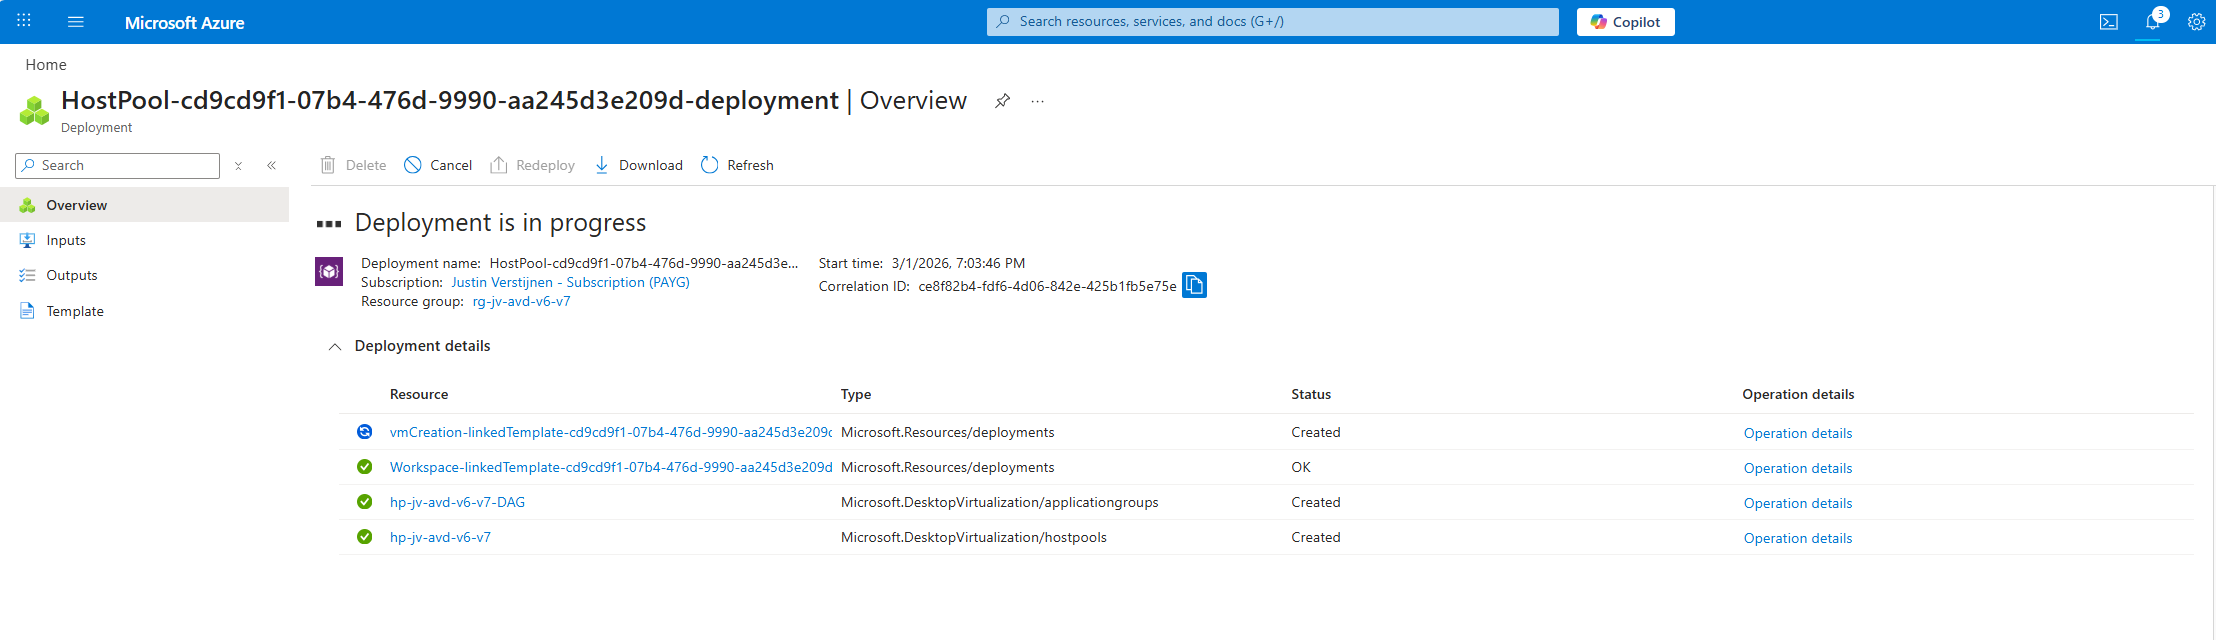
We will now deploy a Azure Virtual Desktop hostpool with one VM in it, to test if we can select V7 machines at the wizard. Go to “host pools” and create a new hostpool if not done so already. Adding VMs to an existing hostpool is also possible.
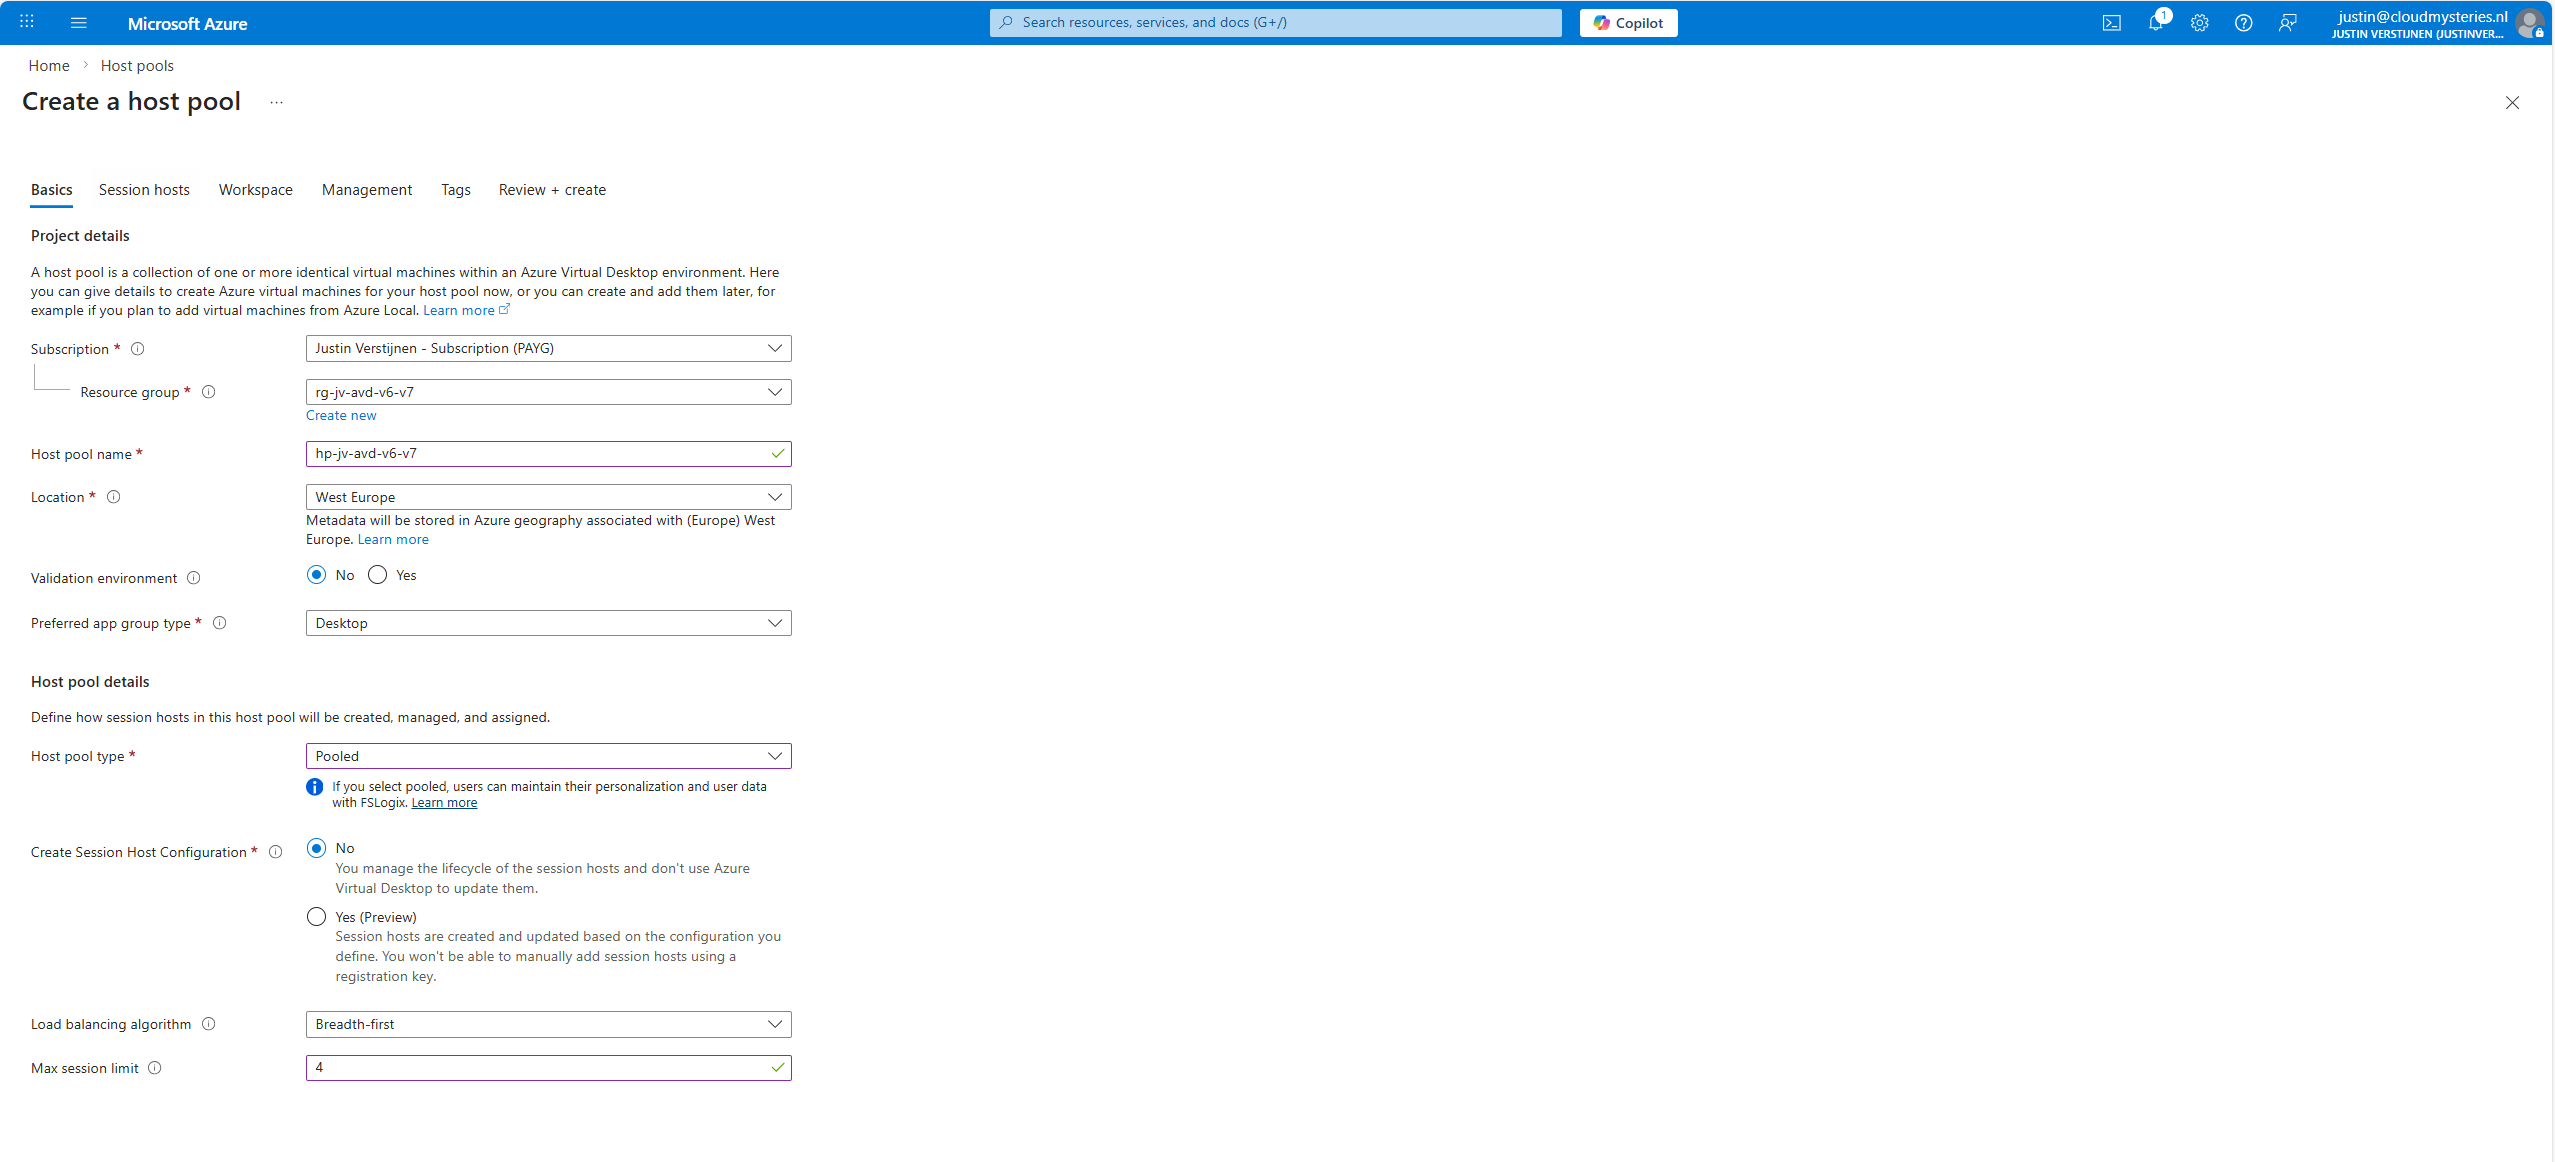
The next tab is more important, as we have to actually add the virtual machines there:
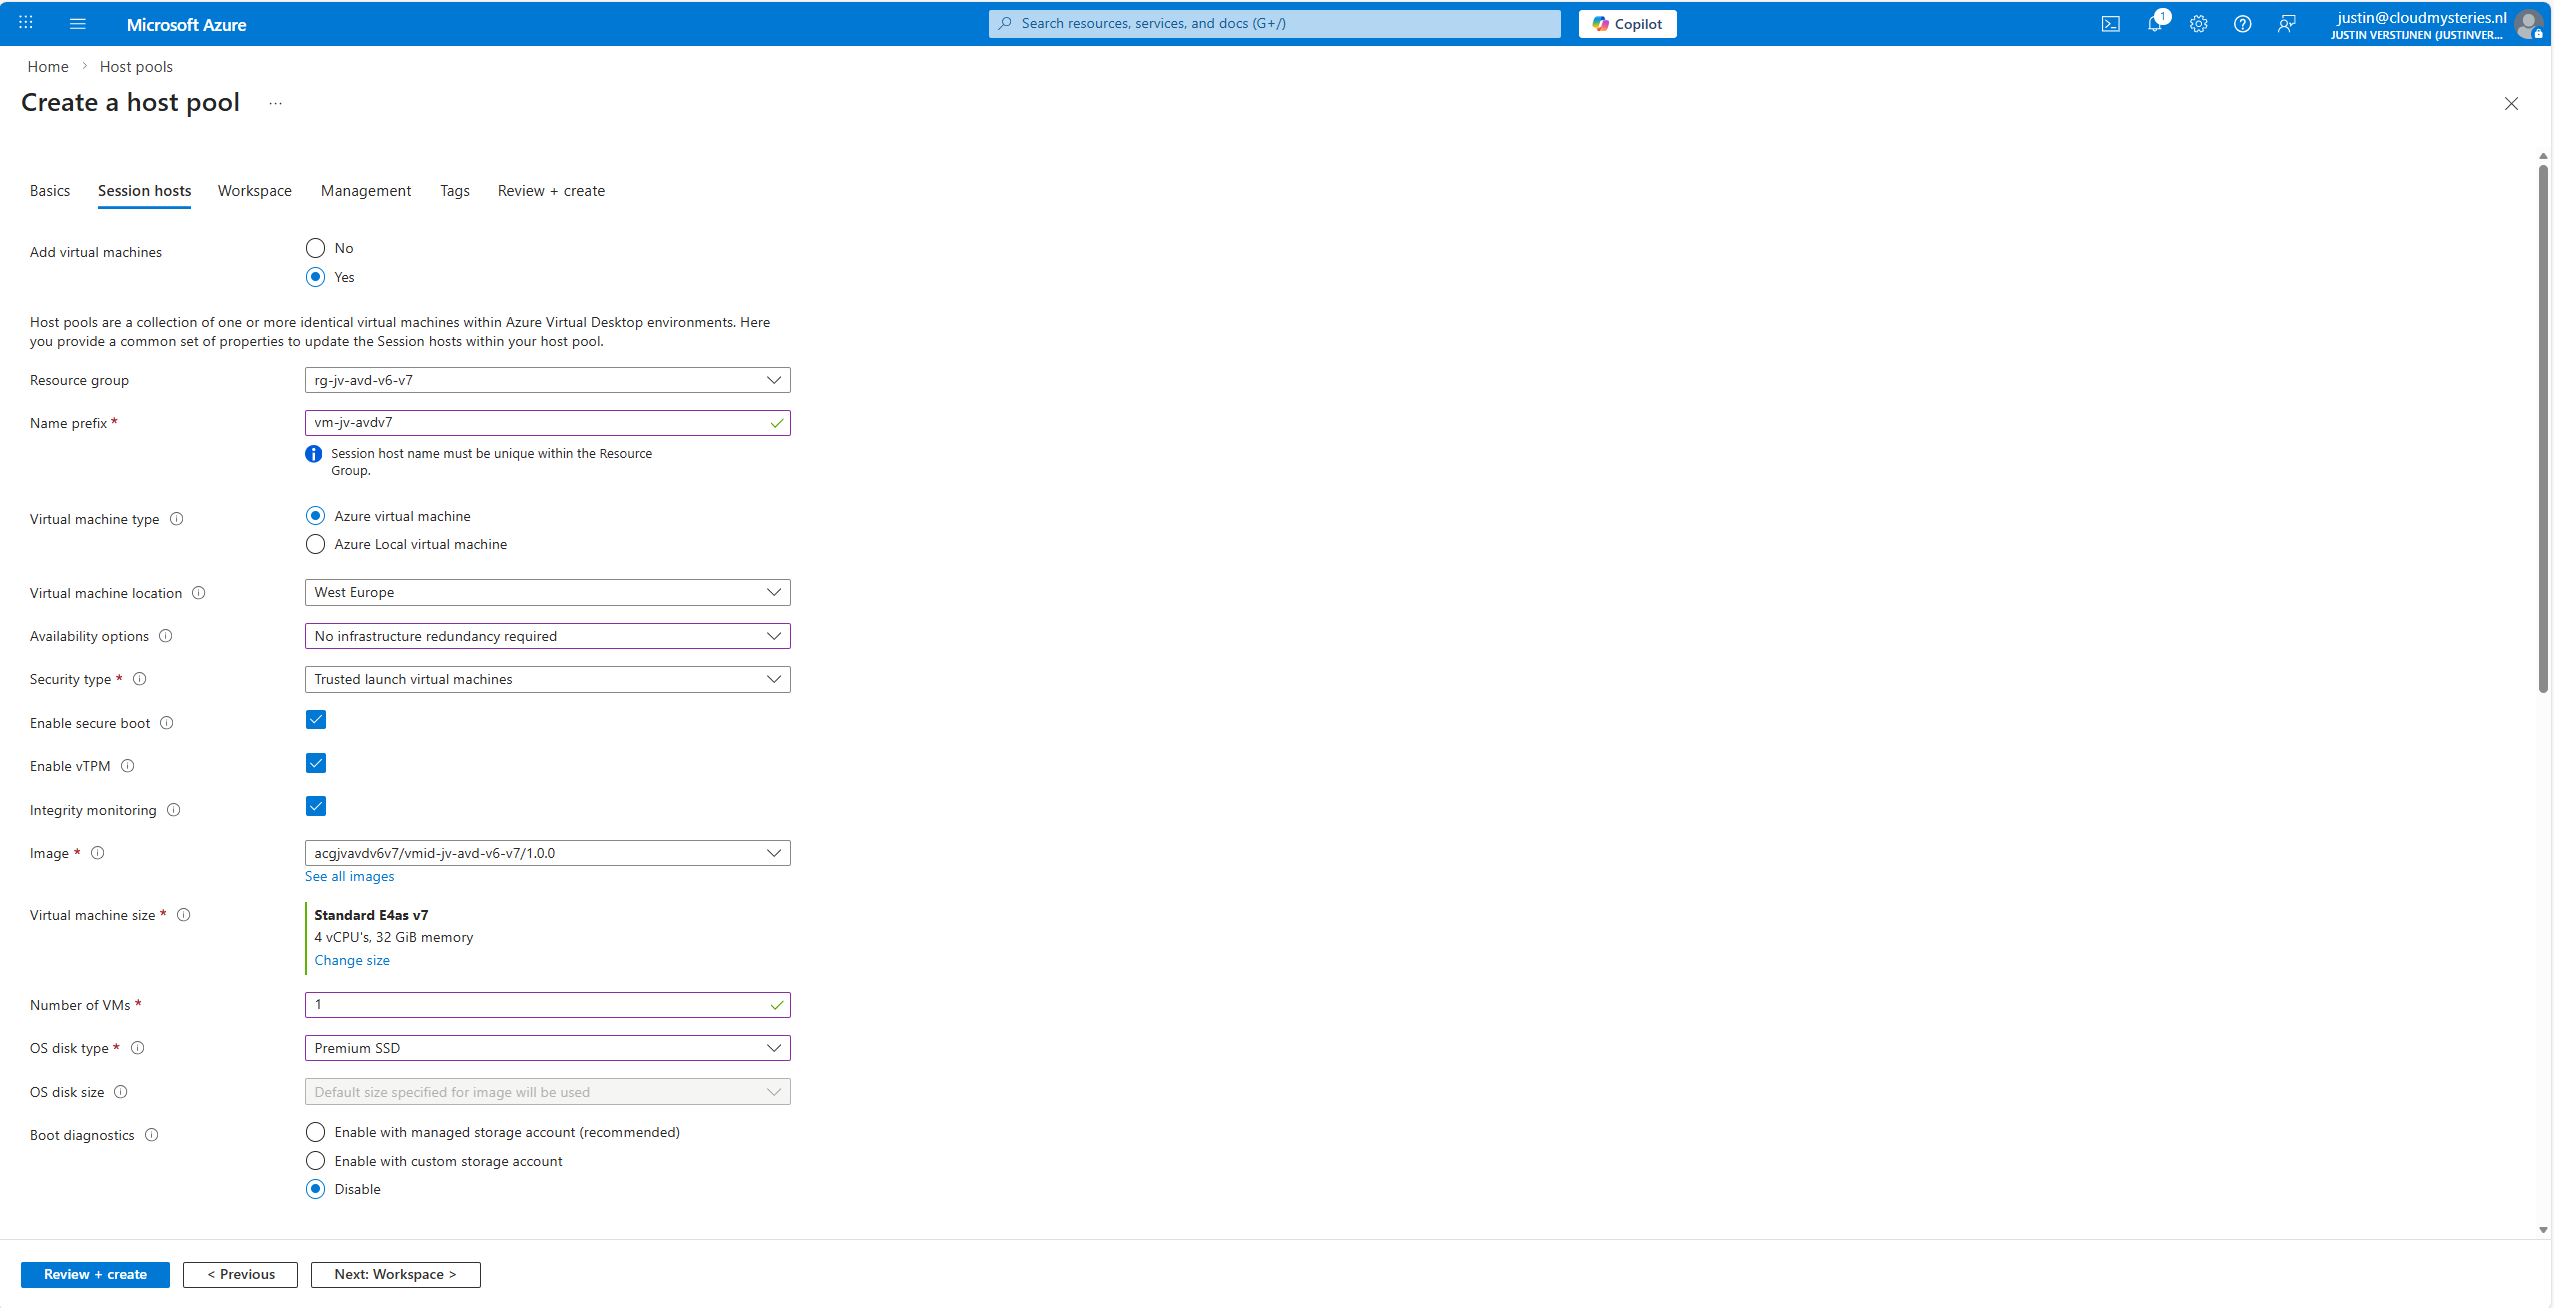
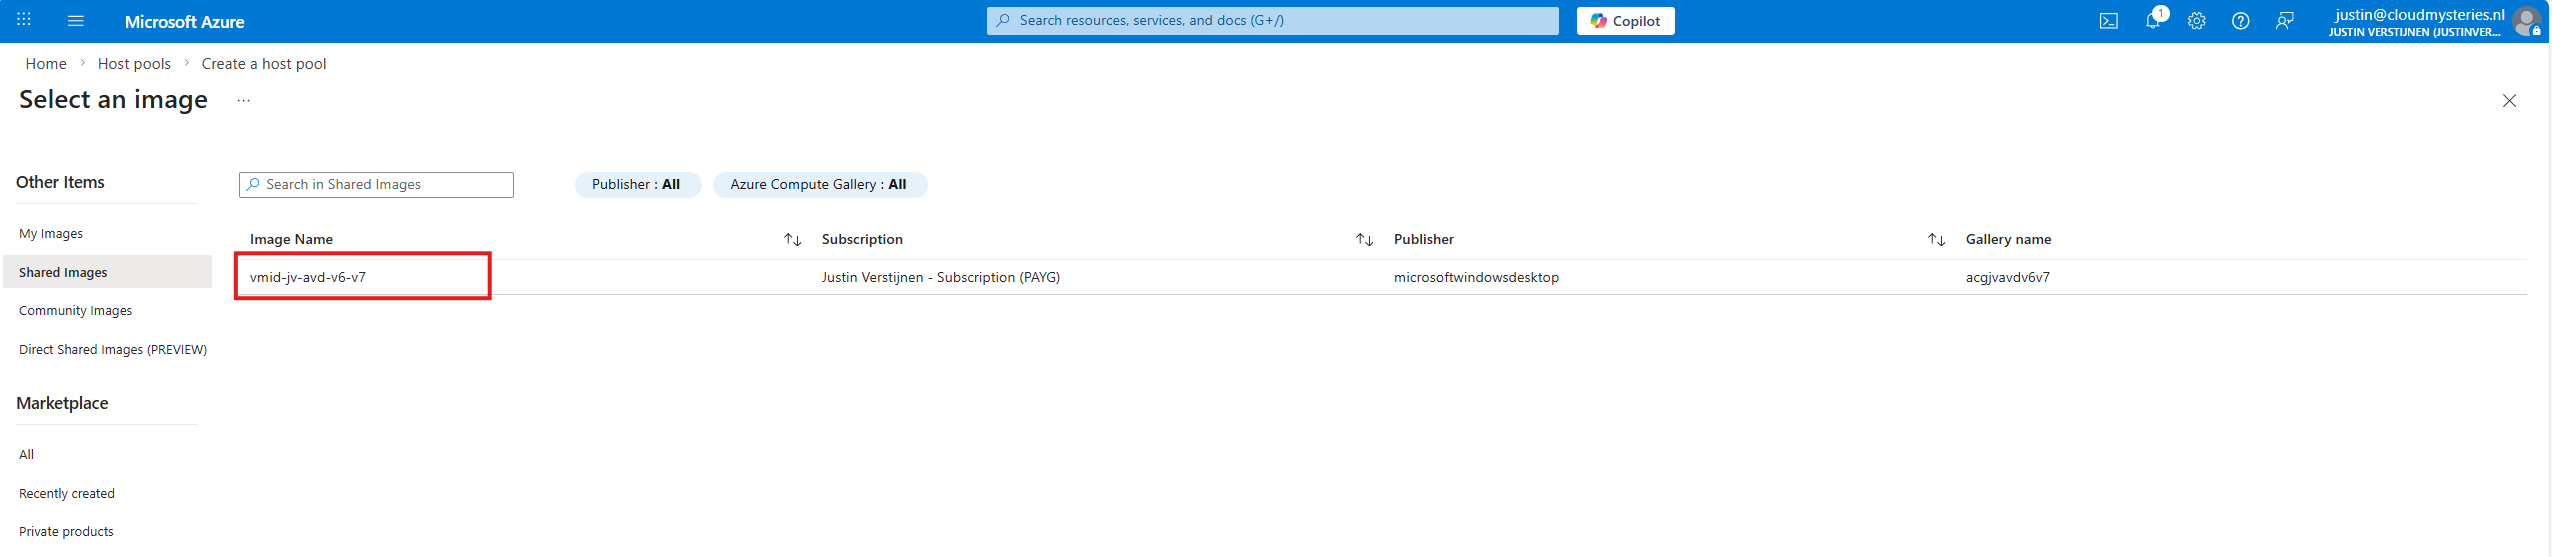
At the “Image” section, click on “see all images”, and then select your shared image definition. This will automatically pick the newest version from the list you saved there.
Now advance through the Azure Virtual Desktop hostpool wizard and finish.
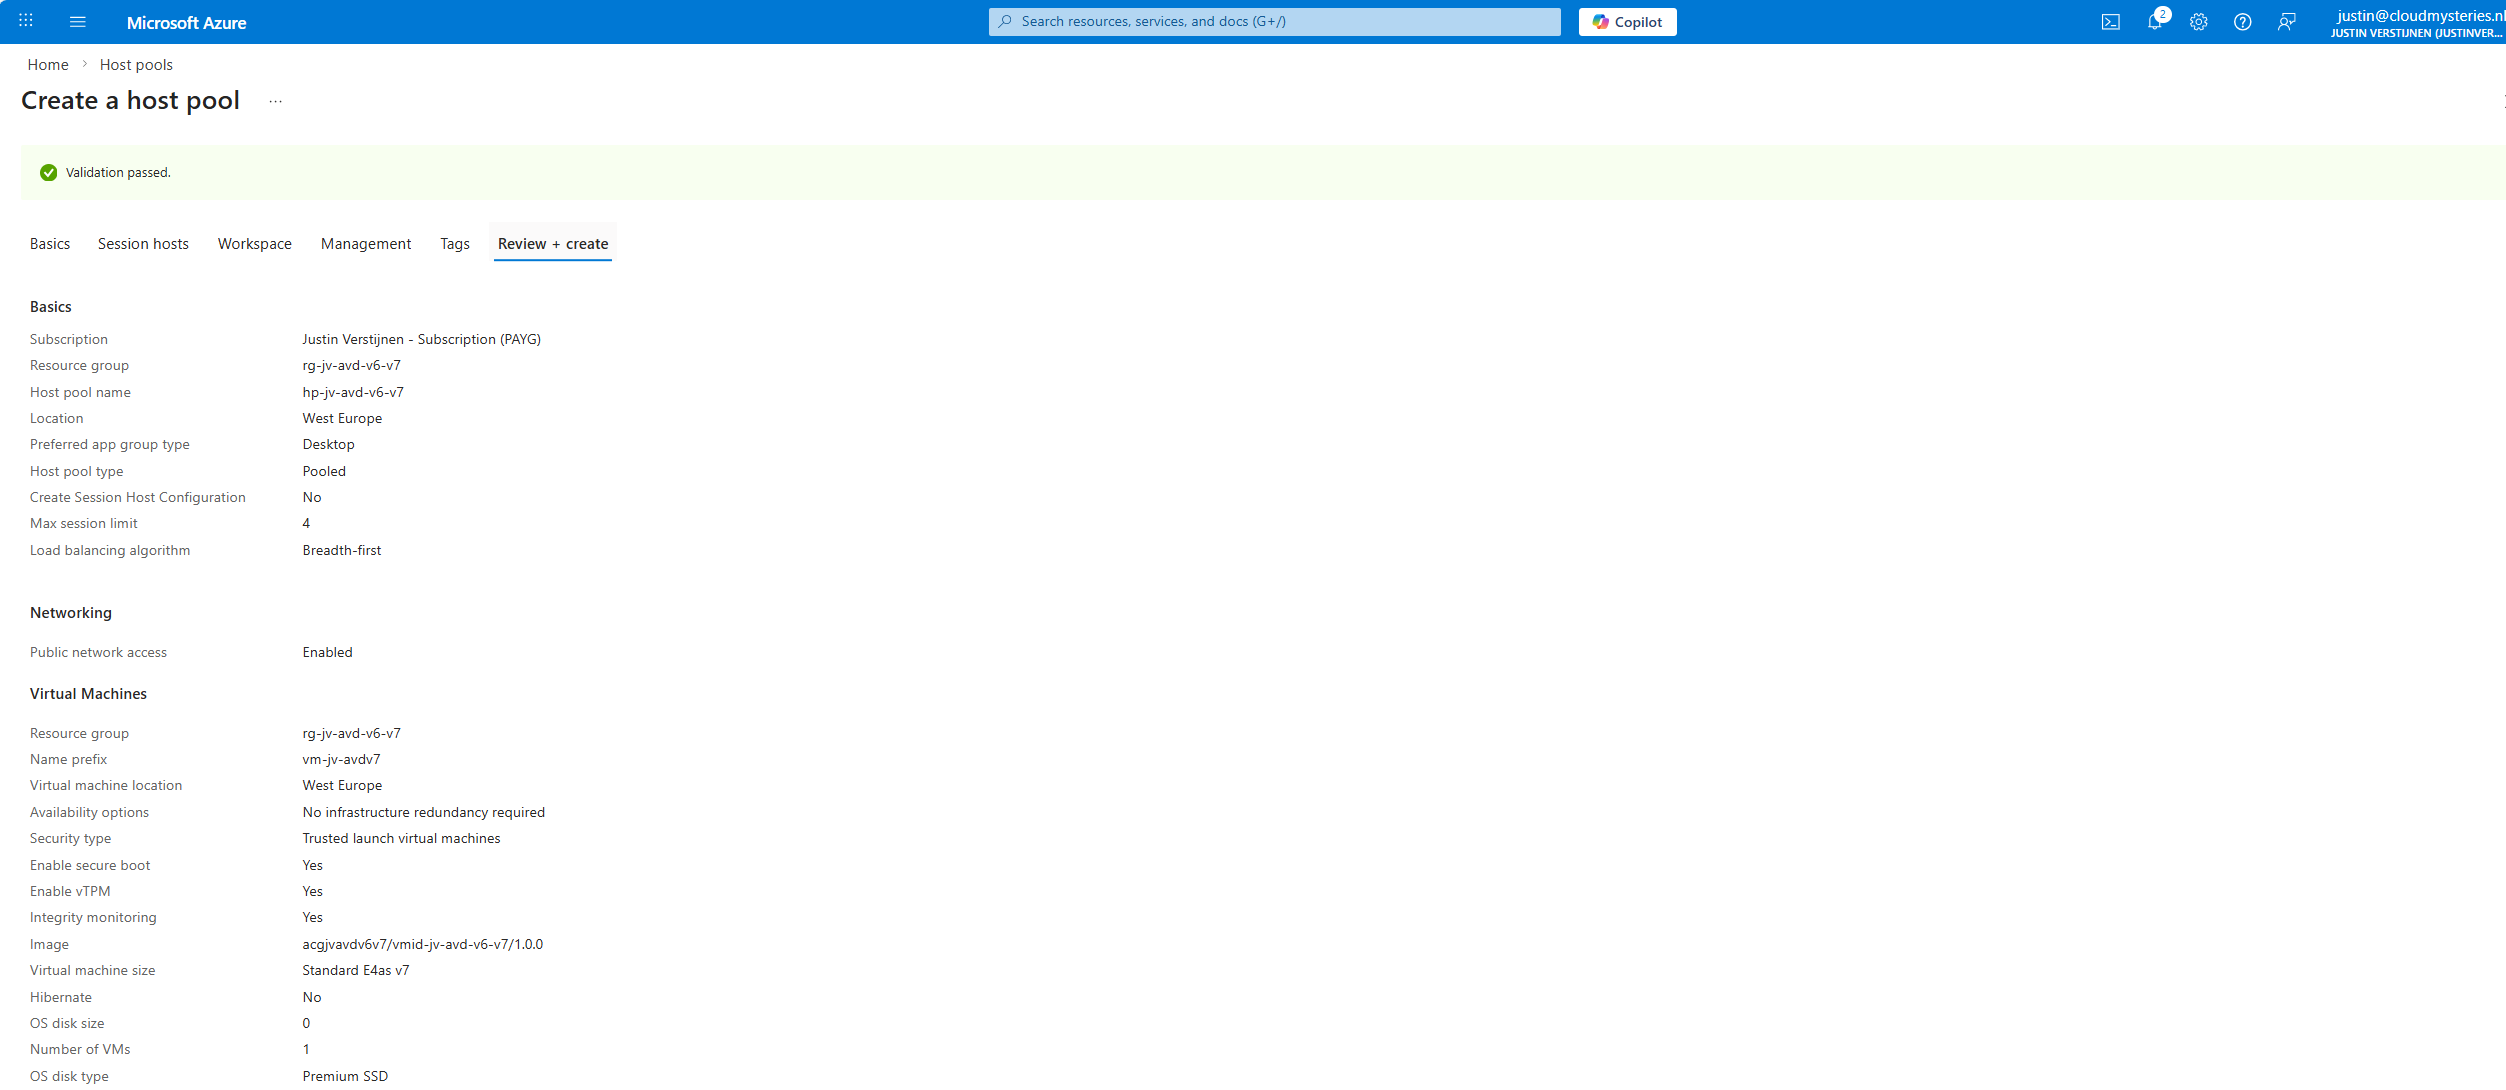
This will create a hostpool with the machines in it with the best specifications and highest security options available at this moment.
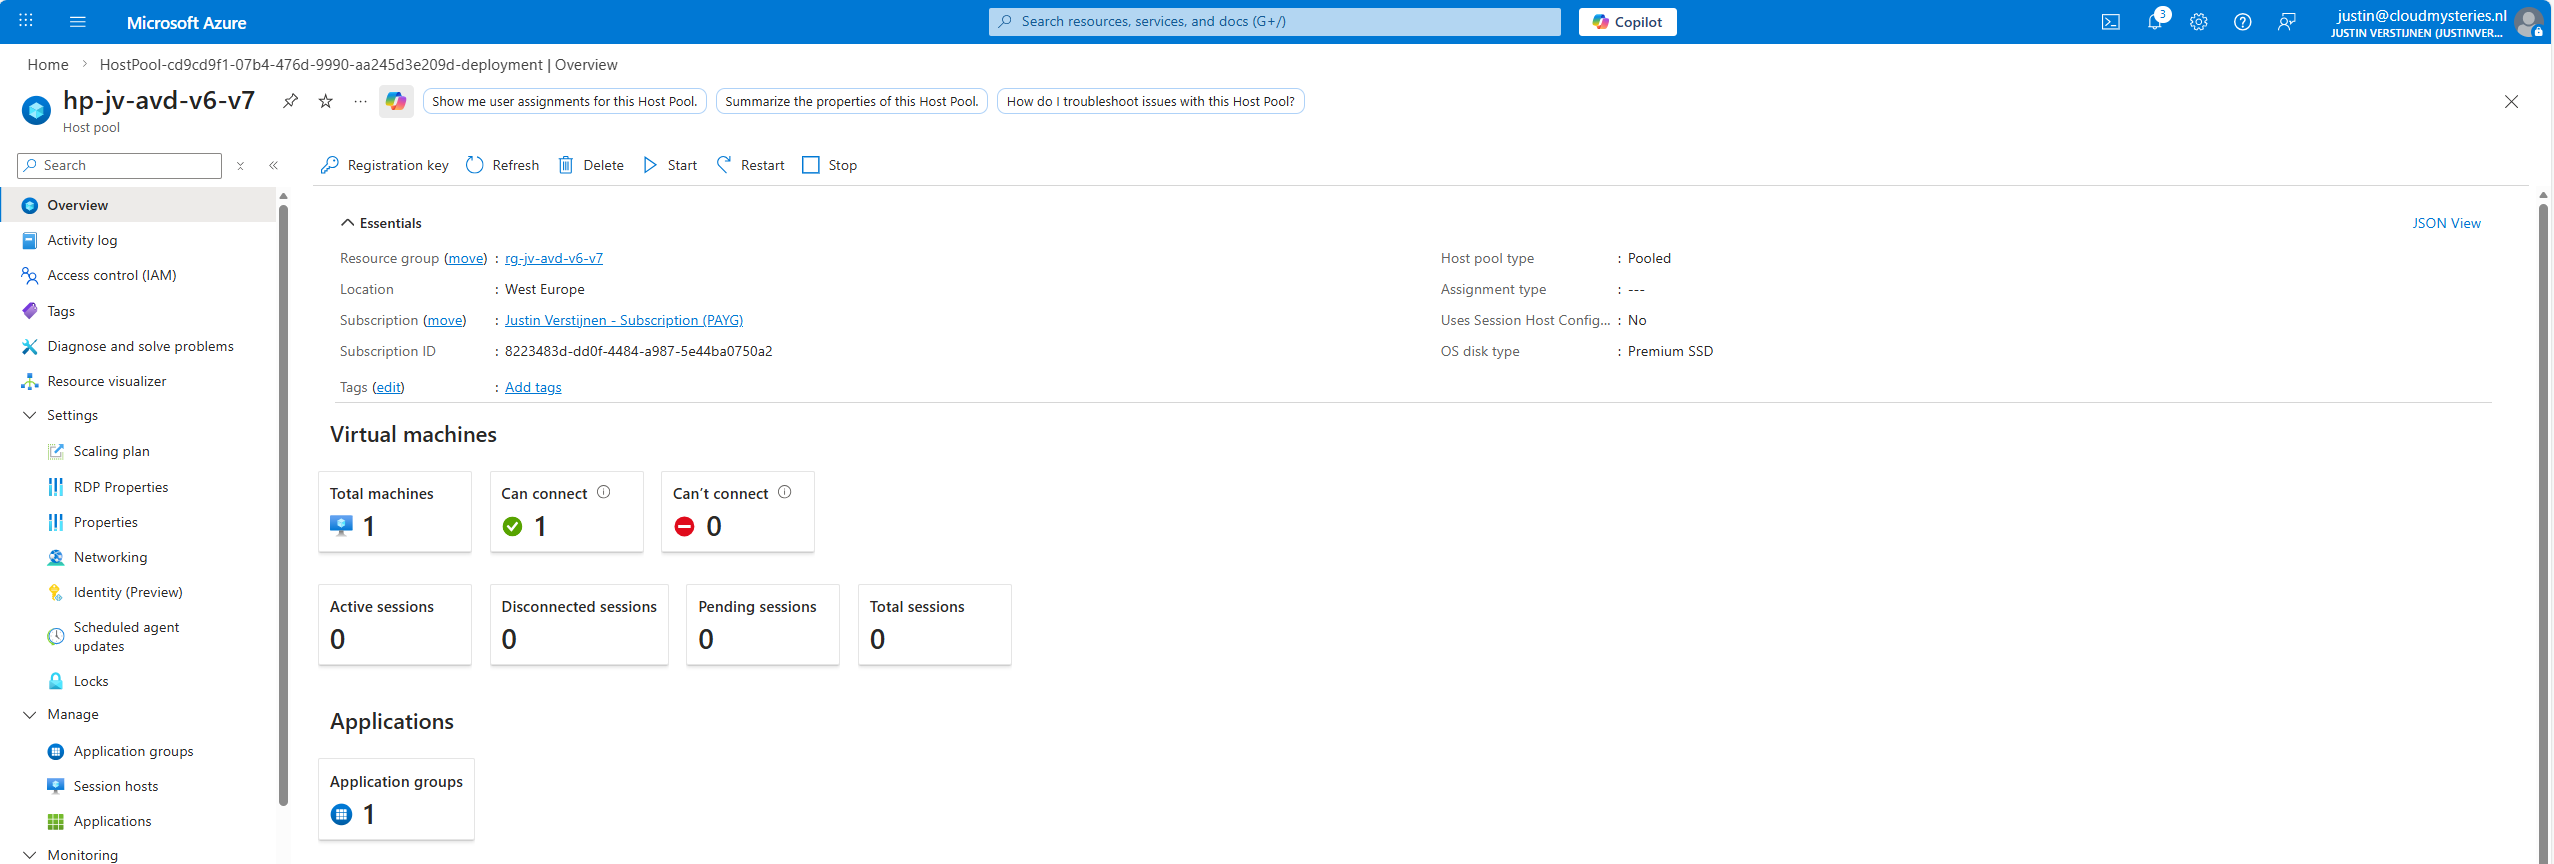
Step 7: Testing the virtual machine
After the hostpool is deployed, we can check how this works now. The hostpool and machine are online:
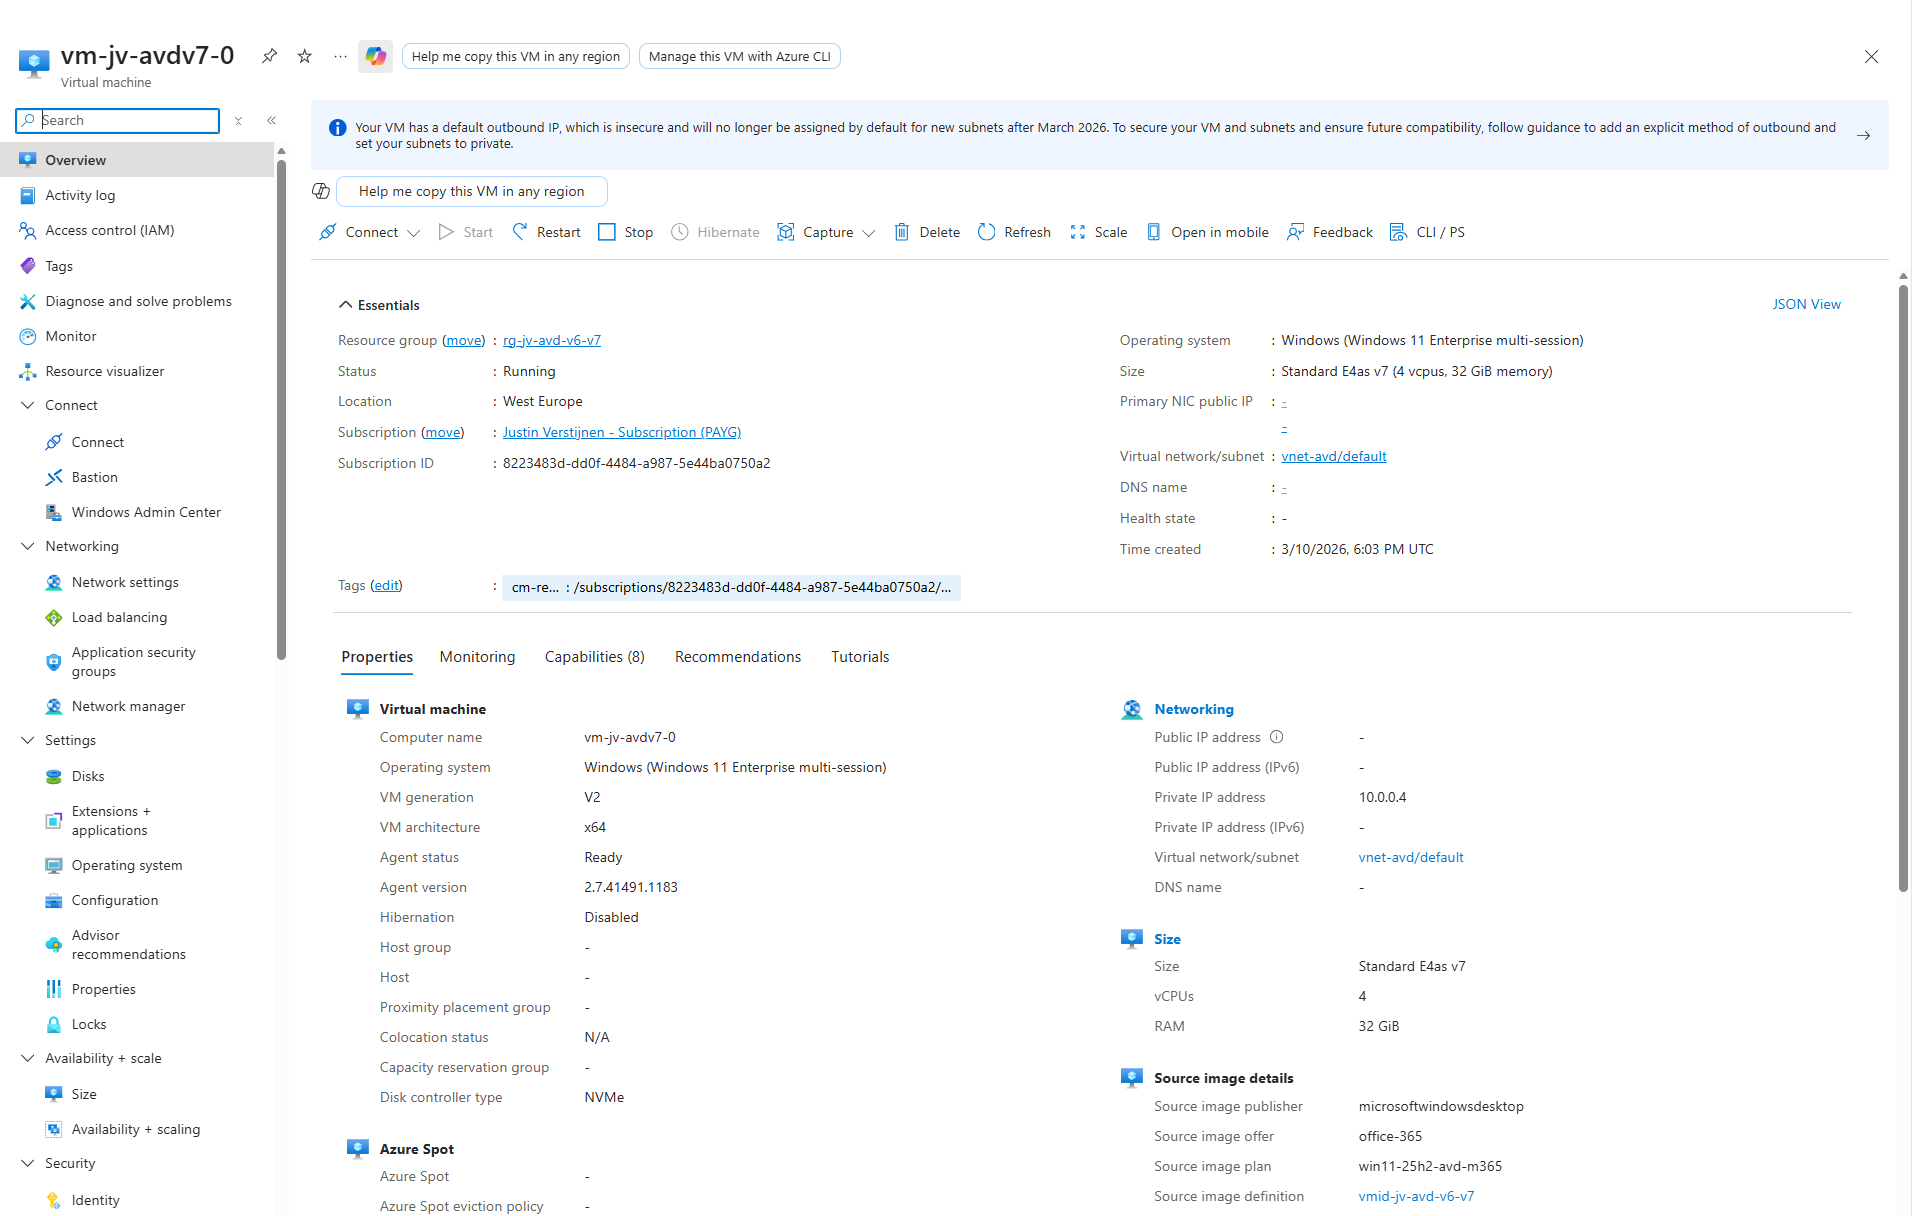
And looking into the VM itself, we can check if this is a newer generation of virtual machine:
Now I have finished the configuration of the hostpool as described in my AVD implementation guide: https://justinverstijnen.nl/azure-virtual-desktop-fslogix-and-native-kerberos-authentication/#9-preparing-the-hostpool
Summary
If you want to use newer V6 or V7 AVD machines, you need to switch to an NVMe-compatible image workflow with Azure Compute Gallery. That is the supported way to build, version, and deploy modern AVD session hosts.
I hope I also informed you a bit on how these newer VMs work and why you cloud get the errors in the first place. Simply by still using a method Microsoft wants you to stop doing. I really think the Azure Compute Gallery is the better option right now, but takes a bit more configuration.
Thank you for reading this guide and I hope it was helpful.
Sources
These sources helped me by writing and research for this post;
- https://learn.microsoft.com/en-us/azure/virtual-machines/shared-image-galleries
- https://learn.microsoft.com/en-us/azure/virtual-machines/nvme-overview
- https://learn.microsoft.com/en-us/azure/virtual-machines/enable-nvme-interface
- https://justinverstijnen.nl/azure-compute-gallery-and-avd-vm-images/
End of the page 🎉
You have reached the end of the page. You can navigate through other blog posts as well, share this post on X, LinkedIn and Reddit or return to the blog posts collection page. Thank you for visiting this post.
If you think something is wrong with this post or you want to know more, you can send me a message to one of my social profiles at: https://justinverstijnen.nl/about/
If you find this page and blog very useful and you want to leave a donation, you can use the button below to buy me a beer. Hosting and maintaining a website takes a lot of time and money. Thank you in advance and cheers :)

The terms and conditions apply to this post.