Create HTTPS 301 redirects with Azure Front Door
Categories:
In this post, I will explain how I redirect my domains and subdomains to websites and parts of my website. If you ever visited my tools page at https://justinverstijnen.nl/tools, you will see I have shortcuts to my tools themselves, although they are not directly linked to the instances.
In this post I will explain how this is done, how to setup Azure Front Door to do this and how to create your own redirects from the Azure Portal.
Requirements
For this solution, you need the following stuff:
- An Azure Subscription
- A domain name or multiple domain names, which may also be subdomains (subdomain.domain.com)
- Some HTTPS knowledge
- Some Azure knowledge
The solution explained
I will explain how I have made the shortcuts to my tools at https://justinverstijnen.nl/tools, as this is something what Azure Front Door can do for you.
In short, Azure Front Door is a load balancer/CDN application with a lot of load balancing options to distribute load onto your backend. In this guide we will use a simple part, only redirecting traffic using 301 rules, but if interested, its a very nice application.
- Our client is our desktop, laptop or mobile phone with an internet browser
- This client will request the URL dnsmegatool.jvapp.nl
- A simple DNS lookup explains this (sub)domain can be found on Azure (jvshortcuts-to-jvtools-eha7cua0hqhnd4gk.z01.azurefd.net)
- The client will lookup Azure as he now knows the address
- Azure Front Door accepted the request and will route the request to the rule set
- The rule set will be checked if any rule exists with this parameters
- The rule has been found and the client will get a HTTPS 301 redirect to the correct URL: tools.justinverstijnen.nl/dnsmegatool.nl
This effectively results in this (check the URL being changed automatically):
Now that we know what happens under the hood, let’s configure this cool stuff.
Step 1: Create Azure Front Door
At first we must configure our Azure Front Door instance as this will be our hub and configuration plane for 301 redirects and managing our load distribution.
Open up the Azure Portal and go to “Azure Front Door”. Create a new instance there.
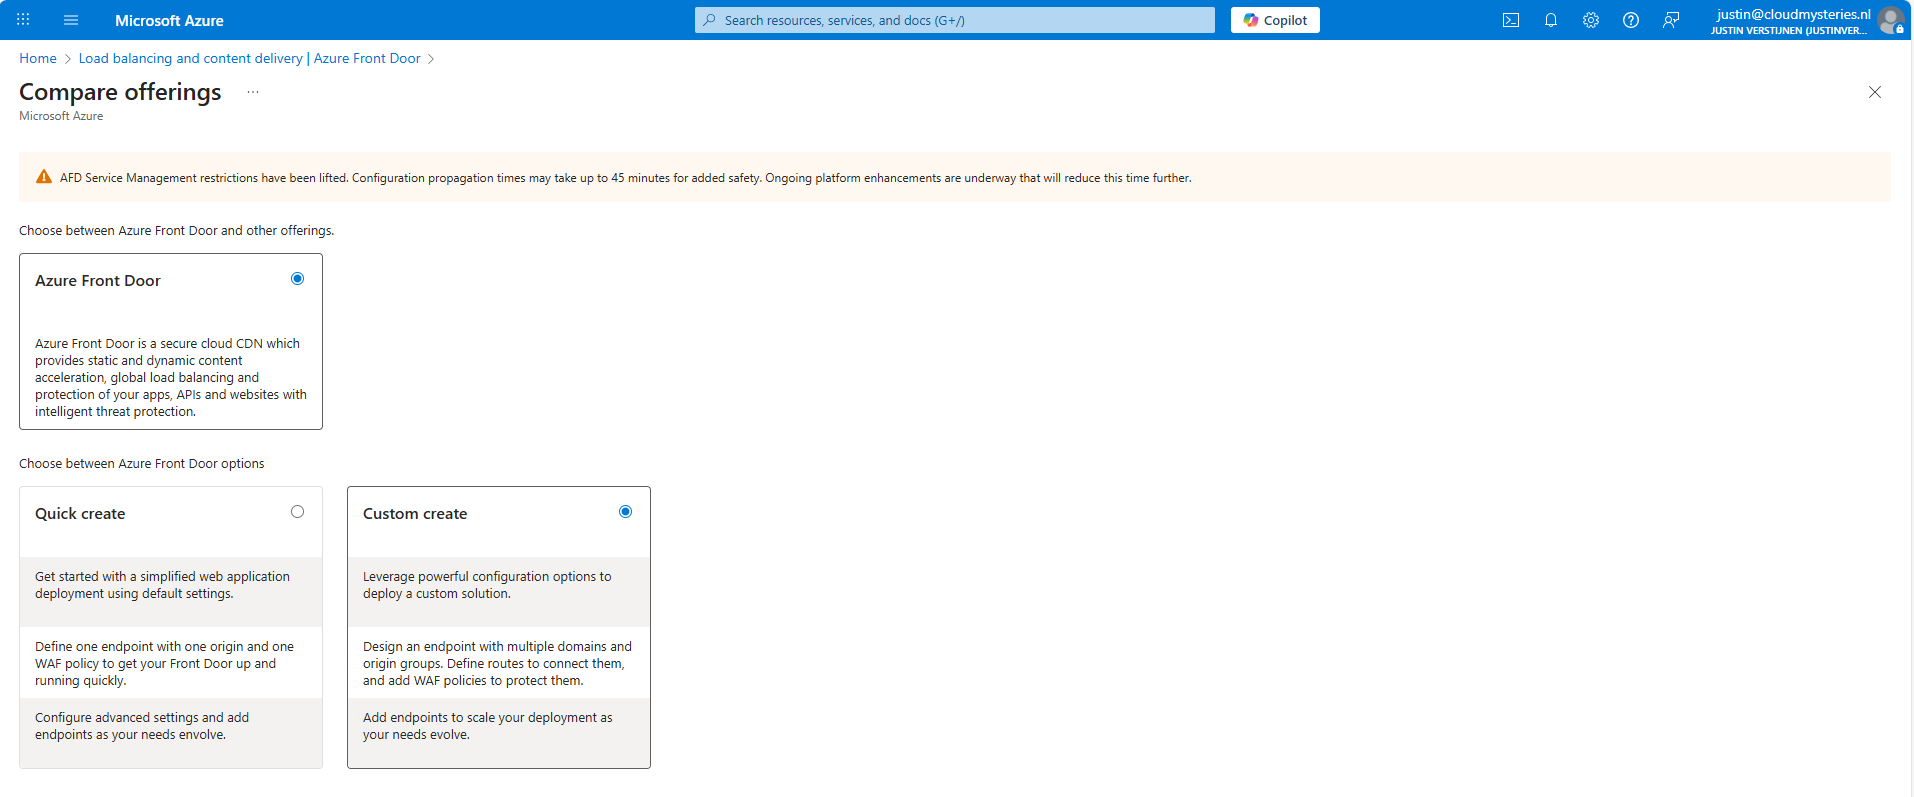
As the note describes, every change will take up to 45 minutes to be effective. This was also the case when I was configuring it, so we must have a little patience but it will be worth it.
I selected the “Custom create” option here, as we need a minimal instance.
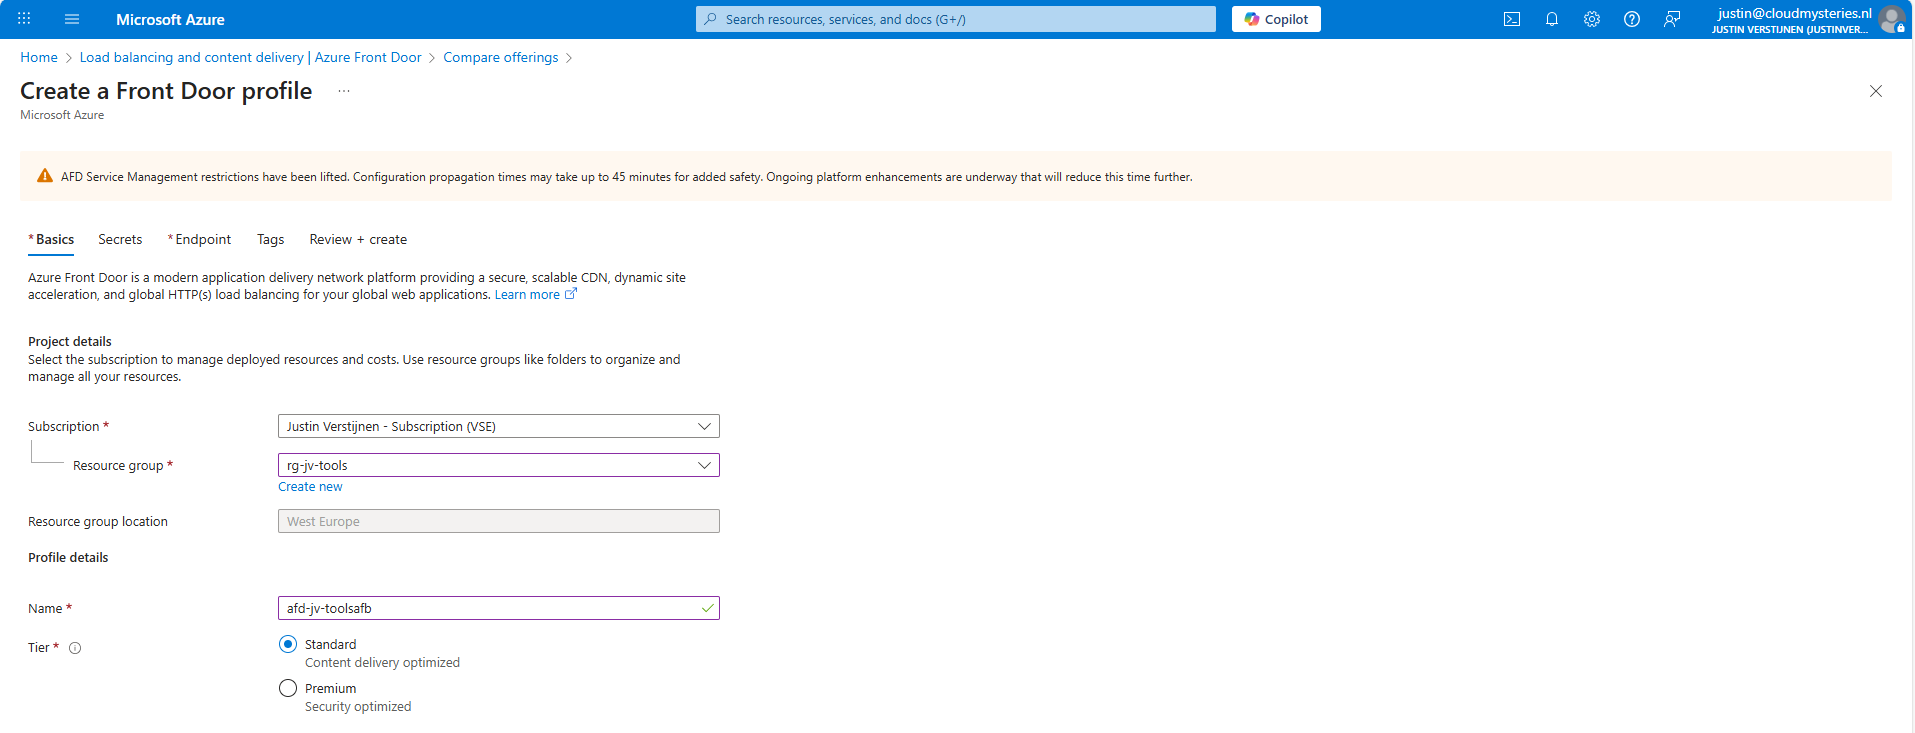
At the first page, fill in your details and select a Tier. I will use the Standard tier. The costs will be around:
- 35$ per month for Standard
- 330$ per month for Premium
Go to the “Endpoint” tab.

Give your Endpoint a name. This is the name you will redirect your hostname (CNAME) records to.
After creating the Endpoint, we must create a route.

Click “+ Add a route” to create a new route.
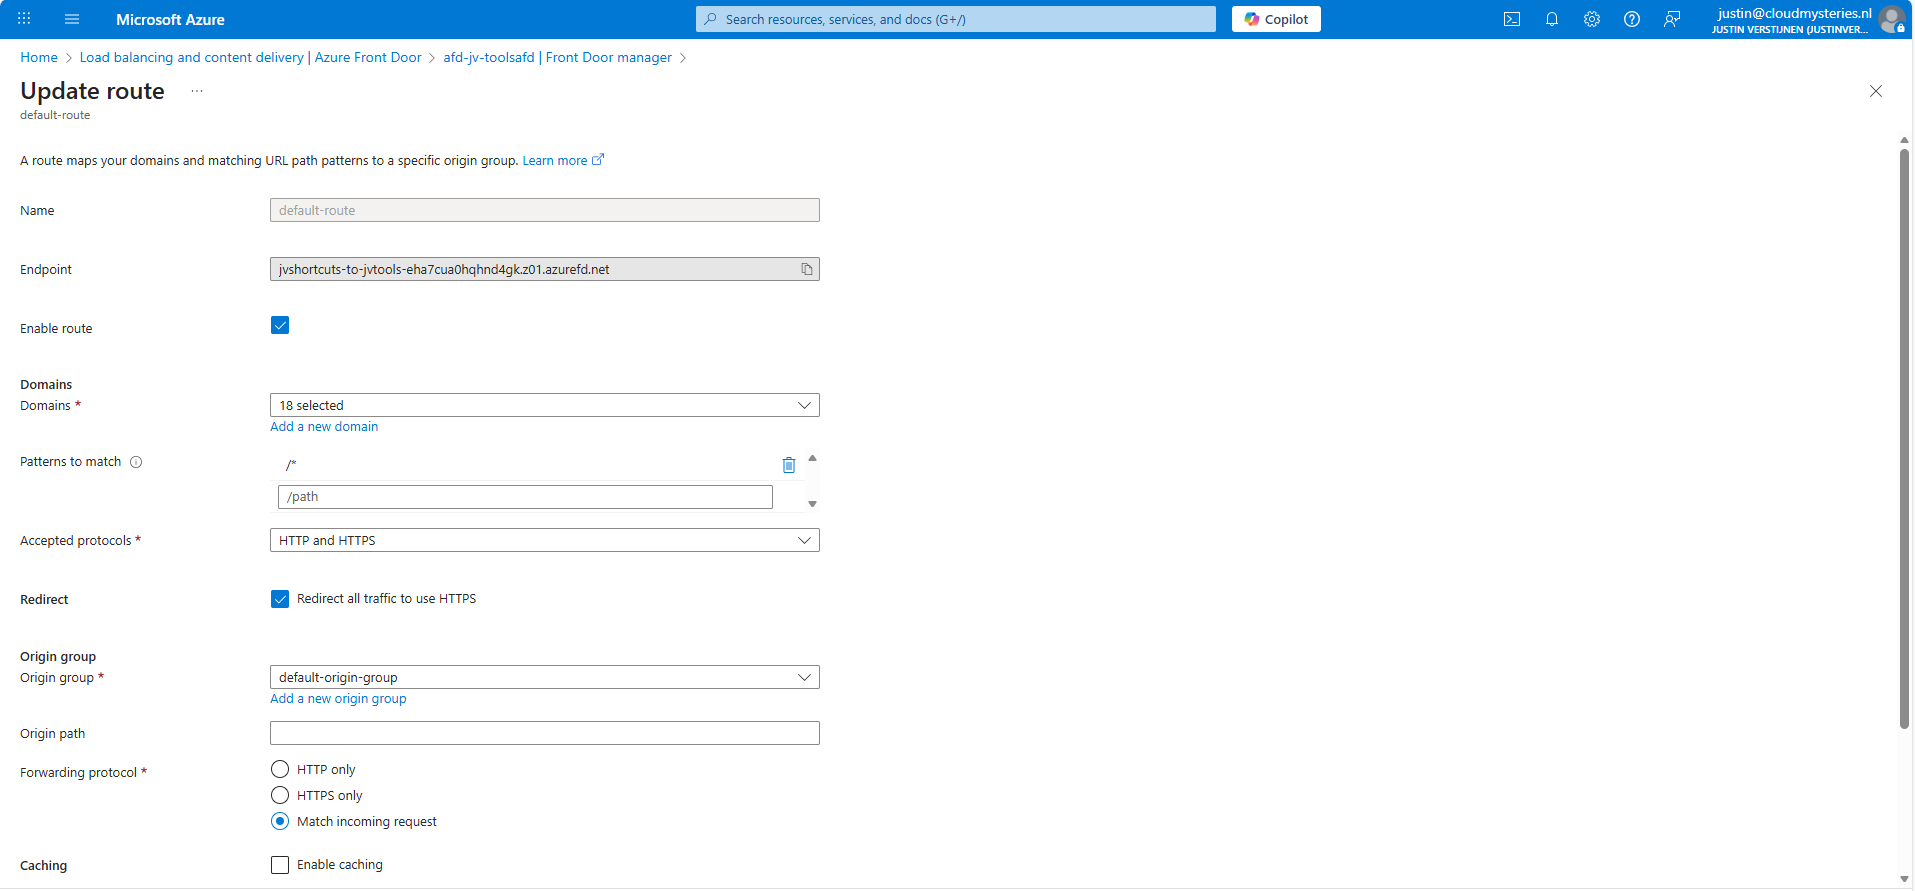
Give the route a name and fill in the following fields:
- Patterns to match: /*
- Accepted protocols: HTTP and HTTPS
- Redirect all traffic to use HTTPS: Enabled
Then create a new origin group. This doesn’t do anything in our case but must be created.
After creating the origin group, finish the wizard to create the Azure Front Door instance, and we will be ready to go.
Step 2: Configure the rule set
After the Azure Front Door instance has finished deploying, we can create a Rule set. This can be found in the Azure Portal under your instance:
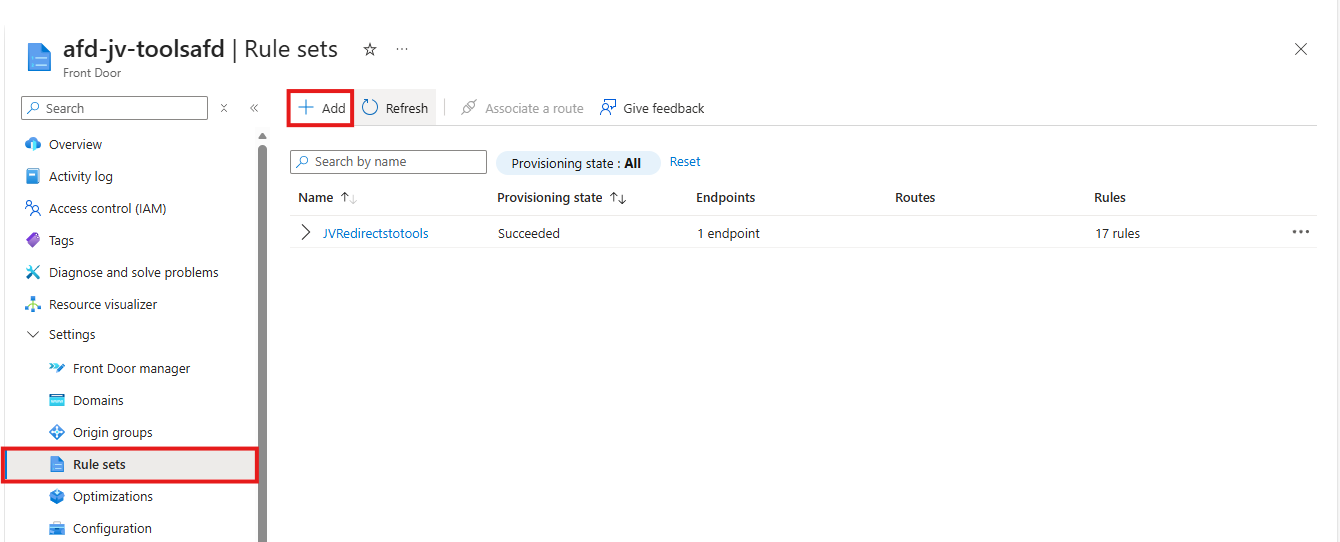
Create a new rule set here by clicking “+ Add”. Give the set a name after that.
The rule set is exactly what it is called, a set of rules your load balancing solution will follow. We will create the redirection rules here by basically saying:
- Client request: dnsmegatool.jvapp.nl
- Redirect to: tools.justinverstijnen.nl/dnsmegatool
Basically a if-then (do that) strategy. Let’s create such rule step by step.
Click the “+ Add rule” button. A new block will appear.

Now click the “Add a condition” button to add a trigger, which will be “Request header”
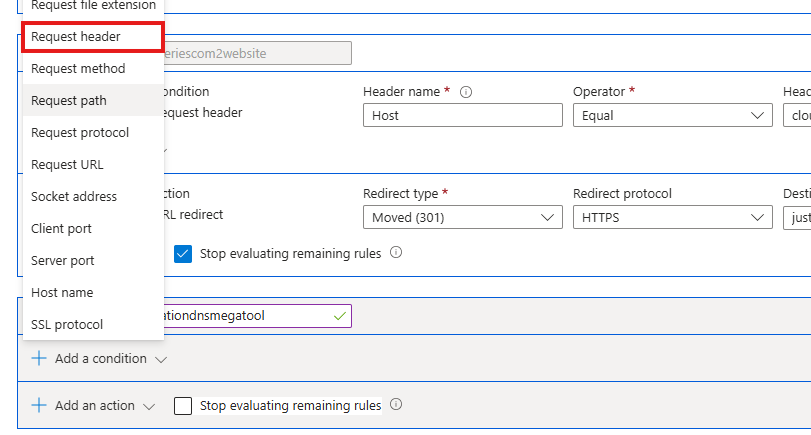
Fill in the fields as following:
- Header name: Host
- Operator: Equal
- Header value: dnsmegatool.jvapp.nl (the URL before redirect)
It will look like this:

The click the “+ Add an action” button to decide on what to do when a client requests your URL:

Select the “URL redirect” option and fill in the fields:
- Redirect type: Moved (301)
- Redirect protocol: HTTPS
- Destination host: tools.justinverstijnen.nl
- Destination path: /dnsmegatool (only use this if the site is not at the top level of the domain)
Then enable the “Stop evaluating remaining rules” option to stop processing after this rule has applied.
The full rule looks like this:

Now we can update the rule/rule set and do the rest of the configurations.
Step 3: Custom domain configuration
How we have configured that we want domain A to link to domain B, but Azure requires us to validate the ownership of domain A before able to set redirections.
In the Azure Front Door instance, go to “Domains” and “+ Add” a domain here.
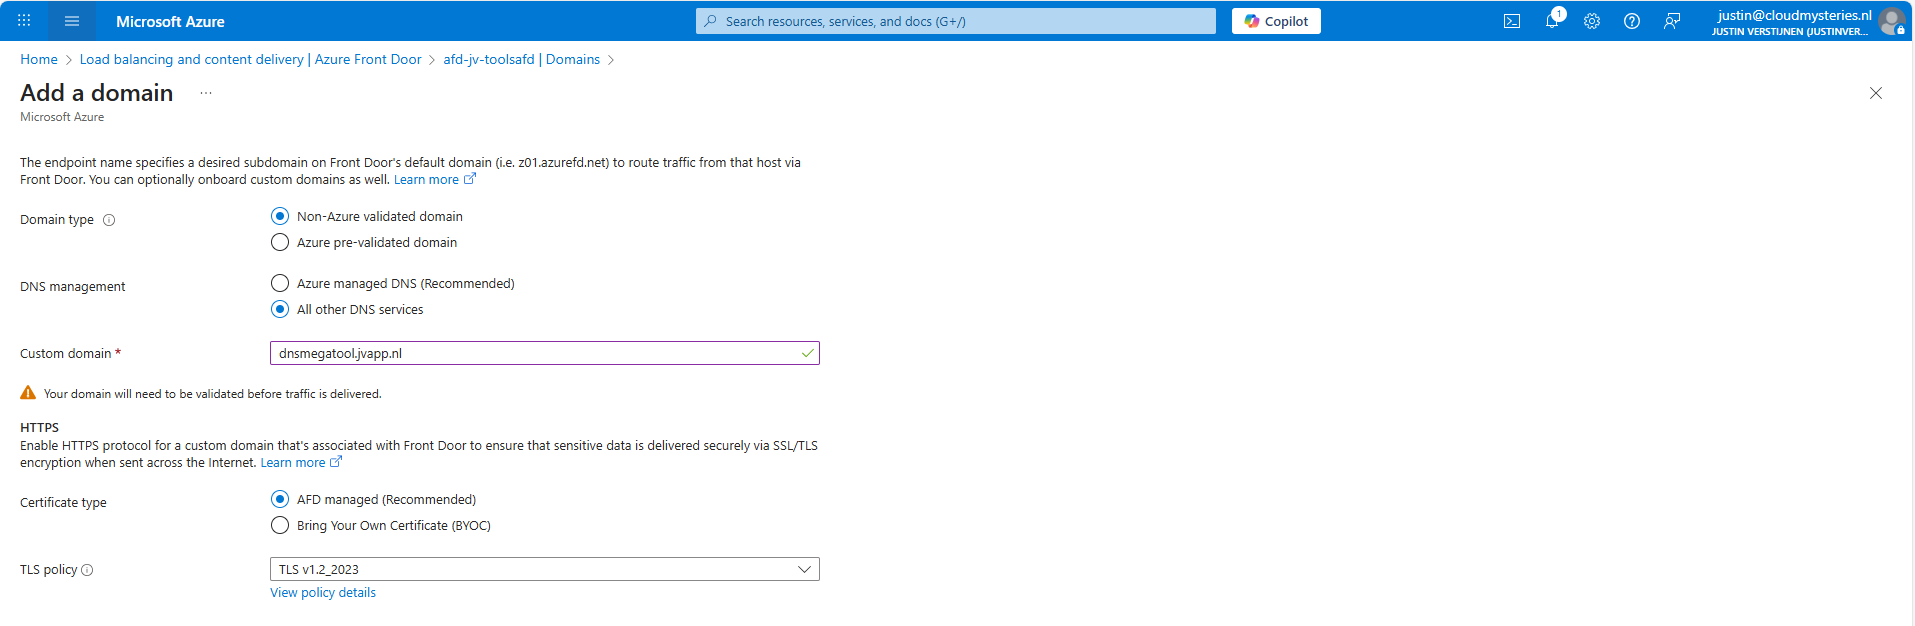
Fill in your desired domain name and click on “Add”. We now have to do a validation step on your domain by creating a TXT record.
Wait for a minute or so for the portal to complete the domain add action, and go to the “Domain validation section”:

Click on the Pending state to unveil the steps and information for the validation:
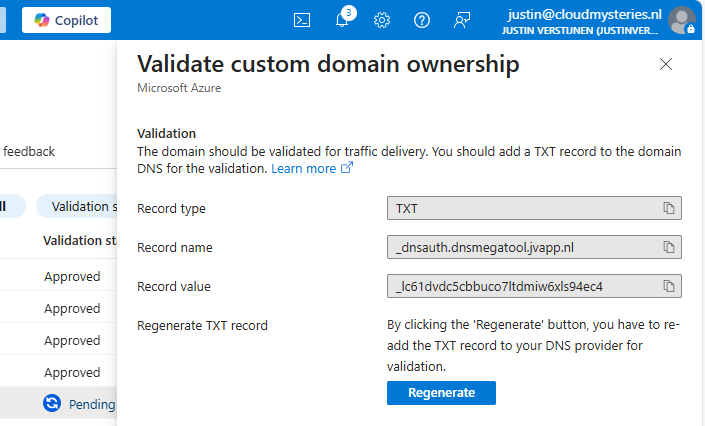
In this case, we must create a TXT record at our DNS hosting with this information:
- Record name: _dnsauth.dnsmegatool (domain will automatically be filled in)
- Record value: _lc61dvdc5cbbuco7ltdmiw6xls94ec4
Let’s do this:

Save the record, and wait for a few minutes. The Azure Portal will automatically validate your domain. This can take up to 24 hours.
In the meanwhile, now we have all our systems open, we can also create the CNAME record which will route our domain to Azure Front Door. In Azure Front Door collect your full Endpoint hostname, which is on the Overview page:
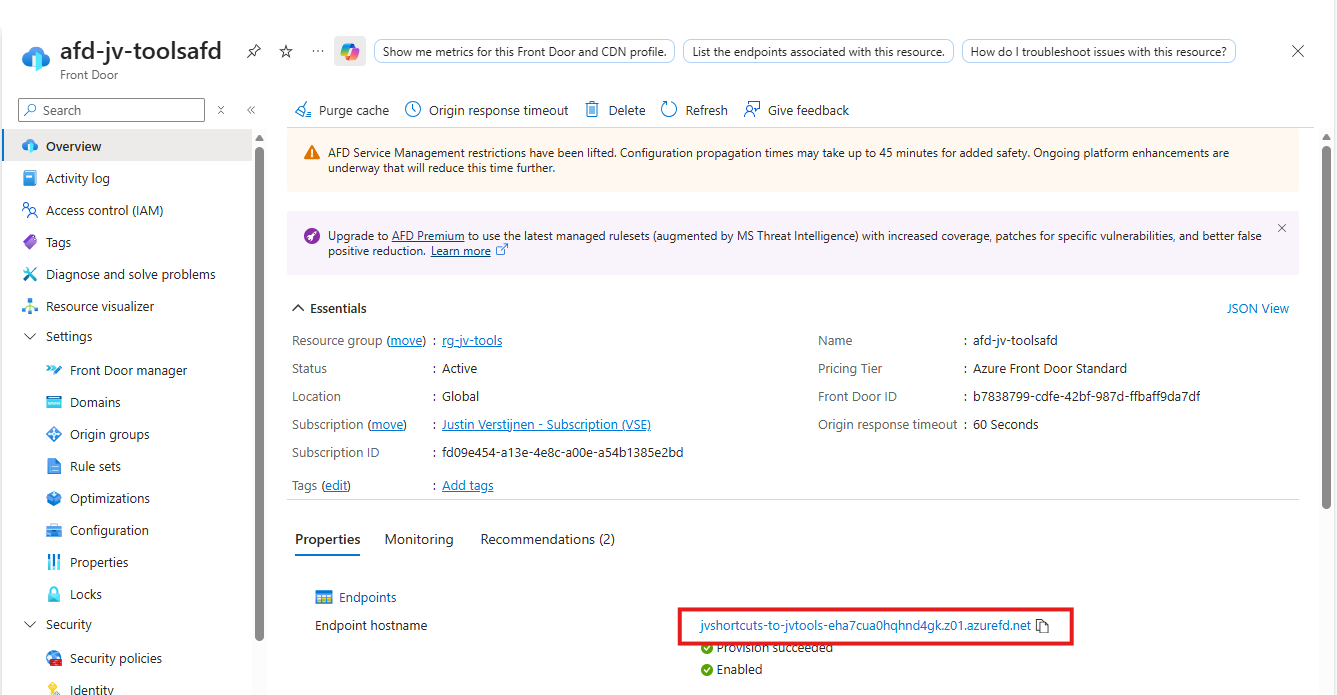
Copy that value and head back to your DNS hosting.
Create a new CNAME record with this information:
- Name: dnsmegatool
- Type: CNAME
- Value: jvshortcuts-to-jvtools-eha7cua0hqhnd4gk.z01.azurefd.net**.**
Make sure to end the value with a trailing dot (.), as this is a hostname externally to your DNS zone.

Save the DNS configuration, and your complete setup will now work in around 45 to 60 minutes.
This domain configuration has to be done for every domain and subdomain Azure Front Door must redirect. This is by design due to domain security.
Summary
Azure Front Door is a great solution for managing redirects for your webservers and tools in a central dashboard. Its a serverless solution so no patching or maintenance is needed. Only the configuration has to be done.
Azure Front Door does also manage your SSL certificates used in the redirections which is really nice.
Thank you for visiting this guide and I hope it wass helpful.
Sources
These sources helped me by writing and research for this post;
- https://azure.microsoft.com/en-in/pricing/details/frontdoor/?msockid=0e4eda4e5e6161d61121ccd95f0d60f5
- https://learn.microsoft.com/en-us/azure/frontdoor/front-door-url-redirect?pivots=front-door-standard-premium
End of the page 🎉
You have reached the end of the page. You can navigate through other blog posts as well, share this post on X, LinkedIn and Reddit or return to the blog posts collection page. Thank you for visiting this post.
If you think something is wrong with this post or you want to know more, you can send me a message to one of my social profiles at: https://justinverstijnen.nl/about/
If you find this page and blog very useful and you want to leave a donation, you can use the button below to buy me a beer. Hosting and maintaining a website takes a lot of time and money. Thank you in advance and cheers :)

The terms and conditions apply to this post.