Dynamic Distribution Groups in Microsoft 365
Categories:
Sometimes you want to have a distribution group with all your known mailboxes in it. For example an employees@justinverstijnen.nl or all@justinverstijnen.nl address to send a mail company wide. A normal distribution group is possible, but requires a lot of manual maintenance, like adding and removing users.
To apply a little more automation you can use the Dynamic Distribution Group feature of Exchange Online. This is a feature like the Dynamic groups feature of Microsoft Entra which automatically adds new user mailboxes after they are created to make sure every new employee is added automatically.
Requirements
- Around 15 minutes
- Exchange Online Powershell module
Creating a Dynamic Distribution Group
To create a dynamic distribution group, go to the Exchange Online Admin center (admin.exchange.microsoft.com)
When you create a group, select the option “Dynamic distribution” and fill in the details.
At the step “Users” you have to select “Users with Exchange mailboxes” to only include users, no shared mailboxes, external/guest users or resource mailboxes.
Define an email address and finish the wizard.
Delivery Management whitelist
To define which users are allowed to email to the group, you can configure delivery management which acts as a whitelist for the dynamic distribution group. Only the users defined may send to the group.
After creating the mailbox, go to Groups and then Dynamic distribution list and select the group.
Go to the tab “Settings” and click “edit delivery management”.
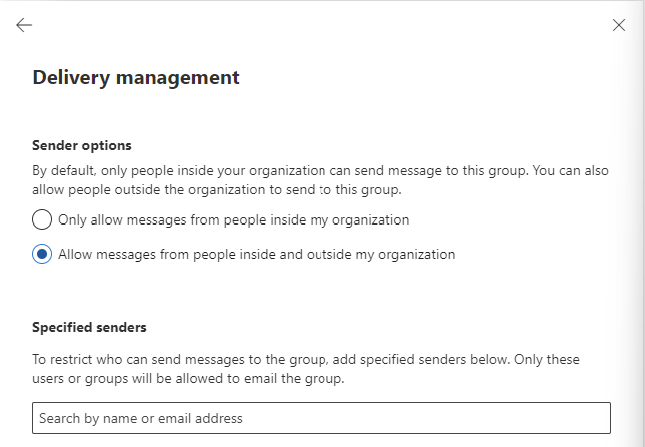
Here you can define the users who may send and a general advice to restrict mailing only from the same orgainzation.
How to exclude mailboxes from the dynamic
It is possible to exclude mailboxes from the dynamic distribution group, but it is not possible in the Admin center. This is possible with Powershell.
My way to do it is to use the attribute field CustomAttribute1 and put “exclude_from_employees” in it without the quotes. In the filter of the dynamic distribution group we select all user mailboxes but not when they have the attribute “exclude_from_employees”.
To configure the attribute filter, we login into Exchange Online Powershell:
Connect-ExchangeOnlineTo configure the filter itself, we run the following script:
$employees = "Name of distributiongroup"
Set-DynamicDistributionGroup -Identity $employees -RecipientFilter "(Recip
ientTypeDetails -eq 'UserMailbox') -and (CustomAttribute1 -ne 'exclude_from_employees')"
After running these commands succesfully you can add the attribute from the Exchange Online admin center in a mailbox. To add this attribute, open a mailbox;
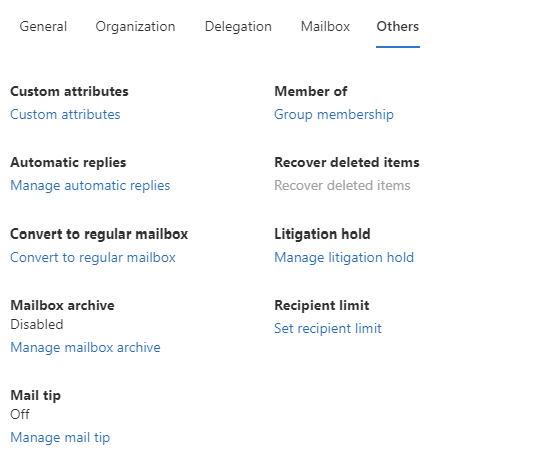
Go to “Custom Attributes” and add the attribute like shown below;

When a mailbox had this attribute in field 1, it will be excluded from the dynamic distribution group.
Check recipients of dynamic distribution group
To check all recipients of the distribution group, you can run the following command when logged in into Exchange Online Powershell:
$employees = Get-DynamicDistributionGroup -Identity *EMAILADDRESS*
Get-Recipient -RecipientPreviewFilter ($employees.RecipientFilter)
Just change the Email Address to your own created dynamic distribution group and all recipients will show. Now you have the list of all email addresses the system considers as “members”.
Check excluded recipients of dynamic distribution group
To check which mailboxes does not receive email from the dynamic distribution group, you can run the following;
Get-Mailbox | where {$_.CustomAttribute1 -eq "exclude_from_employees"}This command will return all users with the created attribute and who does not receive the email.
Summary
Dynamic Distribution Groups are an excellent way to minimize administrative effort while maintaining some internal addresses for users to send mail to. It is really good as a “all-employees” distribution group where you never have to add or remove users from when employees come and leave. The more automation, the better.
I hope this guide was helpful and thank you for reading!
End of the page 🎉
You have reached the end of the page. You can navigate through other blog posts as well, share this post on X, LinkedIn and Reddit or return to the blog posts collection page. Thank you for visiting this post.
If you think something is wrong with this post or you want to know more, you can send me a message to one of my social profiles at: https://justinverstijnen.nl/about/
If you find this page and blog very useful and you want to leave a donation, you can use the button below to buy me a beer. Hosting and maintaining a website takes a lot of time and money. Thank you in advance and cheers :)

The terms and conditions apply to this post.