Everything you need to know about Azure Bastion
Categories:
Azure Bastion is a great tool in Azure to ensure your virtual machines are accessible in a fast, safe and easy way. This is cool if you want to embrace Zero Trust into your servers management layer and so a secure way to access your servers in Azure.
In this guide I will explain more about Azure Bastion and I hope I can give you a good overview of the service, its features, pricing and some practice information.
How does Azure Bastion work?
Azure Bastion is a serverless instance you deploy in your Azure virtual network. It resides there waiting for users to connect with it. It acts like a Jump-server, a secured server from where an administrative user connects to another server.
The process of it looks like this:
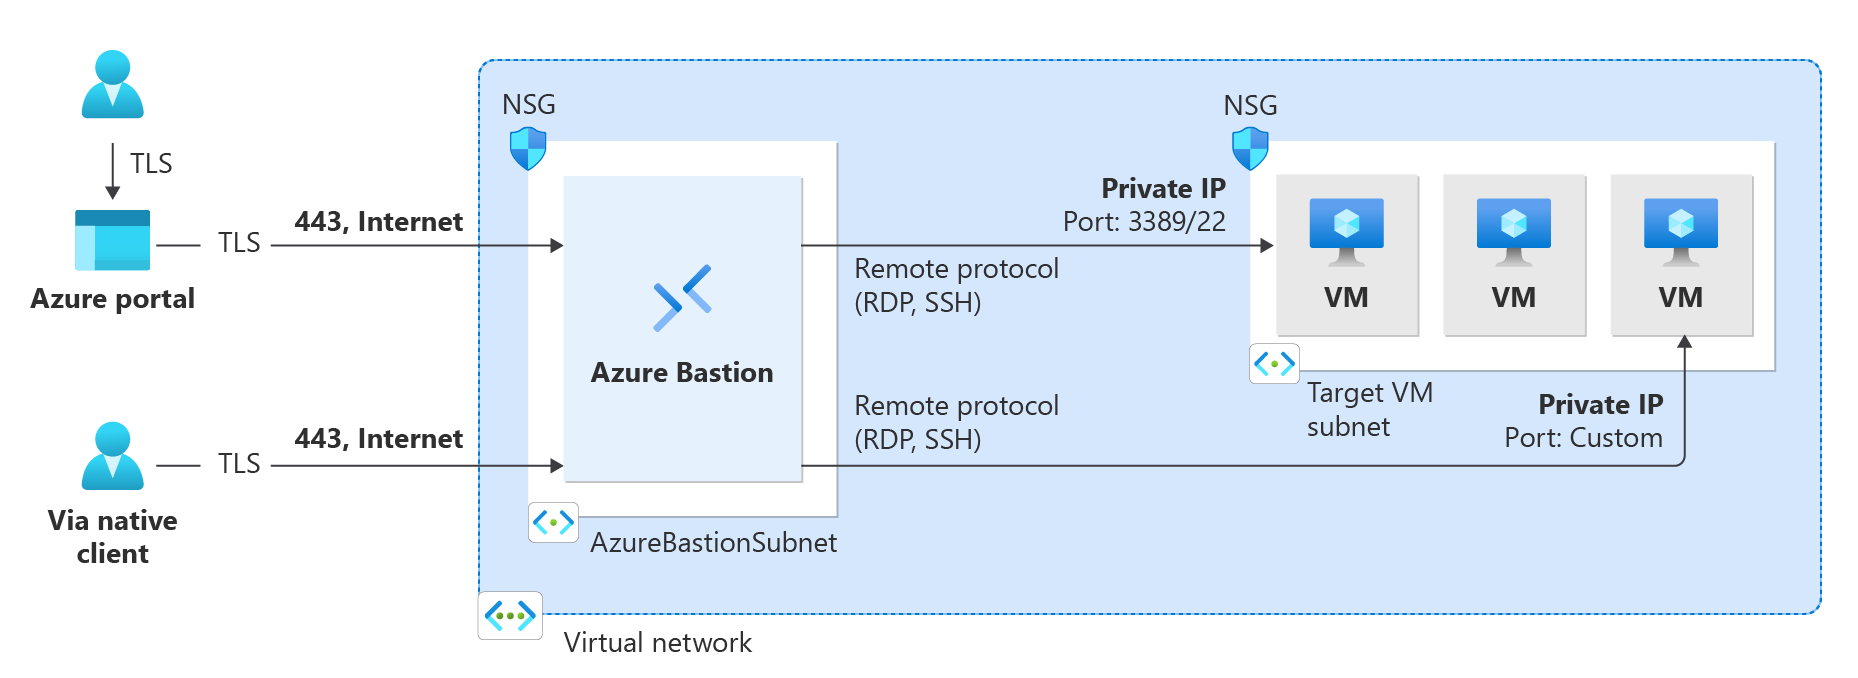
A user can choose to connect from the Azure Portal to Azure Bastion and from there to the destination server or use a native client, which can be:
- SSH for Linux-based virtual machines
- RDP for Windows virtual machines
Think of it as a layer between user and the server where we can apply extra security, monitoring and governance.
Azure Bastion is an instance which you deploy in a virtual network in Azure. You can choose to place an instance per virtual network or when using peered networks, you can place it in your hub network. Bastion supports connecting over VNET peerings, so you will save some money if you only place instances in one VNET.
Features of Azure Bastion
Azure Bastion has a lot of features today. Some years ago, it only was a method to connect to a server in the Azure Portal, but it is much more than that. I will highlight some key functionality of the service here:
| Feature | Basic | Standard | Premium |
| Connecting to Windows VMs | ✅ | ✅ | ✅ |
| Connecting to Linux VMs | ✅ | ✅ | ✅ |
| Concurrent connections | ✅ | ✅ | ✅ |
| Custom inbound port | ❌ | ✅ | ✅ |
| Shareable link | ❌ | ✅ | ✅ |
| Disable copy/paste | ❌ | ✅ | ✅ |
| Session recording | ❌ | ❌ | ✅ |
Now that we know more about the service and it’s features, let’s take a look at the pricing before configuring the service.
Pricing of Azure Bastion
Azure Bastion Instances are available in different tiers, as with most of the Azure services. The normal price is calculated based on the amounth of hours, but in my table I will pick 730 hours which is a full month. We want exactly know how much it cost, don’t we?
The fixed pricing is by default for 2 instances:
| SKU | Hourly price | Monthly price (730 hours) |
| Basic | $ 0,19 | $ 138,70 |
| Standard | $ 0,29 | $ 211,70 |
| Premium | $ 0,45 | $ 328,50 |
The cost is based on the time of existence in the Azure Subscription. We don’t pay for any data rates at all. The above prices are exactly what you will pay.
Extra instances
For the Standard and Premium SKUs of Azure Bastion, it is possible to get more than 2 instances which are a discounted price. These instances are half the prices of the base prices above and will cost you:
| SKU | Hourly price | Monthly price (730 hours) |
| Standard | $ 0,14 | $ 102,20 |
| Premium | $ 0,22 | $ 160,60 |
How to deploy Azure Bastion
We can deploy Azure Bastion through the Azure Portal. Search for “Bastions” and you will find it:

Create Azure Bastion subnet
Before we can deploy Azure Bastion to a network, we must create a subnet for this managed service. This can be done in the virtual network. Then go to “subnets”:
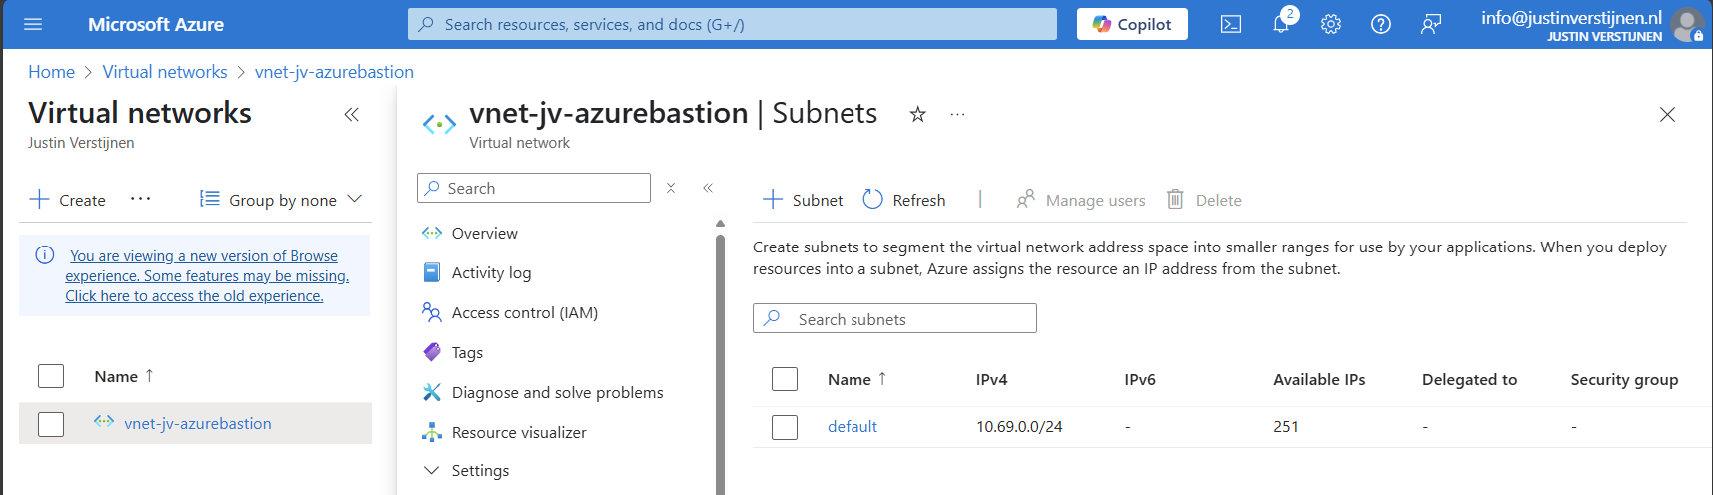
Click on “+ Subnet” to create a new subnet:
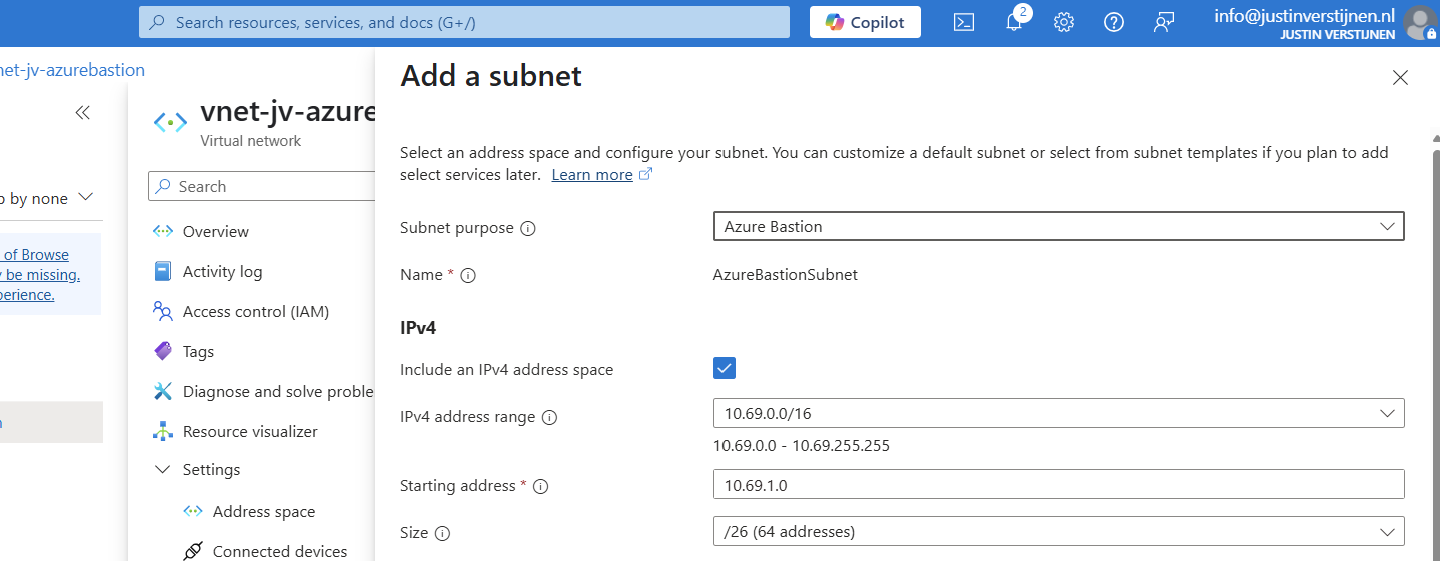
Select “Azure Bastion” at the subnet purpose field, this is a template for the network.
Click on “Add” to finish the creation of this subnet.
Deploy Azure Bastion instance
Now go back to “Bastions” and we can create a new instance:
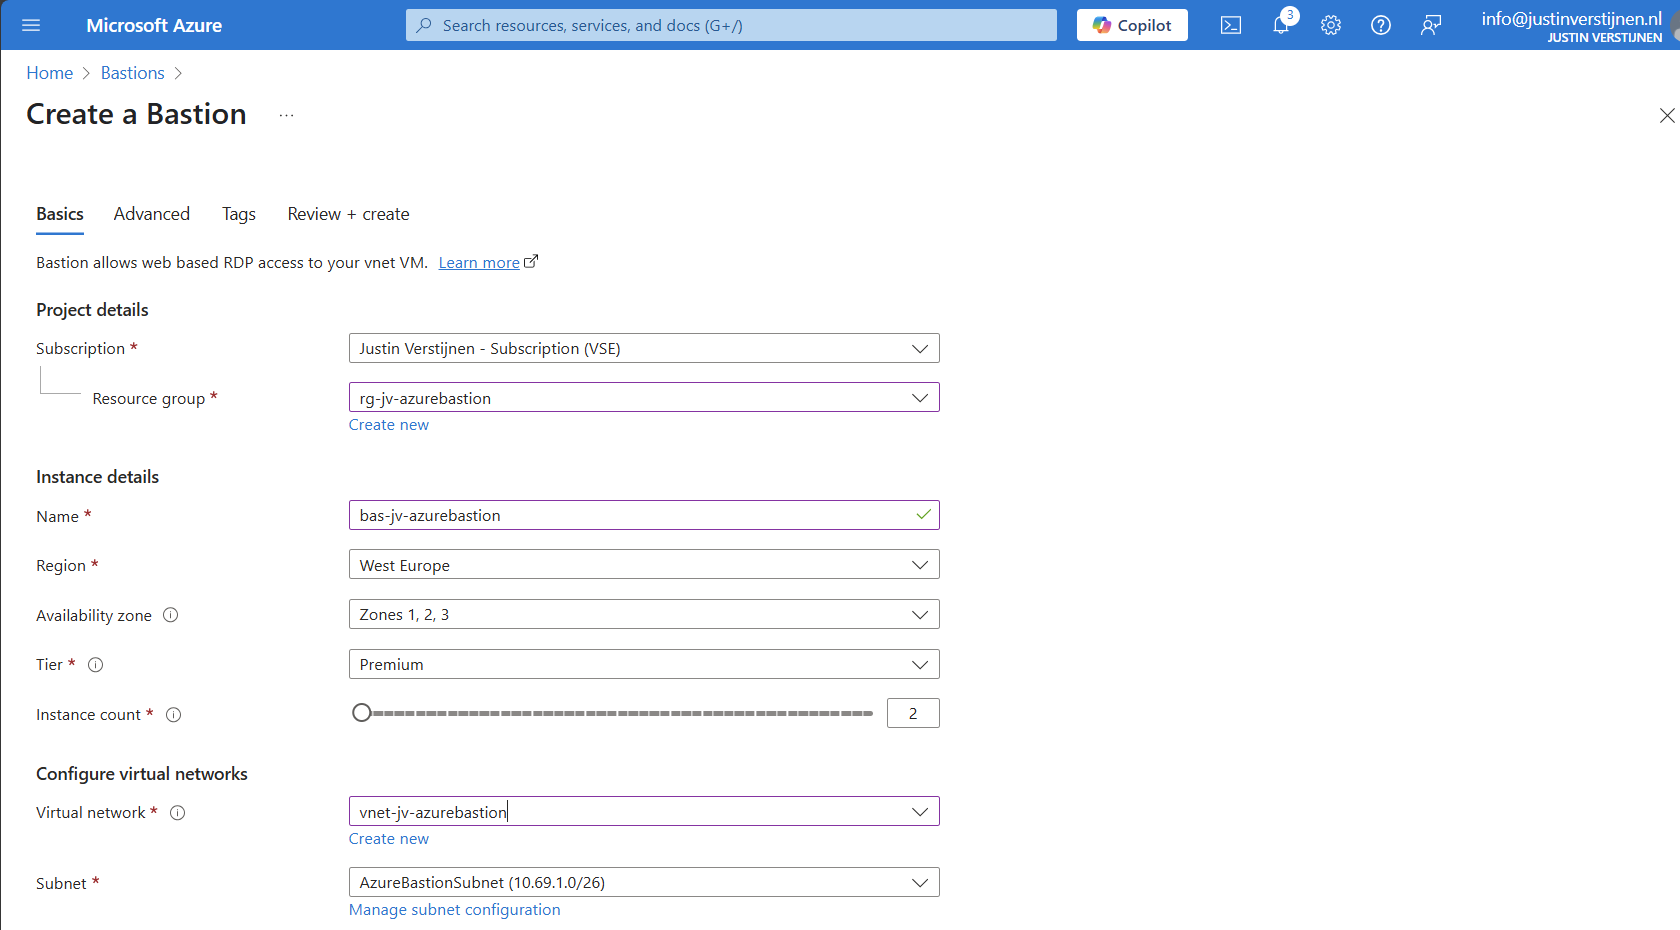
Fill in your details and select your Tier (SKU). Then choose the network to place the Bastion instance in. The virtual network and the basion instance must be in the same region.
Then create a public IP which the Azure Bastion service uses to form the bridge between internet and your virtual machines.
Now we advance to the tab “Advanced” where we can enable some Premium features:
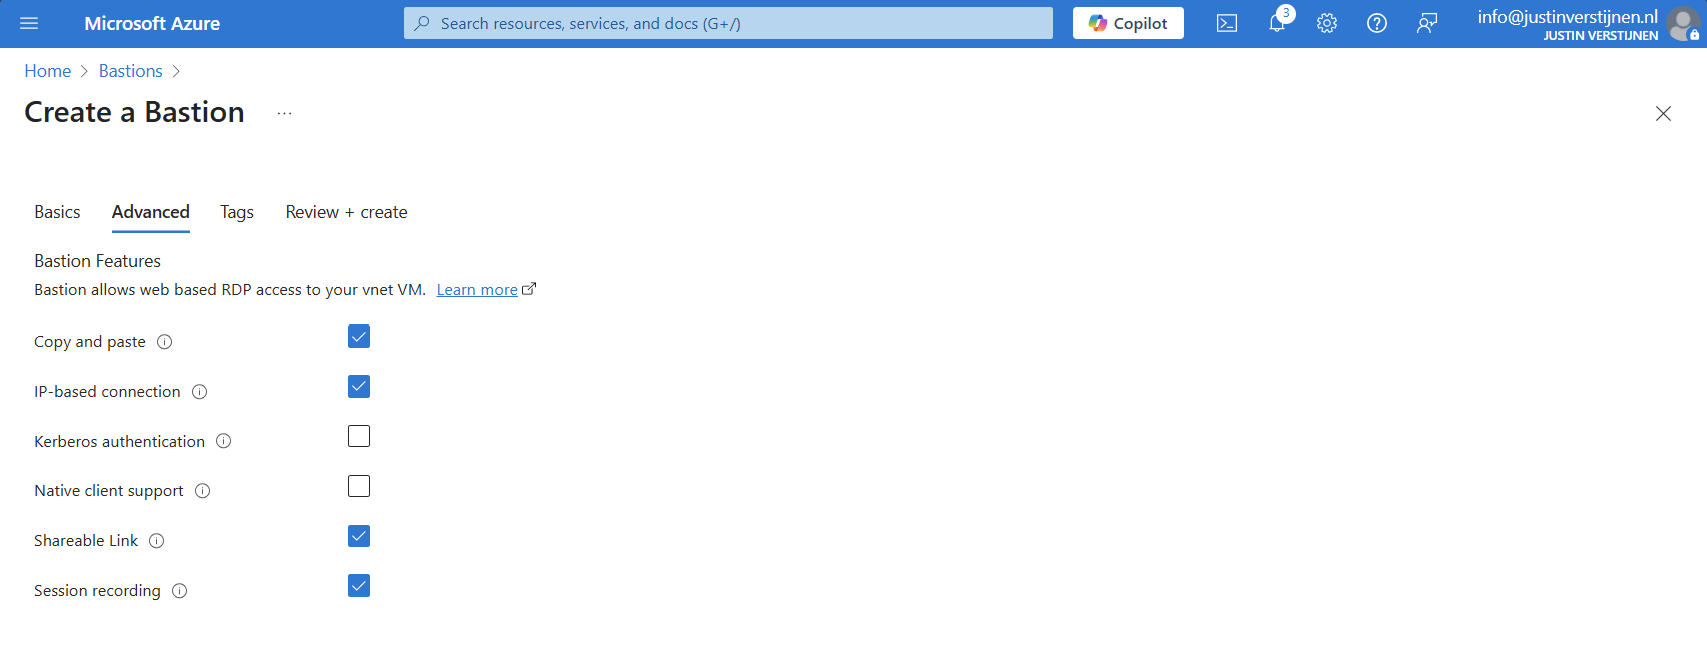
I selected these options for showcasing them in this post.
Now we can deploy the Bastion instance. This will take around 15 minutes.
Alternate way to deploy Bastions
You can also deploy Azure Bastion when creating a virtual network:

However, this option has less control over naming structure and placement. Something we don’t always want :)
Using Azure Bastion
We can now use Azure Bastion by going to the instance itself or going to the VM you want to connect with.
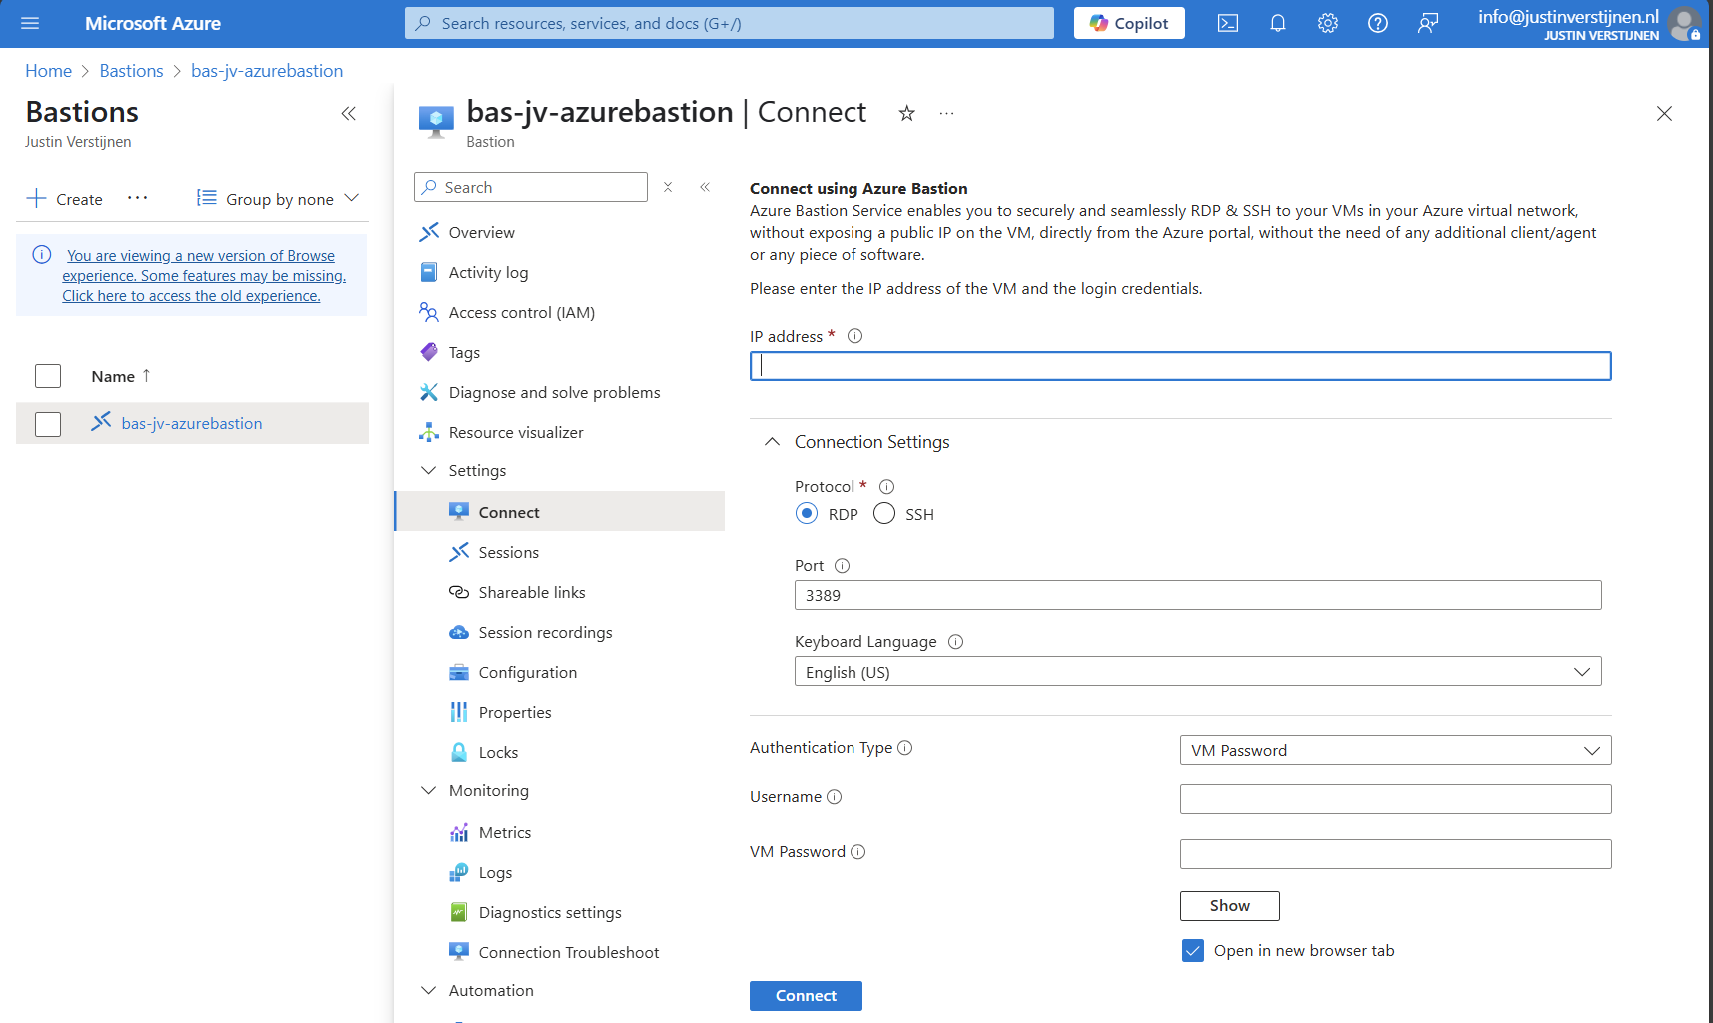
Via instance:
Via virtual machine:
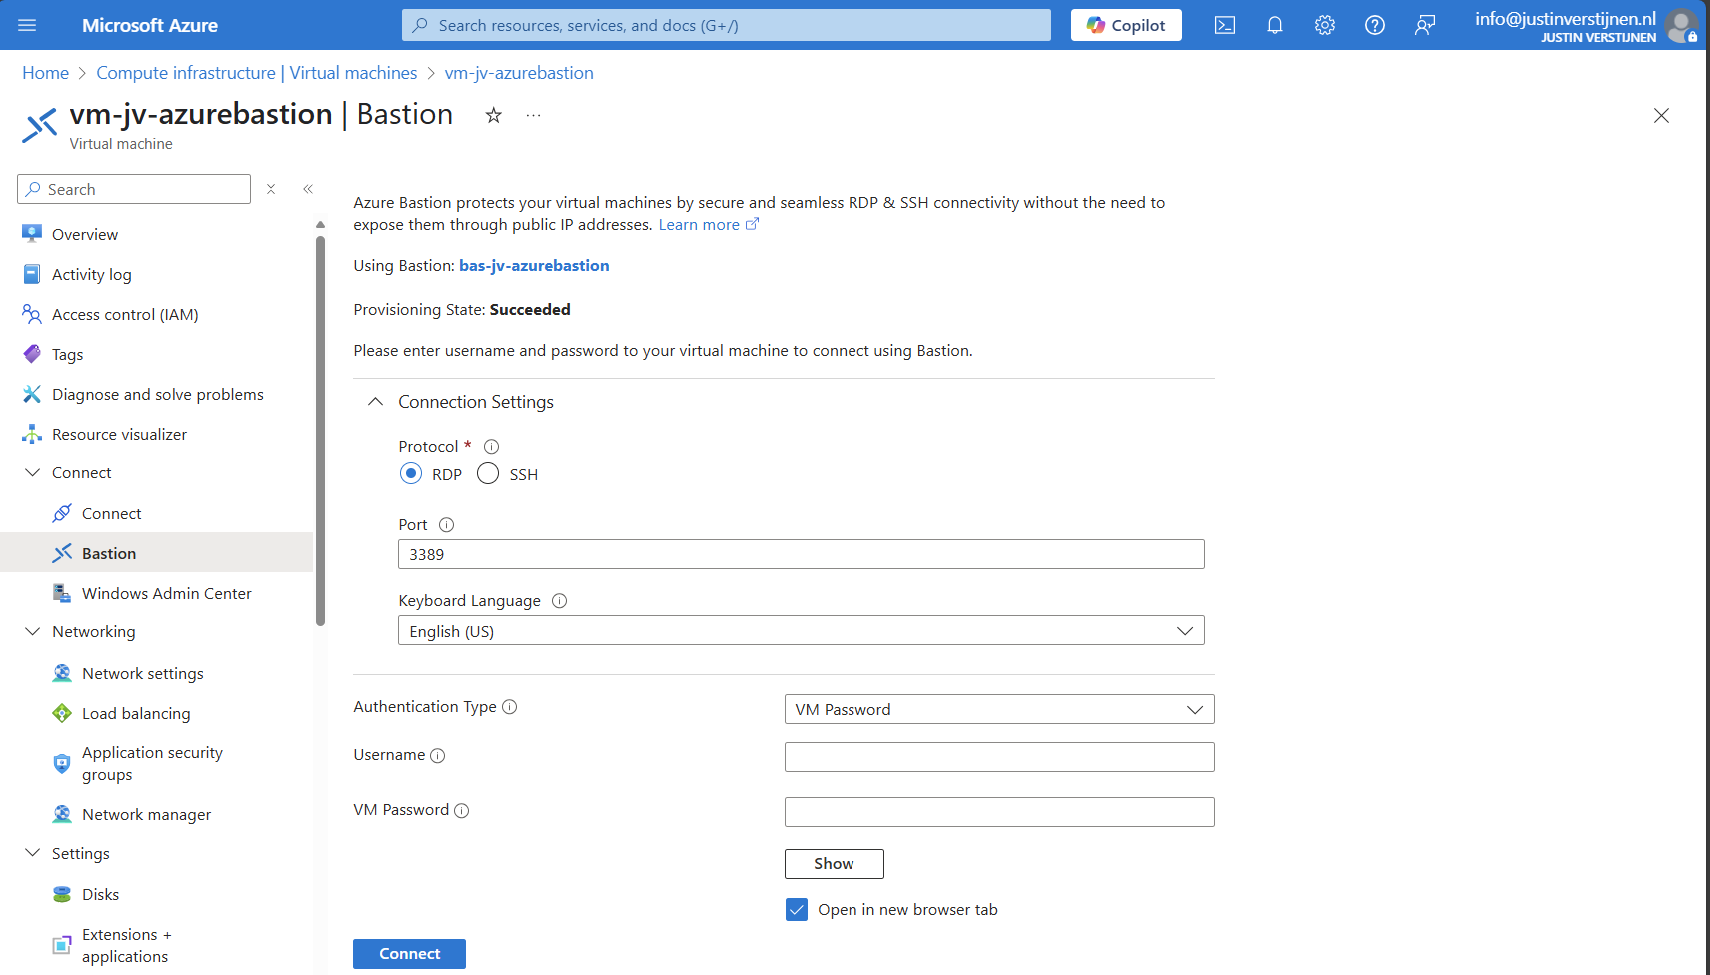
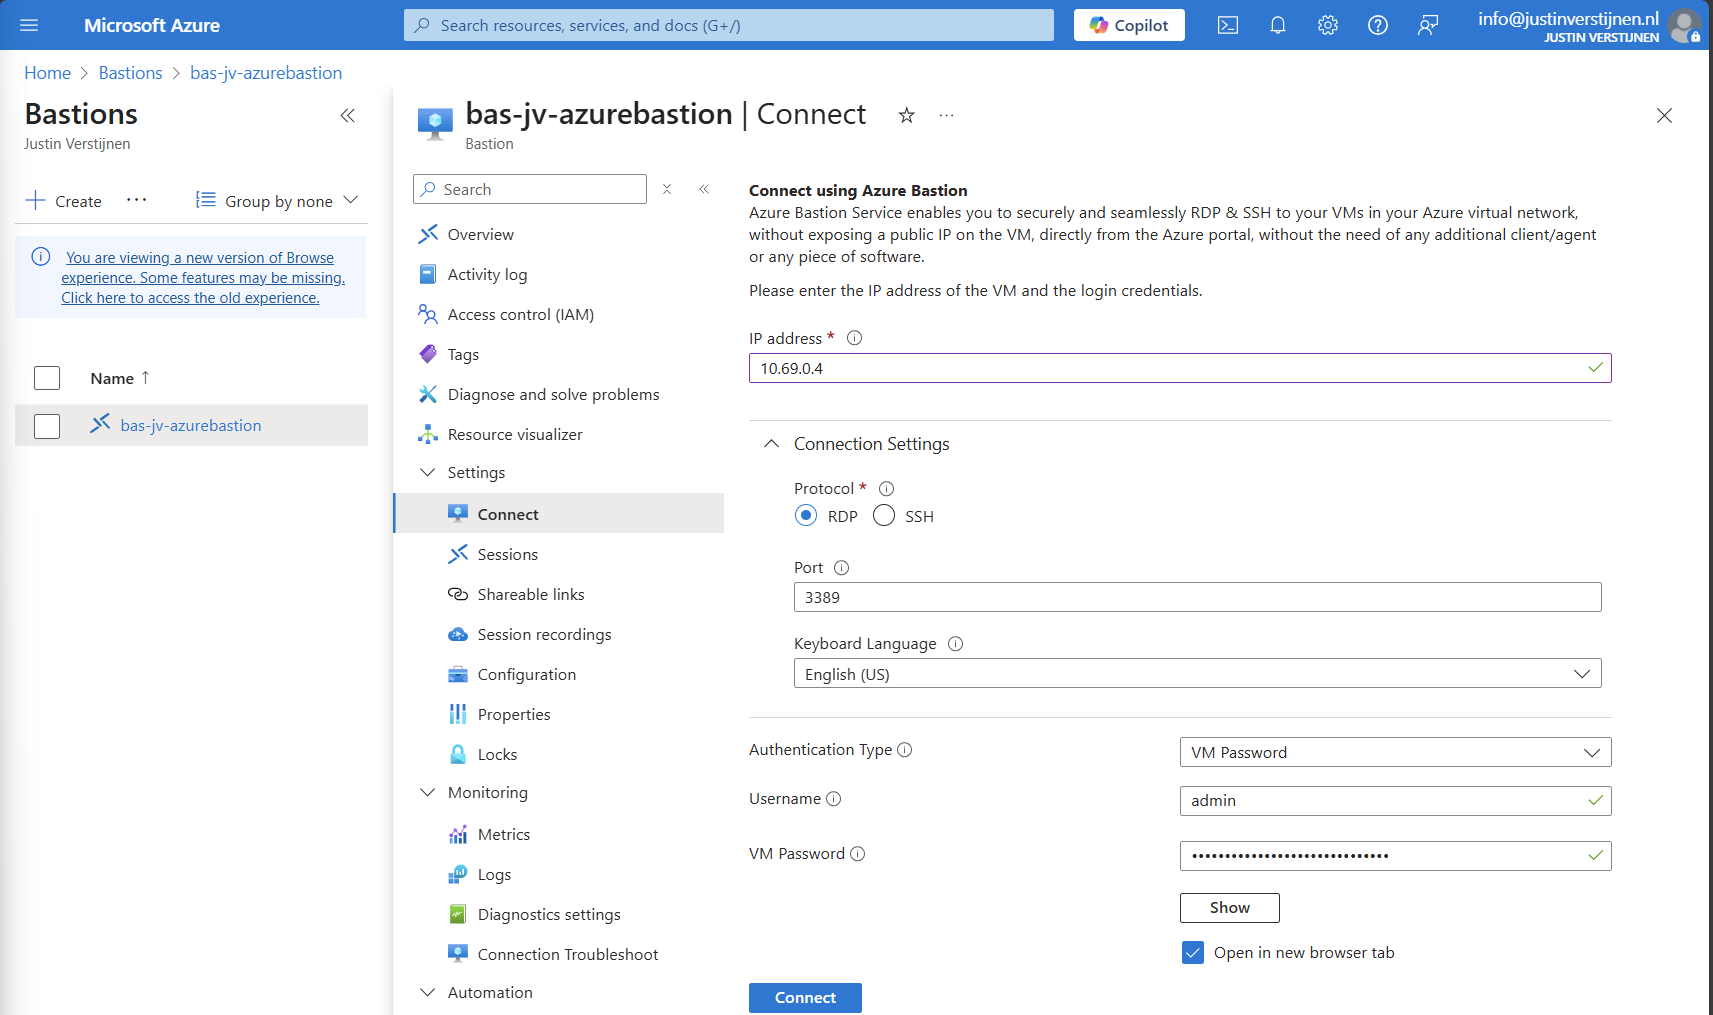
Connecting to virtual machine
We can now connect to a virtual machine. In this case I will use a Windows VM:

Fill in the details like the internal IP address and the username/password. Then click on “Connect”.
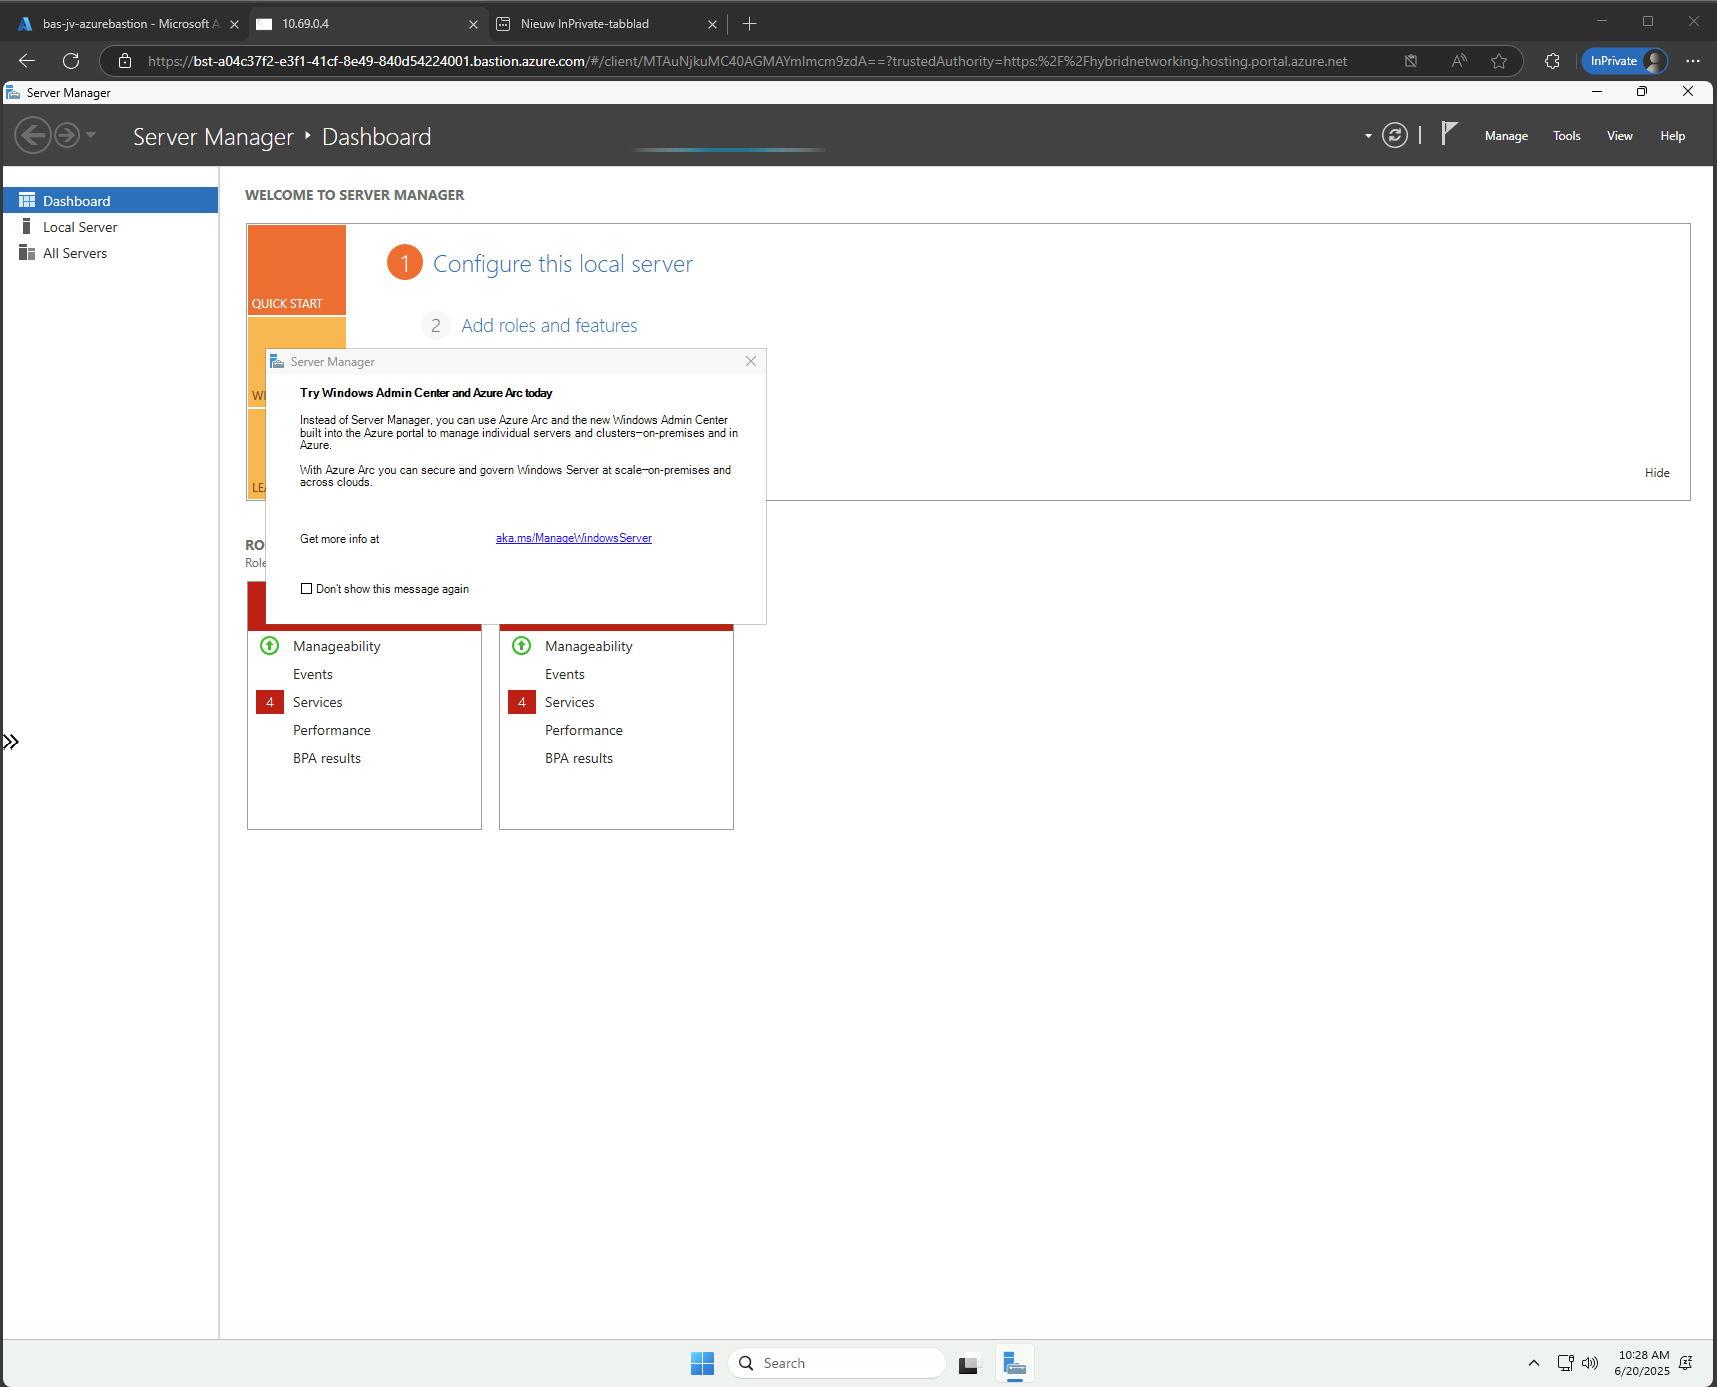
Now we are connected through the browser, without needing to open any ports or to install any applications:
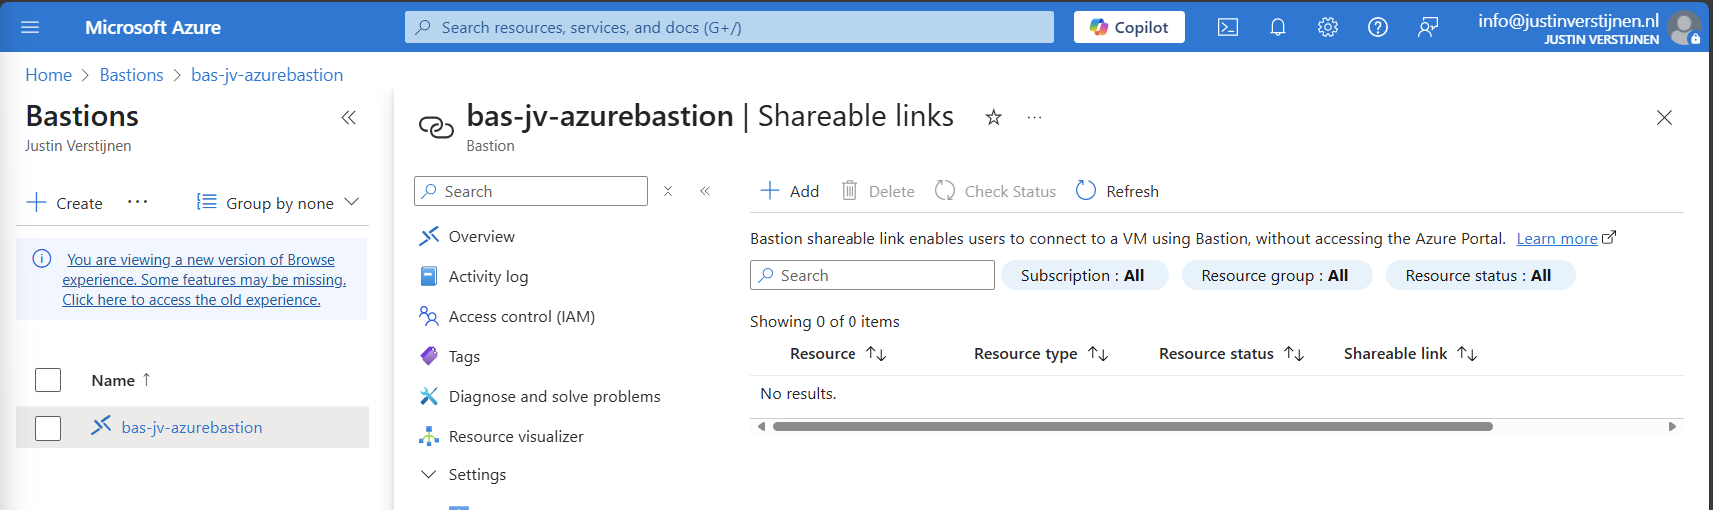
Use shareable links with Azure Bastion (optional)
In Azure Bastion, it’s possible to have shareable links. With these links you can connect to the virtual machine directly from a URL, even without logging into the Azure Portal.
This may decrease the security, so be aware of how you store these links.
In the Azure Bastion instance, open the menu “Shareable links”:
Click on “+ Add”
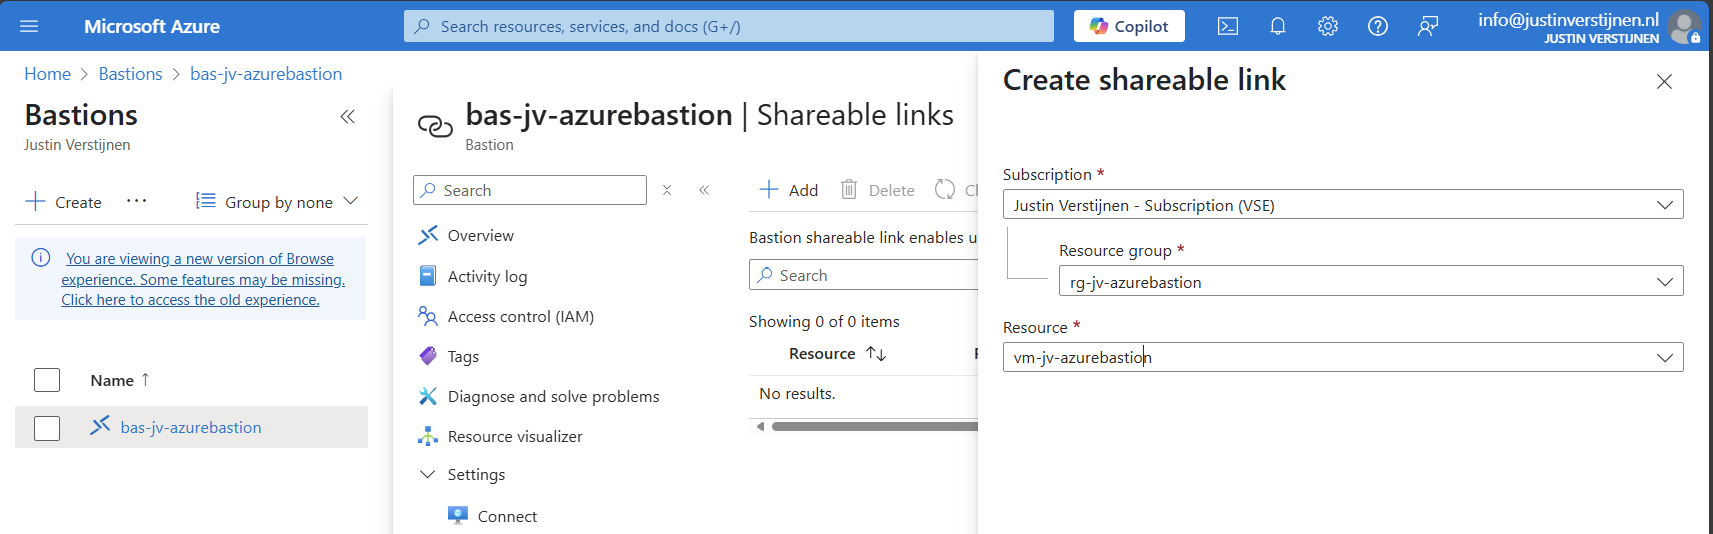
Select the resource group and then the virtual machine you want to share. Click on “Create”.
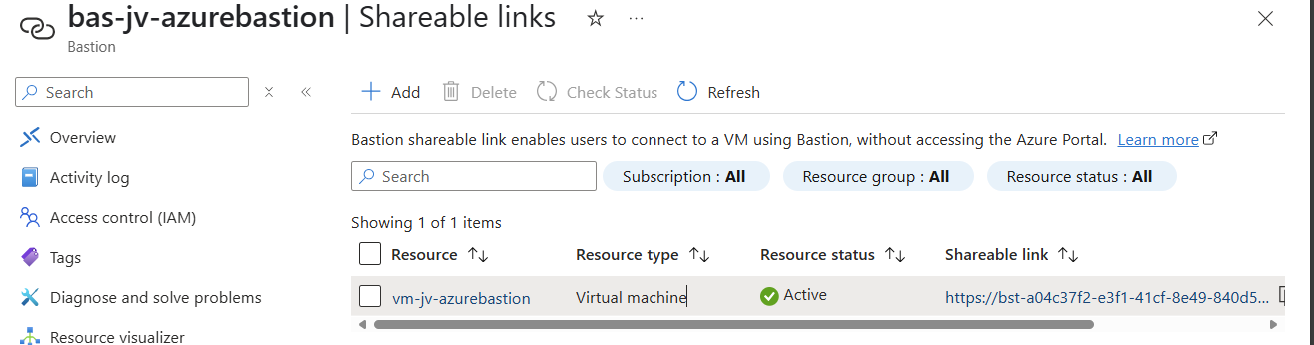
We can now connect to the machine using the shareable link. This looks like this:
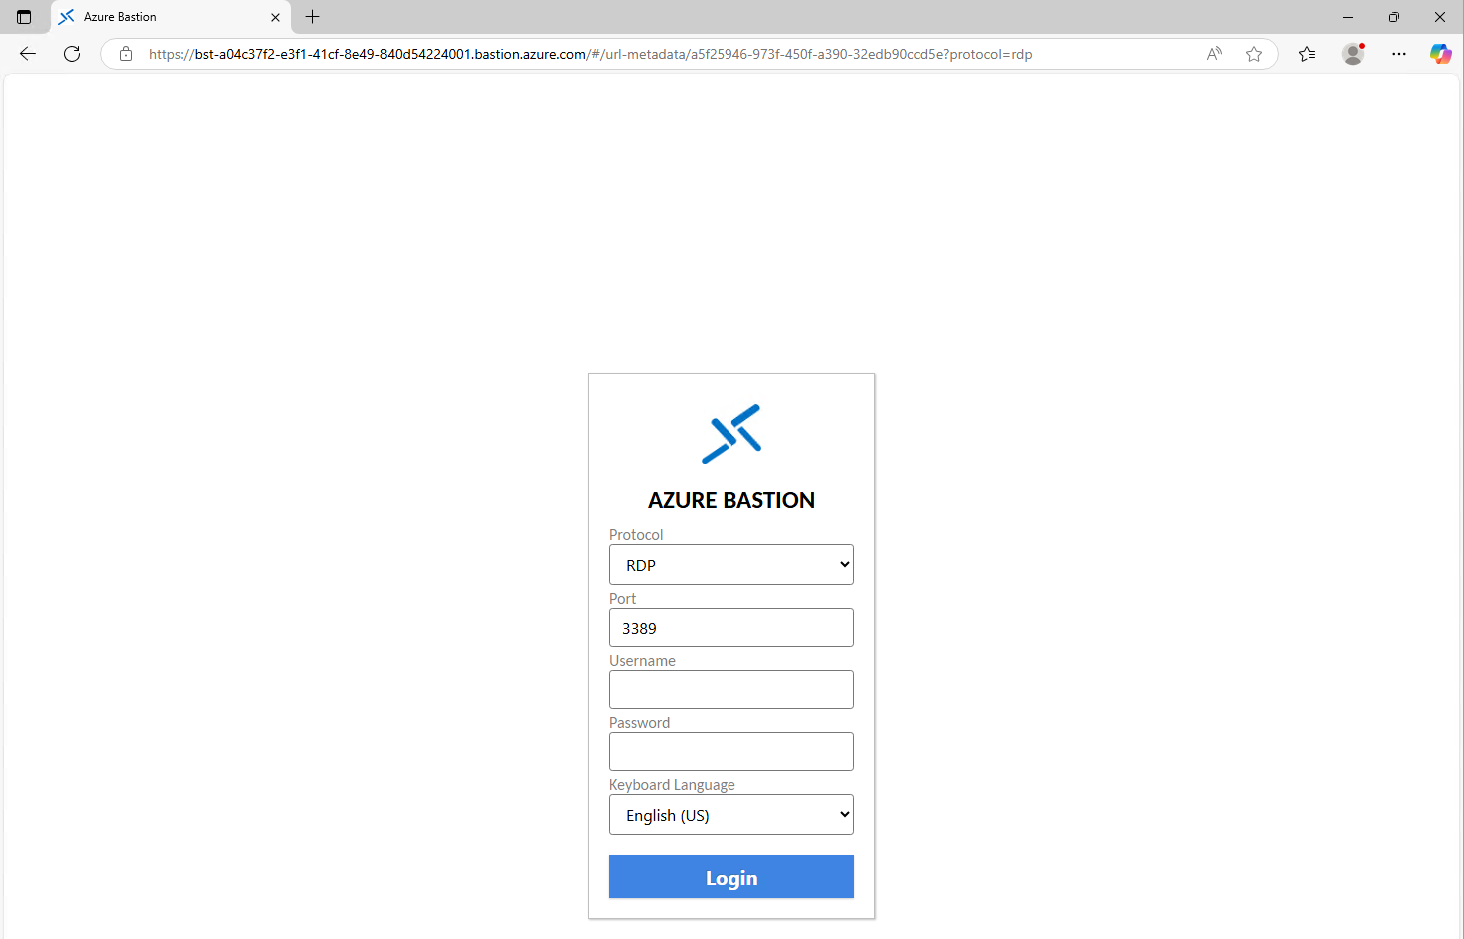
Of course you still need to have the credentials and the connection information, but this is less secure than accessing servers via the Azure Portal only. This will expose a login page to the internet, and with the right URL, its a matter of time for a hacker to breach your system.
Disable Copy/Paste in sessions (optional)
We also have the option to disable copy/paste functionality in the sessions. This improves the security while decreasing the user experience for the administrators.
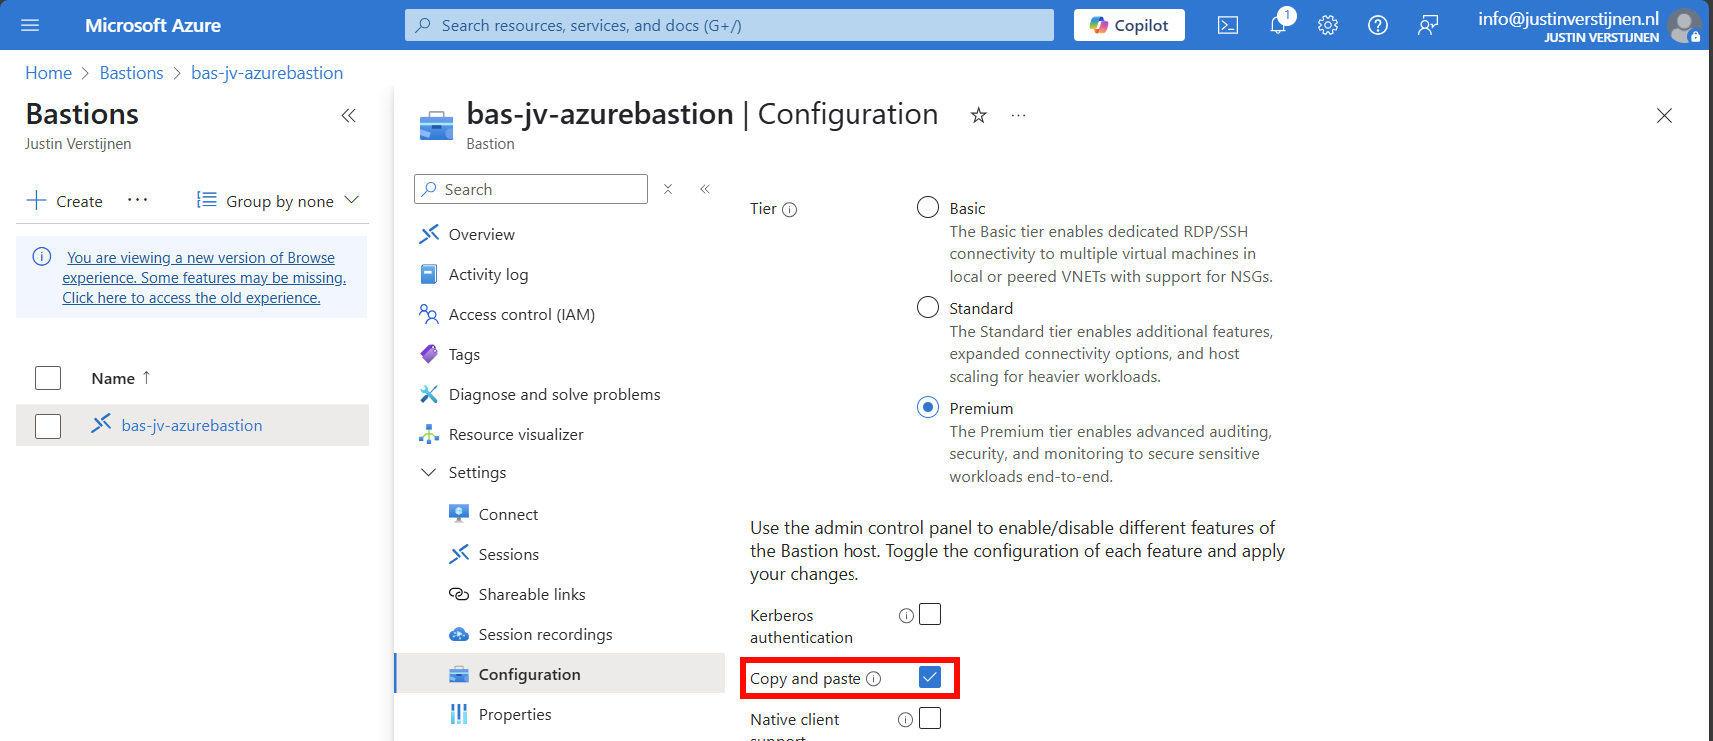
You can disable this by deselecting this option above.
Configure session recording (optional)
When you want to configure session recording, we have to create a storage account in Azure for the recordings to be saved. This must be configured in these steps, where I will guide you through:
- Create a Storage account
- Configure CORS resource sharing
- Create a container
- Create SAS token
- Configure Azure Bastion side
Let’s follow these steps:
Create storage account
Go to “Storage accounts” and create a new storage account:
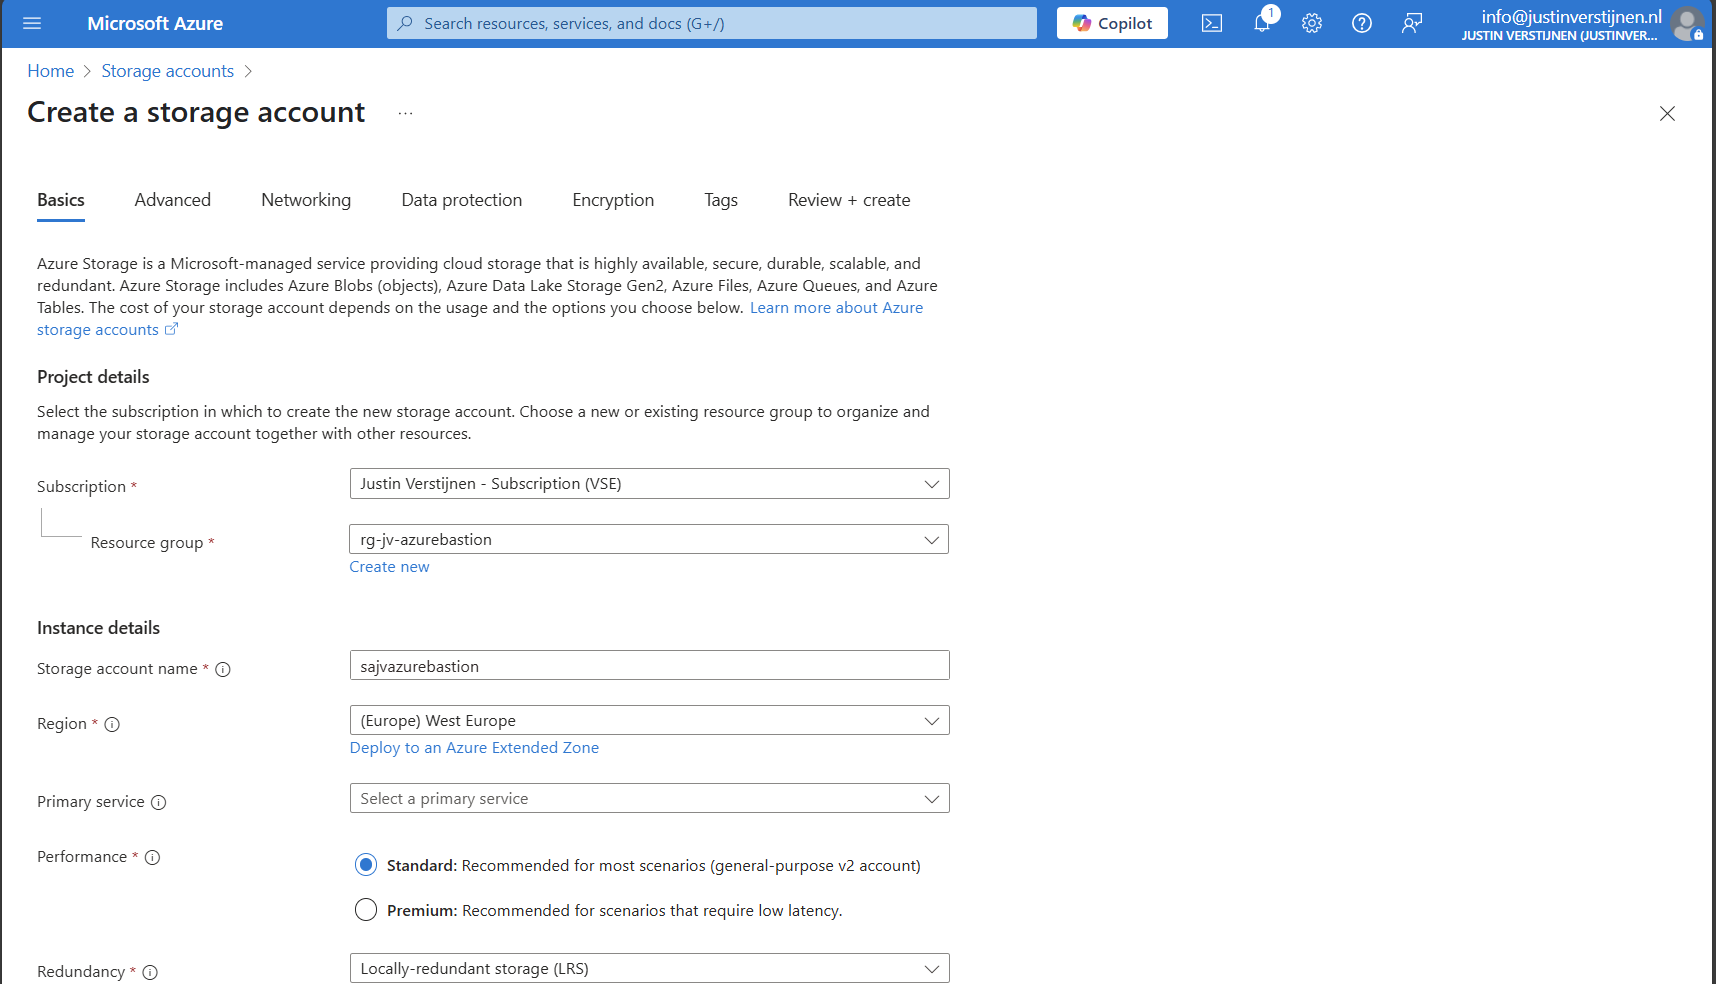
Fill in the details on the first page and skip to the deployment as we don’t need to change other settings.
We need to create a container on the storage account. A sort of folder/share when talking in Windows language. Go to the storage account.
Configure CORS resource sharing
We need to configure CORS resource sharing. This is a fancy way of permitting that the Blob container may be used by an endpoint. In our case, the endpoint is the bastion instance.
In the storage account, open the section “Resource sharing (CORS)”
Here fill in the following:
| Allowed Origins | Allowed methods | Allowed headers | Exposed headers | Max age |
| Bastion DNS name* | GET | * | * | 86400 |
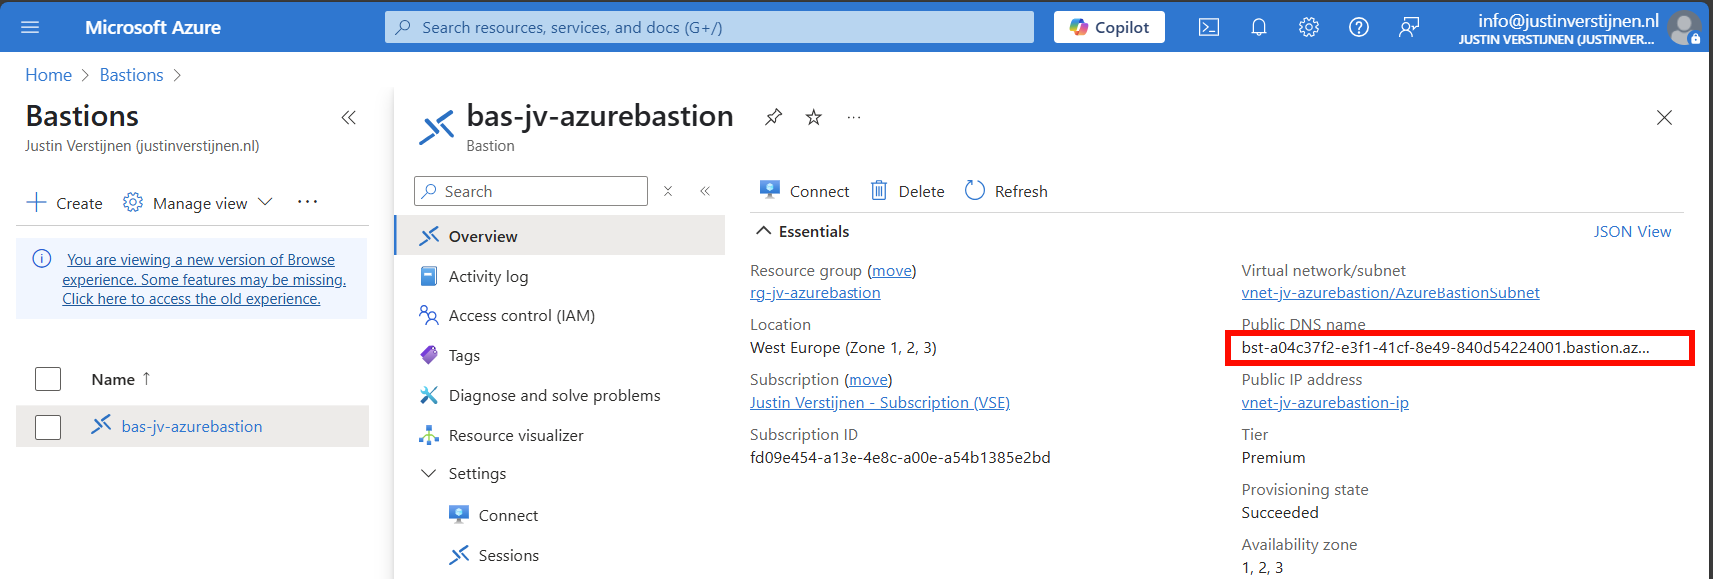
*in my case: https://bst-a04c37f2-e3f1-41cf-8e49-840d54224001.bastion.azure.com
The Bation DNS name can be found on the homepage of the Azure Bastion instance:
Ensure the CORS settings look like this:
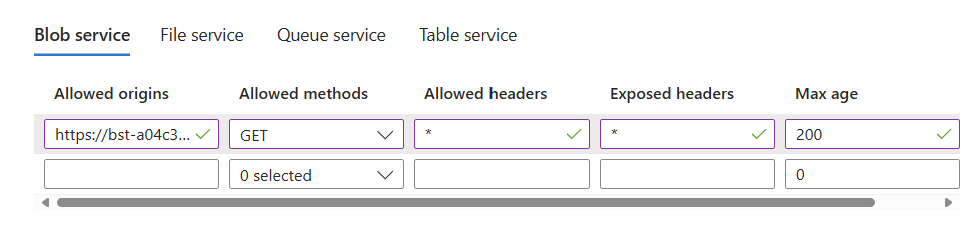
Click on “Save” and we are done with CORS.
Create container
Go to the storage account again and create a new container here:
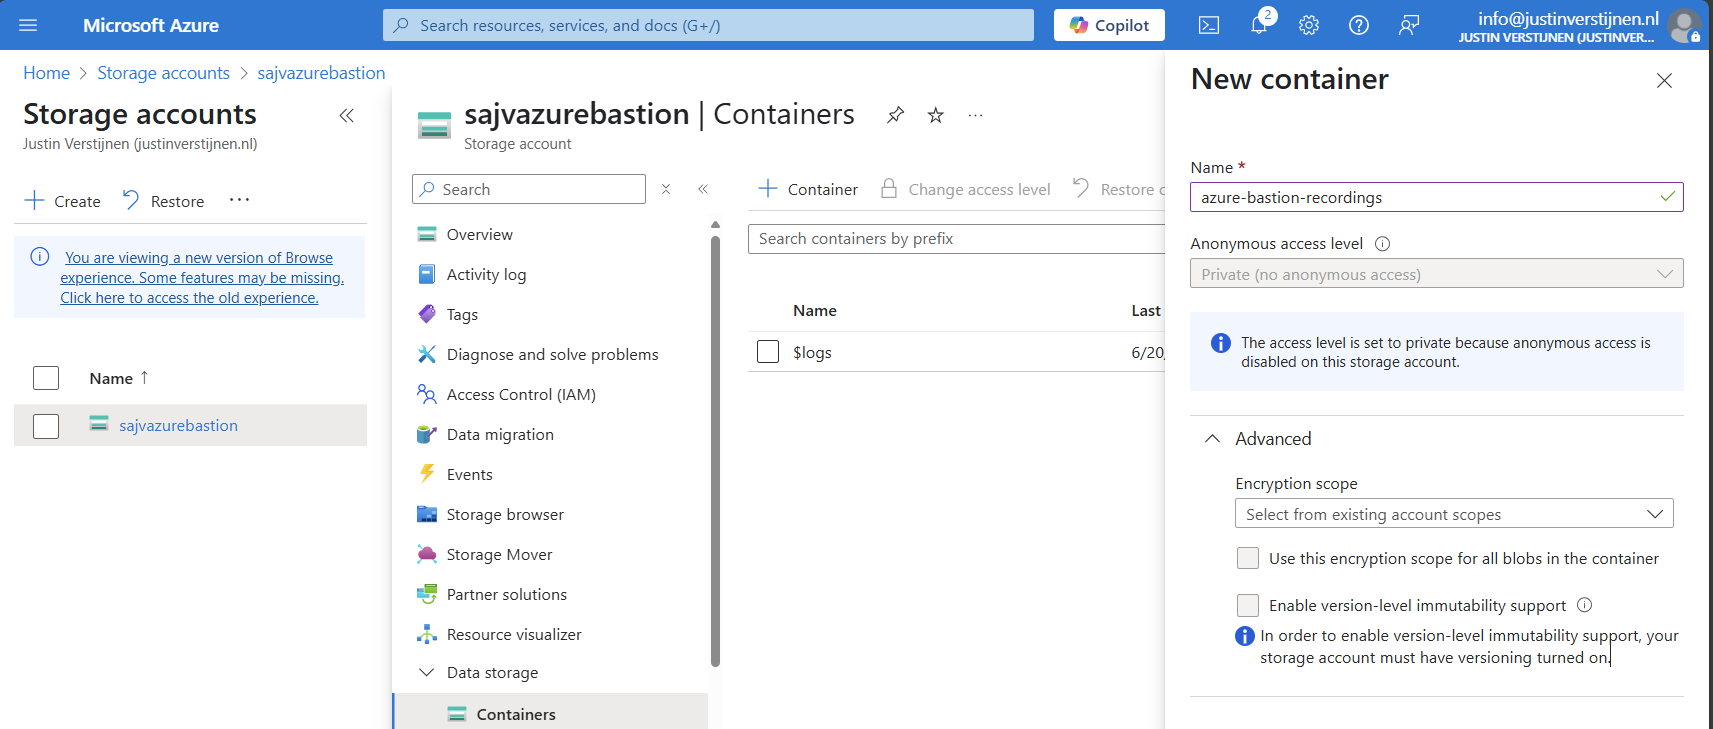
Create the container and open it.
Create SAS token
We need to create a Shared Access Signature for the Azure Bastion instance to access our newly created storage account and container.
A Shared Access Signature (SAS) is a granular token which permits limited access to a storage account. A limited token with limited permissions at suit your needs, while using least-privilege.
To learn more about SAS tokens: click here
When you have opened the container, open “Shared access tokens”:
- Under permissions, select:
- Read
- Create
- Write
- List
- Set your timeframe for the access to be active. This has to be active now so we can test the configuration
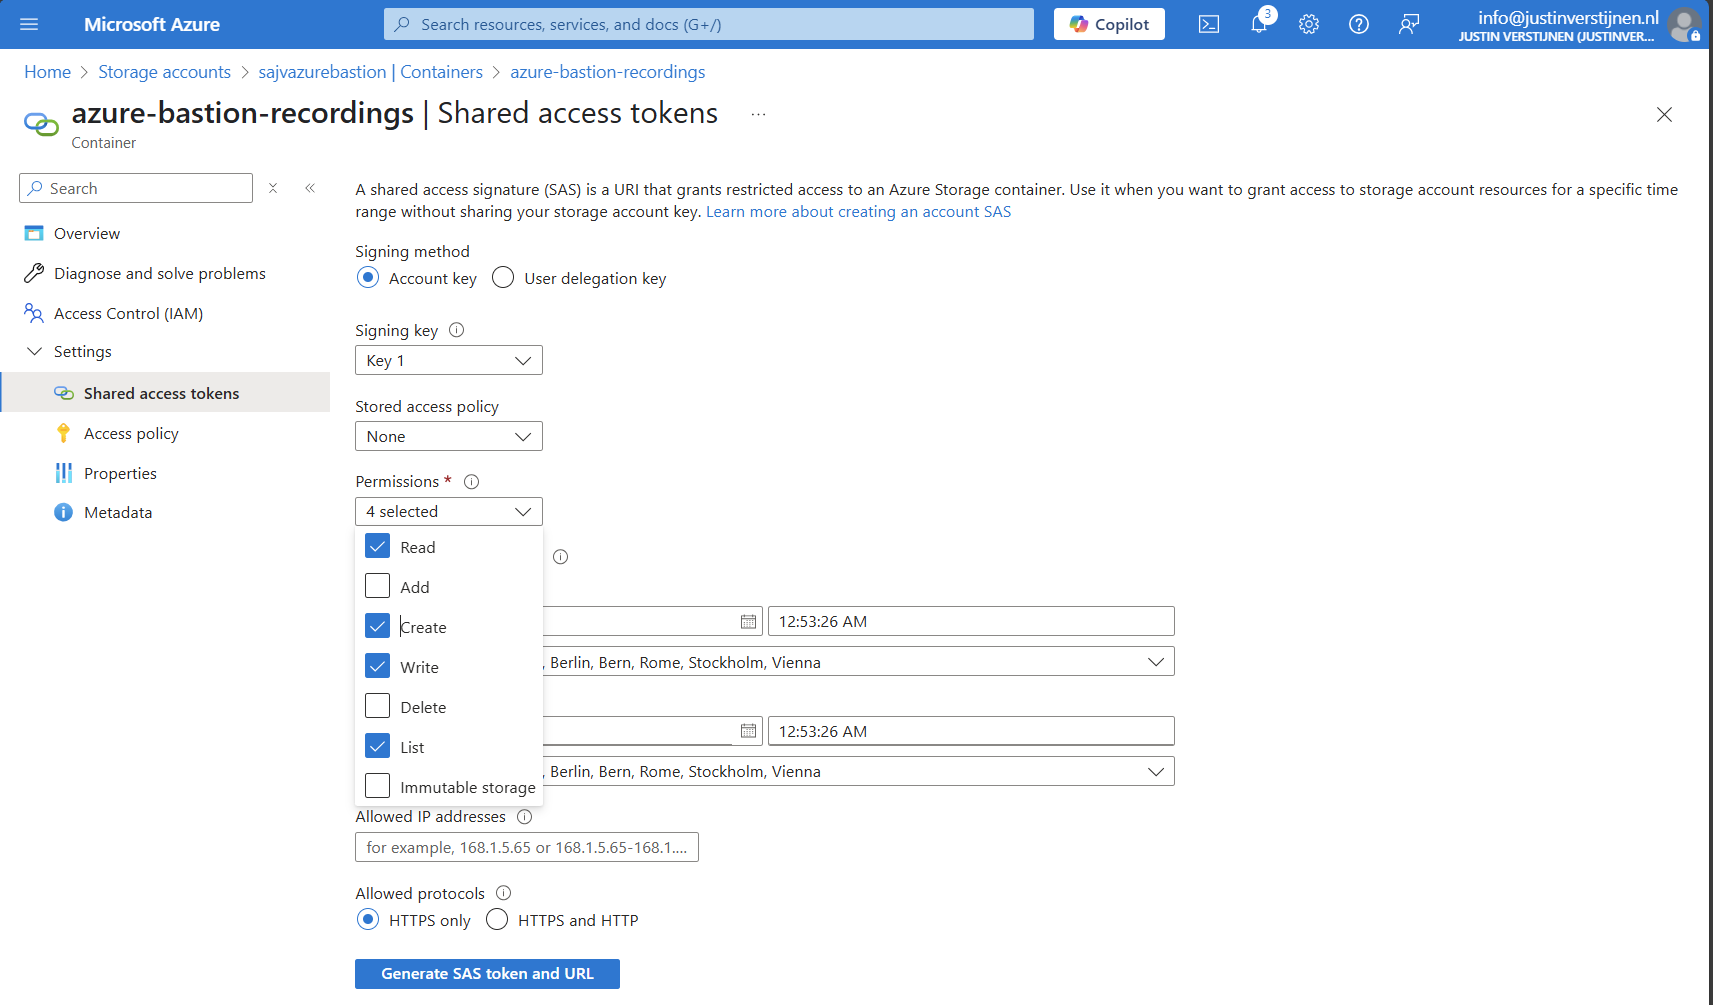
Then click on “Generate SAS token and URL” to generate a URL:

Copy the Blob SAS URL, as we need this in the next step.
Configure Azure Bastion-side for session recording
We need to paste this URL into Azure Bastion, as the instance can save the recordings there. Head to the Azure Bastion instance:
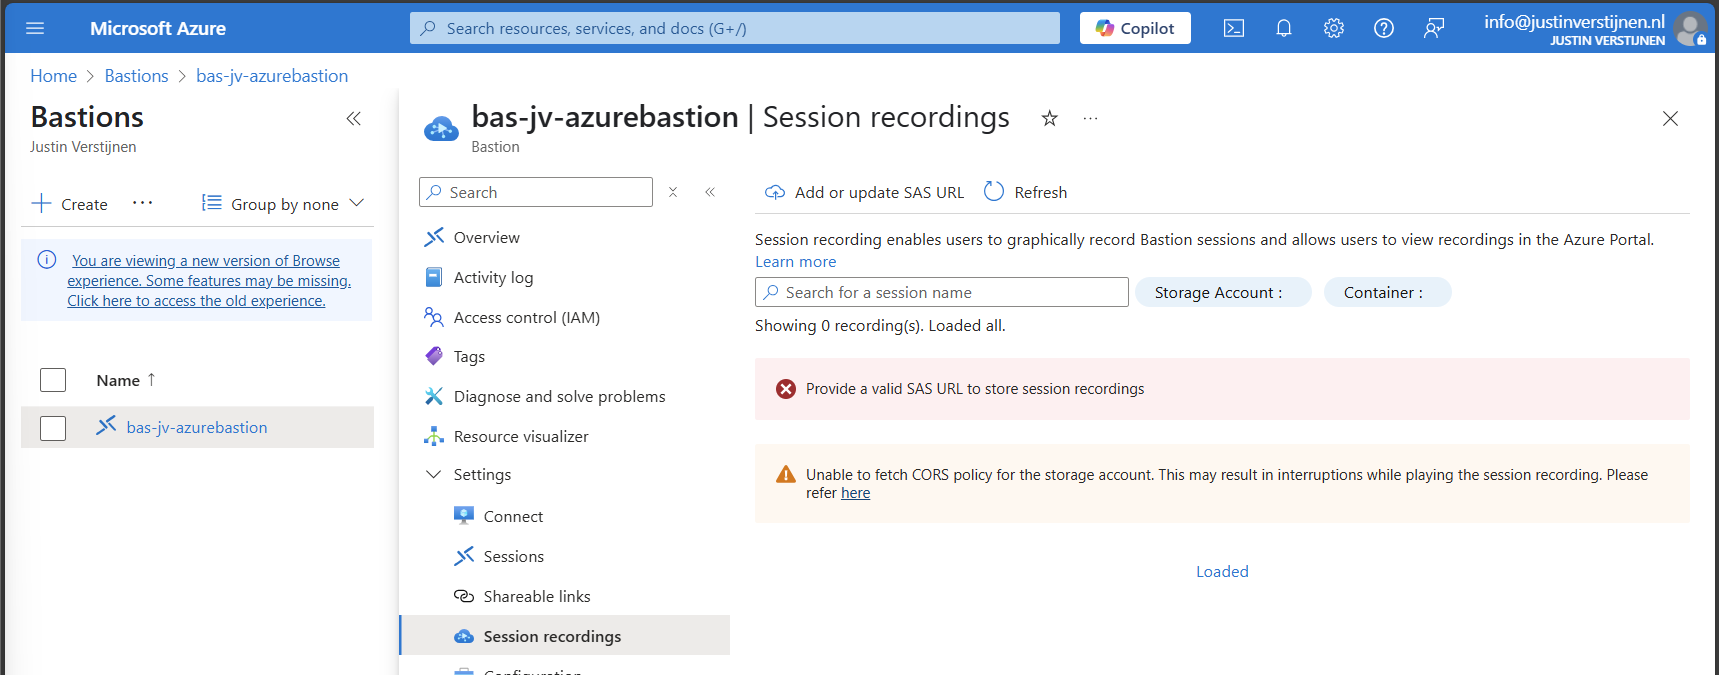
Then open the option “Session recordings” and click on “Add or update SAS URL”.
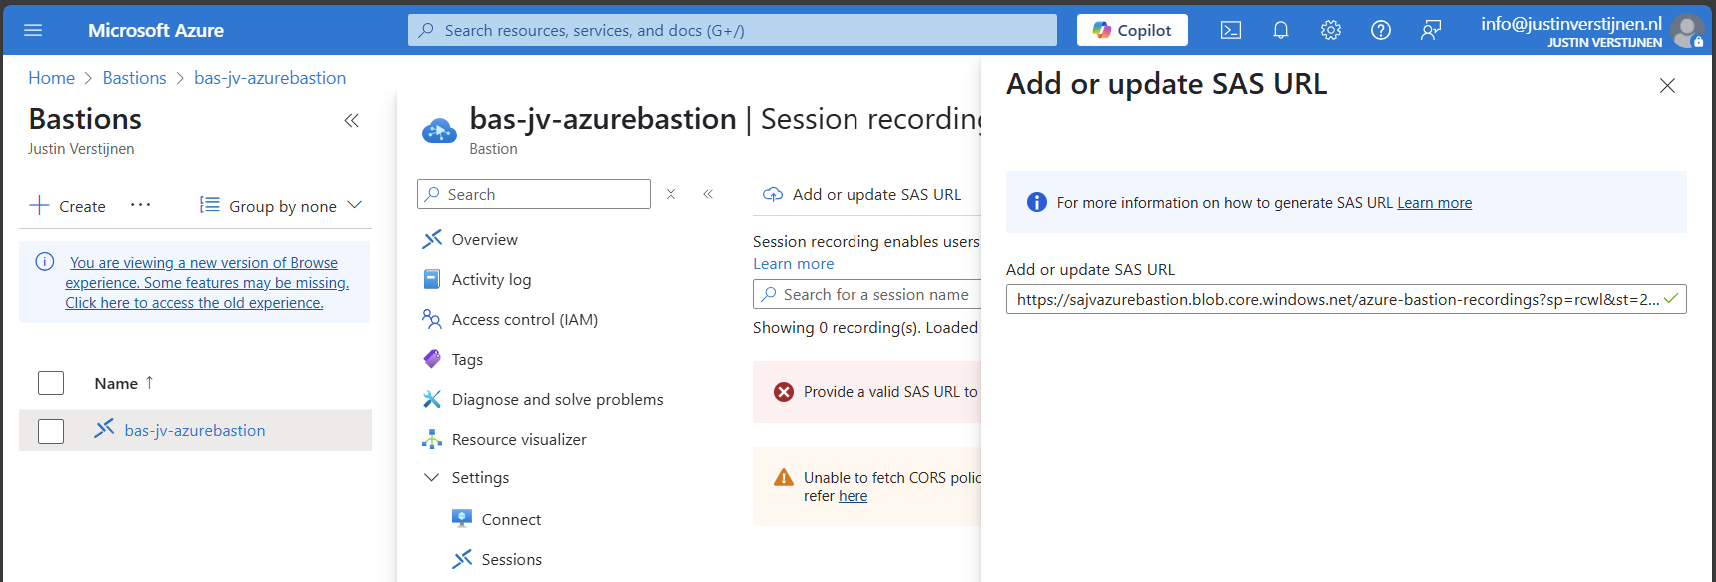
Paste the URL here and click on “Upload”.
Now the service is succesfully configured!

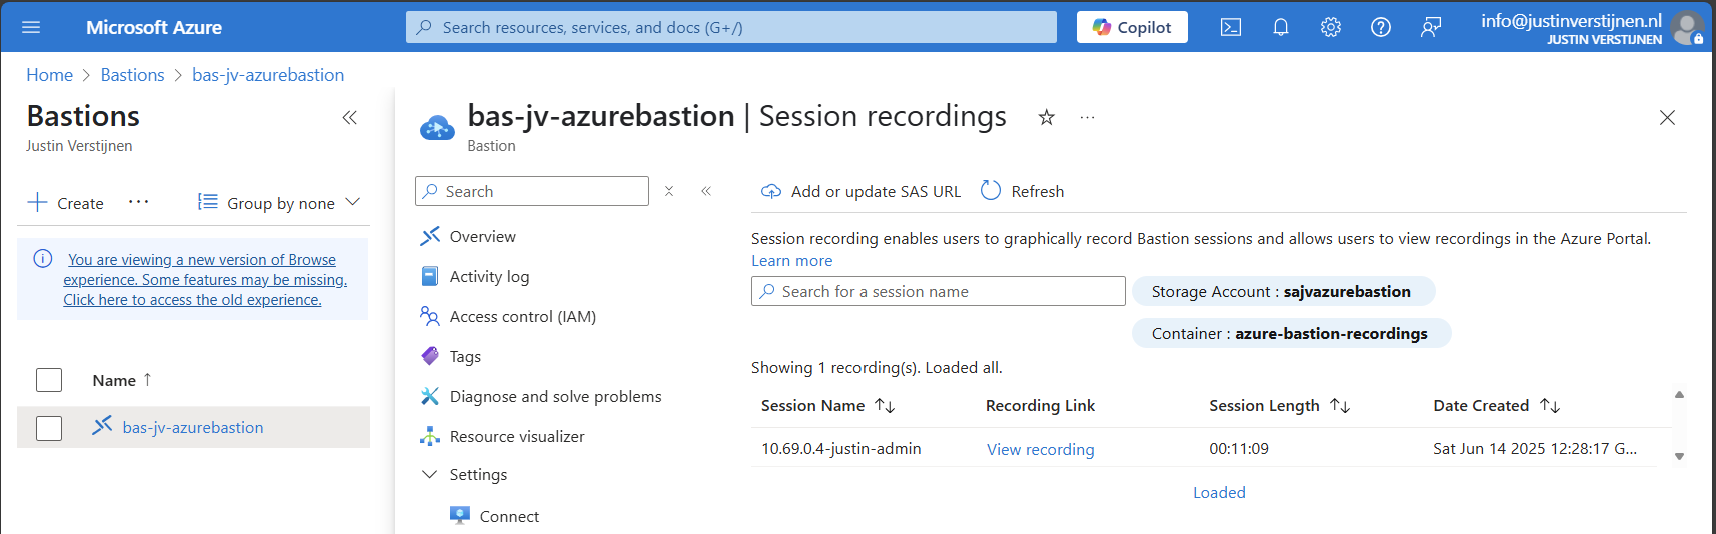
Testing Azure Bastion session recording
Now let’s connect again to a VM now by going to the instance:
Now fill in the credentials of the machine to connect with it.

We are once again connected, and this session will be recorded. You can find these recordings in the Session recordings section in the Azure portal. These will be saved after a session is closed.
The recording looks like this, watch me installing the ISS role for demonstration of this function. This is a recording that Azure Bastion has made.
Summary
Azure Bastion is a great tool for managing your servers in the cloud without opening sensitive TCP/IP ports to the internet. It also can be really useful as Jump server.
In my opinion it is relatively expensive, especially for smaller environments because for the price of a basic instance we can configure a great Windows MGMT server where we have all our tools installed.
For bigger environments where security is a number one priority and money a much lower priority, this is a must-use tool and I really recommend it.
Sources:
- https://learn.microsoft.com/en-us/azure/bastion/bastion-overview
- https://azure.microsoft.com/nl-nl/pricing/details/azure-bastion?cdn=disable
- https://justinverstijnen.nl/amc-module-6-networking-in-microsoft-azure/#azure-bastion
Thank you for reading this post and I hope it was helpful.
End of the page 🎉
You have reached the end of the page. You can navigate through other blog posts as well, share this post on X, LinkedIn and Reddit or return to the blog posts collection page. Thank you for visiting this post.
If you think something is wrong with this post or you want to know more, you can send me a message to one of my social profiles at: https://justinverstijnen.nl/about/
If you find this page and blog very useful and you want to leave a donation, you can use the button below to buy me a beer. Hosting and maintaining a website takes a lot of time and money. Thank you in advance and cheers :)

The terms and conditions apply to this post.